How To Deploy WordPress Plugins With GitHub Using Transients

Email Newsletter
Weekly tips on front-end & UX.
Trusted by 182,000+ folks.


 Celebrating 10 million developers
 Custom Web Forms for Angular, React, & Vue. Your backend.
If you’ve worked with WordPress for a while, you may have tried your hand at writing a plugin. Many developers will start creating plugins to enhance a custom theme or to modularize their code. Eventually, though, you may want to distribute your plugin to a wider audience.
While you always have the option to use the WordPress Subversion repository, there may be instances where you prefer to host a plugin yourself. Perhaps you are offering your users a premium plugin. Maybe you need a way to keep your client’s code in sync across multiple sites. It could simply be that you want to use a Git workflow instead of Subversion. Whatever the reason, this tutorial will show you how to set up a GitHub repository to push updates to your plugin, wherever it resides.
The Plan
Before we get too far into the code we should start with an outline of what we will be doing:
- First, we will learn a little bit about transients and how they work within WordPress.
- Then, we will build a PHP class to house all of our code.
- Next, we are going to connect our plugin to GitHub.
- Lastly, we will create the interface elements that allow users to interact with our plugin.
When you finish this article you should have a fully functioning plugin that will update directly using GitHub releases. Ready to get started?
WordPress Transients
First of all, what are WordPress transients? WordPress transients are a short-lived entry of data that is stored for a defined duration and will be automatically removed when it has expired — think of them as server-side cookies. WordPress uses transients to store information about all of the plugins that have been installed, including their version number. Every once in a while WordPress will refresh the data that is stored in the transient. It is this event that WordPress uses to check the Subversion repository for updated plugins. It is also this event that we will use to check for updates on our own plugin on GitHub.
Getting Started
Let’s begin by setting up our updater class:
class Smashing_Updater {
  protected $file;

  public function __construct( $file ) {
    $this->file = $file;
    return $this;
  }
}
The first thing we must do is create a class name and a constructor (the class name can be anything you want). We are going to need to figure out some basic information about the WordPress plugin we are updating, including the version number. We’ll do this by passing the main plugin file’s path into our updater and then we’ll assign that value to a property.
You might be wondering why we need to pass the plugin’s path into our class. You see, the way WordPress stores plugin information is by using the main plugin file’s path as a unique identifier (i.e. the basename). Let’s say our plugin is in the directory /wp-content/plugins/smashing-plugin/smashing-plugin.php, the basename for our plugin would be smashing-plugin/smashing-plugin.php. We will use this basename to check if the plugin we are updating is activated, among other things.
Next we need to get the plugin data and set it to a property in our class:
class Smashing_Updater {
  protected $file;
  protected $plugin;
  protected $basename;
  protected $active;

  public function __construct( $file ) {
    $this->file = $file;
    add_action( 'admin_init', array( $this, 'set_plugin_properties' ) );
    return $this;
  }

  public function set_plugin_properties() {
    $this->plugin   = get_plugin_data( $this->file );
    $this->basename = plugin_basename( $this->file );
    $this->active   = is_plugin_active( $this->basename );
  }
}
You may have noticed that I am using the action admin_init to set the plugin properties. This is because the function get_plugin_data() may not have been defined at the point in which this code was called. By hooking it to admin_init we are ensuring that we have that function available to get our plugin data. We are also checking if the plugin is activated, and assigning that and the plugin object to properties in our class.
To learn more about WordPress actions and filters you should take a look at the plugin API.
Now that we have our class set up and grabbed some of the basic plugin data we’ll need, it’s time we start talking about GitHub.
Setting Up GitHub
We can start by creating a repository for our plugin. It is important to remember that we will pull the files down from here, so the directory structure is important. You’ll need the root of your repository to be the contents of your plugin folder, not the plugin folder itself. Here is an example of what you should see:
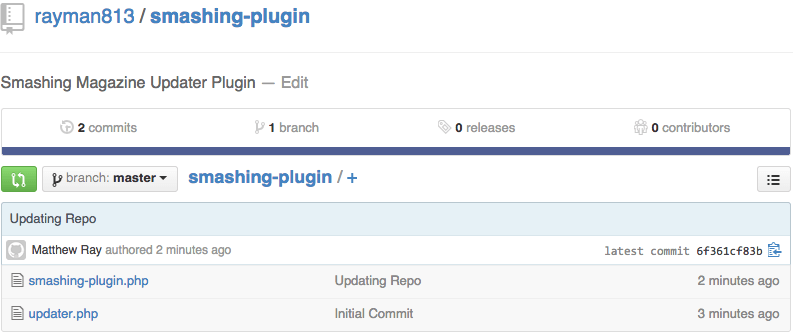
In my repository I have two files. The main plugin file smashing-plugin.php and the updater script updater.php. Your repo may look a little different depending on your plugin files.
Now that we have a repository set up, let’s talk about how we are going to check the version number on GitHub. We have a couple of options here. We could pull down the main file and parse the contents to try to find the version number. However, I prefer using the built-in release functionality of GitHub. Let’s add a new release.
Start by going to the “releases” tab and hitting “Create a new release”:
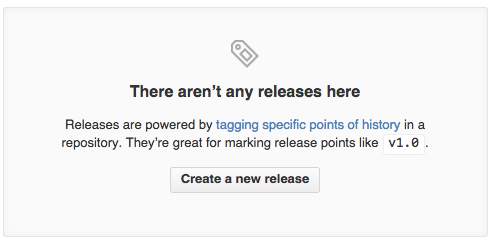
Here you will find a few fields we need to fill out. The most important one is the “Tag version” field. This is where we will put the current release version of our plugin. By now, you are probably familiar with the semantic versioning format. This is the format we are going to use for our field. We should also use this format for our main plugin file, in the PHP comments. Continue filling out the title and description fields in the release until your release looks like something like this:
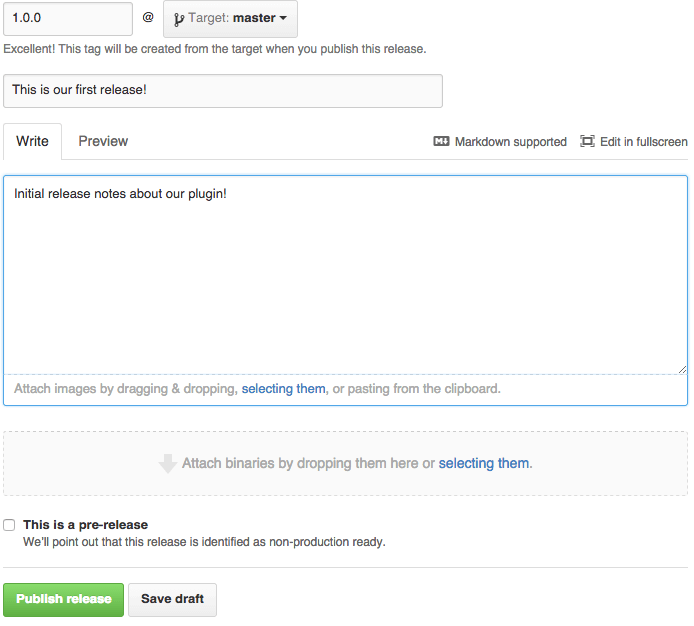
Hit the “Publish release” button to create the release. This will create a ZIP file in our repo that we can use in our updater script. Then, you simply repeat this process whenever you want to deploy a new plugin release. We can now use the GitHub API to check the version number and we have a ZIP file ready to go.
But I Have A Private Plugin!
Don’t worry, just a couple of extra steps. Private plugins require you to pass an authorization token when you make requests to the API. First go to your account settings:
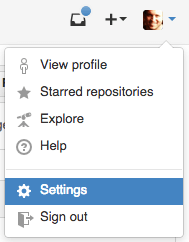
Then go to “Personal access tokens” on the left menu and click “Generate a new access token” button on the top right. You will be brought to this page:
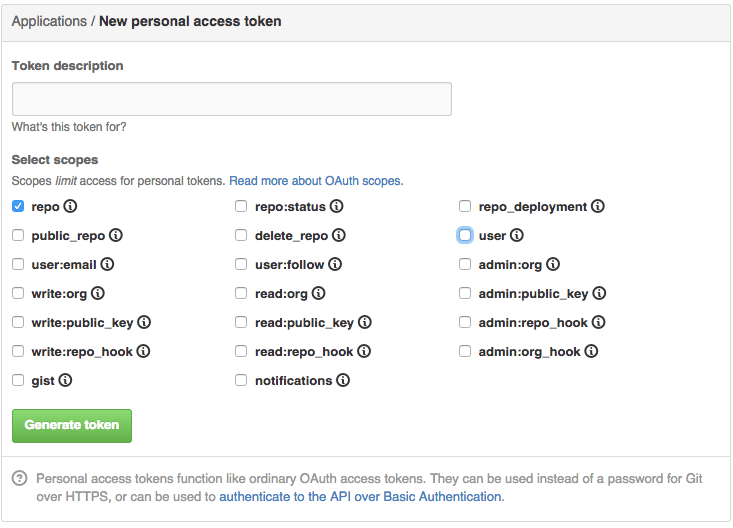
You can give the token any description you like, then select the repo scope and hit “Generate token”. Once you’ve generated your token, copy it down somewhere — we will use it later.
Connecting To GitHub
We can now start adding some code to connect our updater to GitHub. First we’ll add a few more properties to hold our repo information, and one to hold our response from GitHub:
private $username;
private $repository;
private $authorize_token;
private $github_response;
Then we’ll add some setters for our new properties:
public function set_username( $username ) {
  $this->username = $username;
}
public function set_repository( $repository ) {
  $this->repository = $repository;
}
public function authorize( $token ) {
  $this->authorize_token = $token;
}
These setters allow us to modify usernames and repositories without reinstantiating our updater class. Say you wanted to have an unlockable feature or require the users to register, you could change the repo to a pro version of your plugin by simply adding a conditional statement. Let’s take a look at how we should include this code in our main plugin file:
// Include our updater file
include_once( plugin_dir_path( __FILE__ ) . 'update.php');

$updater = new Smashing_Updater( __FILE__ ); // instantiate our class
$updater->set_username( 'rayman813' ); // set username
$updater->set_repository( 'smashing-updater-plugin' ); // set repo
Now let’s write the code we will need to get the version tag from GitHub.
private function get_repository_info() {
  if ( is_null( $this->github_response ) ) { // Do we have a response?
    $request_uri = sprintf( 'https://api.github.com/repos/%s/%s/releases', $this->username, $this->repository ); // Build URI
    if( $this->authorize_token ) { // Is there an access token?
        $request_uri = add_query_arg( 'access_token', $this->authorize_token, $request_uri ); // Append it
    }
    $response = json_decode( wp_remote_retrieve_body( wp_remote_get( $request_uri ) ), true ); // Get JSON and parse it
    if( is_array( $response ) ) { // If it is an array
        $response = current( $response ); // Get the first item
    }
    if( $this->authorize_token ) { // Is there an access token?
        $response['zipball_url'] = add_query_arg( 'access_token', $this->authorize_token, $response['zipball_url'] ); // Update our zip url with token
    }
    $this->github_response = $response; // Set it to our property
  }
}
In this method we are checking if we’ve already gotten a response; if we haven’t, then make a request to the GitHub API endpoint using the username and repo that we’ve supplied. We’ve also added some code to check for an access token for private repos. If there is one, append it to the URL and update the zipball URL (the file we will download when we update). We are then getting the JSON response, parsing it, and grabbing the latest release. Once we have the latest release, we’re setting it to the property we created earlier.
Modifying WordPress
Alright, so far we’ve collected information about our plugin and our repo, and we’ve connected to the repo using the API. Now it’s time to start modifying WordPress to find our new data and put it in the right spots. This is going to involve three steps:
- Modifying the output of the WordPress update transient.
- Updating the WordPress interface to show our plugin’s info properly.
- Making sure our plugin is working properly after the update.
Before we get too deep into how we are going to accomplish each step, we should talk about how we are going to hook into the transient.
Hooking Into The Update Transient
There are a few ways to hook into this transient event. There are two filters and two actions we can use to inject our code; they are:
- Filter:
pre_set_transient_update_plugins - Filter:
pre_set_site_transient_update_plugins - Action:
set_transient_update_plugins - Action:
set_site_transient_update_plugins
You will notice that the tags are fairly similar. The difference here is the addition of the word site. This distinction is important because it changes the scope of our injected code. The tags without the word site will only work on single-site installations of WordPress; the other will work on both single-site and multi-site installations. Depending on your plugin you may choose to use one over the other.
I simply want to modify the default transient, so I am going to use one of the filters. I’ve decided to use pre_set_site_transient_update_plugins so that our code will work on both single and multi-site installations.
Update: If you are using this script to update a theme you can also use the filter pre_set_site_transient_update_themes. Source: Andy Fragen
Let’s take a look at our initialize function:
public function initialize() {
  add_filter( 'pre_set_site_transient_update_plugins', array( $this, 'modify_transient' ), 10, 1 );
  add_filter( 'plugins_api', array( $this, 'plugin_popup' ), 10, 3);
  add_filter( 'upgrader_post_install', array( $this, 'after_install' ), 10, 3 );
}
In this example I have added three filters. Each one corresponds to the steps we talked about earlier. Our first filter is going to modify the transient; the second will ensure that our plugin data gets passed into the WordPress interface; and the last will make sure that our plugin is activated after the update.
Now we need to call this new method in our main plugin file to initialize the updater script. Here is the what the updated code should look like:
// Include our updater file
include_once( plugin_dir_path( __FILE__ ) . 'update.php');

$updater = new Smashing_Updater( __FILE__ ); // instantiate our class
$updater->set_username( 'rayman813' ); // set username
$updater->set_repository( 'smashing-plugin' ); // set repo
$updater->initialize(); // initialize the updater
Now our initialize method will run and the filters within the method will be active. If you are planning on having your plugin’s automatic updates be a premium feature, the initialize method would be a good spot to put your checks and conditionals.
Writing The Code For Our Filters
I have written out all of the methods we will need for each filter we will be using. We can start with the modify_transient method:
public function modify_transient( $transient ) {

  if( property_exists( $transient, 'checked') ) { // Check if transient has a checked property
    if( $checked = $transient->checked ) { // Did WordPress check for updates?
      $this->get_repository_info(); // Get the repo info
      $out_of_date = version_compare( $this->github_response['tag_name'], $checked[$this->basename], 'gt' ); // Check if we're out of date
      if( $out_of_date ) {
        $new_files = $this->github_response['zipball_url']; // Get the ZIP
        $slug = current( explode('/', $this->basename ) ); // Create valid slug
        $plugin = array( // setup our plugin info
          'url' => $this->plugin["PluginURI"],
          'slug' => $slug,
          'package' => $new_files,
          'new_version' => $this->github_response['tag_name']
        );
        $transient->response[ $this->basename ] = (object) $plugin; // Return it in response
      }
    }
  }
  return $transient; // Return filtered transient
}
This snippet simply takes the version number from the comments in our main plugin file, and compares them with the tag name we gave our release on GitHub. If the one on GitHub is higher, our code tells WordPress that there is a newer version available. If you change the version number in the main plugin file to a version that is lower than our GitHub tag, you should start seeing the update notification in the WordPress admin:

You might notice, however, that if you click on the “View version 1.0.0 details” link, you receive an error from WordPress. This is because WordPress is trying to find the details of this plugin from its repositories. Instead, we need to load our own data about the plugin. That is where our next method, plugin_popup, comes in:
public function plugin_popup( $result, $action, $args ) {
if( ! empty( $args->slug ) ) { // If there is a slug
if( $args->slug == current( explode( '/' , $this->basename ) ) ) { // And it's our slug
$this->get_repository_info(); // Get our repo info
// Set it to an array
$plugin = array(
'name' => $this->plugin["Name"],
'slug' => $this->basename,
'version' => $this->github_response['tag_name'],
'author' => $this->plugin["AuthorName"],
'author_profile' => $this->plugin["AuthorURI"],
'last_updated' => $this->github_response['published_at'],
'homepage' => $this->plugin["PluginURI"],
'short_description' => $this->plugin["Description"],
'sections' => array(
'Description' => $this->plugin["Description"],
'Updates' => $this->github_response['body'],
),
'download_link' => $this->github_response['zipball_url']
);
return (object) $plugin; // Return the data
}
}
return $result; // Otherwise return default
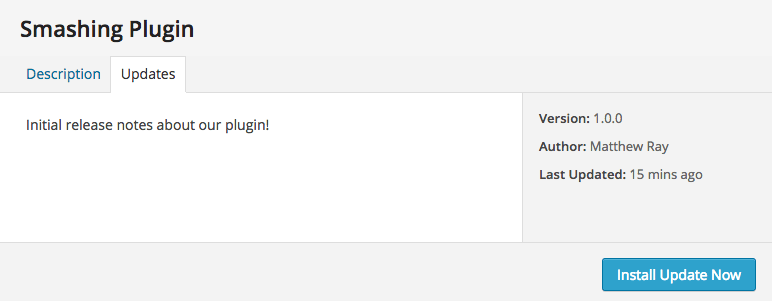
}This snippet is actually pretty simple. We are just checking if WordPress is looking for data about our plugin, and if it is, returning our own array of data. We get the data from a combination of our GitHub response and our plugin’s comment data. You might have also noticed the sections key in this array. Each item in that array is output as a tab in the plugin popup meta box. You could add pretty much anything you’d like in those sections, including HTML. Right now, we are just showing the plugin description and the release notes we wrote earlier.
Let’s take a look at our final method, after_install:
public function after_install( $response, $hook_extra, $result ) {
  global $wp_filesystem; // Get global FS object

  $install_directory = plugin_dir_path( $this->file ); // Our plugin directory
  $wp_filesystem->move( $result['destination'], $install_directory ); // Move files to the plugin dir
  $result['destination'] = $install_directory; // Set the destination for the rest of the stack

  if ( $this->active ) { // If it was active
    activate_plugin( $this->basename ); // Reactivate
  }
  return $result;
}
This snippet does two things. First, it sets an argument named destination, which is simply the directory where WordPress is going to install our new code. We are passing the main plugin file’s directory into this argument since it should always be the root of the plugin. Second, it checks if the plugin was activated using the property we set earlier. If it was active before updating, our method will reactivate it.
Conclusion
Congratulations! You should now be able to update your plugin by clicking the “Update now” button on the plugins page. You should keep in mind, though, that your plugin’s version in the main plugin file needs to be updated to match the current release of your plugin — they should always match. If you didn’t update your version in the comments, you may find yourself in an endless “There is an update available” loop.
If you would like to see the completed script from this tutorial, you can view it in the sample GitHub repository that we made.
Further Reading
- Making A WordPress Plugin That Uses Service APIs
- A Simple Workflow From Development To Deployment
- S(GH)PA: The Single-Page App Hack For GitHub Pages
- Build A Blog With Jekyll And GitHub Pages


