How To Create A Helpful And Better 404 Page

Email Newsletter
Weekly tips on front-end & UX.
Trusted by 182,000+ folks.


 Celebrating 10 million developers
 Custom Web Forms for Angular, React, & Vue. Your backend.
A lot of funny 404 pages have been shared recently: carefully crafted memes, funny GIFs, even the odd interactive game. But if the 404 doesn’t help your visitors, then what’s the point?
A visitor could find themselves on a 404 page for one of many reasons: a mistyped address, a bad link from somewhere else, a deleted page or content that has moved elsewhere. While you can prevent errors from moved pages with redirects, you can’t control people’s mistakes.
Being Helpful
People who land on your website are looking for its content, usually via a link. They would have clicked that link expecting one thing, so why show them a hand-drawn panda? Instead, your 404 page should get them to where they need to be.
This problem isn’t new, and we’ve seen a lot of ideas on how to handle it. Showing a search form or linking to the home page is reasonable. Yet those are passive solutions that don’t solve the visitor’s problem. A more direct approach would be to guess where the visitor intended to go and suggest that page.
Suggesting The Right Page
One way to suggest the right page is to search for it yourself and present the result. Luckily, we don’t have to write a search engine to do this (although, if you have one handy, good for you!). Instead, we can use Google’s Custom Search API.

Google’s Custom Search API is a tool for searching within an individual website. When set up, it enables you to retrieve what it considers to be the best match from your website. It does need a search phrase, though. So, to give Google something to search with, we’ll use the path of the URL that the user is currently on.
Caveat: Limits Abound
Before jumping into the “how to” part, it’s worth noting that the free tier for this API has a limit of 100 calls per day. You might want to go light on the testing while working on it. I managed to burn through the 100 calls in less than an hour, and I had to wire part of it together without seeing the result till the next day.
While someone with a small website might be fine with this limit, paid upgrades are available. Google’s API documentation mentions a price of $5 per 1000 queries and up to 10,000 queries per day.
Setting Up
Before using the Custom Search API, we need to let Google know who we are and get some access keys.
Search Engine ID
We need to go through a few steps before we can fly through those 100 API requests. First, register your site-specific search engine.
- Select “Add.”
- Input your website’s URL (
yoursite.com) in “Sites to search.” - Hit “Create.”
You now need to find your “Search engine ID.” Click “Edit” on the search engine that you created, then the “Search engine ID” button. Take note of that code!

Developer API Access
Next, go to the Developers Console.
If you don’t yet have a project, select the “New Project” option and fill in the form.
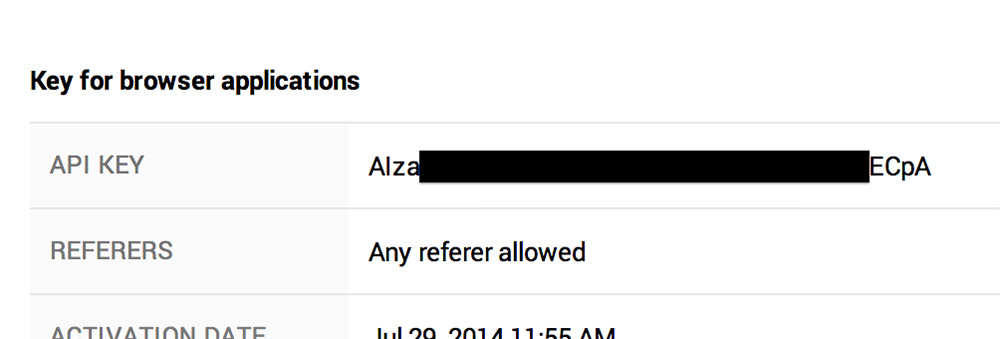
Under “APIs,” activate the “Custom Search API” by switching the “Off” button to “On.” Then, select “Credentials,” then “Create New Key,” and choose the “Browser Key” option. Take note of the API key!
JavaScript
Armed with both a search engine ID and an API key, you can now start hitting the API. The code below requires jQuery. It does some AJAX JSON stuff, so I’d rather lean on the framework to ensure that it works across browsers.
Before creating functions, we should consider the environment that our code will run in. Because we’re writing JavaScript on the front end, our code might run alongside other plugins and scripts. So, let’s build a little space to cleanly separate our functions from everything else:
function createCustomSearch() {
// Private variables and methods here
}
Within our customSearch object, we can define methods and variables safely away from the global context. First, let’s set up some variables to use later:
function createCustomSearch() {
  // Some private variables for this object
  var context = this;
  var dialog = document.querySelector('dialog');
  // Your keys
  var engineID = 'YOUR_ENGINE_ID';
  var apiKey = 'YOUR_API_KEY';
}
Replace the keys with those we generated earlier.
Initially, we establish a local context by storing this in a variable. We’ll use this to access a showDialog method later.
Trying A Search
First, we’ll add a method that tries a custom search:
function customSearchConstructor() {
  // Some private variables for this object
  var context = this;
  var dialog = document.querySelector('dialog');
  // Your keys
  var engineID = 'YOUR_ENGINE_ID';
  var apiKey = 'YOUR_API_KEY';
  this.trySearch = function(phrase) {
    var queryParams = {
      cx: engineID,
      key: apiKey,
      num: 10,
      q: phrase,
      alt: 'JSON'
    }
    var API_URL = 'https://www.googleapis.com/customsearch/v1?';
    // Send the request to the custom search API
    $.getJSON(API_URL, queryParams, function(response) {
      if (response.items && response.items.length) {
        console.log(response.items[0].link);
      }
    });
  };
}
This trySearch method takes a phrase and sends it along with your keys as a request to Google’s API. The response is then checked, and the first link that it finds will be logged to the console. You would call it like so:
var customSearch = new customSearchConstructor();
customSearch.trySearch('cat');
Assuming that your website contains pages about cats (and whose doesn’t?), you should see something logged in your console.
Getting The Search Phrase
Next, we’ll write some code to get the path from the URL of the page. This path will become the search phrase.
$(document).ready(function() {
  var customSearch = new customSearchConstructor();
  var path = window.location.pathname;
  var phrase = decodeURIComponent(path.replace(/\/+/g, ' ').trim());
  customSearch.trySearch(phrase);
});
Within the jQuery ready method, we’ll pick up the pathname part of the current URL and create a search phrase from it. We’ll decode the URI, replace any forward slashes with spaces, and send the result to the trySearch method.
Replacing Strings With JavaScript
One handy thing to know is how to replace a global regular expression in JavaScript. This one is a set of matches separated by pipes:
/\/+/g
The first and last forward slashes (/) are there to contain the expression. Within it, we escape a backslash character (/) so that it is treated as an actual character. The + will match any instances of multiple slashes, and the g then tells it to replace every instance in the string.
Showing The Redirect
In my first version, I had the page redirect immediately. That was fun but not a great experience for the visitor. The page would load, flicker and jump elsewhere.
An alternative approach is to present the option as an overlay and as a link that the visitor can click. This way, the visitor better understands what has happened and sees a clear way to proceed. And they will have the option not to proceed if the result doesn’t suit them.
Other Approaches
Showing a single result is one way to go about this, but it would be worth considering more than the first result. If you wish to give the visitor more options, then your 404 page could show all of the returned pages as a set. Depending on the quality of the results from the custom search, this might be better.
For this example, let’s assume that the first result returned is always the most relevant, and we’ll present a single option in the form of a dialog overlay.
Also, consider cases in which no results are returned. Ensure that your 404 page contains some helpful message or content.
Starting A Dialog
If we find a result, let’s show it as a modal that prompts the user. To help with this, we’ll be able to use the new dialog element in the near future. Originally intended for dialogue from movies, the element is back and can now show any content that needs to be popped up in front of other content. In other words, we now have a native HTML5 modal element.
Let’s define the dialog in HTML:
<dialog>
  <h2>
    Hey, is this what you meant?
    <span class="suggestion"></span>
    <span class="nope">No thanks</span>
  </h2>
</dialog>
Polyfill For Older Browsers
Before calling the JavaScript that will show and hide this dialog, we need to consider older browsers. The dialog element is very new and so isn’t supported everywhere. To fix this, we can use the helpful polyfill provided by Google.
This polyfill requires a little JavaScript. The following external script will need to be called before we create the dialog:
<script src="https://cdn.rawgit.com/GoogleChrome/dialog-polyfill/master/dialog-
polyfill.js"></script>
This script includes a registerDialog method that wraps the dialog selector with a few handy functions that reproduce the native API. We can use it in our customSearch object:
function createCustomSearch() {
  …
  var dialog = document.querySelector('dialog');
  // Apply the polyfill
  dialogPolyfill.registerDialog(dialog);
  …
}
Showing And Hiding
We now have a dialog element, with extra methods added by the registerDialog polyfill. Let’s add some methods to show and hide the element:
function createCustomSearch() {
  …
  this.showDialog = function (url) {
    var suggestedLink = $('<a></a>');
    // Verify that the suggested URL is from this domain
    var hostname = new RegExp(location.host);
    if (hostname.test(url)) {
      suggestedLink.attr('href', url);
      suggestedLink.text(url);
      $('dialog .suggestion').html(suggestedLink);
      dialog.showModal();
    }
  };
  this.hideDialog = function () {
    dialog.close();
  };
}
We’ve got two methods here. The first, showDialog, takes a URL, places it in the dialog element, and calls the showModal method provided by the polyfill.
To protect ourselves, we’re verifying the URL. Because we’re expecting this script to return another page from the same website, we verify that the returned URL’s host name and the local website’s host name are the same.
The URL is then used to generate an anchor, which we place in the dialog HTML.
The second method, hideDialog, hides the modal using its own close method.
Styling The Dialog
Lastly, let’s add some style. The default modal style is a bit too boxy. We’ll make it subtler and give it a dark background with some CSS:
dialog {
  display: none;
  position: absolute;
  top: 0;
  right: 0;
  left: 0;
  text-align: center;
  color: #fff;
  border: none;
  background: none;
}

dialog[open] {
  display: block;
}

dialog[open]:before {
  position: fixed;
  z-index: -1;
  top: 0;
  right: 0;
  bottom: 0;
  left: 0;
  content: ’;
  background: rgba(0,0,0,.8);
}

dialog span {
  display: block;
}

dialog span.suggestion {
  font-size: 1.75em;
  line-height: 2.5em;
}

dialog h2 {
  line-height: 1.5em;
  padding-top: 2em;
}

dialog a {
  padding: .25em;
  border-radius: .25em;
  background: rgba(200,200,255,.9);
}

dialog .nope {
  font-size: .75em;
  cursor: pointer;
  color: #aaa;
}
We’re referring directly to the dialog in this CSS. For more flexibility, you might prefer to refer to it by a class.
Tweak the various styles to fit your design. The main goal of this CSS is to define how the dialog looks, and have it display: block when given the class of open. The other styles, from position to color, are entirely up to you.
Wiring In The Search
Next, we need to adjust that trySearch method from earlier to use the dialog. We do this by placing the showDialog method call within the JSON response callback. Here’s the full script:
function customSearchConstructor() {
  // Some private variables for this object
  var context = this; // Keeps the parent context available so that we can call local methods
  var dialog = document.querySelector('dialog');
  // Apply the polyfill
  dialogPolyfill.registerDialog(dialog);
  // Your keys
  var engineID = 'YOUR_ENGINE_ID';
  var apiKey = 'YOUR_API_KEY';
  this.trySearch = function(phrase) {
    var queryParams = {
      cx: engineID,
      key: apiKey,
      num: 10,
      q: phrase,
      alt: 'JSON'
    }
    var API_URL = 'https://www.googleapis.com/customsearch/v1?';
    // Send the request to the custom search API
    $.getJSON(API_URL, queryParams, function(response) {
      if (response.items && response.items.length) {
        context.showDialog(response.items[0].link);
      }
    });
  };
  this.showDialog = function (url) {
    var suggestedLink = $('<a></a>');
    // Verify that the suggested URL is from this domain
    var hostname = new RegExp(location.host);
    if (hostname.test(url)) {
      suggestedLink.attr('href', url);
      suggestedLink.text(url);
      $('dialog .suggestion').html(suggestedLink);
      dialog.showModal();
    }
  };
  this.hideDialog = function () {
    dialog.close();
  };
}
$(document).ready(function() {
  var customSearch = new customSearchConstructor();
  var path = window.location.pathname;
  var phrase = decodeURIComponent(path.replace(/\/+/g, ' ').trim());
  customSearch.trySearch(phrase);
  $('dialog .nope').click(function() {
    customSearch.hideDialog();
  });
});
Live Demo
You can see this code in action on my 404 page. Typing something like …/mac/plus/article/ will result in a 404 that recommends the CSS Mac Plus blog.
Fallbacks And Other Strategies
API limits aside, it’s possible that a match isn’t found for the mistyped URL. In this case, showing the visitor some helpful content would be a good idea. Depending on your website, you could show recent articles or recently updated pages or perhaps even a custom search box.
Google’s Custom Search Engine gives us the option to get some embedding code. Select your existing engine and then the “Get code” button to find this. Whatever content you decide to show as a fallback, it will be better for your visitors than showing a funny picture. It might not be as much fun, but it will help visitors find what they need.
I hope you’ve enjoyed this article. If you want to share it, please double-check that the URL is correct. Or don’t. I’m sure it’ll be fine.
Front page image credits: OpenSource.com
Further Reading
- 404 Error Pages, One More Time
- Effective Maintenance Pages: Examples and Best Practices
- Optimizing Error Pages: Creating Opportunities Out Of Mistakes
- 15 Essential Checks Before Launching Your Website


