Screencasting: How To Start, Tools and Guidelines

Email Newsletter
Weekly tips on front-end & UX.
Trusted by 200,000+ folks.


Some companies have made a living creating a sort of “virtual classroom,” allowing members to learn at their own pace when they have the time using video tutorials. The advantages of the classroom setting stem from a one on one experience and the ability of the instructor to show the ideas and theories rather than simply explain them.
Screencasting, or sharing your virtual desktop via video presentation, has exploded in popularity with the advent of podcasting, and gives you the ability to bring the classroom feel to a media presentation that can be delivered over the Internet. The medium of screencasting is readily available to everyone and with a few tools of the trade you can be ready to produce your own.
You may also want to take a look at the following related posts:
Screencasts For Web Developers
You can learn a lot from an article or a detailed tutorial, but if you really want to understand a certain technology or tool, it’s great to sit next to someone who has a wide understanding and is able to answer all of your questions. Even better: you can sneak a peek behind their workflows, too!
Well, perhaps you shouldn’t be annoying to your colleague all of the time, so why not get a cup of coffee, biscuits and check a video screencast instead? Chris Coyier’s screencasts often feature interesting workflows and tools, e.g. Build Podcast is all about tools, libraries and techniques. Breakpoint Show is dedicated to developer tools and time-saving techniques.
Why Should You Screencast?
There are several advantages to screencasting both from the user’s side as well as from the creator’s. From the point of view of the audience, the screencast allows them to learn by example, seeing every step in great detail. Learning by watching the host move through the steps enables them to take note of where everything is in the application or presentation. In most cases the ability to pause or rewind also gives the viewer the power to move at their own pace… something a classroom cannot always offer.
For the creator, screencasting offers the capability to explain in detail what may be more confusing when delivered in audio or the written word. Video allows the screencast producer to complete the flow of thoughts or processes without being forced to chop steps into static images, as in a book or slide show. With the combination of video and audio, the creator can mimic the one on one experience of the classroom and deliver clear, complete instruction.
Althought the advantages may seem plentiful, screencasts do have their downside as well. Watching a video requires a commitment of time, and some potential audience members may not have the time to give. While iPods and other portable media players have made video content more portable, a large portion of the population may still rely on books and the printed word for training on-the-go. Screencasting, although not a new technology is still relatively obscure. Individuals that a screencaster is trying to reach may simply not know that the information is available to them.
The technical difficulties of screen capture and exporting can be numerous, and a poorly constructed offering will almost absolutely result in a reduction in audience and exposure. While video and audio quality may not be as important as content, it can make or break the success of a screencast.
Who Can Make a Screencast?
Anyone with something to teach or present can produce a screencast. Required are a good idea, some screen recording software, a microphone, a site for distribution, and a willingness to share your ideas with the world. In seven easy steps you can begin to produce a screencast and deliver it to the world.
Seven Steps to Screencasting
- Content is king. If you don’t have something to present, you don’t have a screencast! In most cases, a screencast is produced to teach a process or technique, or get a set of ideas across to an audience. If you cannot keep the attention of the audience, the screencast may be rendered useless. When choosing a topic, start with areas that are within your knowledge base, and can be covered in the time allotted to complete the series.
- Planning. A script may or may not be utilized in preparation, but it is good practice to complete a dry run of the presentation before actually hitting the record button. Practice makes perfect, and the more familiar you are with your content, the more polished the final recording will be.
- Push the red button. It’s time to shine, and if your preparation went well, this step should be relatively easy. Remember to move at a pace that is comfortable for your audience and speak clearly so as to avoid any confusion. Audio can be added in post production instead of being recorded during the presentation, but this will require an extra editing step and can break the flow of the delivery if not done correctly.
- Review the video. Be sure that no steps were left out and that the flow of the presentation makes sense and will be easy to follow for your intended audience. If imperfections are found, you may choose to edit or re-record the video altogether.
- Editing. If necessary, edit the video according to your standards. Include any transitions, intros, outros, or other post production items.
- Produce. Export your video with the settings that best fit your intended output, whether that will be streaming from a webpage, downloadable media or delivery on a disc.
- Distribute the videos. There are several options from hosting your own weblog site and leveraging an RSS feed, to using a service such as YouTube.
Capturing Your Screen
As is often the case with software, the options are plentiful for capturing video of your computer screen. The feature sets of these software packages for the most part are comparable, but advanced tools and pricing set a few of them apart from the pack. Below are five screen capture software applications that can be used to create a screencast.
Snapz Pro X (Mac)
Snapz Pro X is a robust offering of settings and compressions for screen captures of all sizes. It is fairly easy to use and captures great quality of video and sound. Video from this application is exported in Quicktime (.mov) format only and Snapz Pro X does not allow for video editing. This is a feature-rich application for a reasonable price of about $70.
iShowU (Mac - Tiger or Leopard)
iShowU offers polished recording quality and plenty of settings and export presets for anything from YouTube formatting to 1080p. Like Snapz Pro X, iShowU lacks ability to encode video to different formats. Videos are saved in Quicktime (.mov) format only and editing is not a feature supported by this application. This is a productive little application and priced for the novice at about $20.
Screenflow (Mac)
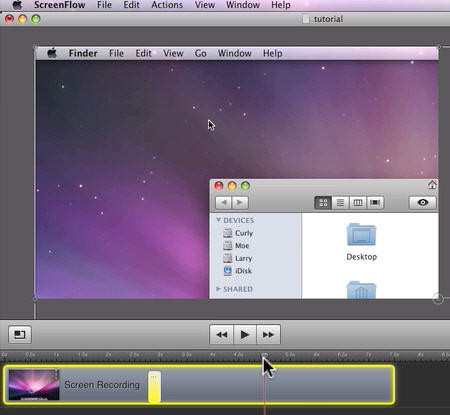
Compared to other applications, Screenflow has advanced algorithms that only encode areas of change on your screen. It can simultaneously record from iSight or DV camera at the same time as your screen (and your microphone and computer’s audio). You can also capture games and DVD-videos. With ScreenFlow editor you can add zoom and pan effects, trim clips, add drop shadow and reflection, adjust audio levels etc. You can also combine existing media into your screencast. Powerful and very user-friendly, price: $99.99.
Camtasia Studio 5 (Windows)
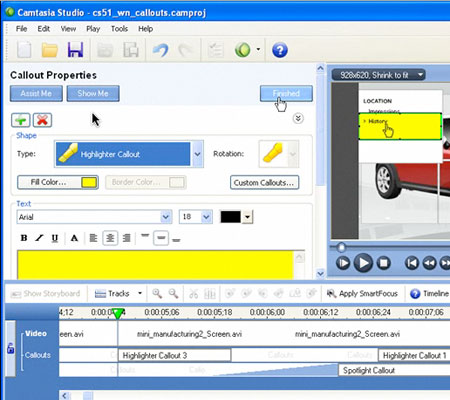
If you are looking for an all-in-one screen capture and video editing software package, and you’re using Windows, this is the one for you! Camtasia Studio 5 lets you record the screen, format and compress for multiple outputs, edit and enhance the audio and video, and save in several different formats. A host of other features including themes, transitions, and captions make this product stand out among the pack, but at a price of about $299.
CamStudio (Windows)

CamStudio is a quick and lightweight screen capture application that allows for recording of video and sound to either an .avi or Flash based swf file. It features the ability to place banners/text boxes with supporting text. This application records only and does not allow for editing, but is a very functional screen capture option and is free for anyone to use, provided you are using the Windows operating system.
Adobe Captivate 3 (Win)
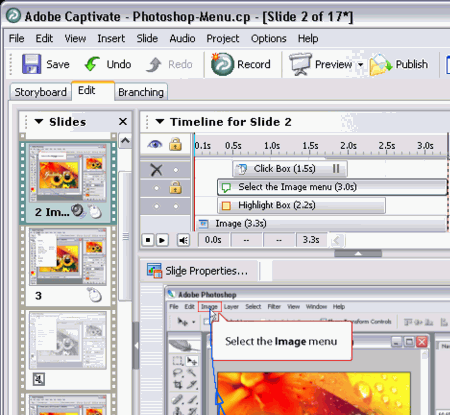
Adobe Captivate builds and edits interactive software demonstrations, simulations, podcasts, screencasts, games, program demos and lessons. For software demos, it can either record in real time or use a smart event-based screen capture that snaps a sequence of still images and then builds mouse movement simulations to create the appearance of a running program.
You can edit Captivate presentations to add captions, clickable hotspots, text entry boxes, rollovers, videos, etc. It is also possible to edit the content (including mouse pointer path, position, image) and change the timing for each item to appear and disappear. The hotspots can branch to other slides in the presentation, or to outside webpages.
Captivate supports the import of still images, PowerPoint, video, .FLV, and audio tracks onto any Captivate slide. Price: $699.
Tricks of the trade
Screencasting, like many other forms of media can be customized as the producer sees fit. Trial and error may be your best ally in figuring out what formula works best. Here are some tips from current screencast producers that may fit into your template of success.
- Expensive equipment is not always the best equipment. While some studio grade microphones will give you excellent audio quality, a decent headset will give you adequate sound and the freedom to work on the computer as you normally would while performing the presentation.
- Taking the time to find the suitable settings for your output can be the key to returning your audience. Poor video or audio quality can have a negative effect on the screencast viewing experience.
- Editing may be an option, but sometimes its better to simply start over and have a nice flow to the production rather than piecing together snippets of good video.
- Think long-term. Are you still going to have content to share via screencast two months from now? How about two years from now? Once you build an audience, their thirst for your content may not fade.
- Consider leaving the mistakes in the presentation. Problems may occur in the viewers’ workflow, and watching you solve a similar problem may help in their learning process.
Speak to the World
Once your screencast is ready for an audience, a suitable distribution system is needed to get the content to the people. Using a weblog software such as WordPress allows you to quickly add posts, or customized web pages, and attach your screencast.
Taking things one step further, the weblog automatically produces an RSS feed, which users can subscribe to in a news reader or aggregator such as iTunes, and receive the screencasts each time you add a new one to the weblog.
Alternatively, you may choose to use a service such as YouTube. These websites both allow you to set up a free account, post your video content to their free-of-charge servers and share it with other users who visit the website. These services can be a cost-effective solution as you are not charged for the storage or transfer of your screencasts, and at times have an opportunity to even make money with your videos.

Making Sense Of It All
Screencasting is a media experience that is available to just about anyone, whether there is an interest in viewing them or hosting and producing them. It is an effective way to educate and inform using some simple tools to share what is happening on your computer screen.
It holds many advantages over the traditional methods of teaching and learning, and in many cases is offered free of charge. See the list below for some high quality screencasts that may teach you a thing or two about design and design applications.
- CSS-Tricks Screencast - by Chris Coyler
- dekePod- by Deke McClelland
- The InDesigner - by Michael Murphy
- One Minute Tip - Photoshop Wednesdays - by John W Chambers
- Photoshop User TV - by The National Association of Photoshop Professionals
- Screencasts Online HD - by screencastsonline.com


