20 Time-Saving Tips to Improve Designer’s Workflow

Email Newsletter
Weekly tips on front-end & UX.
Trusted by 182,000+ folks.


 Celebrating 10 million developers
 Custom Web Forms for Angular, React, & Vue. Your backend.
Want to save some time? Of course you do! You are probably always looking for ways to do this faster and make that easier, it’s human nature! One of the best ways to save time is experience. The more experience you have, the more comfortable you are working, the more you have developed your own best methods, and with experience you know how to better avoid mistakes and disasters. So always stay hard at what you do and you will definitely save more than “just” time!
However, regardless of your experience level, there are ways to speed up the common design tasks. You should find some of these not-so-well-known tips and strategies listed below very helpful for your workflow. And please feel free to suggest more ideas in the comments to this post!
You may also want to check out the following Smashing Magazine articles:
- Powerful Workflow Tips, Tools And Tricks For Web Designers
- Professional Workflow Tips And Guidelines For Web Designers
- Time Savers, Tools And Useful Services For Web Designers
- 50 Powerful Time-Savers For Web Designers
General Workflow and Customization
1. Customize your workspace in design applications
When working, it is important to have all necessary tools and panels readily available to speed up your workflow. However, the tools and panels needed, fluctuate based on the project at hand. Adobe design programs provide several standard default workspace settings, such as Type, Web, Video, etc.
These are beneficial for a start, but customizing workspaces to fit personal and project needs can further speed your workflow. Experiment with different set-ups to find the best settings. It is best to save a workspace after working within a document for a while rather than at the beginning.
- While working in a document: Open, close, and reorganize panels, window layout and interface to optimal conditions
- Go to: Window > Workspace > Save Workspace (In Dreamweaver, the menu option is listed as Workspace layout)
- Give the workspace a name (ex. Mike’s Logo Project); In some cases, you will be asked to select which settings to save, if so select the appropriate items
- To use the layout in the future, Go to: Window > Workspace > title of your workspace
2. Customize your preferences in design applications
Numerous program settings are stored in the Adobe applications, including general display options, file-saving options, performance options, cursor options, transparency options, type options, and options for plug-ins and scratch disks. These preferences are just that, preferences. It is no surprise that not everyone agrees with the same preferences, so for an optimal design experience, you should customize these preferences in each of your design programs to best suit your needs.
Edit Preferences
- Choose Edit > Preferences > General (Windows) OR choose Program Name (ex. Photoshop) > Preferences > General (MAC)
- Preference settings are saved each time you quit the application.
Suggested Preferences to Change
- Photoshop: number of history states, interface display, unit measure default
- Illustrator: keyboard increment, selection tolerance, baseline shift default, tracking default, unit measure default, grid layout, appearance of black
- Dreamweaver: code format, code hint, copy/paste, css, css shorthand, new document, browser preview defaults, validator
- Flash: on launch default, actionscript, drawing, text, warnings, PSD & AI file import
- InDesign: drag-and-drop text editing, dynamic spelling, auto-correct, leading, unit measure default, keyboard increment, dictionary, display performance, appearance of black
3. Combine common graphics from past projects into one document for easy use in the future
Design should never repeat itself, however there are certain elements that are often repeated out of necessity, such as icons, logos, symbols, etc. (particularly when you are creating a wireframe). Combine all of these common elements into one Photoshop or Illustrator document for future use. This will eliminate the search through past design documents for an icon or symbol you have already created.
4. Learn and practice using keyboard shortcuts, then create your own
Sure command-C and command-V are helpful for copying and pasting, but don’t stop there. A keyboard shortcut exists for most of the common commands and if there is not one, you can create your own. The time saving ability of keyboard shortcuts is priceless.
To create your own select Edit > Keyboard Shortcuts (Windows) or Program Name (ex. Photoshop) > Keyboard Shortcuts (Mac OS). You can create different sets of shortcuts for different tasks if desired. Browse to the command that you would like to edit and enter a new shortcut combination. Note: To enter the key combination, press the keys on the keyboard. You do not need to spell out the key names, such as Control, Option, and so on.
Resources for finding and learning shortcuts:
Photoshop
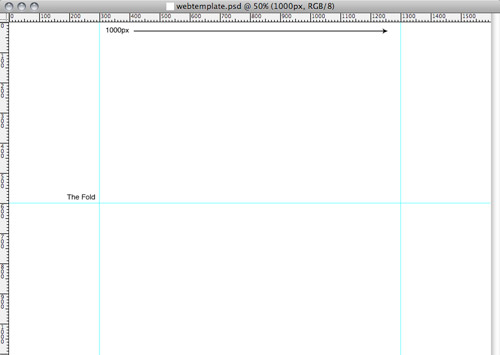
5. Create reusable files or templates with commonly used settings
In general, when beginning a website mockup/design in Photoshop, there are several things you do (or should do) automatically before you begin, such as set the size and dimensions, create guides, and create common layer folders (see Always organize layers into several folders below). Instead of creating these generic settings each time, create a template file with these settings already created.
Next time you begin to design a website mockup, set up your basics, then stop and save a version labeled “webtemplate.psd,” or any other relevant filename. Then begin every future design with that template file. You will appreciate eliminating this repetitive task the next time you design!
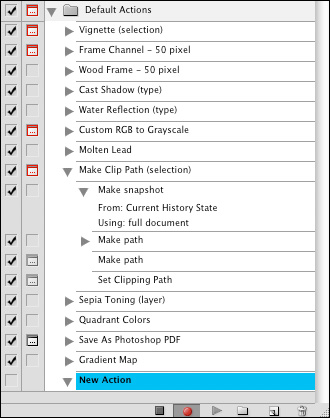
6. Record and use actions for repeated tasks
One of Photoshop’s most effective time-savers is the actions panel. It allows you to record a task or series of tasks to be used later for similar projects. As with many Adobe tools, there are a number of helpful default actions already set-up, however, the actions panel is best used when recording custom actions, many of which are project specific.
For example, if you had a series of filters and adjustments applied to an image within a design and you needed to apply the same effects to several other images, then recording the steps would allow for an exact and quick replication of the effect.
The actions panel can be very dynamic or it can be very simple, depending on your needs and experience. Follow the steps below for the basic functions of the actions panel. Then check out the additional resources listed here for further learning.
- Open the Actions Panel: Window > Actions OR use the keyboard shortcut, Option-F9 (MAC) Alt-F9 (WINDOWS).
- Create a new action by clicking the New Action button, located at the bottom right of the actions panel.
- Once a new action is created, it automatically begins recording. If not, click the round record button, located at the bottom of the actions panel.
- Proceed with applying any adjustments, filters, size changes, etc. until the desired effect has been reached.
- Once finished, click the Stop Playing/Recording button, located next to the record button at the bottom of the actions panel
- If a specific task was recorded during the action that is undesired, that specific task can be deleted without re-recording the action by selecting the task, then clicking the delete button.
- To play an action, select the appropriate layer to apply the action to, then click Play. Photoshop will perform the actions live on the screen, but should only take a few seconds.
Helpful Resources for Photoshop Actions
- Creating a Photoshop Action - Veerle’s blog
- How to use Photoshop Actions (Video Tutorial) - Bukisa
- The Ultimate Collection of Useful Photoshop Actions - Smashing Magazine
- 400+ Time Saving Photoshop Actions - Design Reviver
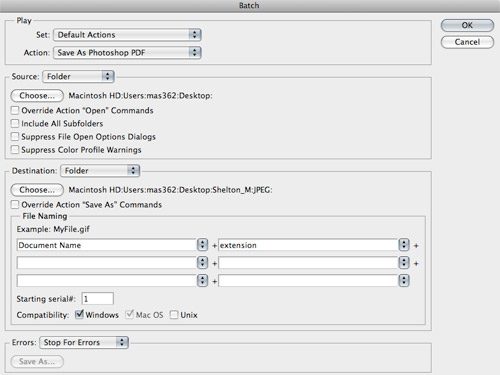
7. Use batch actions for repeating a task on a group of files
When using basic Photoshop actions, you must click play each time to apply the action. This isn’t convenient when the same action needs to be applied to a large group of files. This is where batch actions becomes very helpful. The batch automation panel allows for the application of an action to a folder of images or files. For example, if you had a folder of 50 images that need to be resized to 500x500px and rotated 90 degrees, it would be time consuming to apply the action individually to each file.
Rather, configure the batch actions dialog box to apply the action to all files in the folder, then Photoshop will do the grunt work and spit out all 50 images, rotated and resized.
To access the batch actions panel, select File > Automate > Batch.
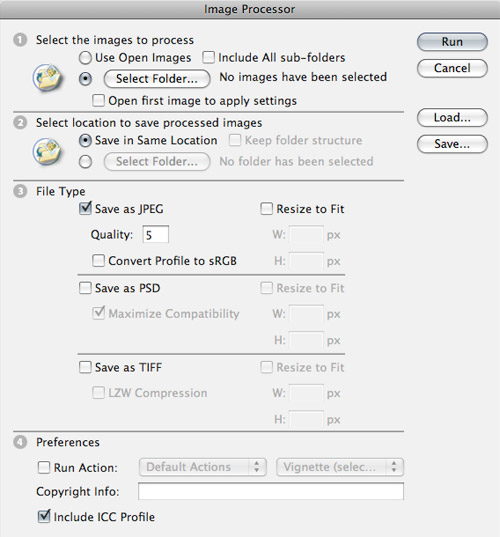
8. Use the image processor for resizing a group of images
Similar to the batch actions panel, the image processor selects a folder of images or all open images and resizes and saves them to a desired location. The image processor is better for resizing images than the batch actions panel, though the same action can be performed in both.
To access the image processor, select File > Scripts > Image Processor.
9. Make history snapshots to create comparable versions of a file
Photoshop’s history panel is a life-saver sometimes, however it is even more convenient to create multiple instances of the same file to be compared later. The Snapshot command lets you make a temporary copy (or snapshot) of any state of the file. The new snapshot is added to the list of snapshots at the top of the History palette. Selecting a snapshot lets you work from that version of the image.
Create a Snapshot
- Select a state and do one of the following:
- To automatically create a snapshot, click the Create New Snapshot button on the History panel, or if Automatically Create New Snapshot When Saving is selected in the history options, choose New Snapshot from the History panel menu.
- To set options when creating a snapshot, choose New Snapshot from the History panel menu, or Alt-click (Windows) or Option-click (Mac OS) the Create New Snapshot button.
- Enter the name of the Snapshot in the Name text box.
- Choose the snapshot contents from the From menu:
- Full Document - Makes a snapshot of all layers in the image at that state
- Merged Layers - Makes a snapshot that merges all layers in the image at that state
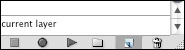
- Current Layer - Makes a snapshot of only the currently selected layer at that state
10. Always organize layers into several folders or groups
It is best practice to always label layers and organize them into manageable folders/groups. It allows for quick navigation of layers and the movement of groups of layers. For example, when designing for the web, it is helpful to have several folders, such as header, sidebar, footer, etc. If the sidebar needed to be relocated within the file, select the folder and drag the entire group to the desired location.
To create a layer folder, click the create a new group icon, located to the left of the create new layer button inside the layers panel.

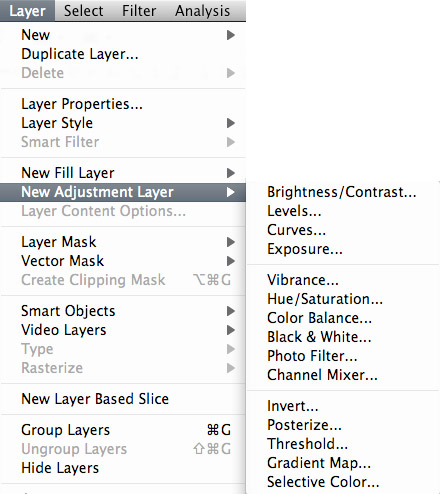
11. Create adjustment layers instead of directly editing a layer
When editing images, using Photoshop’s adjustment features is a life-saver because of the expansive amount of control you have over the appearance. However, it isn’t always an exact science and you may not like the final outcome. This is where adjustment layers come in handy.
Without harming the original layer, Photoshop will apply the adjustment as a clipping mask to the previous layer or the entire document. You may apply as many adjustment layers to one layer as would like and the beauty of them is the ability to hide them with the click of a button, just like any other layer.
To create a new adjustment layer, select Layer > New Adjustment Layer > the desired adjustment
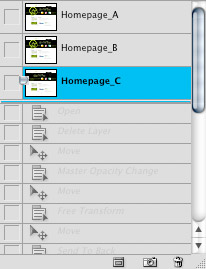
12. Right-click to select a layer
Simple as it sounds, a right-click or control-click (Mac), can save a lot of headache when trying to locate layers. Within a document, to select a layer without scrolling through the layers panel, hover over the object to be selected and right click. Several layers will be displayed, click on the desired layer to move to that layer.
Illustrator
13. Record and use actions for repeated tasks
Recording and using actions is common to Photoshop users, however little-known is that Illustrator possesses the same capability of recording and playing actions.
- Open the Actions Panel: Window > Actions
- Create a new action by click the New Action button, located at the bottom right of the actions panel
- Once a new action is created, it automatically begins recording. If not, click the round record button, located at the bottom of the actions panel
- Proceed with applying any transformations, adjustments, effects, etc. until the desired outcome has been reached
- Once finished, click the Stop Playing/Recording button, located next to the record button at the bottom of the actions panel
- If a specific task was recorded during the action that is undesired, that specific task can be deleted without re-recording the action by selecting the task, then clicking the delete button
- To play an action, select the appropriate object to apply the action to, then click Play. Illustrator will perform the actions live on the screen
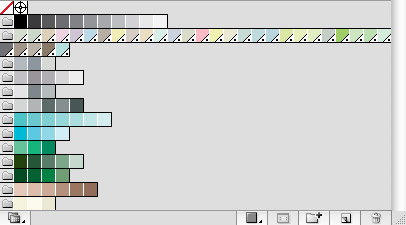
14. Create custom swatch libraries
Color is important to the success or failure of a design. Therefore, choosing colors can be a difficult task. So why not simplify the process by only browsing through colors that are worthy of being selected? Adobe provides a number of excellent swatch books that are a good start, but even those can be overwhelming. Creating custom swatch libraries, organized by project or client, allows for better color management.
- Open the swatches panel: Window > Swatches
- Locate and create the desired swatches. Create a new swatch by clicking New Swatch, located at the bottom of the swatches panel.
- To add a swatch from another swatch book, click and drag the swatch into the swatches panel.
- Optionally, organize swatches into color groups for easier browsing. For example, group all reds and browns together. To create a color group: Select swatches to be included by holding the Command key (Control key on Windows) and clicking. Then, click the New Color Group button, located at the bottom of swatches panel. Give it a name, and click OK. Add additional swatches to the color group by clicking and dragging them into the group.
- Once the swatch panel has been organized and the desired swatches have been added (you can delete undesired swatches also), click the swatch panel options button, located in the upper right corner of the swatches panel. Select Save Swatch Library as ASE or Save Swatch Library as AI. ASE stands for Adobe Swatch Exchange and should be chosen if you would like to use the swatch library in other Adobe programs, like Photoshop or Indesign. If not, choose save swatch library as AI and the swatch library will only be available in Illustrator.
- To open a swatch library: Click the swatch panel options button, located in the upper right corner of the swatches panel. Then select Open Swatch Library and find the category, User Defined. The swatch library you created will be listed under its given name.
15. Use the “same” command to select like elements
A small but mighty time-saving feature, the “same” command in Illustrator allows the selection of all like elements, such as all objects with a red fill color or all objects with a 5pt stroke.
- To use the “same” command: Select the object with the desired characteristic. For example, if you want to select all objects with a red fill color, then select any object with a red fill color within the document.
- Go to Select > Same > the desired command
Also, check out the “object” command for similar options. The “object” command will select all common elements, such as all brush strokes rather than all red brush strokes.
- To use the “object” command: Go to Select > Object > the desired command
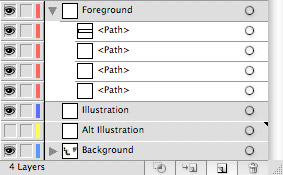
16. Organize elements into layers for easier management
Layers, another common photoshop feature, also exists in Illustrator, however it is not as widely used. The layers function similarly to those in Photoshop. Unlike Photoshop, Illustrator does not automatically place new objects into separate layers, but rather places them into sub-layers. Click the arrow next to the layer to access the sub-layers. It is important to keep in mind that Illustrator and Photoshop are different programs and each have their own purposes.
The biggest time-saving advantage of layers, is the ability to lock them, which allows for easier selection and editing. Also, layers add the ability to create clipping masks.
- To access the layers panel: Window > Layers
- To create a new layer, click Create New Layer, located at the bottom right of the layers panel. To create a sub-layer, which functions similarly to layers within layer groups in Photoshop, click Create New Sub-layer, located next to the new layers button.
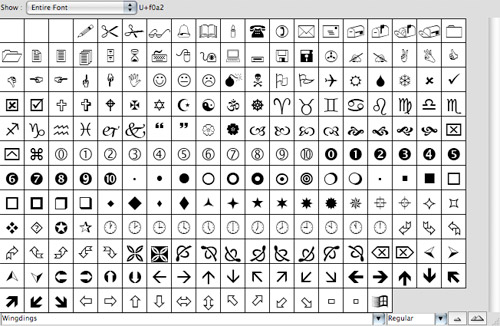
17. Use common symbols from the Glyphs panel
Anybody need a copyright symbol, some arrows, or a email symbol? If so, utilize the Glyphs panel in Illustrator. Many common symbols and some uncommon ones too, are listed there. Each font has its own set of glyphs, however symbol fonts such as Wingdings, Webdings, and Zapf Dingbats are the best to browse through for symbols from anything such as mail and phone symbols to arrows and circles.
- To access the glyphs panel, select Type > Glyphs
- To change the font family, browse through the drop down menu, located at the bottom of the Glyphs panel
InDesign
18. Create stylesheets for quick formatting
Stylesheets in a web designer’s mind usually means only one thing, CSS stylesheets. However, if you are working on a print project in InDesign, stylesheets will also save you hours of time formatting, just as CSS stylesheets do. You can set them up as you work, saving individual styles to be applied to other similar areas.
Styles are handled in four separate panels: character styles, paragraph styles, table styles, and object styles. To add a new style, create the desired effect, then highlight/select the style and click the Create A New Style button. To apply the style, select the text/object to be formatted and click on the new style you created in the styles panel.
To access the styles panels, select Window > Type & Tables > Paragraph Styles OR Character Styles OR Table Styles. The object styles are located under Window > Object Styles.
19. Use Data-Merge for automatically personalizing stationery, invitations, etc.
500 personalized invitations to be completed by tomorrow? Not a problem, if you use the data merge feature in InDesign, also commonly referred to as mail merge. You merge a data source file with your current document and InDesign automatically produces each personalized version of the file. Use data merge for letters, envelopes, invitations, mailing labels, post cards, etc.
To access the data merge panel, select Window > Automation > Data Merge.
Additional Resources for Using Data Merge
- Adobe InDesign CS4 Data Merge - Adobe
20. Vow to learn and use one time-saving tip per day
You can’t commit all of these tips to memory in one day, so pick one to learn everyday, or at least one per week. Do something once, ok. Do something twice, great! Do something 10 times, now that’s dedication. You can also make a note or even a full-color PDF document, if you wish, that contains some of these time-saving tips for quick reference.
Further Resources
- Photoshop Secret Shortcuts - Web Designer Wall
- Illustrator Shortcuts - Web Designer Wall
- 15 Steps to a More Productive Workday - Vandelay Design Blog
- 4-Ways To Be More Productive - Sitepoint


