10 Ways To Make Your XHTML Site Accessible Using Web Standards

Email Newsletter
Weekly tips on front-end & UX.
Trusted by 182,000+ folks.


 Celebrating 10 million developers
 Custom Web Forms for Angular, React, & Vue. Your backend.
 Let’s take a look at 10 ways to improve the accessibility of your XHTML website by making it standards-compliant. We’ll go the extra mile and include criteria that fall beyond the standards set by the W3C but which you should follow to make your website more accessible. Each section lists the criteria you need to meet, explains why you need to meet them and gives examples of what you should and shouldn’t do.
Without argument, one of the most important things to consider when creating a website is that it be accessible to everyone who wants to view it. Does your website play nice with screen readers? Can a user override your style sheet with a more accessible one and still see everything your website has to offer? Would another Web developer be embarrassed if they saw your code? If your website is standards-compliant, you could more confidently answer these questions.
You may want to take a look at the following related posts:
- Misunderstanding Markup: XHTML 2/HTML 5 Comic Strip
- Design Accessibly, See Differently: Color Contrast Tips And Tools
- 10 Principles Of Effective Web Design
- Bringing Interactivity To Your Website With Web Standards
Let’s take a look at 10 ways to improve the accessibility of your XHTML website by making it standards-compliant. We’ll go the extra mile and include criteria that fall beyond the standards set by the W3C but which you should follow to make your website more accessible. Each section lists the criteria you need to meet, explains why you need to meet them and gives examples of what you should and shouldn’t do.
1. Specify The Correct DOCTYPE
Criteria. The Document Type declaration (DOCTYPE) is an instruction that sits at the top of your document. The DOCTYPE is required to tell the browser how to correctly display your page.
Why do I need it? Without a proper DOCTYPE declaration, the browser tries to automatically assign a DOCTYPE to the page. This can slow down the rendering of your page and cause the page to be displayed inconsistently or incorrectly in different browsers. Consistency is the name of the game when it comes to accessibility.
Okay, so what do I do? Include a proper DOCTYPE at the top of each page of your website. XHTML 1.1 is recommended, but XHTML 1.0 Strict is an option as well.
XHTML 1.1. This is the cleanest way to code your website. All style for the website is contained in external CSS files. Be sure to add the XML declaration at the top, which is essential because XHTML 1.1 is considered to be true XML.
<?xml version="1.0" encoding="UTF-8"?>
<!DOCTYPE html PUBLIC "-//W3C//DTD XHTML 1.0 Strict//EN"
"https://www.w3.org/TR/xhtml1/DTD/xhtml1-strict.dtd">
Note: if you are using XHTML 1.1, you cannot include the XML declaration for visitors who are using Internet Explorer 6. Instead, to support IE6 users, you should conditionally display the XML declaration.
XHTML 1.0 Strict. An alternative to XHTML 1.1. The technical differences between the two are minor, but using XHTML 1.1 is recommended to accommodate future website growth.
<!DOCTYPE html PUBLIC "-//W3C//DTD XHTML 1.0 Strict//EN"
"https://www.w3.org/TR/xhtml1/DTD/xhtml1-strict.dtd">
Two other XHTML 1.0 declarations exist for niche uses. But using either of these DOCTYPEs is discouraged.
XHTML 1.0 Transitional. This is used for pages that need to be viewed on legacy browsers that don’t support CSS. Transitional allows inline styles to be applied to elements.
<!DOCTYPE html PUBLIC "-//W3C//DTD XHTML 1.0 Transitional//EN"
"https://www.w3.org/TR/xhtml1/DTD/xhtml1-transitional.dtd">
XHTML 1.0 Frameset. Use Frameset only on websites that require HTML frames. Of course, static CSS divisions should be used instead of HTML frames, right?
<!DOCTYPE html PUBLIC "-//W3C//DTD XHTML 1.0 Frameset//EN"
"https://www.w3.org/TR/xhtml1/DTD/xhtml1-frameset.dtd">
2. Define The Namespace And Default Language

Criteria.
The XHTML namespace and default language of your page must be included in the <html> element.
Why do I need it? XHTML websites should define the default namespace. A namespace defines all of the elements you can use within the page. Setting a default language allows a screen reader to tell the visitor which language the page is in without even seeing the content. It is also required by W3C standards.
Okay, so what do I do?
Append the xmlns and lang attributes to the <html> element. In XHTML 1.1, the lang attribute is xml:lang.
XHTML 1.1
<html xmlns="https://www.w3.org/1999/xhtml" xml:lang="en">XHTML 1.0
<html xmlns="https://www.w3.org/1999/xhtml" lang="en">
3. Supply Proper Meta Tags

Criteria. Supply the http-equiv, language, description and keywords meta tags in the <head> element on your page.
Why do I need it? The http-equiv meta tag is by far the most important. Used in conjunction with the DOCTYPE, it helps the browser display your page correctly. The language meta tag is important for non-English websites, but it has become common practice to include it on every page, despite the language. The description and keywords meta tags are required more for accessibility than to meet standards because they are commonly used by screen readers.
Okay, so what do I do?
Include these four meta tags in the <head> element on your page.
<meta http-equiv="content-type" content="text/html; charset=utf-8" />
<meta name="language" content="en" />
<meta name="description" content="Updating Windows using Microsoft Update" />
<meta name="keywords" content="updating, windows, microsoft, update, techworld" />
Make sure the language you specify in the <html> element is the same one you define in the language meta tag. Also, if you are using XHTML 1.1, make sure the encoding specification in the XML declaration matches the charset in the http-equiv meta tag.
4. Use Accessible Navigation

Criteria. Allow users to easily identify what page and sub-section of a page they are viewing.
Why do I need it? A majority of websites today use a combination of text, colors and graphic styles to organize and display information. Many people with disabilities cannot see or use graphics and thus rely on screen readers, custom style sheets and other accessibility tools to retrieve information. Regardless of who visits your website, implementing an accessible navigation system helps them quickly and accurately find the information they are looking for.
Okay, so what do I do? Create a descriptive title for your website, and then split the page into sub-sections using the heading elements.
Include exactly one
<title>element within the<head>element:<title>Smashing Magazine</title>Include exactly one
<h1>element on the page. The<h1>element should match all or part of your<title>element:<h1>Smashing Magazine: We smash you with the information that makes your life easier. Really!</h1>All heading tags (
<h1>,<h2>, etc.) should have textual content. Alt tags on images do not count. Incorrect:<h2><img loading="lazy" decoding="async" src="logo.png" alt="Smashing Magazine" /></h2>Correct:
<h2><img loading="lazy" decoding="async" src="logo.png" alt="Smashing Magazine" />Smashing Magazine</h2>
5. Properly Escape JavaScript
Criteria. When including JavaScript directly on the page, you should properly escape it as character data.
Why do I need it?
In HTML, text in the <script> element is rendered as CDATA (character data). In XHTML, text in the <script> element is treated as PCDATA (parsed character data). PCDATA is processed by the W3C validator and, therefore, must be escaped properly as CDATA. In addition, while most screen readers are intelligent enough to ignore content within the <script> element, regardless of the type of data it contains, if the code isn’t correctly escaped, another potential point of failure is created in accessibility.
Okay, so what do I do?
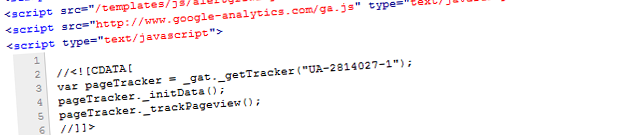
Use the CDATA tags around any content in the <script> element. We also comment out the CDATA tags for legacy browser support.
Example:
<script type="text/javascript">
//<![CDATA[
$(function() {
$('#divone').tipsy({fade: true, gravity: 'n'});
$('#divtwo').tipsy({fade: true, gravity: 'n'});
});
//]]>
</script>
6. Properly Escape HTML Entities
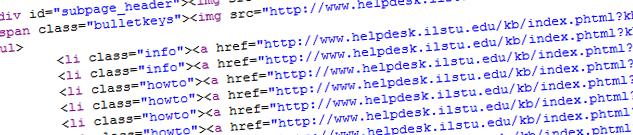
Criteria. Ampersands, quotes, greater- and less-than signs and other HTML must be escaped.
Why do I need it? Using HTML entities, especially in URLs, can cause not only validation problems but also usability problems. For example, the ampersand (&) happens to be the initial character in HTML entities. If you do not properly escape the ampersand, the browser assumes you are telling it to show an HTML entity, one that doesn’t even exist.
Okay, so what do I do? Escape HTML entities with their appropriate entity value.
- Replace & with &
- Replace “ with "
- Replace < with <
- Replace > with >
- Other HTML entities
Example:
<a href="https://www.example.com?page=1&view=top">A "Cool" Link</a>
<code><div id="content">Test information.</div></code>7. Use Only Lowercase Tags And Attributes

Criteria. All elements and element attributes must be lowercase. Attribute values can be both uppercase and lowercase.
Why do I need it? Because the XHTML standard set by the W3C says so.
Okay, so what do I do? Make sure you use only lowercase for all elements and attributes. A common mistake most developers make is using uppercase letters when giving an element JavaScript attributes (e.g. onClick, onLoad, etc.).
Incorrect:
<A href="#" onClick="doSomething();">Send us a message</A>Correct:
<a href="#" onclick="doSomething();">Send us a message</a>8. Label All Form Input Elements

Criteria.
All form elements should be given a <label> tag.
Why do I need it?
The <label> element adds functionality for people who use the mouse and a screen reader. Clicking on text within the <label> element focuses the corresponding form element. Screen readers can read the label so that visitors know what information to provide.
Okay, so what do I do?
Add a <label> element to each field in your form.
Example:
<p><label for="searchbox">Search: </label><input type="text" id="searchbox" /></p>
<p><input type="checkbox" id="remember" /><label for="remember"> Remember</label></p>
9. Supply Alternative Content For Images

Criteria. Every image on your page should be accompanied by a textual alt tag.
Why do I need it? The alt tag tells visitors what an image is if it cannot be displayed or viewed. The Americans with Disabilities Act dictates that all images must have an alt tag.
Okay, so what do I do?
Include one with every image. The alt tag attribute must include text and cannot be left blank. If you use images in your design for stylistic reasons alone, find a way to achieve that style using CSS. And don’t forget to provide explicit values for width and height of your images.
Incorrect:
<img src="picture.png" />
<img src="spacer.gif" alt="" />
Correct:
<img src="picture.png" alt="A warm sunset" width="450" height="350" />10. Use The “id” And “class” CSS Attributes Correctly
Criteria. When using CSS attributes, use each “id” only once on a page. Use each “class” as much as you want.
Why do I need it? Developers often get careless and include an “id” multiple times on a single page. This can create unexpected results across different browsers and get you a big red “Validation Failed” from the W3C.
Okay, so what do I do? Be certain to use a particular “id” only once on a page. If you need the same style applied to mutliple elements, use the “class” attribute.
Incorrect:
<p id="leftNav">Home</p>
<p id="leftNav">Contact</p>
Correct:
<p id="homeNav" class="leftNav">Home</p>
<p id="contactNav" class="leftNav">Contact</p>
Summary: Validate, Validate, Validate!
Using all the techniques in this article, you’ll be well on your way to a more accessible, standards-compliant website. But don’t stop there! Continually validate your website and address problems immediately. Here is a list of validators you should run on every page you create:
- W3C Markup Validation Service
- W3C CSS Validation Service
- HiSoftware Cynthia Says Accessibility Validation
- Functional Accessibility Evaluator


