How To Optimize PNG

Email Newsletter
Weekly tips on front-end & UX.
Trusted by 182,000+ folks.
 Register for Free
 Celebrating 10 million developers

 Custom Web Forms for Angular, React, & Vue. Your backend.

As a web designer you might be already familiar with the PNG image format which offers a full-featured transparency. It’s a lossless, robust, very good replacement of the elder GIF image format. As a Photoshop (or any other image editor) user you might think that there is not that many options for PNG optimization, especially for truecolor PNG’s (PNG-24 in Photoshop), which doesn’t have any. Some of you may even think that this format is “unoptimizable”. Well, in this post we’ll try to debunk this myth.
This post describes some techniques that may help you optimize your PNG-images. These techniques are derived from laborious hours spent on studying how exactly the PNG encoder saves data. We’ll start with some essentials about the PNG format and will then move to advanced optimization techniques.
Further Reading on SmashingMag:
- Clever JPEG Optimization Techniques
- How Optimized Are Your Images? Meet ImageOptim-CLI
- Efficient Image Resizing With ImageMagick
The boring part
Before we dive into image optimization techniques, we have to learn some technical details about the PNG format. Each graphic format has its own advantages and weaknesses; knowing them will allow you to modify original image for better visual quality and compression. This is a key concept behind professional image optimization.
PNG was developed as an open-source replacement of the proprietary GIF format. They have some common features (like indexed color palette), but PNG is much better than GIF in every aspect. It introduced some cool features for image packing and compression, but for us – web designers and developers – the most important one is the scanline filtering (also known as ‘delta filters’).
Scanline filtering
Here is how it works. For example, we have a 5×5 pixels image with horizontal gradient. Here is a schematic view of this image (each number represents a unique color):

As you can see, all identical colors spread vertically, not horizontally. Such images will have a very poor compression ratio in GIF, because it compresses colors that spread horizontally. Let’s see how this image data can be packed by scanline filtering:
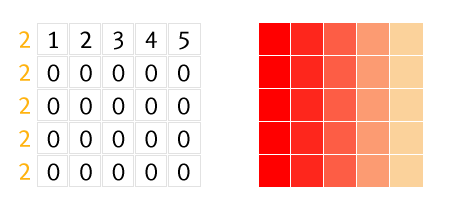
Number 2 before each line represents applied filter, which is “Up” in this case. The “Up” filter sends the message to the PNG decoder: “For the current pixel take the value of the above pixel and add it to the current value.” We have 0 value for lines 2—5 because all pixels in each vertical line have the same color. And such data would be compressed better if the image was relatively large. For example, 15 pixels of value 0 can be written as 0(15) and this is much shorter than fifteen 0’s—this is how compression works in common.
I wrote “can be packed” because in this ideal test case the “Sub” filter (number 1 before each line) will give much better result:

The filter “Sub” sends the message to the decoder: “Take the value of the left pixel and add it to the current value.” In this case, it’s 1. As you may already have guessed, such data will be compressed very effectively.
Scanline filtering is important for us because we can use them: in particular, we can do some image manipulation to make filtering better. There are five filters: None (no filtering), Sub (subtract the left pixel value from the current value), Up (subtract the above pixel value), Average (subtract the average of the left and the upper pixels) and Paeth (substitute the upper, left or upper left pixel value, named after Alan Paeth).
And here’s how these filters affect the image size in comparison with the good ol’ GIF:

GIF, 2568 bytes

PNG, 372 bytes
As you can see, the GIF image is 7 times larger than the same PNG-image.
Image type
Another important thing to know about PNG is image type, the meta-data stored inside the file. As a Photoshop user, you are familiar with PNG-8 (indexed image) and PNG-24 (truecolor image). As a Fireworks user, you may know PNG-32 (truecolor with transparency), which is quite confusing, because Photoshop’s PNG-24 may also store truecolor with transparency. Well, it’s worth knowing that these names are not official, and you won’t find them in PNG specs. For your convenience we’ll use Photoshop’s naming convention of PNG image types in this article.
There are 5 available image types in PNG: Grayscale, Truecolor, Indexed-color, Grayscale with alpha and Truecolor with alpha. There are also two subtypes of indexed-color type (non-official, too): bit transparency (each pixel can be fully transparent or fully opaque) and palette transparency (each pixel can be semi-transparent). In second case each color is stored in palette with its alpha value. Thus, opaque red and 50%-transparent red are two different colors and they take 2 cells inside palette.
The worst thing is that Photoshop can save PNG with only 3 of these types: Indexed-color with bit transparency, Truecolor and Truecolor with transparency. That’s why you may find a lot of opinions that Adobe Fireworks is the best tool for PNG optimization. Personally, I don’t agree with them: Fireworks doesn’t have enough tools for image manipulation, it’s only have slightly more options for saving PNG image, but it’s a topic for another discussion.
This is where utilities such as OptiPNG or pngcrush come in handy. Essentially, these tools do the following:
- Pick up the best image type for an image (for example, truecolor can be converted to indexed-color if there aren’t too many colors in the image).
- Pick up best delta filters.
- Pick up the best compression strategy and, optionally, reduce the color depth.
All these operations do not affect image quality at all, but do reduce the file size of the PNG-images, so I highly recommend you to use such tools every time you save a PNG image.
Now enough with the boring part, let’s do some magic!
1. Posterization
This is a well-known method of the truecolor image optimization. Open up the example image in Photoshop, press the ![]() icon in the Layers palette and choose Posterize:
icon in the Layers palette and choose Posterize:
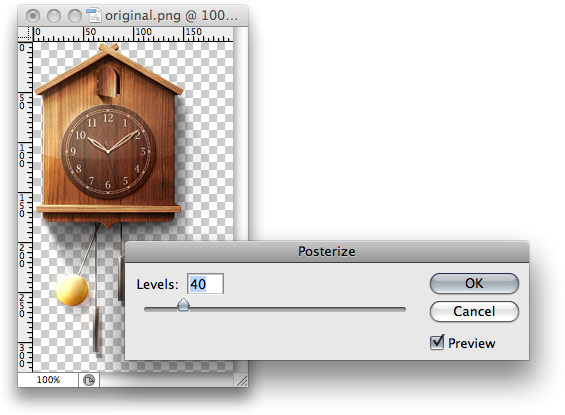
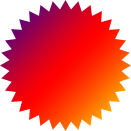
Pick the smallest possible amount of Levels (usually 40 is enough) and save the image:

Original, 84 KB

Posterized, 53 KB
Here is how it works: the posterization simply reduces the amount of colors, converting similar colors to the single one, thus creating posterized regions. This helps to perform a better scanline filtering and achieve a better compression. The downside of this method is color alternation, which is especially visible if you are trying to stitch image with a HTML background:

Original image

Posterized image
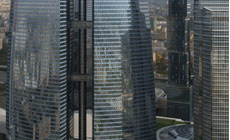
2. Dirty Transparency
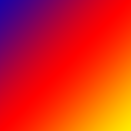
Take a look at the following images:
75 KB
30 KB
Both of them were saved in Photoshop without any optimization. Even if you do a per-pixel comparison of these images, you won’t notice any difference. But why is the first image 2.5x larger than the second one?
You need a special plugin for Photoshop to see hidden details. It’s called Remove Transparency and available for free download on the PhotoFreebies plugin suite. You have to install it first before proceeding with the next step.
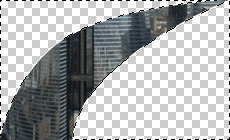
Open both images form the example above in Photoshop and choose Filer > Photo Wiz > Remove Transparency. Now you can see the actual pixel data that was saved in the image:

What’s happening? How is it possible to reveal the data from the original image from a single-layered PNG image? Well, it’s quite simple. Each pixel in the truecolor image with alpha is described by four bytes: RGBA. The last one is Alpha, which controls pixel transparency: the value of 0 means fully transparent pixel and 255 means fully opaque. And this means that every pixel (with any RGB value) can be hidden with just Alpha byte set to 0. But this RGB data still exists and, moreover, it prevents PNG encoder from effectively packing and encoding the data stream. Thus, we have to remove this hidden data (fill it with solid black, for example) before saving the image. Here is a quick method how to do this:
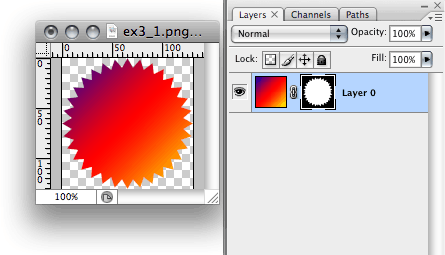
Open the first image from the example above in Photoshop.
Ctrl+click (or Cmd+click on Mac) on image thumbnail in Layers palette to create a selection, then invert it: Select > Inverse.
- Switch to Quick Mask mode by pressing Q key:
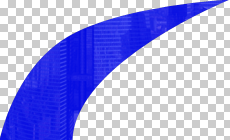
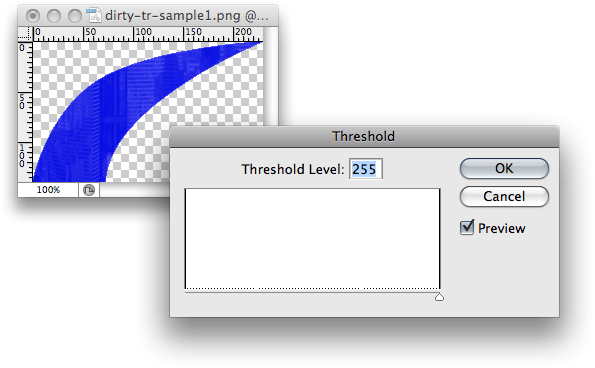
- We have created a mask for a semi-transparent image, but we need to leave fully transparent pixels only. Choose Image > Adjustments > Threshold and move Threshold Level slider to the right, thus leaving fully transparent pixels of the selection:
- Leave Quick Mask mode (press Q key again) and fill the selection with black:

- Invert the seleciton again (Select > Inverse) and click on the
 icon in the Layers palette to add mask.
That’s it, now you can save this image in PNG-24 and ensure that the 75 KB image is now 30 KB. By the way, all these steps can be easily recorded into Photoshop’s Action and reused later with a single keystroke.
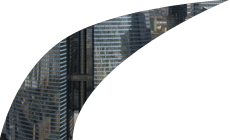
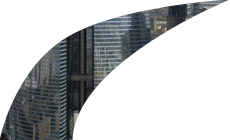
You might think about “dirty transparency” as some kind of a bug in image editors: if those image regions can’t be seen and take so much space, why can’t they be removed automatically before saving? Well, this “bug” can be easily turned into a “feature”. Take a look at the following pictures:
5 537 bytes

6 449 bytes
If you remove transparency from those images, you’ll see the following:

Despite the fact that the first image contains more complex image data, it’s 1Kb lighter than the second one, which was optimized as described above. The explanation of this “abnormal” behavior is simple: image data stream in the first example was effectively packed by delta filters, which works better for smooth color transitions (like gradients).
Tech geeks may look at OptiPNG’s output log and ensure that filters were not applied at all for the second image. That’s why I highly recommend you to read The boring part of this article first before using these techniques: if you don’t understand what you’re doing, you can make your image even larger.
The ultimate solution to preserve original image data is to create a mask on the image layer in Photoshop (we’ll come back to this later):
As you can see, Dirty transparency is a very powerful yet very delicate technique. You have to know how and why it works before using it. If you are saving PNG-24 images with transparent areas, the first thing you have to do is to check image data in these areas and make the right decision on clearing or leaving them as is.
3. Split by transparency
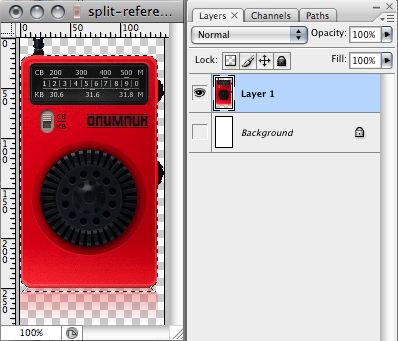
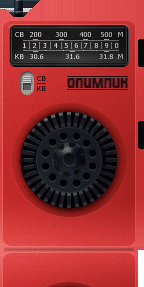
Sometimes you have to save image in the “heavy” PNG-24 because of few semi-transparent pixels. You can save extra Kbs if you split such images in two parts — one with solid pixels, the second one with semi-transparent — and save them in appropriate graphic formats. For example, you can save semi-transparent pixels in PNG-24, and solid pixels in PNG-8 or even JPEG. Here is a quick (and recordable for Actions) solution to do this. For our experiments we’ll use this elder Russian iPod ancestor:
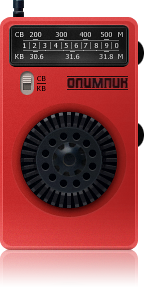
PNG-24, 62 KB
- Ctrl+click/Cmd+click on image thumbnail in Layers palette to create a selection:
- Go to Channels palette and create new channel from selection:

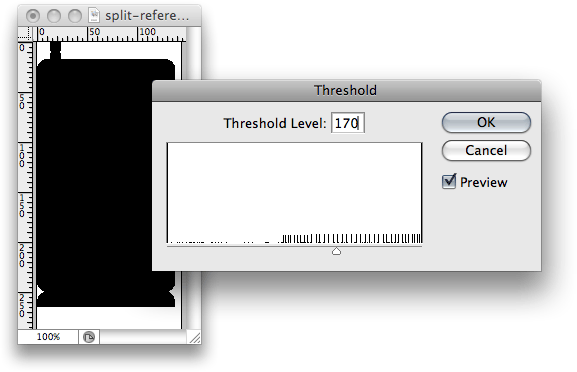
- Remove selection (Ctrl+D or Cmd+D), select the newly created channel and run Threshold (Image > Adjustments > Threshold). Move the slider to the very right:
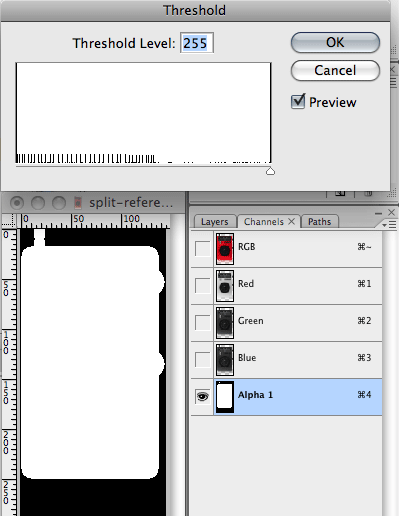
- We’ve made a mask for selecting dead solid pixels. Now we have to split original layer by this mask. Ctrl+click/Cmd+click on Alpha 1 channel, go to Layers palette, select the original layer and run Layer > New > Layer via Cut. As a result, there are two layers with separated solid and semi-transparent pixels.
Now you need to save those two images in separate files: solid pixels in PNG-8, semi-transparent ones in PNG-24. You can apply Posterization technique on semi-transparent pixels layer to make image file even smaller.

PNG-8 128 colors + dithering 17 KB

PNG-24 posterization 35 6 KB
And here is the result for comparison:
Before 63 KB
After 23 KB
This method has an obvious drawback: you get two images instead of one, which may be not so convenient to use (for instance, when making a product catalog in the CMS).
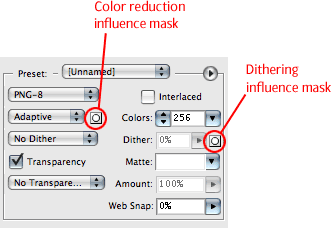
4. Influence masks
Actually, is is not a PNG-specific optimization technique, but demonstration of rarely-used Save for Web properties: Color reduction influence mask and Dithering influence mask.
Sadly, these properties were removed in Photoshop CS4, so you can try this optimization approach only in the pre-CS4 versions (I’m using CS3).
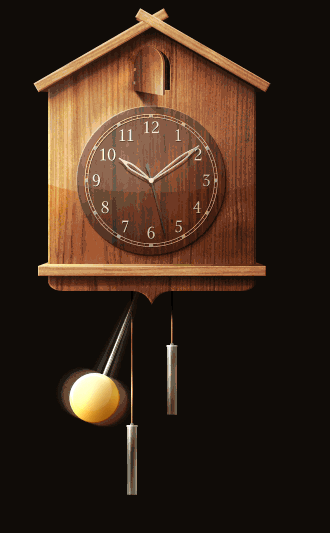
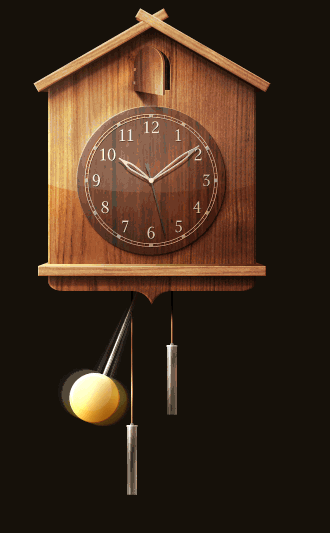
To understand how influence masks works, let’s open this demo image in PS and save it in PNG-8 with the following settings: Color reduction: Adaptive, Dither: No dithering, Colors: 256.
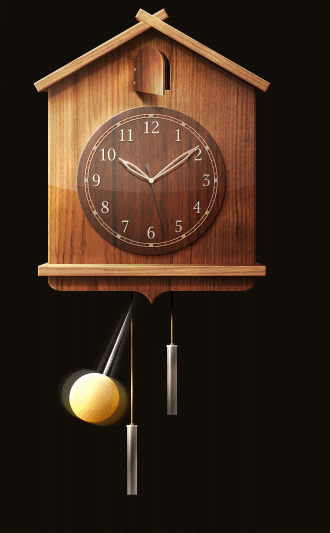
42 KB
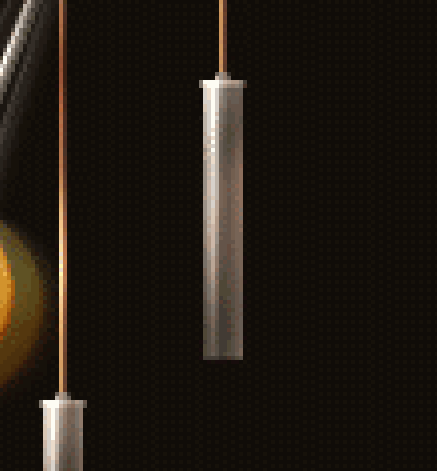
The first thing I’ve noticed about this image is a very fuzzy pendulum. It is a very bright spot on the image and it attracts way too much attention. Let’s try to smooth pendulum’s color transitions by setting dithering to 100%:
46 KB
The pendulum looks better now, but we got another problems: image size increased by 4 KB and solid-color background became very noisy:
We can try to get rid of this noise by lowering dithering value, but the image quality may also be reduced.
Based on these problems, let’s try to do the incredible: increase image quality by lowering the number of colors and image size. Influence masks will help us.
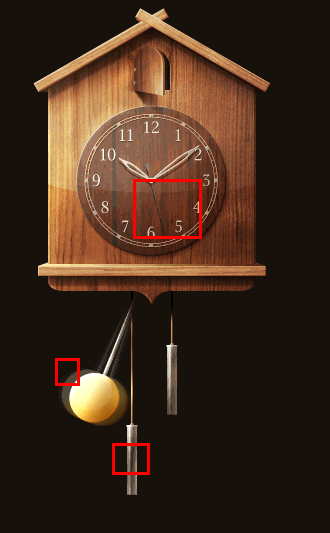
Let’s start with the color. Go to Channels palette, create a new channel and name it color. We’ve already determined that the pendulum is our top priority region to improve image quality, so we need to draw a white circle right on its place (you can enable RGB channel for better precision).
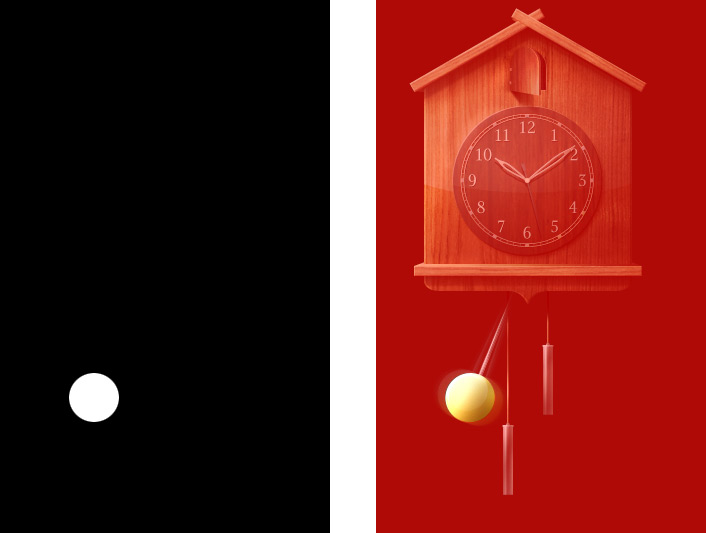
Go to Save for Web dialog and set the following properties: Color reduction: Adaptive, Dither: No, Colors: 128 (as you can see, we reduced number of colors from 256 to 128). Now we have to select an influence mask: click on the ![]() near Color reduction list and select the color channel from drop-down list: Now our image looks as follows:
near Color reduction list and select the color channel from drop-down list: Now our image looks as follows:
You can see the influence mask in action: the pendulum looks perfect, but the other parts of image look really bad. By setting influence mask, we said to Photoshop: “Look, mate, the pendulum is very important part of image so try to preserve as much colors in this area as possible”. Influence mask works exactly the same as regular transparency mask: white color means highest priority in corresponding image region, black color means lowest priority. All intermediate shades of gray affect on image proportionally.
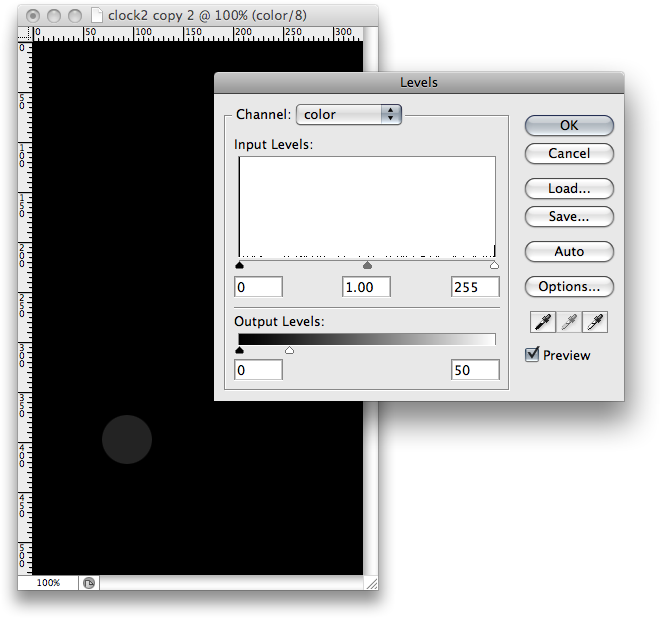
The pendulum now takes the highest color priority, so we have to lower the intensity of white circle to leave more colors for other areas. Close Save for Web dialog, go to Channels palette, select color channel and open Levels dialog (Image > Adjustments > Levels). Set the maximum output level to 50 to lower the white color intensity:
Try to save for Web again with the same properties:
Looks better now, but now we’ve got problems in other image areas:
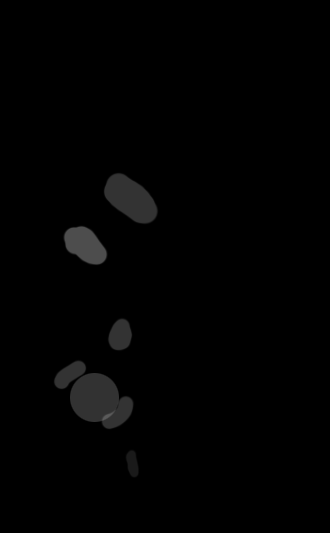
I think you already understand how influence masks works: you provide Photoshop with some clues about important image areas with different shades of gray. With trials and errors I’ve got the following color mask (you can copy it and apply to the image):
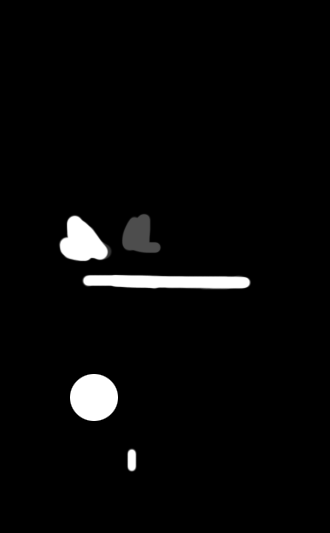
Dithering influence mask works exactly the same, but instead of colors, it affects the dithering amount of different image areas. Lighter color means more dithering. This is a very useful feature, because dithering creates irregular pixel patterns which hinders the PNG compressor to use delta filters. You can determine the exact areas where dithering must be applied while leaving other areas intact, thus gaining better compression of image data.
My dithering channel looks like this:
Applying both color and dithering influence channels with the same optimization settings (Adaptive, 128 colors):

Pretty good for 128 colors, isn’t it? Let’s do some finishing touches: set colors to 180 and max dithering to 80%. And here is our final result compared to original, non-optimized version:
256 colors, no dithering, non-optimized 42 KB

180 colors, optimized 34 KB
Grayscale
Photoshop can’t save grayscale PNGs, so you would have to use OptiPNG after saving black-and-white images, like this:
optipng -o5 bw-image.png
Grayscale images takes much less space than RGBs, because each pixel described with only one byte, not three:
PNG-24 (Photoshop → true-color), 8167 bytes.

PNG-24 (Photoshop + OptiPNG → grayscale), 6132 bytes
Setting the Grayscale color mode (Image → Mode → Grayscale) for images prior to saving them in PNG is very important, especially for semi-transparent images (see Dirty transparency method for more information).
Fewer Colors
This is an alternative to the Posterization method of reducing colors in an image. Posterization can dramatically change the colors in your image, which is unacceptable if you have to blend the image into the background of your website. This method gives you more control over color but is limited to 256 colors.
The method is basically to extract image data from the semi-transparent image (i.e. remove transparency), convert it to an indexed color and apply the original mask. Reducing the amount of colors will make image data stream packing by the PNG compressor more effective. Let’s see how it works.
- Open the original image in Photoshop and duplicate it (Image → Duplicate).
63 KB
- Remove transparency from the duplicated image (Filter → Photo Wiz → Remove Transparency):

- Set the image mode to Indexed Color (Image → Mode → Indexed Color). In the new dialog window, enter the following settings:
- Colors: 190,
- Dither: Diffusion,
- Amount: 80%.
- Set the image mode back to RGB and copy the image layer to the original file. Align the copied layer with the referenced one and apply its mask. Now save it to PNG-24:

51 KB
As you can see, these easy steps have saved us 11 KB of the original image without any noticeable effect on image quality. But this method has another advantage: running OptiPNG on these images often saves even more bytes. In this example, the image’s size was reduced by 36%, from 51 KB to 33 KB. Instead of converting the image to Indexed Color mode, you can save it for the Web and apply the Influence mask to save extra bytes.
Please note that this method is not the same as PNG-8 with palette transparency in Fireworks. In most cases fewer colors will give you more than 256 colors, so you will have to save the image in PNG-24, not PNG-8. Remember, solid red and 50%-transparent red are two different colors.
Reducing Detail
This technique is useful for optimizing shadows, reflections, glows, etc. The idea is to reduce detail in areas of the image that are barely visible. As you will recall from the Dirty transparency method, each pixel of a true-color image with transparency is described in four bytes: RGBA. The last one controls pixel transparency. For pixels whose Alpha value is too low (i.e. pixels that are barely visible), you can replace the RGB data for better image compression. Let’s try that.
- Open iPod retro in Photoshop, again.
63 KB
- As you can see, the radio has a reflection below it, which is a good candidate for optimization. Ctrl + click or ⌘ + click on the image thumbnail in the Layers palette to create a selection. Go to the Channels palette and create a new channel from the selection:

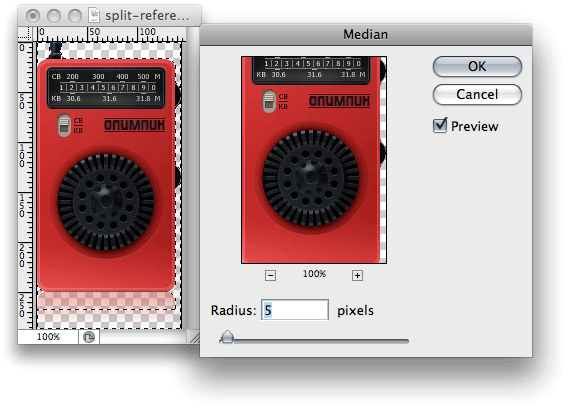
- 3. We have to localize only those pixels that are barely visible. Invert the channel (Image → Adjustments → Invert) and open the Threshold dialog (Image → Adjustments → Invert). Setting the Threshold Level to 170 is good enough:
4. We’ve got the mask that includes barely visible pixels only. Ctrl + click or ⌘ + click on the channel in the palette to create a selection. Go back to the Layers palette, select the image layer and open Filter → Noise → Median. This filter will smooth out pixels in the selection, making them more conducive to compression. Set the Radius value to 5:
Now save this image “for the Web” in PNG-24 and see how its size has been reduced from 63 KB to 59 KB. You can vary the threshold level and median radius to compress more or preserve more details.
More Tips For PNG Use And Optimization
Each optimization must begin with a thorough image analysis. Choose the best technique for each image or combine techniques to achieve better results.
Be creative. Use these techniques as a starting point for your own methods customized to your particular images.
Many people think that PNG-8 is always better than PNG-24 for low-color images. It’s not. In some cases, PNG-24 may give you better results:

PNG-8, 833 bytes

PNG-24, 369 bytes
In this example, there is an overhead in PNG-8: 3 bytes were used to describe the pixels in the color palette, and 1 byte to describe the pixel color in the image data stream, while PNG-24 took up only 3 bytes for each pixel. So, if you’re saving low-color images in PNG without transparency, test whether PNG-8 or PNG-24 gives you the smaller file.
If you are using an older version of Photoshop (prior CS3), you may find that PNG images in the image editor look different from ones in a Web browser. This is because of the gAMA chunk that is saved in the PNG file, which controls image gamma. You can safely remove it with tools such as TweakPNG (Windows only) or smush.it.
A “special” PNG image type allows you to save a semi-transparent image as an indexed-color PNG-8. This image type isn’t available in Photoshop (Fireworks has it), but you can prepare the image in Photoshop and then convert it with OptiPNG. OptiPNG will convert truecolor images to 8-bit palette by default if your image contains less than 256 colors. To do this, you can apply “Less colors” and “Lowering details” techniques and “guess” number of colors.
But it may be very time consuming. There’s a tool called PNGNQ which can convert truecolor image to 256 palette, but you won’t have enough control over resulting image. You will have to reduce the total amount of different colors, including semi-transparent ones, to 256 or fewer. This format is “special” because of how it displays in IE6:
IE6
Other browsers
As you can see, IE6 displays only the opaque pixels. The good thing is that you can include such images with the regular <img> tag or as background images (i.e. without using the resource-greedy AlphaImageLoader CSS filter), making for graceful degradation.
Don’t use the “Save As” dialog to save PNG images for the Web; use the “Save for Web” dialog instead. By default, Photoshop saves an image preview as additional info in the file, making the file a few times larger than it needs to be.
PNG Optimization In Real Life
A screencast demonstrating how most of these techniques work in real life:
Advanced PNG Optimization from Sergey Chikuyonok on Vimeo.
And here is the result. You can also download source PSD to try it yourself.
(al)


