Photoshop Performance - 10 Simple Steps
If you never changed the default performance settings in your Photoshop or you just want to double check them to improve the Photoshop performance, here are 10 important and useful points that you may want to consider.
Before getting started with Photoshop, we all should have first visited the “Edit > Preferences” menu and change the “Performance” settings to fit our personal taste and computer specifications, but this isn’t always the case – in many situations designers simply forget these aspects.
Further Reading on SmashingMag:
- Top 10 Killer Photoshop Combo Moves
- 20 Time-Saving Tips to Improve Designer’s Workflow
- Compositing in Adobe Photoshop: Time-Saving Tips
1. Adjust The Number Of History States
Maybe you already went through that bad feeling of clicking “undo” dozens of times and realizing that Photoshop wouldn’t provide you with more previous steps, but this problem can be easily resolved by changing the History States setting in the Edit > Preferences > Performance menu.
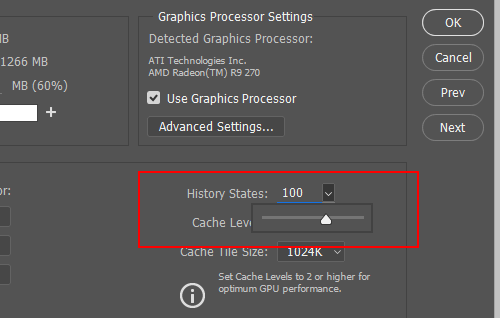
There are more efficient ways of going back and forward in your projects like using the “Snapshots” feature, which are essentially comfortable checkpoints of your work that you can go back to. But if you use Undo a lot, you may want to consider adding more states, e.g. set them to ‘30’. However, be aware that too many states on a single image will usually result in History Palette literally “eating” RAM and if you work with less than 8GB of RAM, you probably shouldn’t using the Undo Feature that often! Overall, you may add up to 1,000 history state levels in Photoshop.
2. How Many Cache Levels Do You Need?
The Cache Levels setting can be found inside the Edit > Preferences > Performance menu, right under the History States. It controls the histogram and the time it takes an image to reappear on the screen after an action is applied to it.
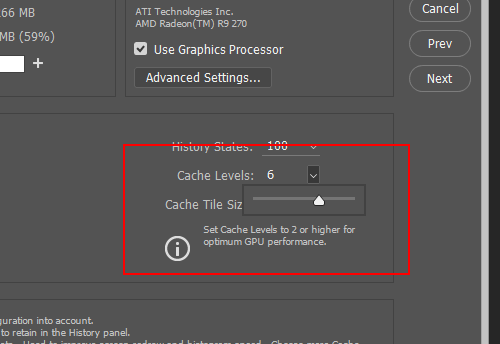
By default, there are 6 cache levels; the number of levels can be increased to the maximum of 8 which will – obviously – increase the rendering speed. It is particular effective when you are working with high-resolution images. When workin with smaller view-sizes, e.g. viewing an image at 50% Zoom, the cache levels will determine the number of “down samplings” allowing Photoshop to perform operations faster.
Photoshop uses Image Caching and if you have a good amount of RAM, like at least 8GB and work with high-resolution images, you might want to raise the level to 8 as the speed performance will compensate the memory loss, but if you have a low RAM amount and usually work with small images only (1-4MB), you may want to lower the value to 1 or 2 as the RAM will be better allocated – storing the images rather then caching them.
3. Keep An Eye On Your Memory Usage
Photoshop really likes RAM and will use every little bit it can grab, but it also allows you to limit the RAM resources of your computer that Photoshop will use, and it even gives you good suggestions for the appropriate range of RAM values it wants. This setting, of course, can be found inside the Edit > Preferences > Performance menu, on the Left Side.
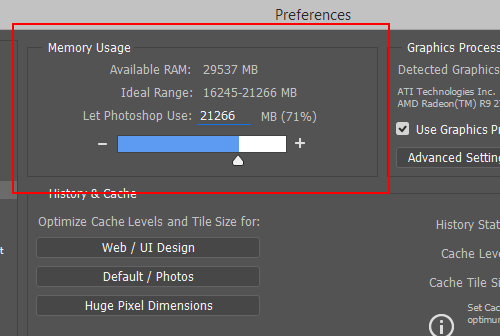
The displayed available RAM is the value left for applications after the Operating System loads into memory. If you are going to use mostly only Photoshop, or if you have a low amount of memory, you will probably want to give it 75-80% of the available RAM. But if, on the other hand, you are more of a multi-task kind of person with browser, word processor, mail, Twitter client etc. being always opened, then you might want to limit Photoshop to around 50%.
Efficient Use of Memory for Photoshop Performance
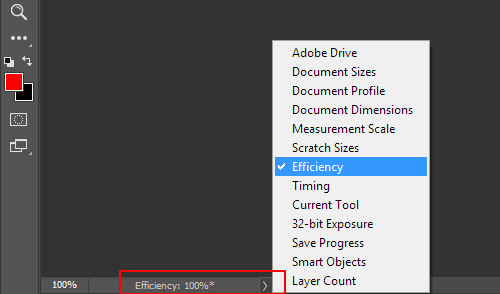
After setting up your memory values, you can keep an eye on how Photoshop is performing. At the base of your image window, click to the right of the document size information and you will be able to choose “Efficiency” which will show you a percentage value. If this value is not 100%, it indicates that if you allocate more RAM to Photoshop, the operations would perform faster. Closing applications or images that you are not using can also increase the efficiency – not exactly a secret, but worth mentioning nevertheless.
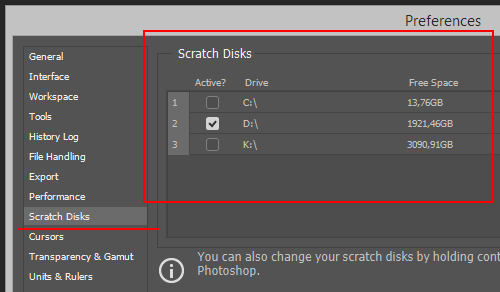
4. Use Proper Scratch Disks
Similar to what happened with RAM, Photoshop also uses a good amount of your hard drive space as the so-called “scrath disk” (Edit > Preferences > Scratch Disks) which works as the secondary memory resource. Photoshop assumes that your primary hard drive is its scratch disk, but you can set it up differently with a secondary internal or external hard drive.
If you are going to work with large images, it is recommended that you have a dedicated scratch disk that is different from the one containing the image file. Using different scratch disks is good, especially to avoid killing your primary boot drive when you have just a few gigabytes left.
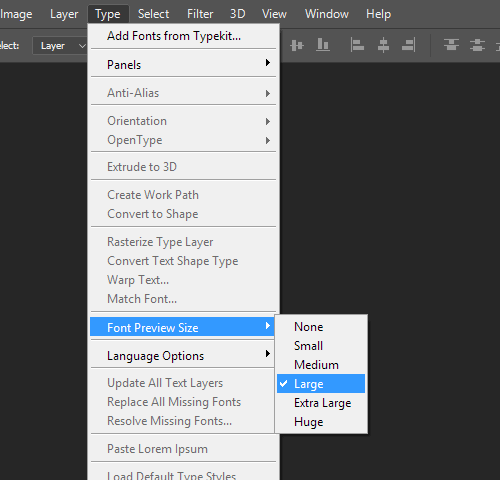
5. Turn Font Preview Off
Photoshop users (and especially designers) like to have a good selection of fonts always installed and ready to be used; but when the font preview is active, having too many fonts can slow you down. Turning the font preview feature off can be a simple and instant step towards improving your Photoshop performance. To do so, simply go to Type > Font Preview Size > None.
6. Use Thumbnails In Your Palettes
Displaying preview thumbnails in the Layers, Channels, and Paths palettes will cause Photoshop to consume some more of your RAM as it will be constantly updating the thumbnails to reflect the changes you will be doing in your project. The memory consumption will keep growing with the amount of thumbnails you have opened at the same time as well as their size.
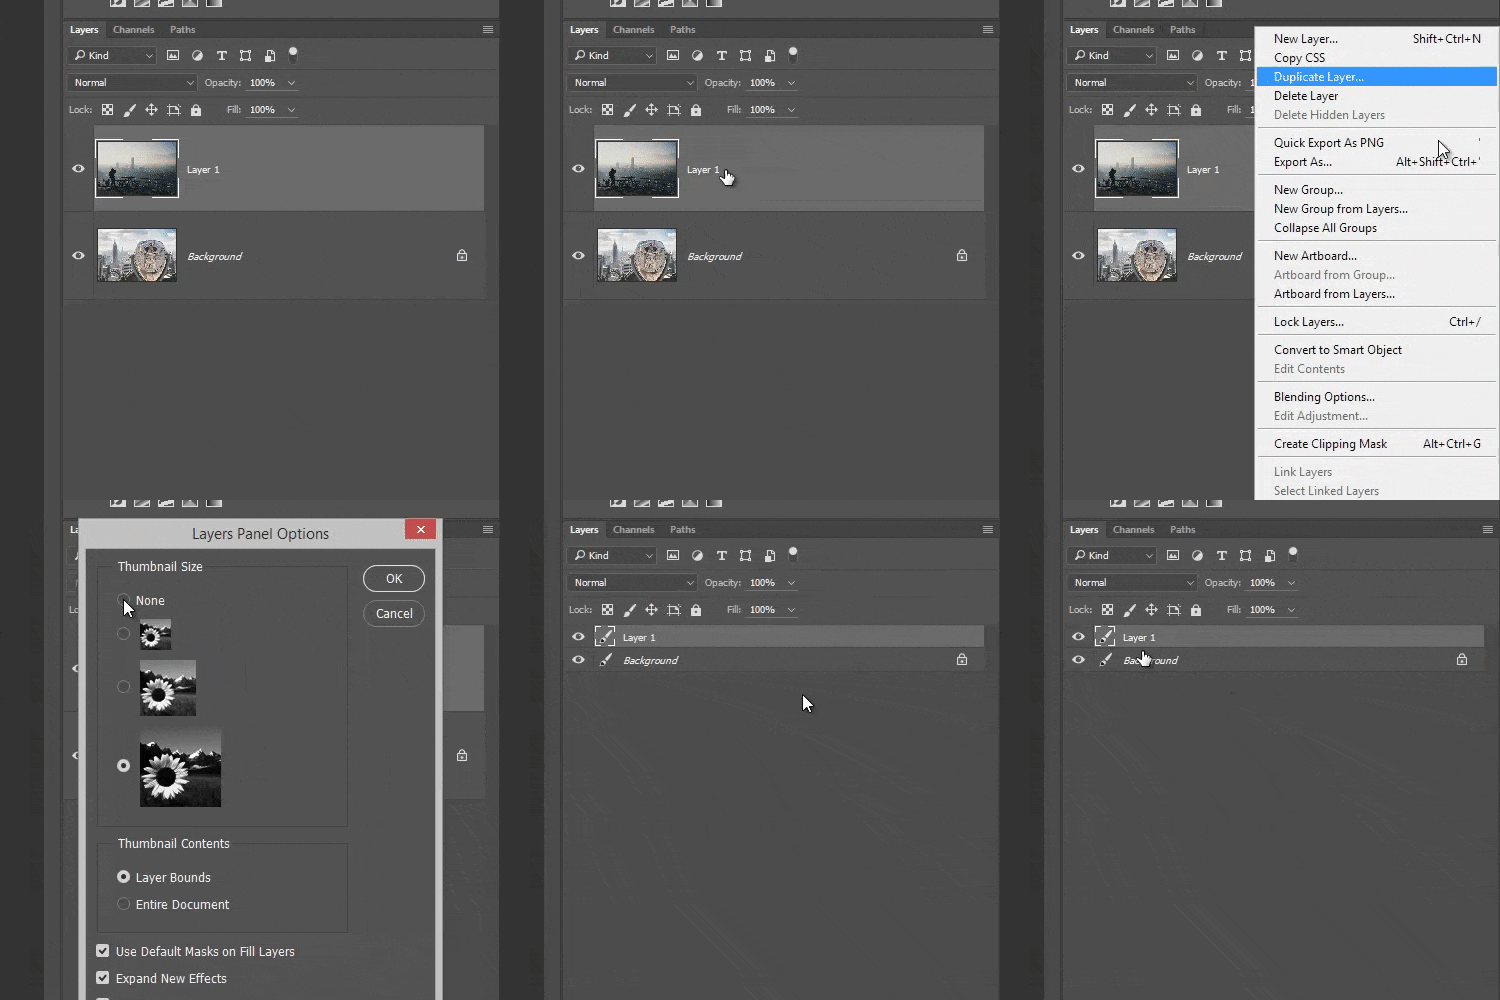
You could use the smaller thumbnail size or no thumbnail at all to increase your Photoshop performance. To do so, in each palette, select Panel Options from the palette menu as it is shown on the picture above and select the smallest thumbnail size or “None”.
7. Learn How To Use Purge
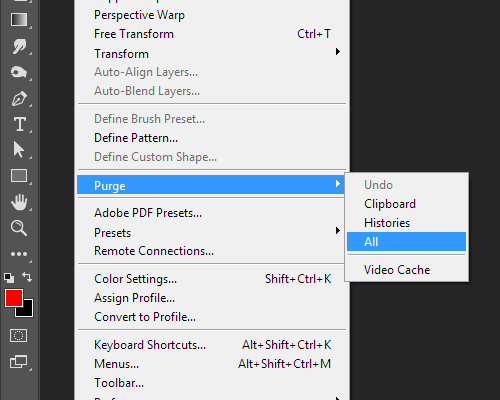
When you are working on your images, Photoshop stores image data for the Undo, Clipboard, and History features. This data consumes memory, especially if you have been working for a while and have a high number of History States defined (see Point 1 for more on History States).
To eliminate that extra image data consuming your RAM, go to: Edit > Purge > ( option ). Keep in mind that clearing History will remove all the history states saved previously and you will not be able to undo your latest actions.
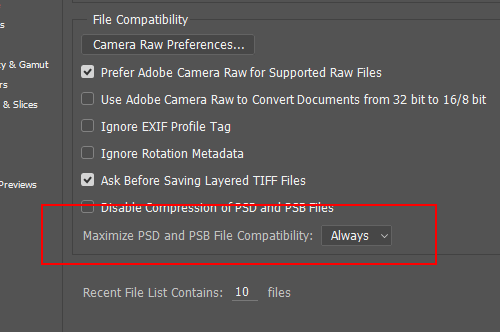
8. Set Maximize PSD And PSB File Compatibility to Always or Ask
Maximize PSD and PSB File Compatibility increases the size of your file by attaching a flattened copy of your image when you save your image. A small amount of extra data is included in the file when you choose this option that ensures that PSD and PBS files saved in Photoshop will open in previous versions.
Additionally, if you want to use the Edit in Photoshop feature in Photoshop Lightroom, this option needs to be on. To change the Maximize File Compatibility option choose Photoshop > Preferences > File Handling.
9. Don’t clutter your Photoshop
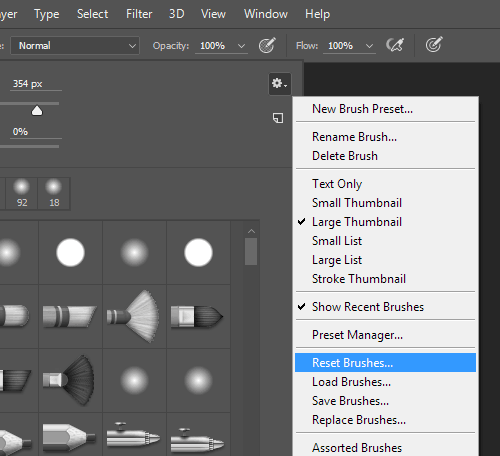
Of course, you can easily find an enormous amount of free stuff to add up to the default Photoshop brushes, fonts, patterns, etc. but that doesn’t mean you need to download every freebie that comes in your way. Keep it simple! Having too many plugins and other resources installed will greatly decrease Photoshop performance. Most top designers use a small selection of fonts and brushes that define their style and that can be used in a great amount of ways for literally millions of different results.
10. Reset Default Settings
If you are using a shared machine for your Photoshop needs there is a little Photoshop start-up trick that may come in handy. When the application is launching, if you press and hold: Alt + Control + Shift (Windows) or Command + Option + Shift (Mac), a window will pop up asking you if you want to delete the Photoshop settings file, resetting all of the preferences to their default.


 See the full picture →


 Celebrating 10 million developers
 SurveyJS: White-Label Survey Solution for Your JS App

