Spicing Up Your Website With jQuery Goodness

Email Newsletter
Weekly tips on front-end & UX.
Trusted by 182,000+ folks.
 Register for Free

 Custom Web Forms for Angular, React, & Vue. Your backend.
 Celebrating 10 million developers

There comes a point in every website design when you simply want to give the website a little spice to impress the visitor and make it memorable. You want that sexy interaction to capture the user’s attention. In our previous articles, we showed you how to spice up your website with sexy buttons, practical elements and attractive visual effects.
In this article, we’ll discuss how to seduce your visitors with a little JavaScript action. In our examples, we’ll be using jQuery, a fast and concise JavaScript library that simplifies HTML document traversing, event handling, animation and Ajax interactions for rapid Web development. Ready? Let’s get things rolling!
Ajax Image Uploader
Image uploads will be much better after your read this. Guaranteed. By using a bit of jQuery, we can upload images with previews.
How do you upload images now? You select a file and click upload. Simple, right? Except that once you select your image, you can no longer see what was selected. The name of the file is at the end of the input field, and if the input field is short or the file path is deep, you won’t see anything useful. You’ll forget what you selected and have no idea what you’re about to upload.
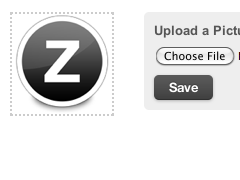
Now try this variation on uploading an image. We ditch the “Upload” button in favor of a “Save” button and fire the Ajax upload event as soon as a file is selected. The image is processed server-side, and a thumbnail is loaded onto the existing page. Doesn’t that feel so much better? We now have a visual representation (imagine that!) of the image we selected.
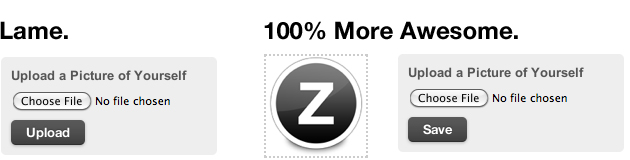
This is particularly useful in larger forms where many fields will be submitted in a single action. It allows the user to review the form before pressing “Save” and see what image (or images) they selected.
How does it work? Here’s the code. You’l need jQuery and the Ajax Upload jQuery plug-in. Link them up, and make sure jQuery is loaded first.
<script src="/js/jquery.min.js" type="text/javascript"></script>
<script src="/js/ajaxupload.js" type="text/javascript"></script>
Here is the JavaScript we will use in its entirety.
$(document).ready(function(){

    var thumb = $('img#thumb');

    new AjaxUpload('imageUpload', {
        action: $('form#newHotnessForm').attr('action'),
        name: 'image',
        onSubmit: function(file, extension) {
            $('div.preview').addClass('loading');
        },
        onComplete: function(file, response) {
            thumb.load(function(){
                $('div.preview').removeClass('loading');
                thumb.unbind();
            });
            thumb.attr('src', response);
        }
    });
});
Let’s break the code down now and look at what’s really going on. First, we attach the AjaxUpload behavior to our file form element.
new AjaxUpload('imageUpload', {Next, we specify where to post the Ajax upload. We want to keep all of our URLs in our HTML document, so we pass this URL using the action attribute of our form element.
action: $('form#newHotnessForm').attr('action'),Set the name of the file form element that will be posted to your server.
name: 'image',Add a class to your preview div to indicate that the image is uploading. In our case, we are applying a background image to the preview div. We also need to set the image tag to display: none; in the preview div, so that the loading background image is visible, as well as for a more subtle reason explained below.
onSubmit: function(file, extension) {
     $('div.preview').addClass('loading');
},
When the image has been uploaded, we have to do two things:
- First, we have to set the
srcattribute of our previewimgtag to the new thumb. - Secondly, we have to remove the loading class. If we simply execute these things in that order, then we would see an annoying flicker of the old image when the loading class has been removed but the new image has not yet loaded.
We avoid the annoying flicker of the old image by waiting to remove the loading class until after the preview image’s load event fires. We also unbind our listener after it has fired because we want to capture this event only once.
onComplete: function(file, response) {
    thumb.load(function(){
        $('div.preview').removeClass('loading');
        thumb.unbind();
    });
Lastly, we set the source of the preview image to the thumbnail that our server has just created. In this example, the response from the Ajax call is just the thumbnail’s URL as text. You could return it in whatever fancy format you like.
thumb.attr('src', response);
}
If JavaScript-support is disabled in user’s browsers, they will get the good old submit form without the interactive preview. Clean and functional solution, with rich interactions for users with more capable browsers.
Better Image Uploads
Want to try out and implement the image uploader yourself? Check out a live demo, the example code and more for this improved way to support image uploads on your website.
Validation With jQuery Text-Change Event
Here’s a pretty common problem: you have a text form to validate client-side. Doing this is easy enough when the form is submitted, but in some cases doing it as the user is typing is best. For example, imagine how annoying Twitter would be if you had to submit your tweet before you were told how many characters it was.
Keep in mind, though, that this kind of immediate validation can be overused or abused. Don’t insult the user by congratulating them for every piece of text they enter in a field.
Implementing this requires that you bind events to the keyup event — and a couple other events if you want to detect text changes on cut-and-paste events. Even if you’re a JavaScript god, having to keep writing this logic over and over again is tedious. We created a text-change event plug-in to help you handle all text-change events.
Detecting the Text (Better Than Twitter)
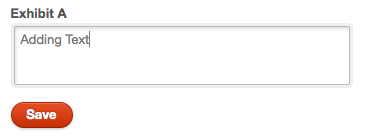
We begin by detecting text in the standard textarea. Look at the shot below: looks like a standard textarea with a disabled “Save” button.
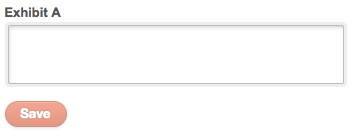
If you add text to the field, then the “Save” button enables and then disables when no text is in the field. Moderately impressive, right?
Now, what if you try copying, pasting or cutting text with the shortcut keys? That works as well. What about right-clicking or using the “Edit” menu? Works, too. (By the way, Twitter doesn’t support the click or menu interactions.)
The code behind this is pretty simple. You’ll need to download and link up the textchange plug-in.
<script src="/javascripts/plugins/jquery.textchange.js"></script>The plug-in adds the hastext and notext events, to which you can bind input and textarea elements.
$('#exhibita').bind('hastext', function () {
  $('#exhibitaButton').removeClass('disabled').attr('disabled', false);
});

$('#exhibita').bind('notext', function () {
  $('#exhibitaButton').addClass('disabled').attr('disabled', true);
});
The hastext event fires when the element goes from having no text to having text, and the notext event fires when the element goes from having text to being blank. Looking for more advanced validation? Keep reading.
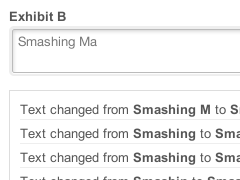
Detecting Text Change
What about detecting text change in the field?
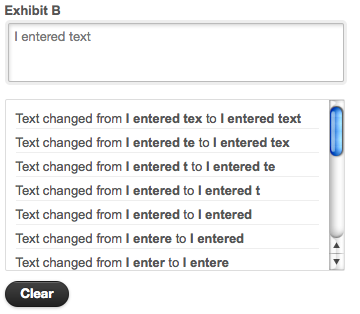
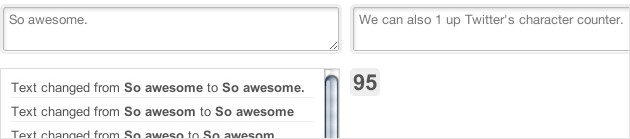
This is very easy, too. A third textchange event fires whenever the text changes, and it provides you with the previous value.
$('#exhibitb').bind('textchange', function (event, previousText) {
  $('#output').append('Text changed from <strong>' +
    previousText + '</strong> to <strong>' + $(this).val() +
    '</strong> </p>');
});
Twitter-Style Validation
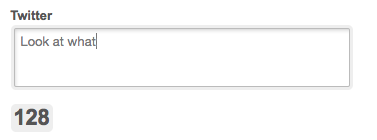
We can implement some simple Twitter-like validation with just a single line and our textchange event.
$('#twitter').bind('textchange', function (event, previousText) {
  $('#charactersLeft').html( 140 - parseInt($(this).val().length) );
});
Ajax Save
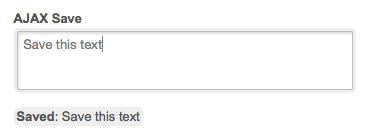
With a little more code and setTimeout, we can hook up an Ajax call to save a few seconds once the user stops editing. The Ajax call is just stubbed out here, but you get the idea.
var timeout;
$('#ajaxSave').bind('textchange', function () {
  clearTimeout(timeout);
  $('#ajaxFired').html('Typing...');
    var self = this;
    timeout = setTimeout(function () {
    $('#ajaxFired').html('Saved: ' + $(self).val());
  }, 1000);
});
Validate Text
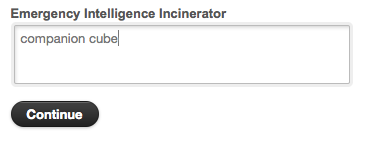
This may sound contrived, but say you would like to ensure that the two words “companion cube” are in the emergency intelligence incinerator (i.e. the text field) before allowing the user to continue. No problem:
$('#emergencyIntelligenceIncinerator').bind('textchange', function () {
  if ($(this).val().indexOf('companion cube') !== -1) {
    $('#continue').removeClass('disabled').attr('disabled', false);
  }
});
jQuery Text-Change event can be very useful for web applications that are aiming for a high level of interactivity and visual feedback. You may even want to analyze some of the input and provide helpful clues. For instance, if the user is opening a new ticket in your support area, you may want to present links to possibly related answers in the support forum. Be sure not to analyze every keystroke, though, as it could result in a significant overhead for the back-end. And it is also important to keep in mind that the immediacy of the application should be subtle and should not interrupt user’s interaction.
Text Change Events
Don't fret about complicated validation, text events and edge cases. Check out the live demo and download the plug-in, which makes it a snap to perform a number of functions on text boxes to look for values, changes and more.
JavaScript Annotation Plug-In

An application that we recently developed (Notable) allows users to collect user feedback through interactive tools. Most of these tools require the user to annotate an image. We figured that many folks are trying to solve the same problem, so why not create a plug-in that they can use? This is the result. Our plug-in uses jQuery and makes it very simple to add and save image annotations.
To start off, download the JS Annotation Plug-In. To use the plug-in, just link up jQuery (1.2.3 or higher) and our plug-in.
<script src="/javascripts/plugins/jquery.js"></script>
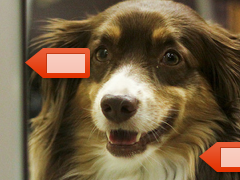
<script src="/javascripts/plugins/jquery.annotate.js"></script>Meet Nutmeg the Dog. After clicking on a random spot on Nutmeg, you’ll see the black circle appear.
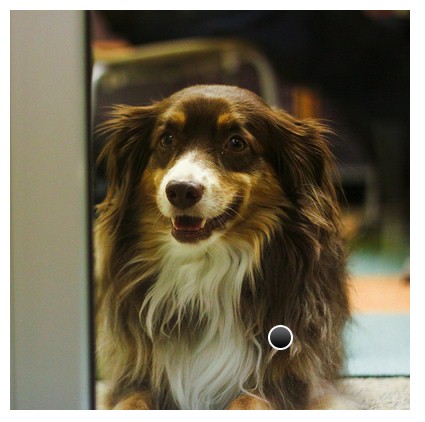
function blackNote() {
  return $(document.createElement('span')).addClass('black circle note')
}

$('#nutmeg').annotatableImage(blackNote);
Here’s how it works: The first parameter to annotatableImage is a function that is implemented by you and that defines the element to be added when you click. In the example above, that function is called blackNote. Simple, right?
How to Save the Annotations?
Glad you asked. Use the jQuery selector to grab all the elements that you want to serialize, and call the serializeAnnotations function.
$('#nutmeg span.note').serializeAnnotations();These values are returned in an array of objects, so you can easily save them with an Ajax call. The response_time variable is the time in milliseconds that the user took to add the annotation after you made the call to annotatableImage.

Let’s Get Relative
In our website feedback tool we needed to show our annotations in different-sized versions of our original image. The full size is just won't always cut it in the world of good design. To make this easier, we store the x and y positions of our annotations relative to the width and height of the image.
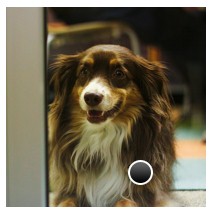
If you didn't pass fifth-grade math, don't worry: our plug-in does all the basic arithmetic for you. Warning: if you change the aspect ratio or crop the image, this will not work properly. Also, be sure to always store x and y as floating-point data types.
$('#smallNutmeg').addAnnotations(blackNote, annotations);The annotations variable is an array of objects with x and y attributes. It looks exactly like the array returned by the serializeAnnotations function without the response_time attribute. What other attributes might you put in the annotation object? Read on…
Passing Attributes
We may want to pass some data to each of our annotations when adding existing annotations. Maybe we have numbered our annotations, or have added special classes or behaviors, whatever.

The function we pass to annotatableImage accepts a single parameter, which is the annotation object from the array that you passed to addAnnotations. In this example, we added a position attribute, which we will display.
$('#numberedNutmeg').addAnnotations(function(annotation){
  return $(document.createElement('span')).
    addClass('black circle note').html(annotation.position);
},[
    {x: 0.3875, y: 0.3246, position: 4},
    {x: 0.57, y: 0.329, position: 2}
  ]
);
Hitting All the Positions
When we were annotating Nutmeg, you may have noticed that the annotation was centered at your click position. This may be great for circles and sparkly unicorns, but sometimes we may want to position our annotations differently.
The xPosition and yPosition options allow you to indicate where the annotation is positioned relative to the click. Options are middle (default), left, right and middle (default), top, bottom, respectively.
$('#labeledNutmeg').annotatableImage(function(annotation){
  return $(document.createElement('span')).addClass('set-label');
}, {xPosition: 'left'});
Give Nutmeg some clicks on our demo page to see what we're talking about. In this example, we are positioning the click on the left side of the annotation.
Warning: make sure to pass the xPosition and yPosition to the serializeAnnotations function if you set these options in annotatableImage. The default behavior is to calculate the x and y values from the middle of the annotation.
JavaScript Annotations Plug-In
Start supporting powerful, easily implemented annotations on your website or app with this plug-in. Adding notes, descriptions and more to these annotations is simple.
Bonus: CSS Grid Builder
In our design process, we have been using a flexible grid framework that lets us rapidly prototype and implement websites. Recently, we've created some variant grids for different widths and gutter sizes, so we thought, why not just create grids on the fly with a simple tool?
$('#exhibita').bind('hastext', function () {
  $('#exhibitaButton').removeClass('disabled').attr('disabled', false);
});

$('#exhibita').bind('notext', function () {
  $('#exhibitaButton').addClass('disabled').attr('disabled', true);
});
The hastext event fires when the element goes from having no text to having text, and the notext event fires when the element goes from having text to being blank. Looking for more advanced validation? Keep reading.
Detecting Text Change
What about detecting text change in the field?
This is very easy, too. A third textchange event fires whenever the text changes, and it provides you with the previous value.
$('#exhibitb').bind('textchange', function (event, previousText) {
  $('#output').append('Text changed from <strong>' +
    previousText + '</strong> to <strong>' + $(this).val() +
    '</strong> </p>');
});
Twitter-Style Validation
We can implement some simple Twitter-like validation with just a single line and our textchange event.
$('#twitter').bind('textchange', function (event, previousText) {
  $('#charactersLeft').html( 140 - parseInt($(this).val().length) );
});
Ajax Save
With a little more code and setTimeout, we can hook up an Ajax call to save a few seconds once the user stops editing. The Ajax call is just stubbed out here, but you get the idea.
var timeout;
$('#ajaxSave').bind('textchange', function () {
  clearTimeout(timeout);
  $('#ajaxFired').html('Typing...');
    var self = this;
    timeout = setTimeout(function () {
    $('#ajaxFired').html('Saved: ' + $(self).val());
  }, 1000);
});
Validate Text
This may sound contrived, but say you would like to ensure that the two words “companion cube” are in the emergency intelligence incinerator (i.e. the text field) before allowing the user to continue. No problem:
$('#emergencyIntelligenceIncinerator').bind('textchange', function () {
  if ($(this).val().indexOf('companion cube') !== -1) {
    $('#continue').removeClass('disabled').attr('disabled', false);
  }
});
jQuery Text-Change event can be very useful for web applications that are aiming for a high level of interactivity and visual feedback. You may even want to analyze some of the input and provide helpful clues. For instance, if the user is opening a new ticket in your support area, you may want to present links to possibly related answers in the support forum. Be sure not to analyze every keystroke, though, as it could result in a significant overhead for the back-end. And it is also important to keep in mind that the immediacy of the application should be subtle and should not interrupt user’s interaction.
Text Change Events
Don't fret about complicated validation, text events and edge cases. Check out the live demo and download the plug-in, which makes it a snap to perform a number of functions on text boxes to look for values, changes and more.
JavaScript Annotation Plug-In
An application that we recently developed (Notable) allows users to collect user feedback through interactive tools. Most of these tools require the user to annotate an image. We figured that many folks are trying to solve the same problem, so why not create a plug-in that they can use? This is the result. Our plug-in uses jQuery and makes it very simple to add and save image annotations.
To start off, download the JS Annotation Plug-In. To use the plug-in, just link up jQuery (1.2.3 or higher) and our plug-in.
<script src="/javascripts/plugins/jquery.js"></script>
<script src="/javascripts/plugins/jquery.annotate.js"></script>
Meet Nutmeg the Dog. After clicking on a random spot on Nutmeg, you’ll see the black circle appear.
function blackNote() {
  return $(document.createElement('span')).addClass('black circle note')
}

$('#nutmeg').annotatableImage(blackNote);
Here’s how it works: The first parameter to annotatableImage is a function that is implemented by you and that defines the element to be added when you click. In the example above, that function is called blackNote. Simple, right?
How to Save the Annotations?
Glad you asked. Use the jQuery selector to grab all the elements that you want to serialize, and call the serializeAnnotations function.
$('#nutmeg span.note').serializeAnnotations();These values are returned in an array of objects, so you can easily save them with an Ajax call. The response_time variable is the time in milliseconds that the user took to add the annotation after you made the call to annotatableImage.
Let’s Get Relative
In our website feedback tool we needed to show our annotations in different-sized versions of our original image. The full size is just won't always cut it in the world of good design. To make this easier, we store the x and y positions of our annotations relative to the width and height of the image.
If you didn't pass fifth-grade math, don't worry: our plug-in does all the basic arithmetic for you. Warning: if you change the aspect ratio or crop the image, this will not work properly. Also, be sure to always store x and y as floating-point data types.
$('#smallNutmeg').addAnnotations(blackNote, annotations);The annotations variable is an array of objects with x and y attributes. It looks exactly like the array returned by the serializeAnnotations function without the response_time attribute. What other attributes might you put in the annotation object? Read on…
Passing Attributes
We may want to pass some data to each of our annotations when adding existing annotations. Maybe we have numbered our annotations, or have added special classes or behaviors, whatever.
The function we pass to annotatableImage accepts a single parameter, which is the annotation object from the array that you passed to addAnnotations. In this example, we added a position attribute, which we will display.
$('#numberedNutmeg').addAnnotations(function(annotation){
  return $(document.createElement('span')).
    addClass('black circle note').html(annotation.position);
},[
    {x: 0.3875, y: 0.3246, position: 4},
    {x: 0.57, y: 0.329, position: 2}
  ]
);
Hitting All the Positions
When we were annotating Nutmeg, you may have noticed that the annotation was centered at your click position. This may be great for circles and sparkly unicorns, but sometimes we may want to position our annotations differently.
The xPosition and yPosition options allow you to indicate where the annotation is positioned relative to the click. Options are middle (default), left, right and middle (default), top, bottom, respectively.
$('#labeledNutmeg').annotatableImage(function(annotation){
  return $(document.createElement('span')).addClass('set-label');
}, {xPosition: 'left'});
Give Nutmeg some clicks on our demo page to see what we're talking about. In this example, we are positioning the click on the left side of the annotation.
Warning: make sure to pass the xPosition and yPosition to the serializeAnnotations function if you set these options in annotatableImage. The default behavior is to calculate the x and y values from the middle of the annotation.
JavaScript Annotations Plug-In
Start supporting powerful, easily implemented annotations on your website or app with this plug-in. Adding notes, descriptions and more to these annotations is simple.
Bonus: CSS Grid Builder
In our design process, we have been using a flexible grid framework that lets us rapidly prototype and implement websites. Recently, we've created some variant grids for different widths and gutter sizes, so we thought, why not just create grids on the fly with a simple tool?
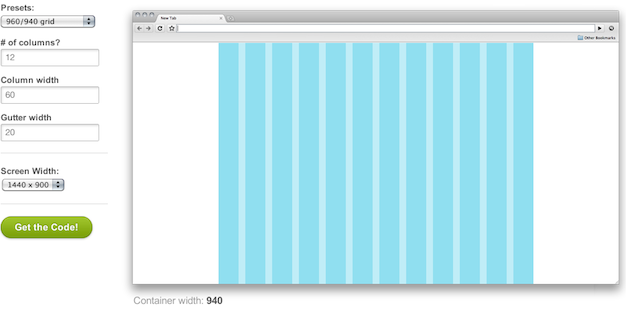
Please feel free to use the ZURB CSS Grid Builder to build and generate source code for a simple, flexible grid framework for variable grid sizes and column numbers. Play around with it — we prefer it to a more full-featured solution such as YUI because it's lighter and a little more flexible.
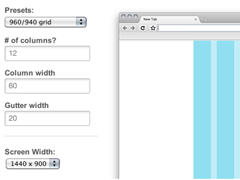
CSS Grid Builder
Check out the CSS Grid Builder in the playground. You can preview the grid in different-sized browser windows and output a complete CSS framework.


