Syncing Content With HTML5 Video

Email Newsletter
Weekly tips on front-end & UX.
Trusted by 182,000+ folks.
 Register for Free
 Custom Web Forms for Angular, React, & Vue. Your backend.


 Celebrating 10 million developers
<object> element to a highly specified <video> and <audio> element, and with a rich API to access in pure JavaScript.
Native multimedia capability has a few benefits. For instance, end users have full control over the multimedia. The native controls of browsers allow users to save videos locally or email them to friends. Also, HTML5 video and audio are keyboard-enabled by default, which is a great accessibility benefit.One of the main changes from HTML4 to HTML5 is that the new specification breaks a few of the boundaries that browsers have been confined to. Instead of restricting user interaction to text, links, images and forms, HTML5 promotes multimedia, from a generic <object> element to a highly specified <video> and <audio> element, and with a rich API to access in pure JavaScript.
Native multimedia capability has a few benefits:
- End users have full control over the multimedia. The native controls of browsers allow users to save videos locally or email them to friends. Also, HTML5 video and audio are keyboard-enabled by default, which is a great accessibility benefit.
- End users do not need to install a plug-in to play them. The browser already has everything it needs to play movies and sound.
- Video and audio content on the page can be manipulated. They are simply two new elements like any other that can be styled, moved, manipulated, stacked and rotated.
- You can build your own controls using HTML, CSS and JavaScript. No new skills or development environment needed.
- Interaction with the rest of the page is simple. The multimedia API gives you full control over the video, and you can make the video react both to changes in the video itself and to the page around it.
Let’s quickly recap how you can use native video in the browser, starting with the embedding task.
Further Reading on SmashingMag:
- Creative Use of Video in Web Design: Background Videos
- The Future Of Video In Web Design
- Bringing Production Video To The Web
Embedding Video
This is old news. Embedding video in a document is as easy as adding a <video> element and pointing it to the source video. Adding a controls attribute gives you native controls:
<video src="chris.ogv" controls></video>This is the theory, though. In the real world of intellectual property, corporate competition and device-specific solutions, we as developers have to jump through a few hoops:
<video controls="true" height="295" width="480">
  <!-- hello iOS, Safari and IE9 -->
  <source src="chris.mp4" type="video/mp4">
  <!-- Hello Chrome and Firefox (and Opera?) -->
  <source src="chris.webm" type="video/webm">
  <!-- Hello Firefox and Opera -->
  <source src="chris.ogv" type="video/ogg">
  <!-- Hello legacy -->
  Your browser does not support the video tag,
  <a href="https://youtube.com/watch?v=IhkUe_KryGY">
    check the video on YouTube
  </a>.
</video>
This shows how we need to deliver video in three formats in order to satisfy all of the different browsers out there. There are a few ways to accomplish this. Here’s what I do…
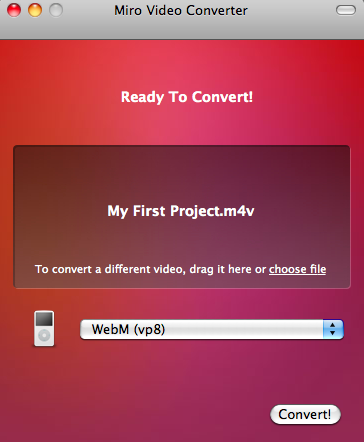
Convert Video With Miro Video Converter
Miro Video Converter is an open-source tool for Mac that makes converting videos dead easy. Simply drag the video to the tool, select WebM as the output format, and watch the progress. A few other converters for Windows and Linux are available, too.
Hosting And Automated Conversion On Archive.org
Because I license my videos with Creative Commons, I can use Archive.org to both host the videos and convert the WebM versions to MP4 and OGV. Simply upload your video and wait about an hour. Reload the page, and the server pixies at Archive.org will have created the other two formats (and also a cool animated GIF of your video).

You can use Archive.org to both host the videos and convert the WebM versions to MP4 and OGV. Large view.
Industrial-Strength Conversion With Vid.ly
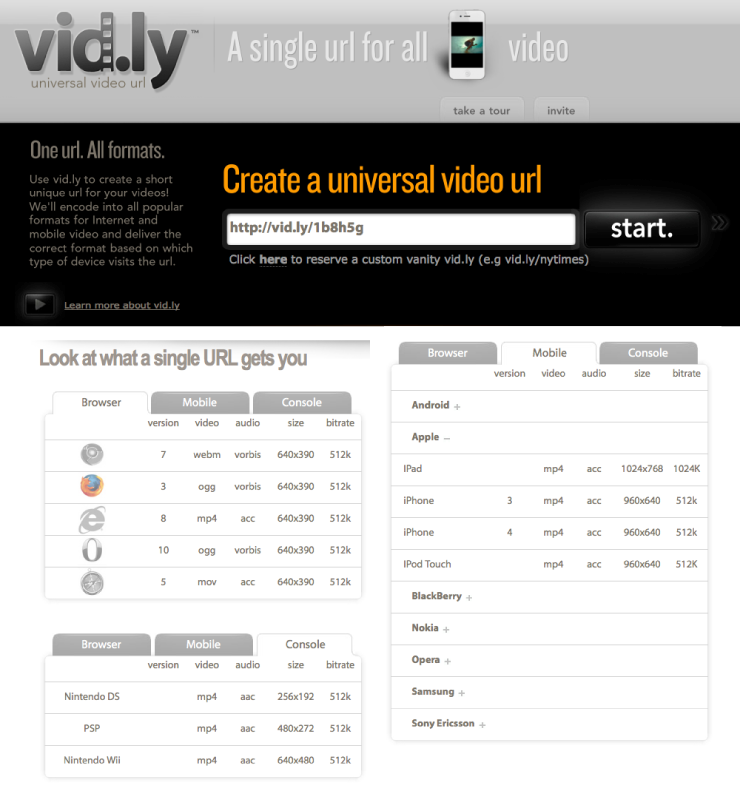
WebM, OGV and MP4 take care of only the major browsers, though. If you want to support all mobile devices, tablets and consoles and you want the video quality to adapt to the user’s connection speed, then you’ll have to create a few dozen versions of the same video. Encoding.com feels our pain and has released a free service called Vid.ly, which converts any video you upload into many different formats more or less in real time. Unfortunately, the service is in private beta at the moment, but you can use the invite code HNY2011.
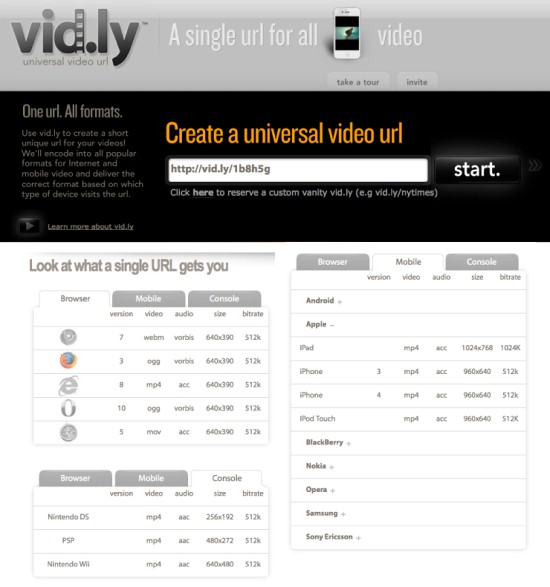
Vid.ly converts any video you upload into many different formats more or less in real time. Large view.
Furthermore, Vid.ly creates a URL for your video that automatically redirects the browser or device calling it to the right format. This keeps your embed code as simple as possible:
<video src="https://vid.ly/4f3q1f?content=video" controls></video>Cool, isn’t it?
The Power Of The HTML5 Video API: Syncing Content
Now that our video is on the page, let’s check out the power of the API. Say, for example, you want to know what part of the movie is playing right now. This is as simple as subscribing to an event of the <video> element:
<div id="stage">
  <video src="https://vid.ly/4f3q1f?content=video" controls></video>
  <div id="time"></div>
</div>
<script>
  (function(){
    var v = document.getElementsByTagName('video')[0]
    var t = document.getElementById('time');
    v.addEventListener('timeupdate',function(event){
      t.innerHTML = v.currentTime;
    },false);
  })();
</script>
If you try this out in your browser, you will see the current time below the video when you play it.
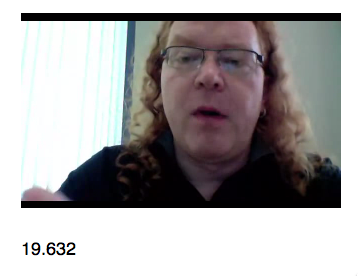
You will also see that the timeupdate event gets fired a lot and at somewhat random times. If you want to use this to sync the showing and hiding of parts of the document, then you’ll need to throttle it somehow. The easiest way to do this is to limit the number to full seconds using parseInt():
<div id="stage">
  <video src="https://vid.ly/4f3q1f?content=video" controls></video>
  <div id="time"></div>
</div>
<script>
  (function(){
    var v = document.getElementsByTagName('video')[0]
    var t = document.getElementById('time');
    v.addEventListener('timeupdate',function(event){
      t.innerHTML = parseInt(v.currentTime) + ' - ' + v.currentTime;
    },false);
  })();
</script>
You can use this to trigger functionality at certain times. For example, you can sync an Indiana Jones-style animation of a map to a video:
For a full explanation of this demo, check out the blog post on Mozilla Hacks.
Let’s have a go at something similar: a video that shows the content from web pages being referred to by a presenter. Check out this video demo of me explaining what we’re doing here, with the content appearing and disappearing at certain times in the video. Make sure to jump around the video with the controls.
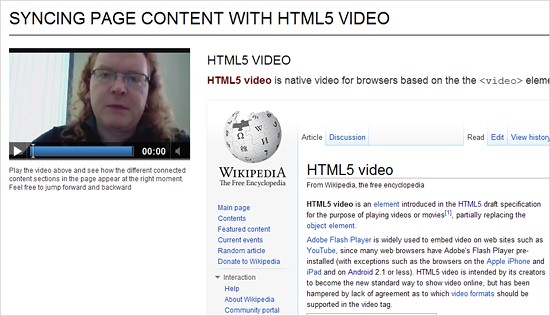
We’ve already covered how to get the current time of a video in seconds. What I want now is to display and hide a few parts of the website at certain times in the video. If video is not supported in the browser, then I would just show all of the content without any syncing.
The first issue I have to solve is to allow the maintainer to control what is shown when. Normally, I’d use a JSON object in the JavaScript, but I figure that keeping the maintenance in the markup itself makes much more sense.
HTML5 allows you to store information in data- attributes. So, to make it easy to tell the script when to show what, I just use data-start and data-end attributes, which define the time frames for the articles that I want to sync with the video:
<article data-start="64" data-end="108">
  <header><h1>Archive.org for conversion</h1></header>
  <p><a href="https://archive.org">Archive.org</a> is a website dedicated to
archiving the Internet. For content released as under a Creative Commons
license, it offers hosting for video and audio and automatically converts the
content to MP4 and Ogg video for you.</p>
  <iframe src="https://archive.org"></iframe>
</article>
You can try it out by downloading the code and changing the values yourself (or use Firebug or the Web Inspector to change it on the fly).
Here’s the script (using jQuery) that makes this happen:
/* if the document is ready… */
$(document).ready(function(){

/* if HTML5 video is supported */
  if($('video').attr('canPlayType')){

    $('aside::first').append('<p>Play the video above and see how ' +
                             'the different connected content sections ' +
                             'in the page appear at the right moment. '+
                             'Feel free to jump forward and backward</p>');

    var timestamps = [],
        last = 0,
        all = 0,
        now = 0,
        old = 0,
        i=0;

/* hide all articles via CSS */
    $('html').addClass('js');

/*
   Loop over the articles, read the timestamp start and end and store
   them in an array
*/
    $('article').each(function(o){
      if($(this).attr('data-start')){
        timestamps.push({
          start : +$(this).attr('data-start'),
          end : +$(this).attr('data-end'),
          elm : $(this)
        });
      }
    });

    all = timestamps.length;

/*
  when the video is playing, round up the time to seconds and call the
  showsection function continuously
*/
    $('video').bind('timeupdate',function(event){
      now = parseInt(this.currentTime);

      /* throttle function calls to full seconds */
      if(now > old){
        showsection(now);
      }
      old = now;

    });

/*
  Test whether the current time is within the range of any of the
  defined timestamps and show the appropriate section.
  Hide all others.
*/
    function showsection(t){
      for(i=0;i<all;i++){
        if(t >= timestamps[i].start && t <= timestamps[i].end){
          timestamps[i].elm.addClass('current');
        } else {
          timestamps[i].elm.removeClass('current');
        }
      }
    };

  };
});
So, what’s going on here? First, we’re checking whether the browser is capable of playing HTML5 video by testing for the canPlayType attribute. If all is fine, then we add some explanatory text to the document (which wouldn’t make sense if the browser couldn’t show a video). Then, we define some variables to use and add a class of js to the root element of the document. This, together with the .js article selector in the CSS, hides all of the articles in the document.
We then loop through the articles, read out the timestamps for the start and end of each of the sections and store them in an array called timestamps.
We then subscribe to the timeupdate event, rounded up to full seconds, and call the showsection() function every new second.
The showsection() function loops through all of the timestamps and tests whether the current time of the video is in the range of one of the articles. If it is, then that article is displayed (by adding a current class) and all the others are hidden. This could be optimized by storing the current section and removing the class from only that element.
Can We Do The Same With Less Or No Code?
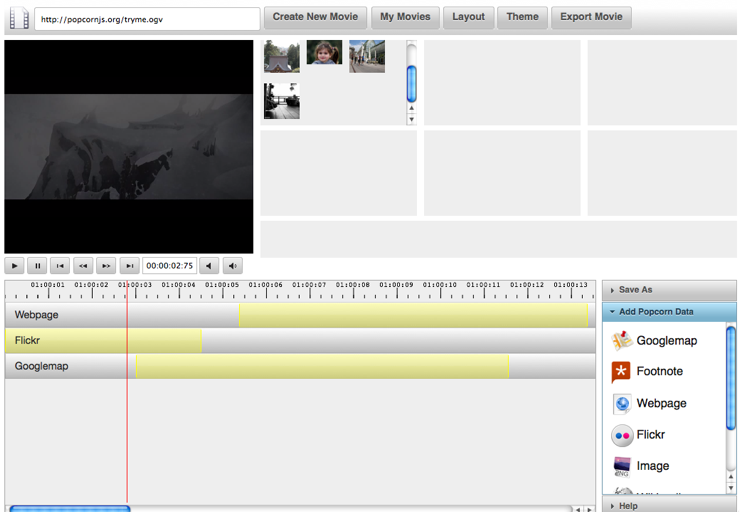
If you like the idea of syncing content and video, check out the Popcorn framework, which is based on the same techniques but gives you much more control over the video itself.
Butter is a point-and-click interface to go on top of Popcorn. It has a nice timeline editor that allows you to play a video and show all kinds of Web content at certain times. You can export and send your creations to friends, too.
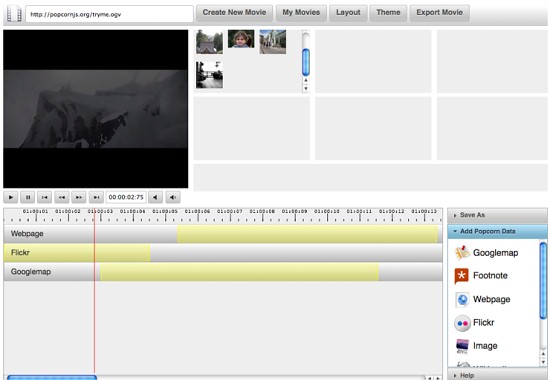
With systems like Popcorn and Butter, we are one step closer to having authoring tools for the rich interactions that HTML5 offers us. What can you think of building?
Summary
Today we looked at how to embed video onto a Web document; and with the native video API that gives us event handlers for changes in a video, we saw how easy it is to make the video interact with the rest of the document. Instead of trying to control the video, we use native controls to make the page react to what is happening in the video itself. We used semantic HTML and data attributes to allow maintainers to use the syncing script without having to touch any JavaScript, and we looked at some services that make hosting and converting video easy.
All of these cool technologies give us a lot of power, but we can’t just, say, write some simple CSS, JavaScript and HTML to use them. If we want open technologies to succeed, then we have to make them easy for people to use. The next step now is to move from the “one-off implementation” phase and think about creating tools and step-by-step code-creation systems for users who want to use these cool new technologies but don’t want to spend much time and effort doing it.
With native audio and video in browsers, we’ve taken a massive step toward make the open Web more engaging and beautiful. The next step will be to use multimedia not only for output but for input. A lot of hardware these days comes with cameras and microphones; we need to start using and supporting open technology that allows our users to take advantage of this hardware to interact with our Web products.
For a screencast on this topic, see Syncing page content with HTML5 video on the Mozilla Hacks blog.


