Photo Retouching Tips And Tricks In Photoshop
Email Newsletter
Weekly tips on front-end & UX.
Trusted by 182,000+ folks.


 Celebrating 10 million developers
 Custom Web Forms for Angular, React, & Vue. Your backend.

Here is a short overview of the techniques we’ll be covering in this follow-up:
- Defining Colors
- Controlling Folders
- Split-Toning Effect
- Flexible Vignette
- Skin Retouching In Camera Raw
- Setting Lights
- Distinguished Paleness
- Dodge And Burn Look
- Bright Eyes
- The Orton Effect
- Optimizing Lasso Selections
- Aligning Layer Contents
- Restoring Selections
- More Photoshop Tips and Tricks
Defining Colors
If you want to redefine the foreground and background colors, use the Eyedropper tool to select the foreground color, and then switch the position with the background color, maybe by using the shortcut X, and pick up the next color. But there is an easier way. First, define the foreground color just as you’re accustomed to, but then define the background color by holding the Alt/Option key. Instead of changing the foreground color, you’ll redefine the background color with just one click.
Define foreground and background colors.
Controlling Folders
Folders give structure to layers, which is especially important if you’re working on demanding compositions. Folders are often collapsed, so you can’t see the contents at first sight. This conserves space but it’s not always desirable. If you want nested layers to reveal their contents and offer a quick overview, hold the Control/Command key and click on one of the triangles to expand. All folders at the first level will expand. You can collapse them again using the same trick. To expand all nested folders inside the folders as well, hold the Alt/Option key as well as the Control/Command key.
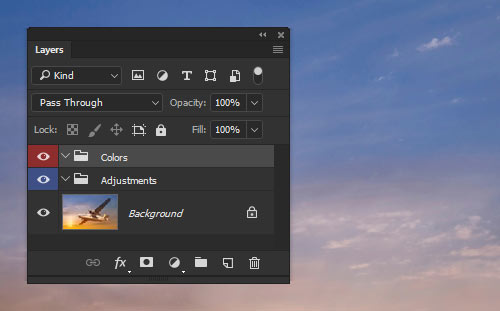
Hold the Control/Command key to expand the folder.
Split-Toning Effect
Create two new gradient maps via Layer → New Adjustment Layer → Gradient Map. You could, for example, create a gradient from dark-blue to beige and another from dark-brown to white. To change a gradient, click on it to open up the “Gradient Editor” dialog box. There, click on your chosen color patches and open up the color picker via the “Color field.”

Blending Options: This Layer
Confirm with “OK,” double-click the layer with the second gradient map and, under “This Layer,” move the right slider to the left. To make the transition a little smoother, click on the slider while holding down the Alt/Option key and move it to the right. Confirm with “OK.”
Split-Toning Effect
Flexible Vignette
To create a non-destructive vignette, go to New Adjustment Layer → Levels. Darken the image completely by, for example, setting the Highlights down to 80. Now use the Brush tool with black color to paint the light center into the layer mask. Instead of using a brush to paint the area, you could use the Elliptical Marquee tool and fill the selection with black.
Adjustment Layer: Levels
You can use the Move tool to adjust the vignette’s position any time, or blur it using the “Gaussian Blur.” You can also increase or decrease the darkening. To do so, open the Levels Adjustment dialog box again.
Skin Retouching In Camera Raw
Again, open a photo in Camera Raw (for example, by using the right mouse key from Bridge and clicking “Open in Camera Raw”). In general, you can use the Spot Healing Brush tool and all other tools and sliders to improve the image. When you’re happy with it, hold the Shift key and click on “Open Object.” The image will be put on a new layer as a Smart Object.
You could also click the blue link at the bottom of the screen, which opens the “Workflow Options” dialog window. From there, you can control some other settings as well. Make sure to check the “Open in Photoshop as Smart Object” checkbox, and then confirm with “OK” to open the images (without having to holding Shift).
Here, layers are smart objects.
Right-click on the layer and choose “New Smart Object via Copy,” and then open the Camera Raw dialog box again by double-clicking the layer icon. Set the “Clarity” value to -100 and confirm with “OK.” Hold the Alt/Option key and click on the “Create Layer Mask” button, then use a soft brush to paint over the optimized skin. Use the opacity slider to control the amount of retouching.
Here is optimized skin with the help of Camera Raw.
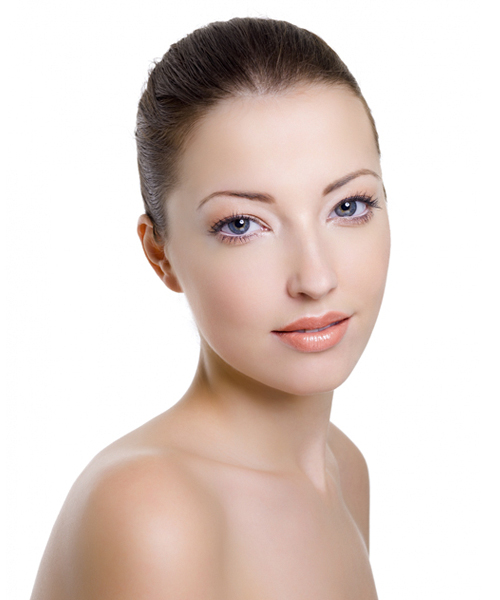
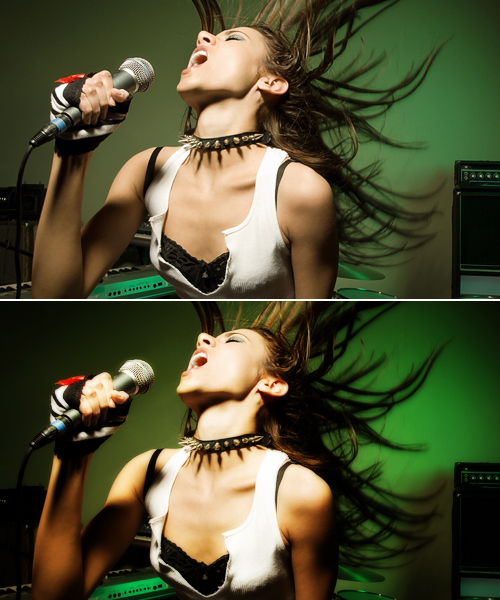
Setting Lights
If you want to do some virtual re-positioning of your strobes, then neutralize the shot first. Go to Select → Color Range, and set Select option to “Highlights.” Copy the selection content to a new layer by hitting Control/Command + J. Activate the background layer again, and select the “Shadows” this time. Bring those to their own layer, too, with Control/Command + J, and then set the blending mode to “Screen” and the highlights to “Multiply.”
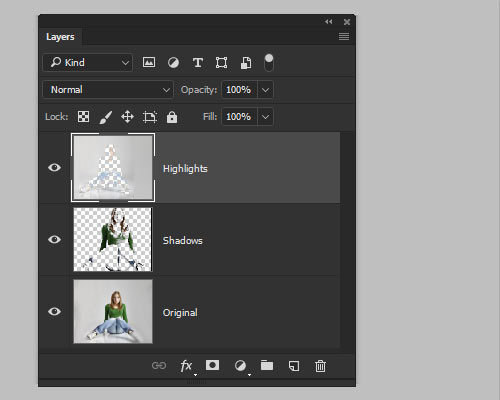
Highlights and shadows
Reduce the opacity to about 30%, depending on the image content. “Shadows/Highlights” might also help. On a new layer, filled with a neutral gray and its blending mode set to “Overlay,” paint in the desired light quality with the Dodge and Burn tools. Alternatively, add a new layer and set its blending mode to “Soft Light” or “Overlay” and, with a low opacity brush, paint black and white on this layer.
The lights were neutralized a bit.
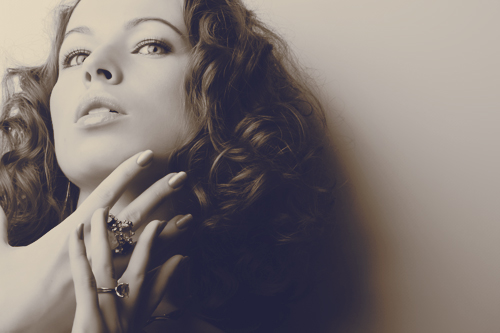
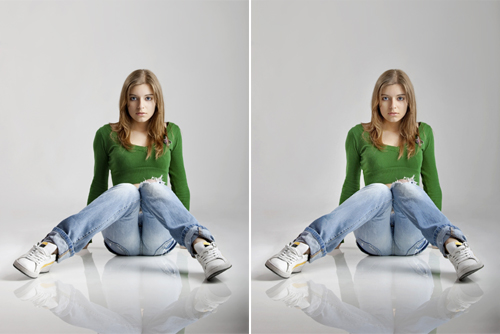
Distinguished Paleness
For a distinguished paleness, copy the background layer and set its blending mode to “Screen.” Use Image → Adjustments → Desaturate or “Black & White,” then “Shadows/Highlights” to increase the effect. The exact adjustment options can vary according to your image content.
The effect will cover the entire image unless you click on the “Create Layer Mask” button while holding the Alt/Option key, and then paint the pale areas with the brush tool and white color. You can control the effect’s strength with the opacity slider.

Distinguished paleness.
Dodge And Burn Look
Copy the reduced layers to a new layer with Shift + Control/Command + Alt/Option + E, and then set the blending mode to “Vivid Light.” Use Control/Command + I to invert the layer content, and apply Filter → Blur → Surface Blur with a radius of about 70 pixels and a threshold of 40 levels. Press Shift + Control/Command + Alt/Option + E again, delete the layer below, and set the blending mode to “Overlay.” Apply a “Gaussian Blur” to make the contours a little softer, and then click Image → Adjustments → Desaturate.
Dodge and Burn Look
Bright Eyes
To make eyes appear brilliant, click on New Adjustment Layer → Exposure. Fill the layer mask with black (or invert the mask), and paint with white over the irises and with black over the pupils. Set the blending mode of the adjustment layer to “Luminosity.” Increase the exposure in concert with the gamma value to give the iris structure more contrast. Also, try changing the “Offset slider.”
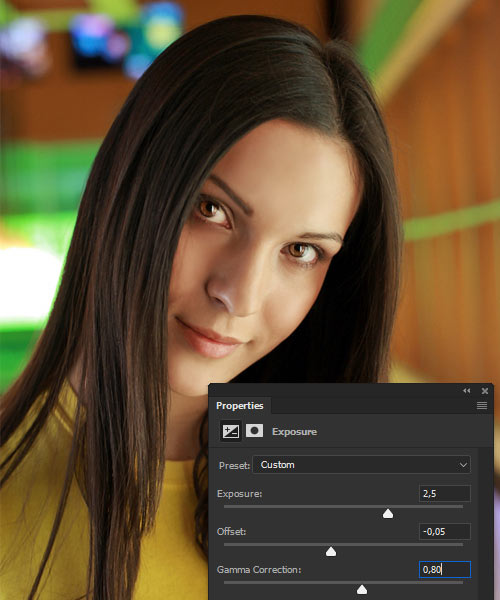
Create beautiful eyes with exposure.
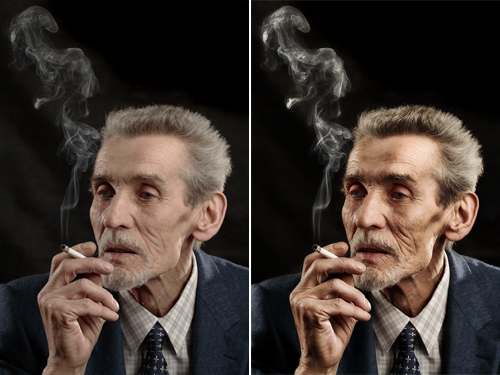
The Orton Effect
With the Orton effect, sharp and blurred versions of a photo are mixed together. Copy the background layer with Control/Command + J, and click on Image → Apply Image. Change the blending mode to “Screen” and click “OK.” Copy the current layer again with Control/Command + J. Apply a Gaussian Blur to this copy by clicking Filter → Blur → Gaussian Blur. The value will depend on the size of the image. The shapes should always blur slightly. Set the blending mode for the layer to “Multiply.”
The Orton effect creates contrast and depth.
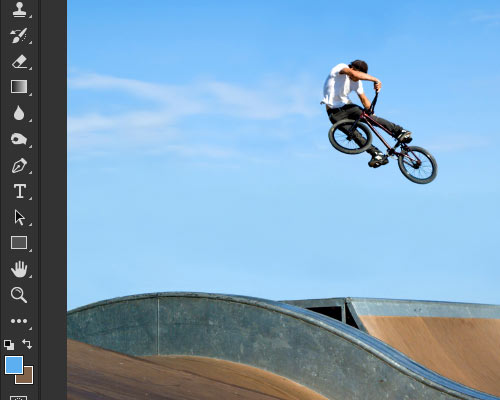
Optimizing Lasso Selections
Many users (even professionals) prefer the Lasso Selection tool to the Path tool for uncomplicated selections. To switch to the Polygon Lasso tool for a short stretch, hold the Alt/Option key while working. To switch back to the regular Lasso tool, just release the Alt/Option key while depressing the mouse button.
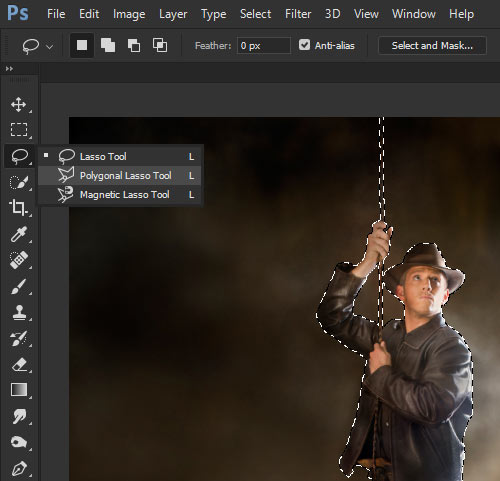
Switching between the Lasso and Polygon Lasso tools is easy.
It often happens that, during a zoom, you hit the edge of the work area while making a selection. Just keep the space bar pressed to switch to the Hand tool, and you can quickly change the displayed image section.
Aligning Layer Contents
Some areas in Photoshop are hardly ever noticed. This is one of them. If you activate the Move tool, you’ll see some mysterious symbols to the right called Align tools, in the option bar next to Auto-Select and the Transform controls (which are basically equivalent to Free Transform).
Align tools
If you activate just one layer, the Align tools won’t do anything, but if you select two or more layers by holding the Control/Command key, then you can align the layer’s contents with these buttons. Choose from options such as “Align Top Edge” and “Align Vertical Center.”
Restoring Selections
Often, while in the middle of working on a tricky selection, you’ll accidentally deselect it by clicking once too often. You can restore the lost selection by pressing Shift + Control/Command + D. This will get the ants marching again. You can also undo (Control/Command + Z) the action, and even perform multiple undos with Control/Command + Alt/Option + Z.
By the way, you can hold the Alt/Option key to subtract elements from the selection at any time, or hold the Shift key to add to the selection. Pressing a combination of both keys creates a selection intersection. Important selections that you might need later can be saved by going to Select → Save Selection.
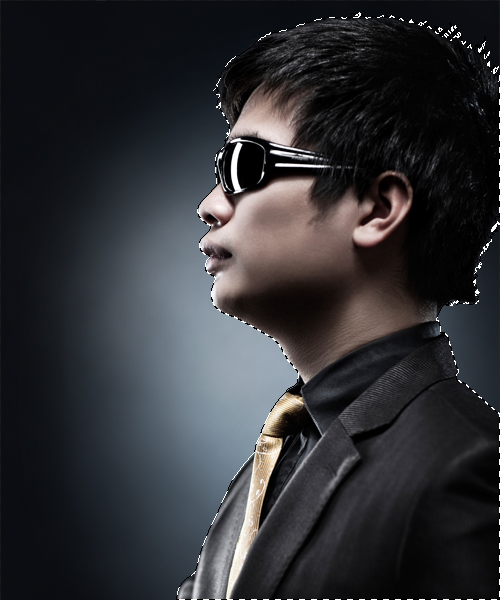
Restore lost selections.
More Tips and Tricks to Improve Your Workflow:
- Mastering Photoshop: Unknown Tricks and Time-Savers by Thomas Giannattasio
- Compositing in Adobe Photoshop: Time-Saving Tips by Daniel Durrans
- Mastering Photoshop: Noise, Textures, Gradients and Rounded Rectangles by Marc Edwards
- Useful Adobe Photoshop Techniques, Tutorials and Tools by Vitaly Friedman
- The Ultimate Guide To Cloning In Photoshop by Joshua Johnson
- The Ultimate Collection Of Useful Photoshop Actions by Jacob Gube
- Unveiling Photoshop Masks by Thomas Giannattasio
(al) (vf) (ik)


