Creating A “Save For Later” Chrome Extension With Modern Web Tools

Email Newsletter
Weekly tips on front-end & UX.
Trusted by 182,000+ folks.
 Custom Web Forms for Angular, React, & Vue. Your backend.
 Celebrating 10 million developers


Creating an extension for the Chrome browser is a great way to take a small and useful idea and distribute it to millions of people through the Chrome Web Store. This article walks you through the development process of a Chrome extension with modern web tools and libraries.
It all begins with an idea. Mine was formed while reading an interesting (and long) article about new front-end technologies. I was concentrating on reading the article when suddenly my wife called me to kick out a poor baby pigeon that got stuck on our balcony. When I finally got back to the article, it was too late — I had to go to work.
To make a long story short, I thought it would be nice to create a Chrome extension that enables you to mark your reading progress in articles so that you can continue reading them later — anywhere.
“Markticle” is the name I chose for this extension. I’ll share here the technologies that I used to develop it. After reading this article, you’ll have a ready-to-use “Save for Later”-like Chrome extension.
Prior Knowledge
We’re going to use a few front-end technologies. While you can learn some of them on the fly, knowledge of others is required (marked in bold):
- jQuery
- AngularJS
- Node.js
- Grunt
- Bower
- Yeoman
Scaffolding
Let’s start with some infrastructure work.
Assuming you’re familiar with npm (Node.js’ package manager), we’re going to use the Yeoman generator to create a basic extension for Chrome.
Note: If you still don’t have Yeoman installed on your machine, start by following the “Getting Started” tutorial.
Open a new command line or terminal window, and write the following command:
npm install -g generator-chrome-extension
This will install Yeoman’s generator for Chrome extensions on your machine.
Create a new folder in your file system:
mkdir my-extension
And then run the following command to generate all of the files that you’ll need to start developing your extension:
yo chrome-extension
After running this command, the generator will ask you which features to include in the extension.
In our case, Markticle should do a few things:
- Add an icon next to the address bar.
- Run on each page that the user opens.
- Run some code in the background to connect the current page to the extension in order to save data.
For the first feature, we’ll choose “browser” as a UI action. To enable the extension to run on each web page, we’ll check the “Content scripts” box. Finally, to enable background processes to run, we’ll use a background.js file.
Note: Another way to create a Chrome extension is to use the online generator Extensionizr. Extensionizr is a great tool that helps you create basic Chrome extensions. It has multiple configuration options, all of which can be enabled with checkboxes. In the end, you’ll get a ZIP file that includes all of the files you’ll need to start working on the extension. The downside is that you’ll need to configure Grunt and Bower manually.
Folder Tree
Let’s look at the generated files and folders we’ve got now.
apptestbower.jsonpackage.jsonGruntfile.js
Gruntfile.js is where we’ll configure Grunt tasks for serving, building, testing and packaging our extension.
The package.json and bower.json files are Node.js and Bower JSON files that define our extension’s dependencies on third-party plugins and libraries.
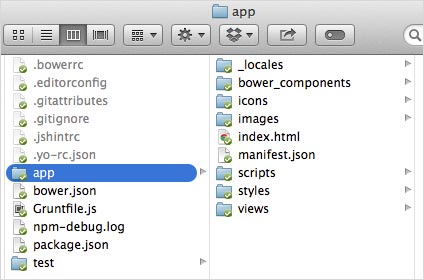
The test folder will include all of the unit and end-to-end tests for the extension. Finally, the app folder is the most interesting because it is where the core of our extension will reside.
After reordering some of the folders and files, here’s what our app folder will look like:
iconsicon-16.pngicon-19.pngicon-38.pngicon-128.png
imagesviewsscriptsinject.jsbackground.js
stylesmain.css_localesenmessages.json
index.htmlmanifest.json
The most important file here is manifest.json. It is actually the heart of the extension, and it specifies several things, including the following:
- the location of every file used by the extension,
- which icon to present as the “action” button,
- the permissions that your extension needs,
- the name of the extension.
Here’s an example of what the manifest.json file should look like:
{
  "name": "Markticle",
  "version": "1.0.0",
  "manifest_version": 2,
  "icons": {
    "16": "icons/icon-16.png",
    "38": "icons/icon-38.png",
    "128": "icons/icon-128.png"
  },

  "default_locale": "en",
  "background": {
    "scripts": [
      "scripts/helpers/storage.helper.js",
      "scripts/background.js"
    ]
  },

  "browser_action": {
    "default_icon": "icons/icon-19.png",
    "default_popup": "index.html"
  }
}
First Flight
We now have a basic extension that does nothing. Still, just to make sure everything is in place and working properly, let’s test the extension in runtime.
Open Chrome and write this in the address bar:
chrome://extensions
This page displays information about all of the extensions currently installed in your browser.
In the top-right corner, you’ll see an option to enable “Developer mode.” Click it.
Now, click the “Load unpacked extension” button, browse to the location of the extension you created, select the app folder, and click “Select.”
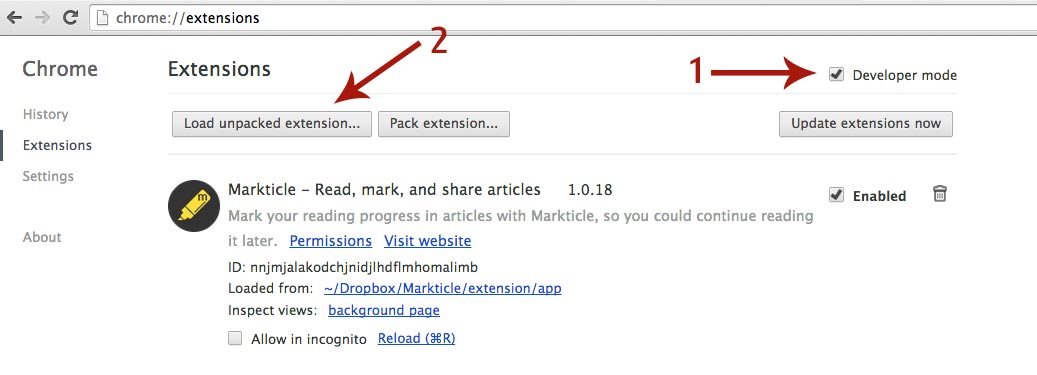
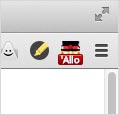
You should now see the extension’s icon next to the address bar.
Installing Dependencies
Before running the app, we need to install some Node.js plugin dependencies. We’ll do so by running the following command:
npm install
The last thing we need to do before diving into the code is set up the dependencies of the third-party libraries we’re going to use. We do this in the bower.json file:
{
  "name": "Markticle",
  "version": "1.0.0",
    "dependencies": {
      "angular": "1.2.6",
      "jquery": "2.0.3",
      "normalize.scss": "3.0.0"
    },

  "devDependencies": {}
}
I chose three libraries for this project: AngularJS, jQuery and Normalize.css. To install these, run this command:
bower install
Development
Now that we are ready to start development, let’s split our work into two parts.
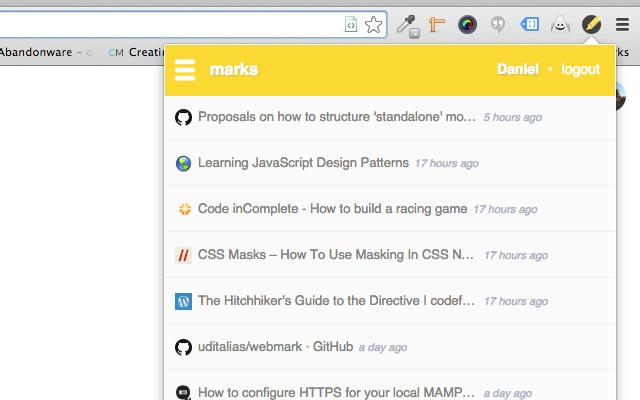
The first part will be the popup window that opens when the user clicks the extension’s icon. Markticle’s popup will present the list of bookmarks (i.e. websites) that the user has saved.
The second part connects the user’s actions to the extension itself. Each time the user takes a particular action on a page, the extension should save the URL and title of the current tab (so that we know what to display in the popup).
The first part is pretty straightforward. We’ll use classic AngularJS code to develop it.
Let’s start by adding the following file structure to the app/scripts folder.
scriptscontrollersmain.controller.jsdirectivesmain.directive.jshelpersstorage.helper.jsservicesstorage.service.jsapp.jsinject.jsbackground.js
In the app.js file, we’ll add the following code, which will define our app’s main module:
angular.module('markticle', []);
Now, let’s add some basic code to the index.html file:
<!DOCTYPE HTML>
<html>
  <head>
    <link href="styles/main.css" rel="stylesheet">
  </head>
  <body ng-app="markticle">
    <div id="main_wrapper">Sample</div>

    <script src="bower_components/jquery/jquery.min.js">
    <script src="bower_components/angular/angular.min.js">

    <script src="scripts/app.js">
    <script src="scripts/controllers/main.controller.js">
    <script src="scripts/directives/main.directive.js">
  </body>
</html>
What we’ve done here is very simple:
- define a global AngularJS module named
markticle, - add a single div element with sample text,
- include the list of script files that we’re going to use.
Now, let’s extend the div element that we created.
<div id="main_wrapper" ng-controller="MainController">
  <header>
  <h1>My Marks</h1>
</header>
<section id="my_marks"></section>
</div>
Again, nothing special here — we’ve just set up an AngularJS controller named MainController and added some header and section tags for the upcoming content.
In the app/scripts/controllers/main.controller.js file, let’s create a new AngularJS controller:
angular.module('markticle').controller('MainController', function($scope) {
  $scope.marks = [];
});
This controller currently doesn’t do much except define an array, named marks, that is attached to the controller’s scope. This array will include the user’s saved items.
Just for fun, let’s add two items to this array:
$scope.marks = [
{
  title: 'Smashing magazine',
  url: 'https://www.smashingmagazine.com/'
},
{
  title: 'Markticle',
  url: 'https://markticle.com'
}
];
Now, in the index.html file, let’s loop through them with the ng-repeat directive:
<section id="my_marks">
  <ul>
    <li ng-repeat="mark in marks">
      <a target="_blank" ng-href="{{mark.url}}">{{mark.title}}
    </li>
  </ul>
</section>
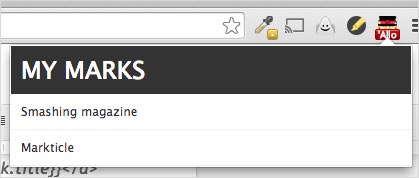
Click the extension’s icon to open the popup and see the result!
After adding some basic CSS to the main.css file, here’s what we’ve come up with:
Now for the second part.
In the second part, we’ll connect user interactions to our extension.
Let’s start by adding a new property to our manifest.js file:
{
  …
  "background": {…},
  "content_scripts": [
{
  "matches": ["https://*/*", "https://*/*"],
  "js": ["bower_components/jquery/jquery.min.js", "scripts/inject.js"]
}
],
…
}
Here, we’ve added a property named content_scripts, which has its own two properties:
matchesThis is an array that defines in which websites to inject the script — in our case, all websites.jsThis is an array of scripts that will be injected into each web page by the extension.
Let’s open the inject.js script and add some basic code to it:
$(document).ready(function() {
var createMarkticleButton = function() {
var styles = 'position: fixed; z-index: 9999; bottom: 20px; left: 20px;';
$('body').append('');
};
$(document).on('click', '#markticle_button', function() {
var title = document.title;
var url = window.location.href;
console.log(title + ': ' + url);
});
createMarkticleButton();
});
This script does two things once the page is ready. First, it adds a basic button using the createMarkticleButton() method. Then, it adds an event listener that writes the URL and title of the current page to Chrome’s console every time the user clicks the button.
To test this, go to chrome://extensions, find your extension, and click the “Reload” button. Then, open any website, click the Markticle button, and look at the console in Chrome Developer Tools.

Storing Data
To store data in the extension (without having to use a server-side solution), we have several options. My favorite is HTML5 localStorage.
Let’s go back to our scripts folder and create a localStorage service. First, edit app/scripts/helpers/storage.helper.js:
var markticleStorageService = function() {
  var lsName = 'marks';
  var data = localStorage.getItem(lsName) ? JSON.parse(localStorage.getItem(lsName)) : [];

  return {

    get: function() {
      return data;
    },
    add: function(item) {
      this.remove(item.url);
      data.push(item);
      this.save();
    },
    remove: function(url) {
      var idx = null;
      for(var i = 0; i < data.length; i++) {
        if(data[i].url === url) {
          idx = i;
          break;
        }
        }
      if(idx !== null) {
      data.splice(idx, 1);
      this.save();
      }
    },
    save: function() {
      localStorage.setItem(lsName, JSON.stringify(data));
    }
  };
};
With this, we’re first holding a data array with the current data that we’re pulling from localStorage. Then, we’re revealing a few methods to manipulate the data, such as get(), add() and remove().
After creating this class, let’s also add it as an AngularJS service in app/scripts/services/storage.service.js:
angular.module('markticle').service('StorageService', markticleStorageService);
Note: Don’t forget to refer to both scripts in index.html.
The reason we’ve split it into two scripts is because we’re going to reuse the markticleStorageService class in background.js, where we won’t access AngularJS.
Returning to our MainController, let’s make sure we’re injecting the storage service in the app:
angular.module('markticle').controller('MainController', function($scope, StorageService) {
  $scope.marks = […];
});
Finally, let’s connect the StorageService data to our app and introduce a method that will be used in the UI.
angular.module('markticle').controller('MainController', function($scope, StorageService) {
  $scope.marks = StorageService.get();
  $scope.removeMark = function(url) {
    StorageService.remove(url);
    $scope.marks = StorageService.get();
    if(!$scope.$$phase) {
      $scope.$apply();
    }
  };
});
Back to the index.html file. Let’s add an option to remove items by connecting the view to the controller’s remove() method:
<li ng-repeat="mark in marks">
  <a ng-href="{{mark.url}}">{{mark.title}}</a>
  <span class="remove" ng-click="removeMark(mark.url)">remove</span>
</li>
So, each time the user clicks the “Remove” button, it will call the remove() method from the controller, with the page’s URL as a parameter. Then, the controller will go to StorageService and remove the item from the data array and save the new data array to the localStrorage property.
Background Process
Our extension now knows how to get and remove data from the localStorage service. It’s time to enable the user to add and save items.
Open app/scripts/background.js, and add the following code:
chrome.extension.onMessage.addListener(function(request, sender, sendResponse) {
  if(request) {
    var storageService = new markticleStorageService();
    if(request.action === 'add') {
      storageService.add(request.data);
    }
  }
});
Here, we’re adding a listener for the onMessage event. In the callback function, we’re creating a new instance for markticleStorageService and getting a request object. This object is what we’re going to send with the chrome.extension.sendMessage event that is triggered from the inject.js script. It contains two properties:
actionThis is the type of action that we want the background process to perform.dataThis is the object of the data that we want to add.
In our case, the type of action is add, and the object is a model of a single item. For example:
{
title: 'Markticle',
url: 'https://markticle.com'
}
Let’s go back to the inject.js script and connect it to the background.js script:
$(document).on('click', '#markticle_button', function() {
  var title = document.title;
  var url = window.location.href;
chrome.extension.sendMessage({
    action : 'add',
    data: {
  title: title,
  url: url
}
});
alert('Marked!');
});
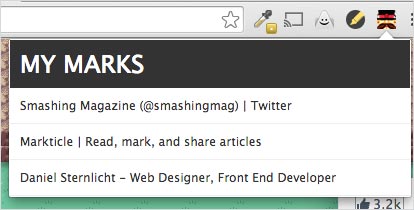
Now, go to any website and click the “Mark me!” button. Open the popup again and see the new item you’ve just added. Pretty cool, right?
Build
We’ve created a cool “Save for Later” Chrome extension of sorts. Before releasing it to the Chrome store, let’s talk about the build process for a Chrome extension.
A build process for this kind of app could have a few goals (or “tasks,” to use Grunt’s naming convention):
- test (if you’re writing unit tests for the extension),
- minify,
- concatenate,
- increment the version number in the manifest file,
- compress into a ZIP file.
If you’re using Yeoman’s generator, you can perform all of these tasks automatically by running this command:
grunt build
This will create a new dist folder, where you will find the minified and concatenated files, and another folder named package, where you’ll find a ZIP file named with the current version of your extension, ready to be deployed.
Deploy
All that’s left to do is deploy the extension.
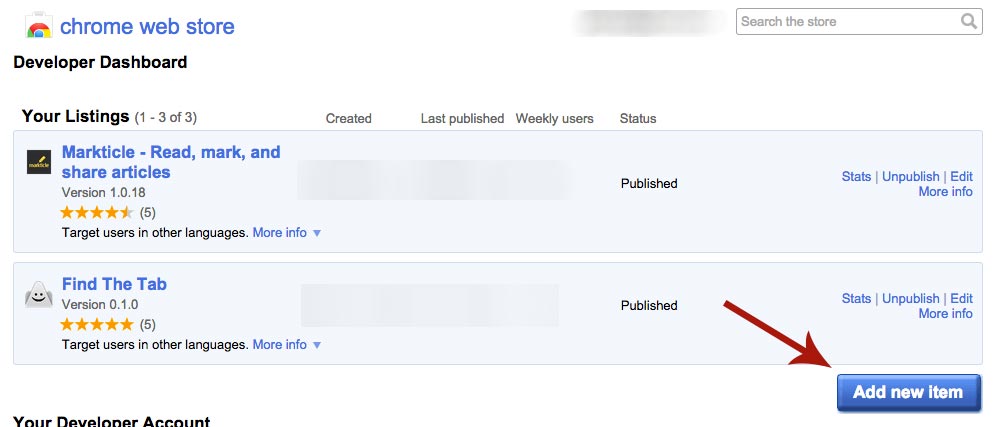
Go to your “Developer Dashboard” in the Chrome Web Store, and click the “Add new item” button.
Browse to the ZIP file we created and upload it. Fill in all of the required information, and then click the “Publish changes” button.
Note: If you want to update the extension, instead of creating a new item, click the “Edit” button next to the extension. Then, click the “Upload updated package” button and repeat the remaining steps.
Conclusion
As you can see, developing a Chrome extension has never been easier!
If you use Node.js and Grunt for their time-saving features, AngularJS as a development framework and the Chrome Web Store for distribution, all you need is a good idea.
I hope you’ve enjoyed reading this article. If it was too long to read in one sitting, consider using Markticle.
Further Reading
- Testing Mobile: Emulators, Simulators And Remote Debugging
- Creating One Browser Extension For All Browsers
- How To Write Fast, Memory-Efficient JavaScript
- Revisiting Firefox’s DevTools


