A Detailed Guide To A Custom WordPress Page Templates

Email Newsletter
Weekly tips on front-end & UX.
Trusted by 182,000+ folks.

 Celebrating 10 million developers

 Custom Web Forms for Angular, React, & Vue. Your backend.
I like to think of WordPress as the gateway drug of web development. Many people who get started using the platform are initially merely looking for a comfortable (and free) way to create a simple website, often with the help of a WordPress page builder plugin. Kind of like “I’m just going to try it once.”
However, a good chunk of users don’t stop there. Instead, they get hooked. Come up with more ideas. Experiment. Try out new plugins. Discover Firebug. Boom. Soon there is no turning back. Does that sound like your story? As a WordPress user it is only natural to want more and more control over your website. To crave custom design, custom functionality, custom everything.
Luckily, WordPress is built for exactly that. Its flexible structure and compartmentalized architecture allows anyone to change practically anything on their site.
Among the most important tools in the quest for complete website control are page templates. They allow users to dramatically alter their website’s design and functionality. Want a customized header for your front page? Done. An additional sidebar only for your blog page? No problem. A unique 404 error page? Be. My. Guest.
If you want to know how WordPress page templates can help you achieve that, read on. But first, a little background information.
Template Files In WordPress
What are we talking about when we speak of templates in the context of WordPress? The short version is that templates are files which tell WordPress how to display different types of content.
The slightly longer version: every time someone sends a request to view part of your website, the WordPress platform will figure out what content they want to see and how that specific part of your website should be rendered.
For the latter, WordPress will attempt to use the most appropriate template file found within your theme. Which one is decided on the basis of a set order, the WordPress template hierarchy. You can see what this looks like in the screenshot below or in this interactive version.
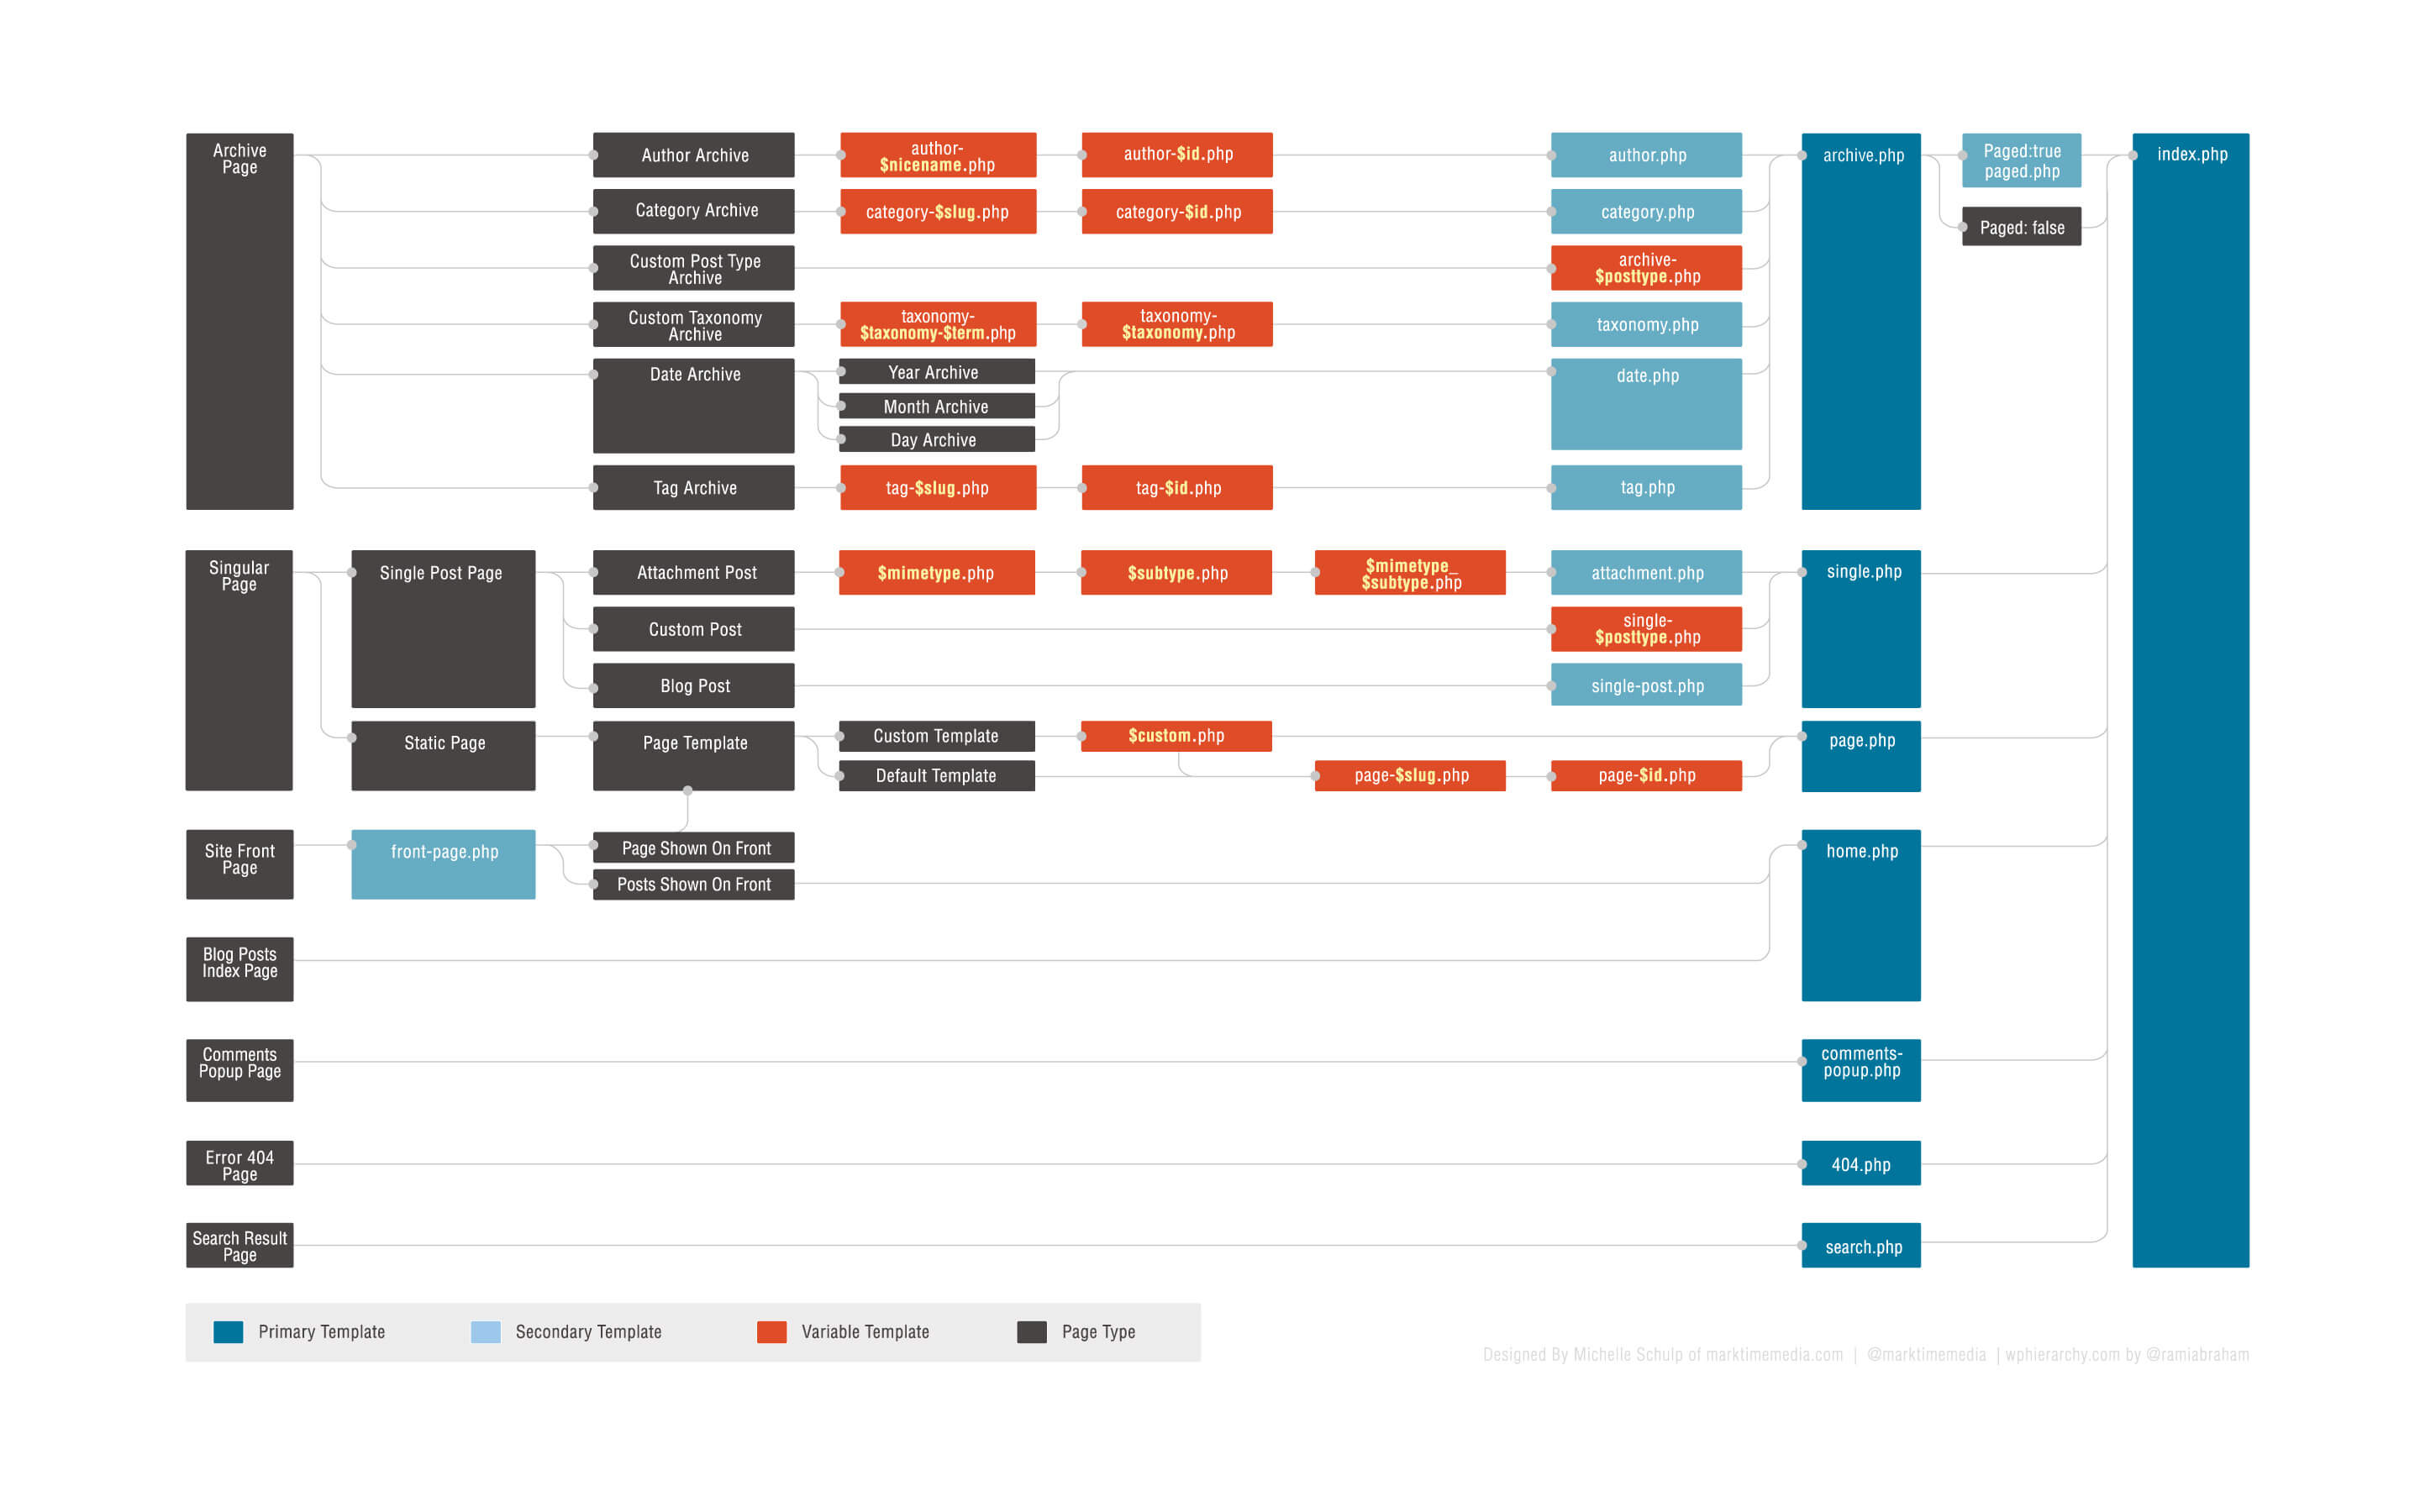
The template hierarchy is a list of template files WordPress is familiar with that are ranked to determine which file takes precedence over another.
You can think of it as a decision tree. When WordPress tries to decide how to display a given page, it works its way down the template hierarchy until it finds the first template file that fits the requested page. For example, if somebody attempted to access the address https://yoursite.com/category/news, WordPress would look for the correct template file in this order:
- category-{slug}.php: in this case category-news.php
- category-{id}.php>: if the category ID were 5, WordPress would try to find a file named category-5.php
- category.php
- archive.php
- index.php
At the bottom of the hierarchy is index.php. It will be used to display any content which does not have a more specific template file attached to its name. If a template file ranks higher in the hierarchy, WordPress will automatically use that file in order to display the content in question.
Page Templates And Their Use
For pages, the standard template is usually the aptly named page.php. Unless there is a more specific template file available (such as archive.php for an archive page), WordPress will use page.php to render the content of all pages on your website.
However, in many cases it might be necessary to change the design, look, feel or functionality of individual parts of your website. This is where page templates come into play. Customized page templates allow you to individualize any part of your WordPress site without affecting the rest of it.
You might have already seen this at work. For example, many WordPress themes today come with an option to change your page to full width, add a second sidebar or switch the sidebar’s location. If that is the case for yours, it was probably done through template files. There are several ways to accomplish this and we’ll go over them later.
First, however, a word of caution: since working with templates involves editing and changing files in your active theme, it’s always a good idea to go with a child theme when making these kinds of customizations. That way you don’t run the danger of having your changes overwritten when your parent theme gets updated.
How To Customize Any Page In WordPress
There are three basic ways to use custom page templates in WordPress: adding conditional statements to an existing template; creating specific page templates which rank higher in the hierarchy; and directly assigning templates to specific pages. We will take a look at each of these in turn.
Using Conditional Tags In Default Templates
An easy way to make page-specific changes is to add WordPress’s many conditional tags to a template already in use. As the name suggests, these tags are used to create functions which are only executed if a certain condition is met. In the context of page templates, this would be something along the line of “Only perform action X on page Y.”
Typically, you would add conditional tags to your theme’s page.php file (unless, of course, you want to customize a different part of your website). They enable you to make changes limited to the homepage, front page, blog page or any other page of your site.
Here are some frequently used conditional tags:
is_page(): to target a specific page. Can be used with the page’s ID, title, or URL/name.is_home(): applies to the home page.is_front_page(): targets the front page of your site as set under Settings → Readingis _category(): condition for a category page. Can use ID, title or URL/name likeis_page()tag.is_single(): for single posts or attachmentsis_archive(): conditions for archive pagesis_404(): applies only to 404 error pages
For example, when added to your page.php in place of the standard get_header(); tag, the following code will load a custom header file named header-shop.php when displaying the page https://yoursite.com/products.
if ( is_page('products') ) {
  get_header( 'shop' );
} else {
  get_header();
}
A good use case for this would be if you have a shop on your site and you need to display a different header image or customized menu on the shop page. You could then add these customization in header-shop.php and it would show up in the appropriate place.
However, conditional tags are not limited to one page. You can make several statements in a row like so:
if ( is_page('products') ) {
  get_header( 'shop' );
} elseif ( is_page( 42 ) ) {
  get_header( 'about' );
} else {
  get_header();
}
In this second example, two conditions will change the behavior of different pages on your site. Besides loading the aforementioned shop-specific header file, it would now also load a header-about.php on a page with the ID of 42. For all other pages the standard header file applies.
To learn more about the use of conditional tags, the following resources are highly recommended:
Creating Page-Specific Files In The WordPress Hierarchy
Conditional tags are a great way to introduce smaller changes to your page templates. Of course, you can also create larger customizations by using many conditional statements one after the other. I find this a very cumbersome solution, however, and would opt for designated template files instead.
One way to do this is to exploit the WordPress template hierarchy. As we have seen, the hierarchy will traverse a list of possible template files and choose the first one it can find that fits. For pages, the hierarchy looks like this:
- Custom page template
- page-{slug}.php
- page-{id}.php
- page.php
- index.php
In first place are custom page templates which have been directly assigned to a particular page. If one of those exists, WordPress will use it no matter which other template files are present. We will talk more about custom page templates in a bit.
After that, WordPress will look for a page template that includes the slug of the page in question. For example, if you include a file named page-about.php in your theme files, WordPress will use this file to display your ‘About’ page or whichever page can be found under https://www.yoursite.com/about.
Alternatively, you can achieve the same by targeting your page’s ID. So if that same page has an ID of 5, WordPress will use the template file page-5.php before page.php if it exists; that is, only if there isn’t a higher-ranking page template available.
(BTW, you can find out the ID for every page by hovering over its title under ‘All Pages’ in your WordPress back-end. The ID will show up in the link displayed by your browser.)
Assigning Custom Page Templates
Besides providing templates in a form that WordPress will use automatically, it is also possible to manually assign custom templates to specific pages. As you can see from the template hierarchy, these will trump any other template file present in the theme folder.
Just like creating page-specific templates for the WordPress hierarchy, this requires you to provide a template file and then link it to whichever page you want to use it for. The latter can be done in two different ways you might already be familiar with. Just in case you aren’t, here is how to do it.
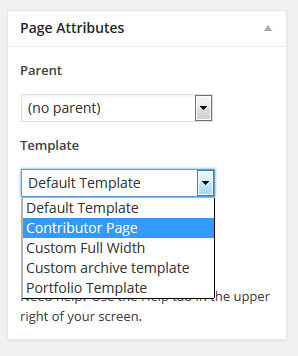
1. Assigning Custom Page Templates From The WordPress Editor
In the WordPress editor, you find an option field called ‘Page Attributes’ with a drop-down menu under ‘Template’.

Clicking on it will give you a list of available page templates on your WordPress website. Choose the one you desire, save or update your page and you are done.
2. Setting A Custom Template Via Quick Edit
The same can also be achieved without entering the WordPress editor. Go to ‘All Pages’ and hover over any item in the list there. A menu will become visible that includes the ‘Quick Edit’ item.
Click on it to edit the page settings directly from the list. You will see the same drop-down menu for choosing a different page template. Pick one, update the page and you are done.
Not so hard after all, is it? But what if you don’t have a custom page template yet? How do you create it so that your website looks exactly the way you want it? Don’t worry, that’s what the next part is all about.
A Step-By-Step Guide To Creating Custom Page Templates
Putting together customized template files for your pages is not that hard but here are a few details you have to pay attention to. Therefore, let’s go over the process bit-by-bit.
1. Find The Default Template
A good way is to start by copying the template which is currently used by the page you want to modify. It’s easier to modify existing code than to write an entire page from scratch. In most cases this will be the page.php file.
(If you don’t know how to find out which template file is being used on the page you want to edit, the plugin What The File will prove useful.)
I will be using the Twenty Twelve theme for demonstration. Here is what its standard page template looks like:
<?php
/**
 * The template for displaying all pages
 *
 * This is the template that displays all pages by default.
 * Please note that this is the WordPress construct of pages
 * and that other 'pages' on your WordPress site will use a
 * different template.
 *
 * @package WordPress
 * @subpackage Twenty_Twelve
 * @since Twenty Twelve 1.0
 */
get_header(); ?>

  <div id="primary" class="site-content">
    <div id="content" role="main">

      <?php while ( have_posts() ) : the_post(); ?>
        <?php get_template_part( 'content', 'page' ); ?>
        <?php comments_template( ’, true ); ?>
      <?php endwhile; // end of the loop. ?>

    </div><!-- #content -->
  </div><!-- #primary -->

<?php get_sidebar(); ?>
<?php get_footer(); ?>
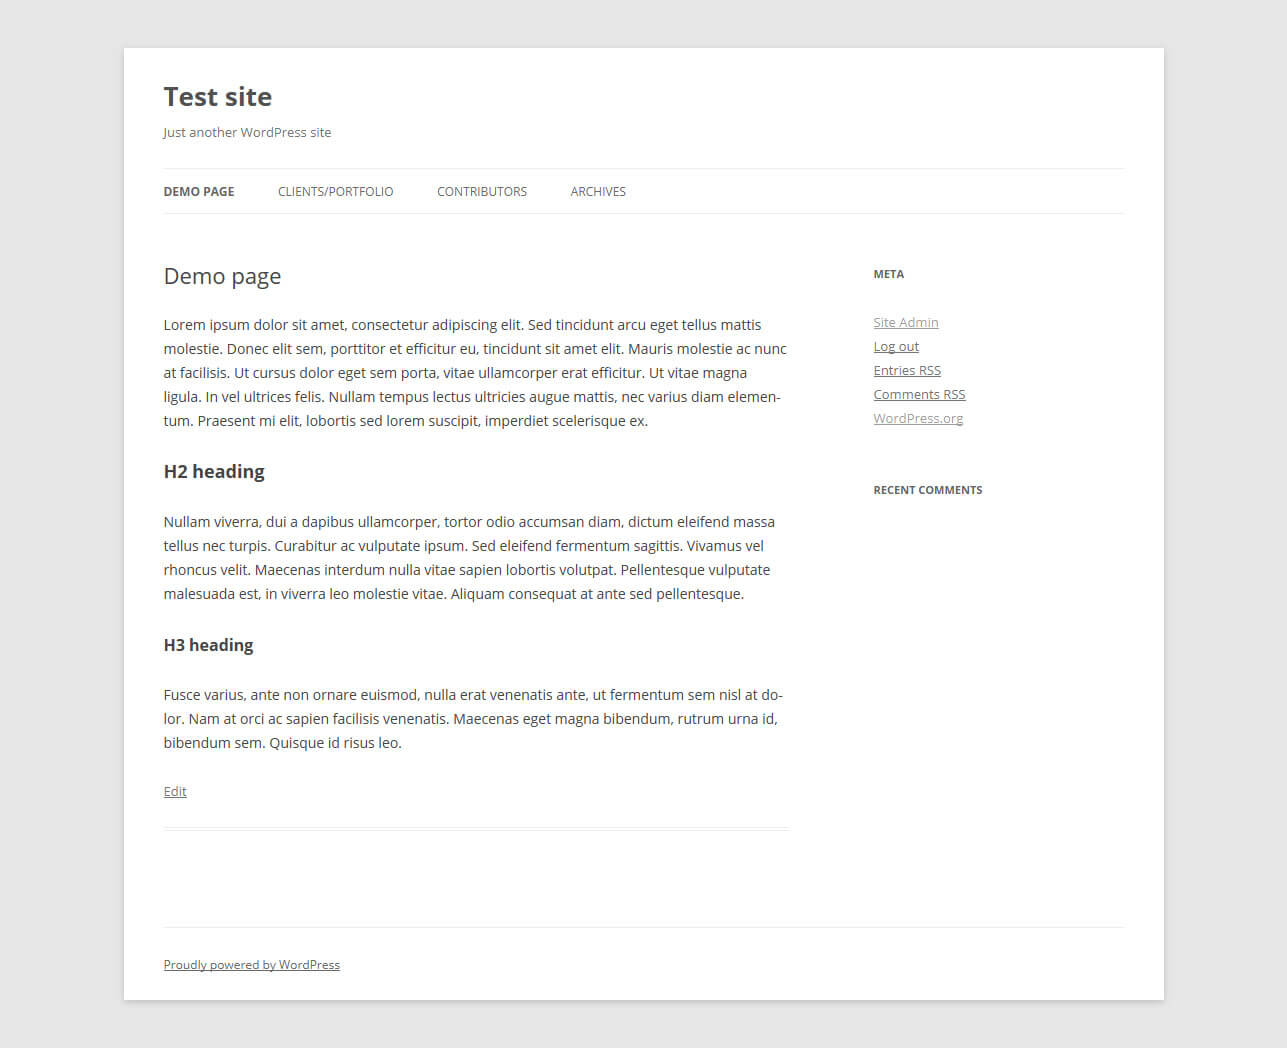
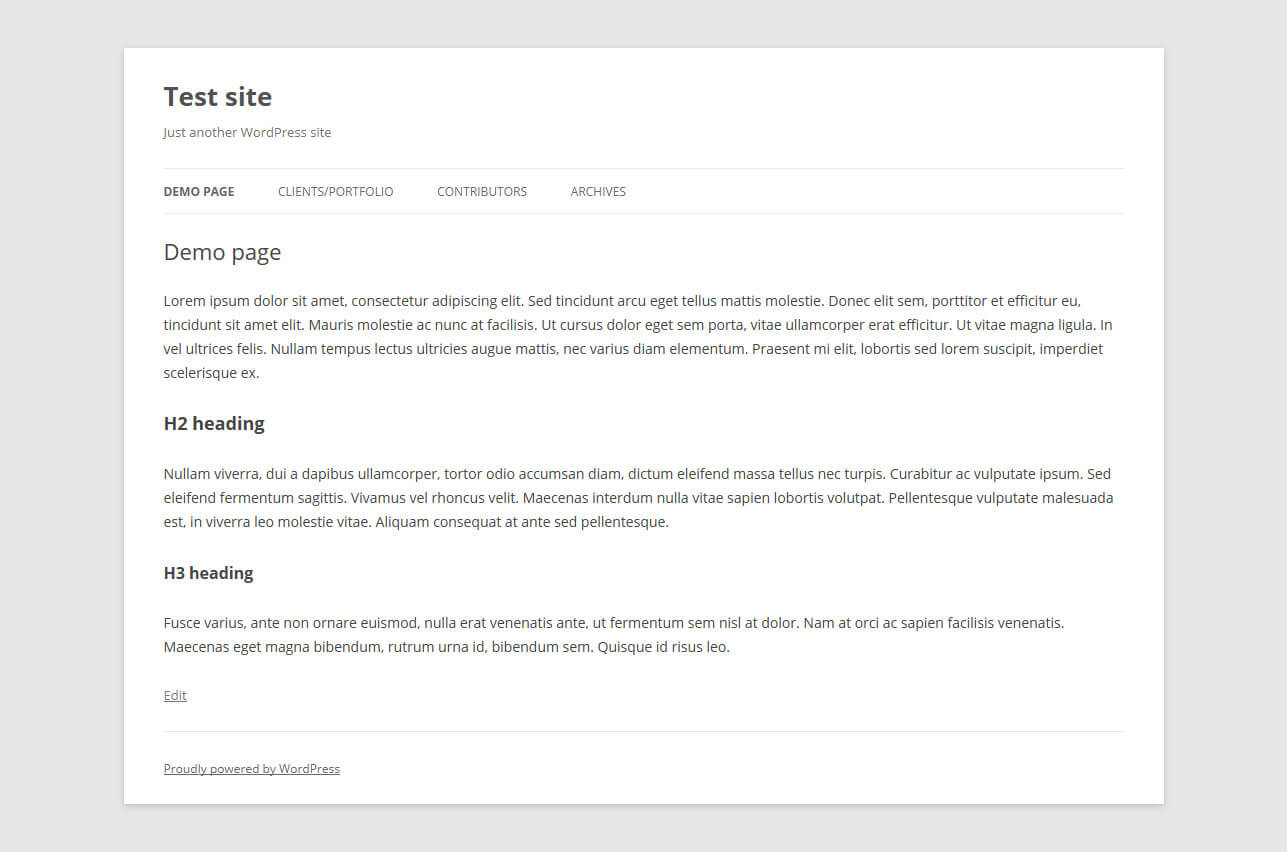
As you can see, nothing too fancy here: the usual calls for the header and footer, and the loop in the middle. The page in question looks like this:
2. Copy And Rename The Template File
After identifying the default template file, it’s time to make a copy. We will use the duplicated file in order to make the desired changes to our page. For that we will also have to rename it. Can’t have two files of the same name, that’s just confusing for everyone.
You are free to give the file any name you like as long as it doesn’t start with any of the reserved theme filenames. So don’t be naming it page-something.php or anything else that would make WordPress think it is a dedicated template file.
It makes sense to use a name which easily identifies what this template file is used for, such as my-custom-template.php. In my case I will go with custom-full-width.php.
3. Customize The Template File Header
Next we have to tell WordPress that this new file is a custom page template. For that, we will have to adjust the file header in the following way:
<?php
/*
 * Template Name: Custom Full Width
 * description: >-
  Page template without sidebar
 */

// Additional code goes here...
The name under ‘Template Name’ is what will be displayed under ‘Page Attributes’ in the WordPress editor. Make sure to adjust it to your template name.
4. Customize The Code
Now it’s time to get to the meat and potatoes of the page template: the code. In my example, I merely want to remove the sidebar from my demo page.
This is relatively easy, as all I have to do is remove <?php get_sidebar(); ?> from my page template since that’s what is calling the sidebar. As a consequence, my custom template ends up looking like this:
<?php
/*
 * Template Name: Custom Full Width
 * description: >-
  Page template without sidebar
 */

get_header(); ?>

<div id="primary" class="site-content">
  <div id="content" role="main">

    <?php while ( have_posts() ) : the_post(); ?>
      <?php get_template_part( 'content', 'page' ); ?>
      <?php comments_template( ’, true ); ?>
    <?php endwhile; // end of the loop. ?>

  </div><!-- #content -->
</div><!-- #primary -->

<?php get_footer(); ?>
5. Upload The Page Template
After saving my customized file, it is now time to upload it to my website. Custom page templates can be saved in several places to be recognized by WordPress:
- Your active (child) theme’s folder
- The folder of your main parent theme
- A subfolder within either of these
I personally like to create a folder named page_templates in my child theme and place any customized templates in there. I find this easiest to retain an overview over my files and customizations.
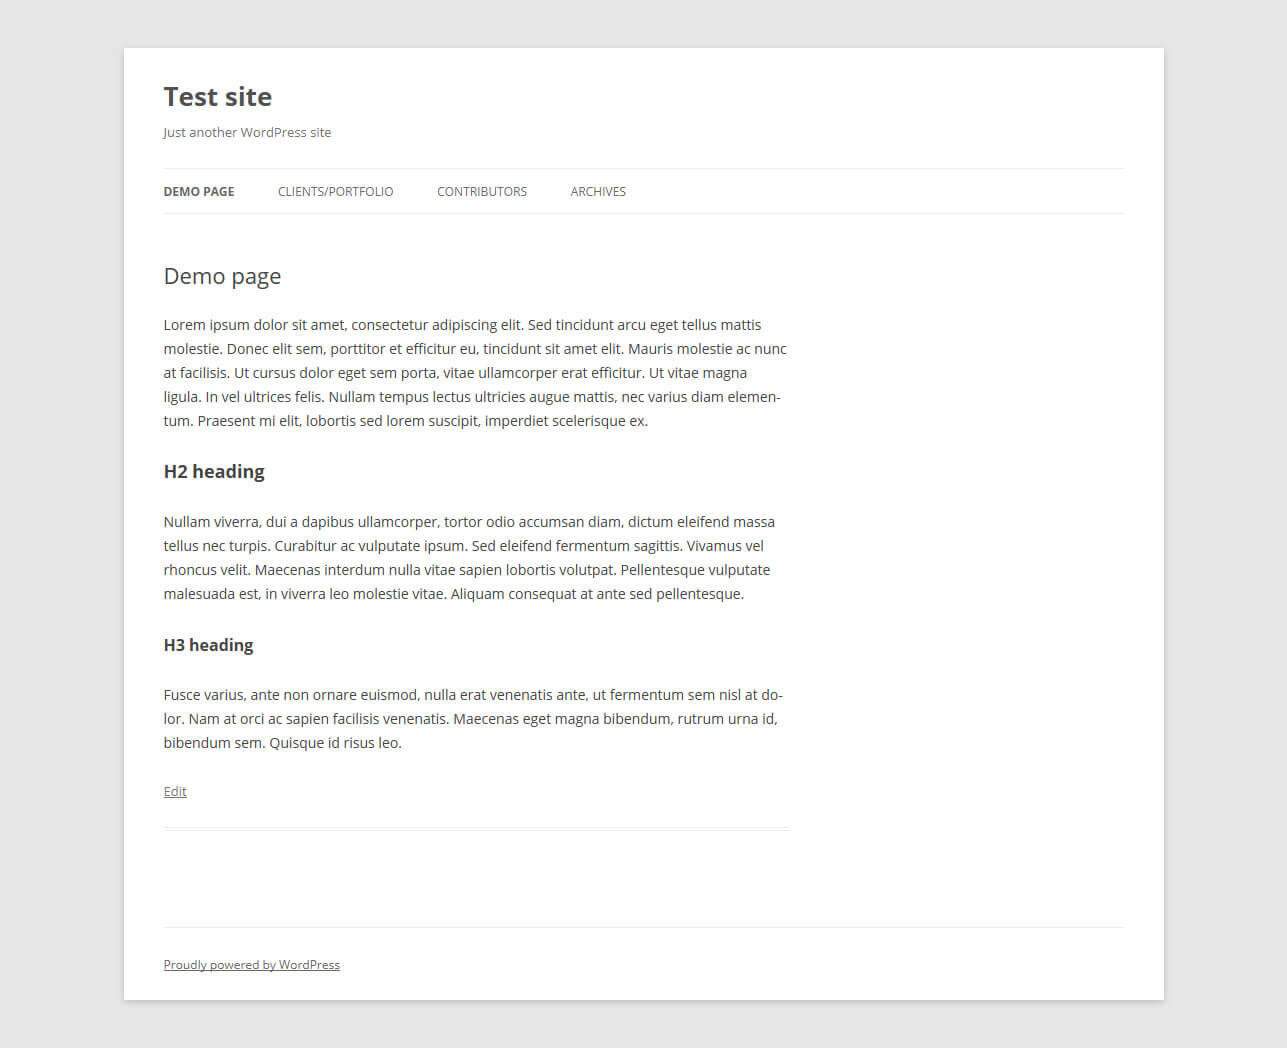
6. Activate The Template
As a last step, you need to activate the page template. As mentioned earlier, this is done under Page Attributes → Templates in the WordPress editor. Save, view the page and voilà! Here is my customized page without a sidebar:
Not so hard, is it? Don’t worry, you will quickly get the hang of it. To give you a better impression of what to use these page templates for, I will demonstrate additional use cases (including the code) for the remainder of the article.
Five Different Ways To Use Page Templates
As already mentioned, page templates can be employed for many different purposes. You can customize pretty much anything on any page with their help. Only your imagination (and coding abilities) stand in your way.
1. Full-Width Page Template
The first case we will look at is an advanced version of the demo template we created above. Up there, we already removed the sidebar by deleting <?php get_sidebar(); ?> from the code. However, as you have seen from the screenshot this does not actually result in a full-width layout since the content section stays on the left.
To address this, we need to deal with the CSS, in particular this part:
.site-content {
  float: left;
  width: 65.1042%;
}
The width attribute limits the element which holds our content to 65.1042% of the available space. We want to increase this.
If we just change it to 100%, however, this will affect all other pages on our site, which is far from what we want. Therefore, the first order here is to change the primary div’s class in our custom template to something else, like class=“site-content-fullwidth”. The result:
<?php
/*
 * Template Name: Custom Full Width
 * description: >-
  Page template without sidebar
 */

get_header(); ?>

<div id="primary" class="site-content-fullwidth">
  <div id="content" role="main">

    <?php while ( have_posts() ) : the_post(); ?>
      <?php get_template_part( 'content', 'page' ); ?>
      <?php comments_template( ’, true ); ?>
    <?php endwhile; // end of the loop. ?>

  </div><!-- #content -->
</div><!-- #primary -->

<?php get_footer(); ?>
Now we can adjust the CSS for our new custom class:
.site-content-fullwidth {
  float: left;
  width: 100%;
}
As a result, the content now stretches all the way across the screen.
2. Dynamic 404 Error Page With Widget Areas
The 404 error page is where every person lands who tries to access a page on your website that doesn’t exist, be it through a typo, a faulty link or because the page’s permalink has changed.
Despite the fact that getting a 404 is disliked by everyone on the Internet, if you are running a website the 404 error page is of no little importance. Its content can be the decisive factor on whether someone immediately abandons your site or sticks around and checks out your other content.
Coding a customized error page from scratch is cumbersome, especially if you are not confident in your abilities. A better way is to build widget areas into your template so you can flexibly change what is displayed there by drag and drop.
For this we will grab and edit the 404.php file that ships with Twenty Twelve (template hierarchy, remember?). However, before we change anything on there, we will first create a new widget by inserting the following code into our functions.php file:
register_sidebar( array(
  'name' => '404 Page',
  'id' => '404',
  'description'  => __( 'Content for your 404 error page goes here.' ),
  'before_widget' => '<div id="error-box">',
  'after_widget' => '</div>',
  'before_title' => '<h3 class="widget-title">',
  'after_title' => '</h3>'
) );
This should display the newly created widget in your WordPress back-end. To make sure that it actually pops up on the site, you need to add the following line of code to your 404 page in the appropriate place:
<?php dynamic_sidebar( '404' ); ?>In my case, I want to replace the search form (<?php get_search_form(); ?>) inside the template with my new widget, making for the following code:
<?php
/**
* The template for displaying 404 pages (Not Found)
*
* @package WordPress
* @subpackage Twenty_Twelve
* @since Twenty Twelve 1.0
*/
get_header(); ?>
<div id="primary" class="site-content">
<div id="content" role="main">
<article id="post-0" class="post error404 no-results not-found">
<header class="entry-header">
<h1 class="entry-title"><?php _e( 'This is somewhat embarrassing, isn&rsquo;t it?', 'twentytwelve' ); ?></h1>
</header>
<div class="entry-content">
<?php dynamic_sidebar( '404' ); ?>
</div><!-- .entry-content -->
</article><!-- #post-0 -->
</div><!-- #content -->
</div><!-- #primary -->
<?php get_footer(); ?>
After uploading the template to my site, it’s time to populate my new widget area:
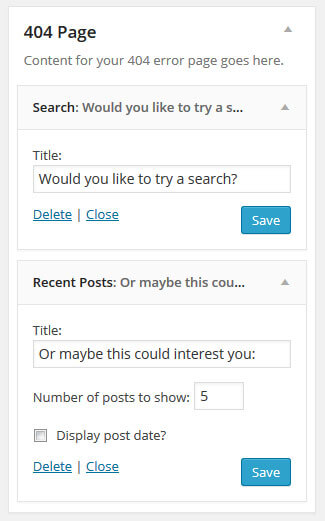
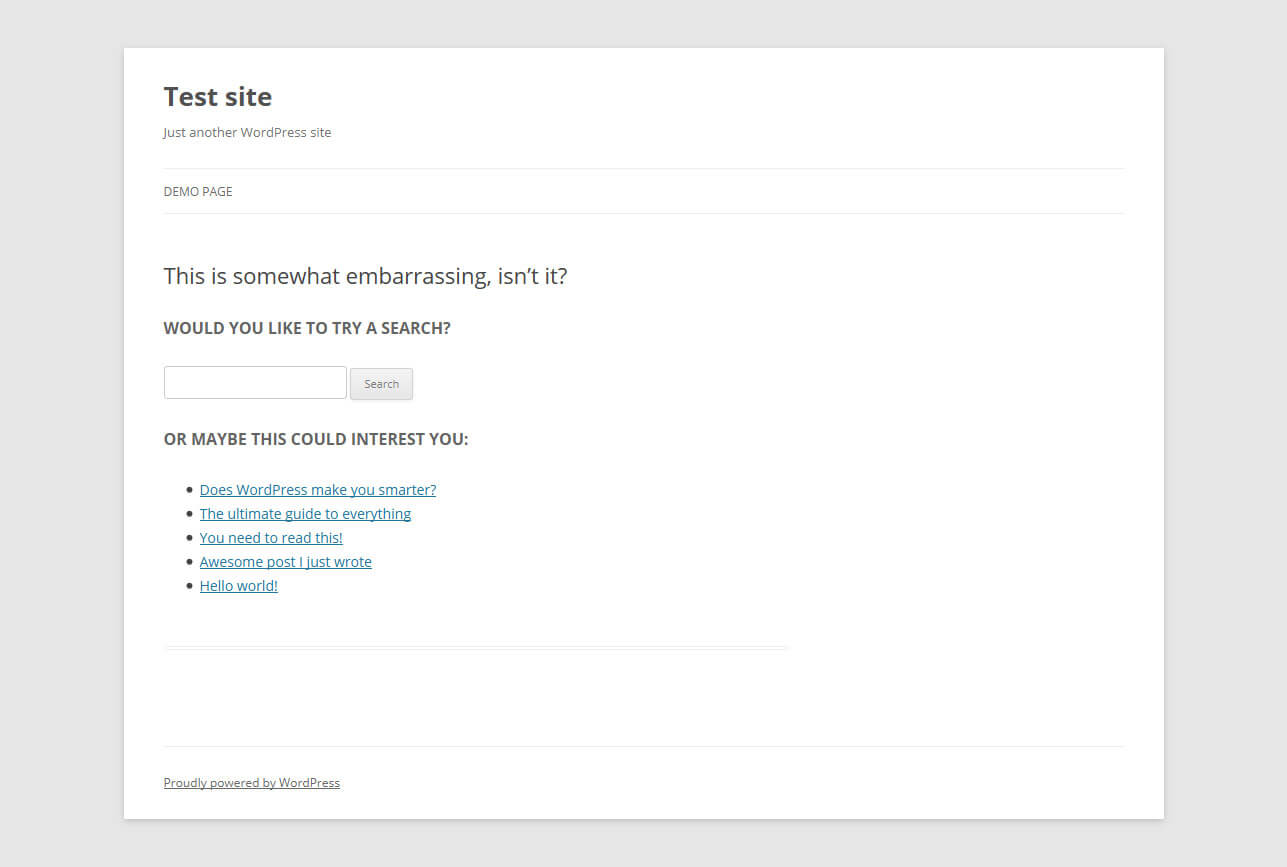
If I now take a look at the 404 error page, my newly created widgets show up there:
3. Page Template For Displaying Custom Post Types
Custom post types are a great way to introduce content that has its own set of data points, design and other customizations. A favorite use case for these post types are review items such as books and movies. In our case we want to build a page template that shows portfolio items.
We first need to create our custom post type (CPT). This can be done manually or via plugin. One plugin option I can wholeheartedly recommend is Types. It lets you easily create custom post types and custom fields.
Install and activate Types, add a custom post, make sure its slug is ‘portfolio’, customize any fields you need (such as adding a featured image), adjust any other options, and save.
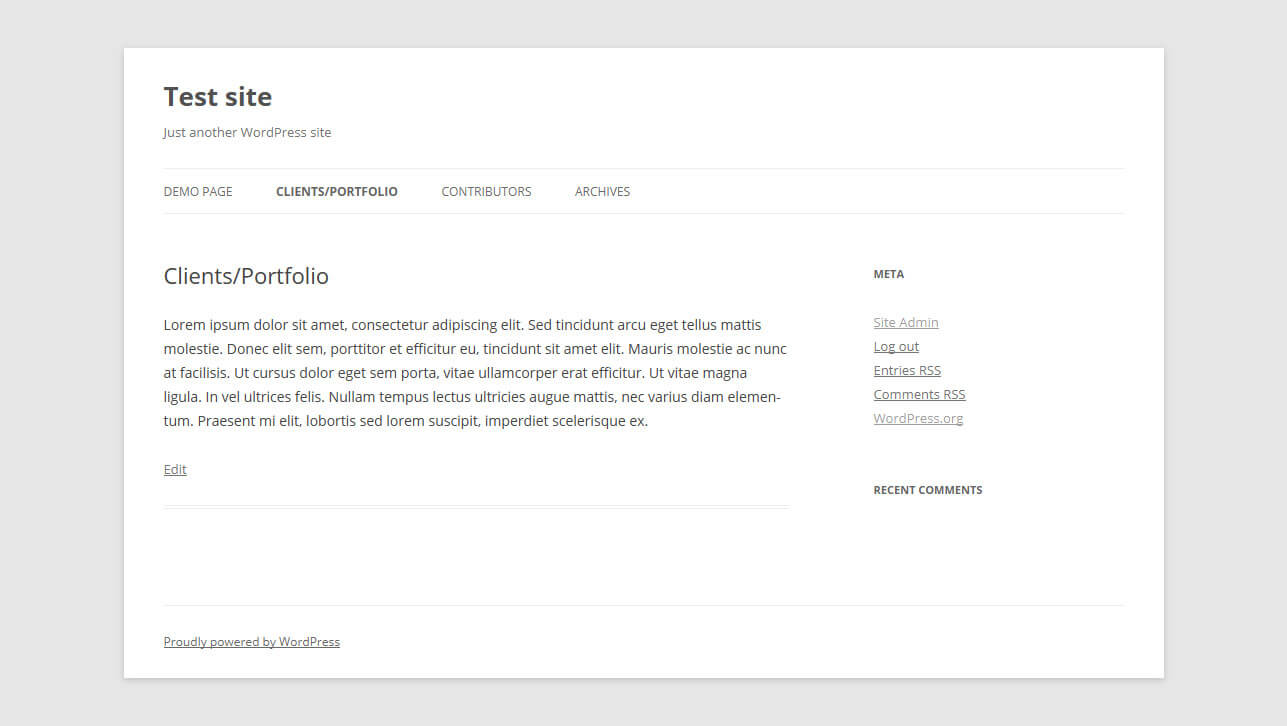
Now, that we have our portfolio post type, we want it to show up on our site. The first thing we’ll do is create the page in question. Be aware that if you chose ‘portfolio’ as the slug of your CPT, the page can not have the same slug. I went with my clients-portfolio and also added some example text.
After adding a few items in the ‘portfolio’ post type section, we want them to show up on our page right underneath the page content.
To achieve this we will again use a derivative of the page.php file. Copy it, call it portfolio-template.php and change the header to this:
<?php
/*
 * Template Name: Portfolio Template
 * description: >-
  Page template to display portfolio custom post types
 * underneath the page content
 */
However, in this case we will have to make a few changes to the original template. When you take a look at the code of page.php, you will see that it calls another template file in the middle, named content-page.php (where it says <?php get_template_part( 'content', 'page' ); ?>). In that file we find the following code:
<article id="post-<?php the_ID(); ?>" <?php post_class(); ?>>
  <header class="entry-header">
    <?php if ( ! is_page_template( 'page-templates/front-page.php' ) ) : ?>
    <?php the_post_thumbnail(); ?>
    <?php endif; ?>
    <h1 class="entry-title"><?php the_title(); ?></h1>
  </header>

  <div class="entry-content">
    <?php the_content(); ?>
    <?php wp_link_pages( array( 'before' => '<div class="page-links">' . __( 'Pages:', 'twentytwelve' ), 'after' => '</div>' ) ); ?>
  </div><!-- .entry-content -->
  <footer class="entry-meta">
    <?php edit_post_link( __( 'Edit', 'twentytwelve' ), '<span class="edit-link">', '</span>' ); ?>
  </footer><!-- .entry-meta -->
</article><!-- #post -->
As you can see, it is here that the page title and content are called. Since we definitely want those on our portfolio site, we will need to copy the necessary parts of this template to our page.php file. The result looks like this:
get_header(); ?>

<div id="primary" class="site-content">
  <div id="content" role="main">

    <?php while ( have_posts() ) : the_post(); ?>
      <header class="entry-header">
        <?php the_post_thumbnail(); ?>
        <h1 class="entry-title"><?php the_title(); ?></h1>
      </header>

      <div class="entry-content">
        <?php the_content(); ?>
      </div><!-- .entry-content -->

      <?php comments_template( ’, true ); ?>
    <?php endwhile; // end of the loop. ?>

  </div><!-- #content -->
</div><!-- #primary -->

<?php get_sidebar(); ?>
<?php get_footer(); ?>
To get the portfolio items onto our page, we will add the following code right beneath the the_content() call.
<?php
  $args = array(
    'post_type' => 'portfolio', // enter custom post type
    'orderby' => 'date',
    'order' => 'DESC',
  );

  $loop = new WP_Query( $args );
  if( $loop->have_posts() ):
  while( $loop->have_posts() ): $loop->the_post(); global $post;
    echo '<div class="portfolio">';
    echo '<h3>' . get_the_title() . '</h3>';
    echo '<div class="portfolio-image">'. get_the_post_thumbnail( $id ).'</div>';
    echo '<div class="portfolio-work">'. get_the_content().'</div>';
    echo '</div>';
  endwhile;
  endif;
?>
This will make the CPT show up on the page:
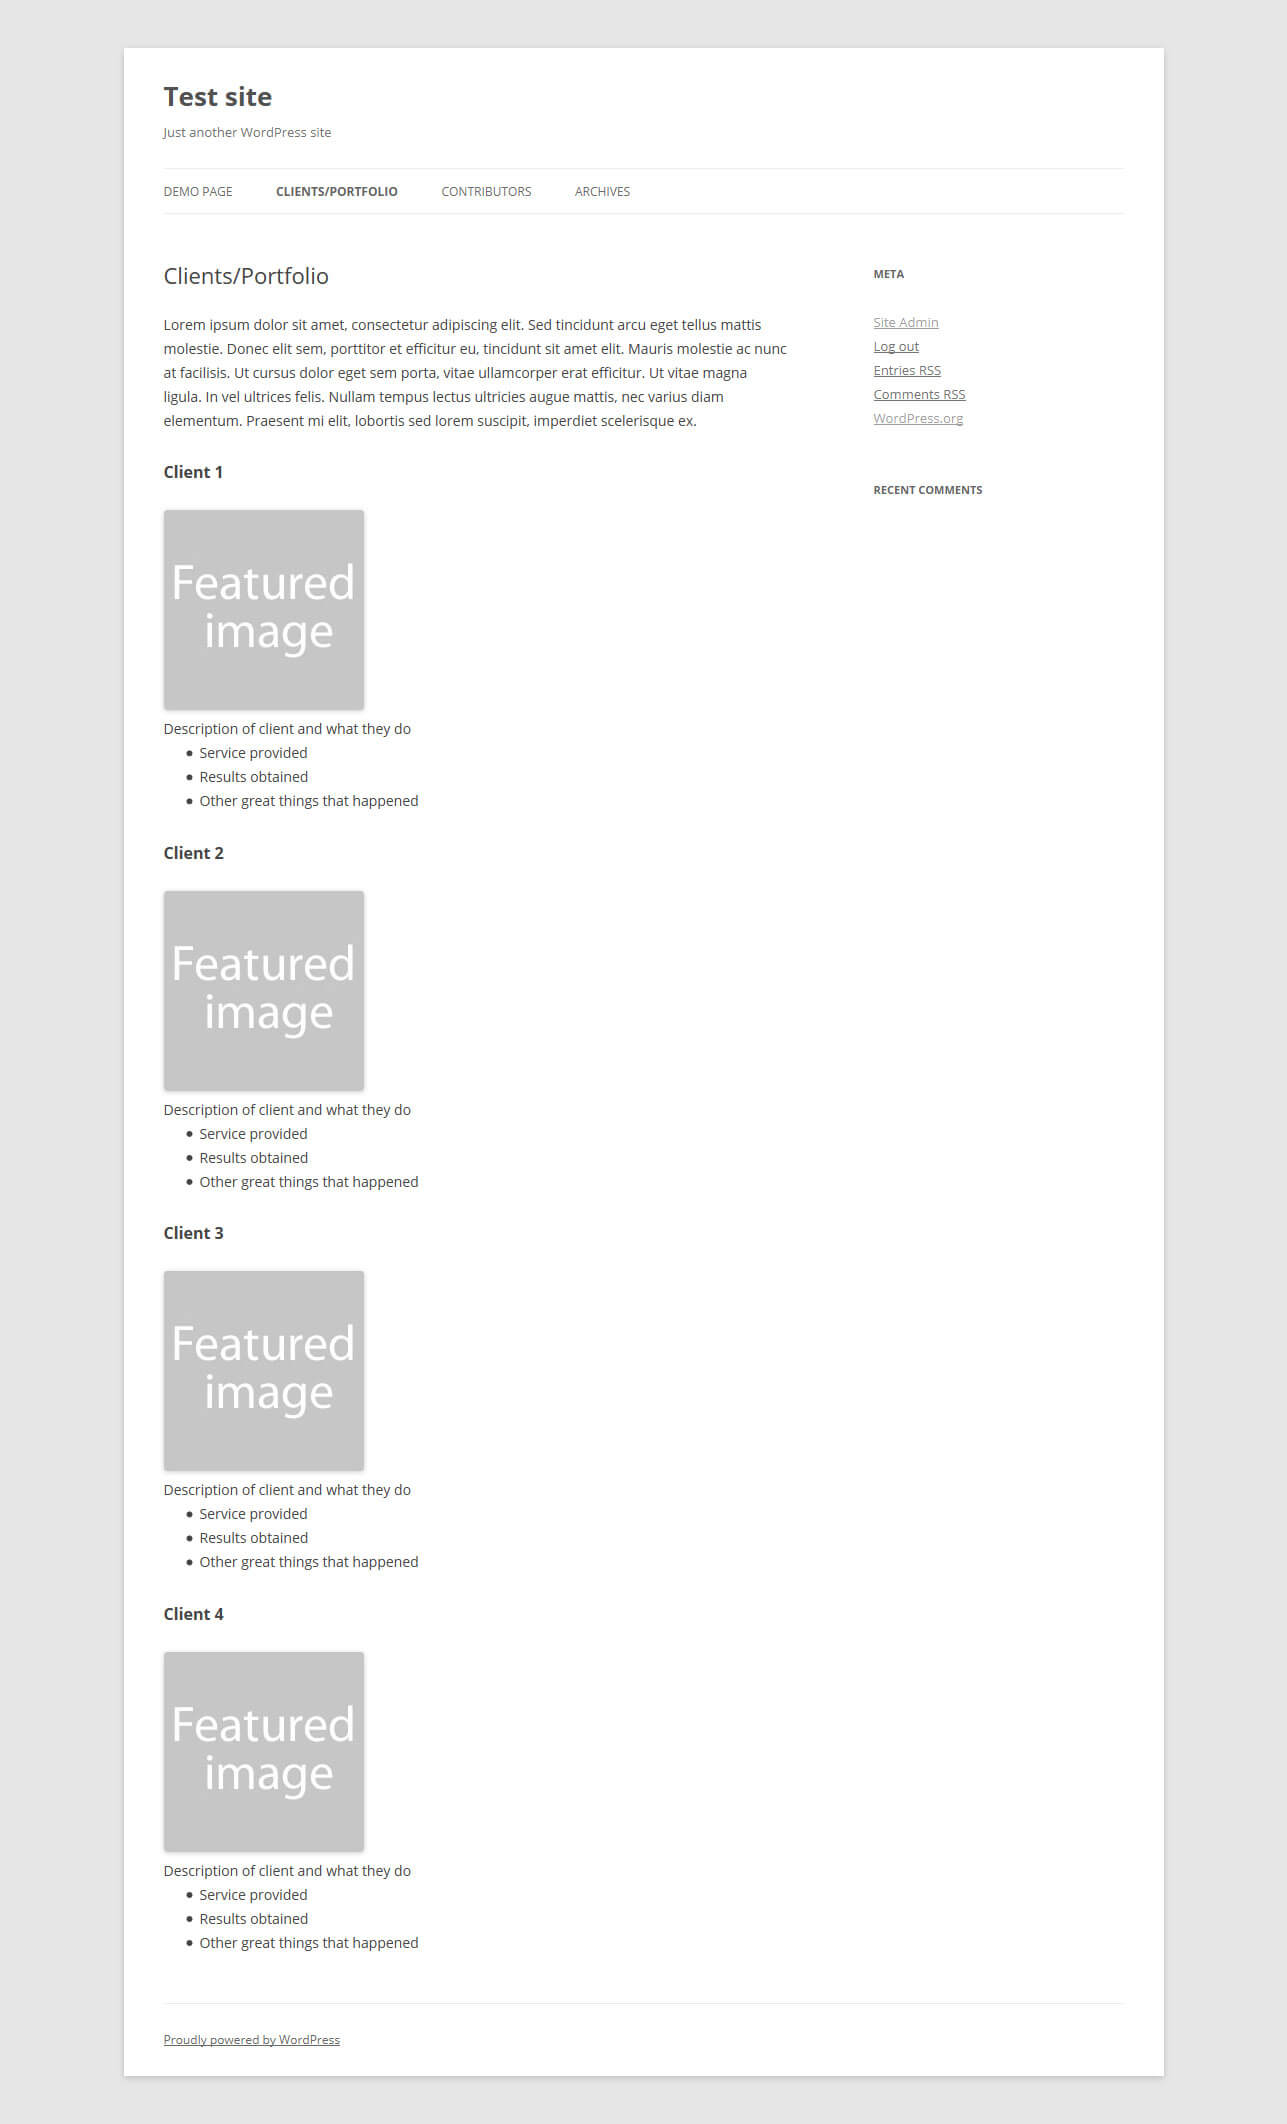
I’m sure we all agree that it looks less than stellar, so some styling is in order.
/* Portfolio posts */

.portfolio {
  -webkit-box-shadow: 0px 2px 2px 0px rgba(50, 50, 50, 0.75);
  -moz-box-shadow:    0px 2px 2px 0px rgba(50, 50, 50, 0.75);
  box-shadow:         0px 2px 2px 0px rgba(50, 50, 50, 0.75);
  margin: 0 0 20px;
  padding: 30px;
}
.portfolio-image {
  display: block;
  float: left;
  margin: 0 10px 0 0;
  max-width: 20%;
}
.portfolio-image img {
  border-radius: 0;
}
.portfolio-work {
  display: inline-block;
  max-width: 80%;
}
.portfolio h3{
  border-bottom: 1px solid #999;
  font-size: 1.57143rem;
  font-weight: normal;
  margin: 0 0 15px;
  padding-bottom: 15px;
}
Much better, don’t you think?
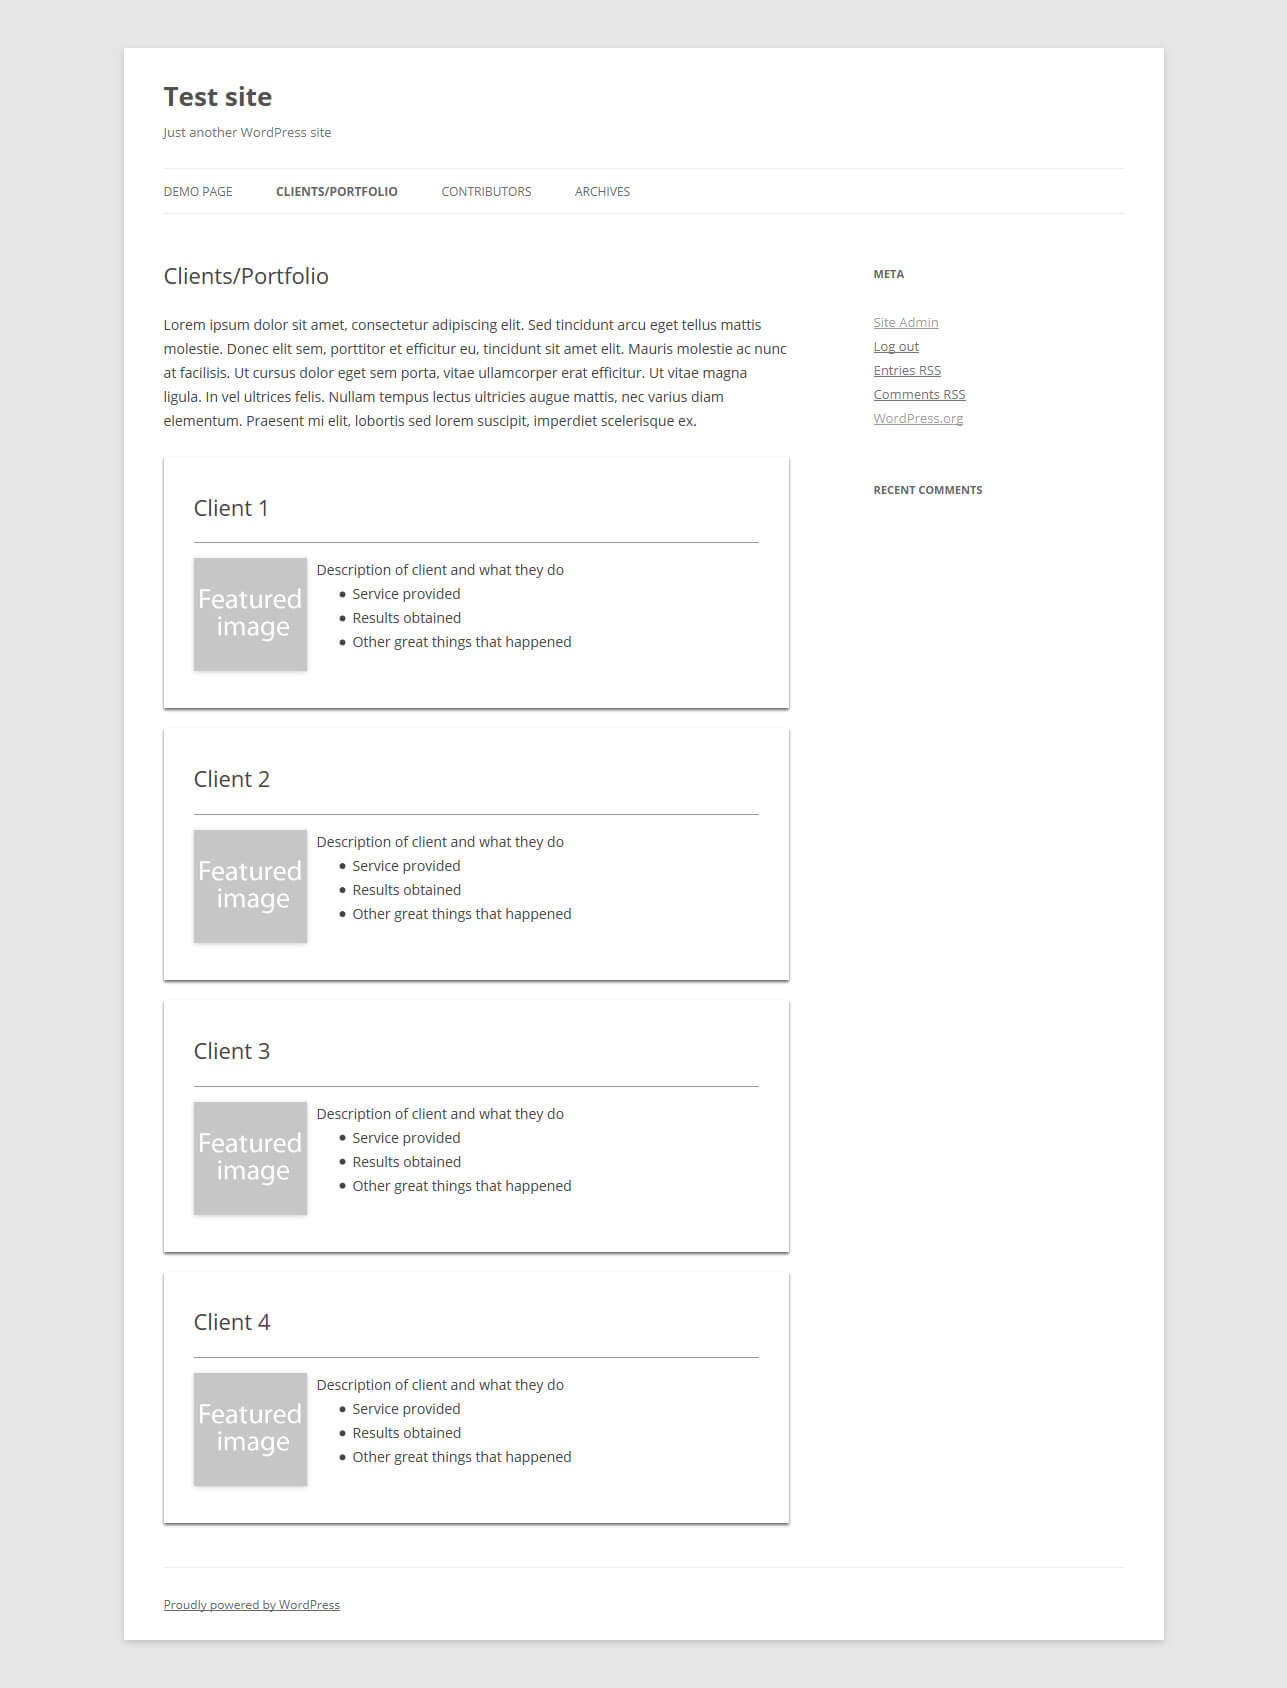
And here is the entire code for the portfolio page template:
<?php
/*
 * Template Name: Portfolio Template
 * description: >-
  Page template to display portfolio custom post types
 * underneath the page content
 */

get_header(); ?>

<div id="primary" class="site-content">
  <div id="content" role="main">

    <?php while ( have_posts() ) : the_post(); ?>

      <header class="entry-header">
        <?php the_post_thumbnail(); ?>
        <h1 class="entry-title"><?php the_title(); ?></h1>
      </header>

      <div class="entry-content">
        <?php the_content(); ?>
        <?php
          $args = array(
            'post_type' => 'portfolio', // enter custom post type
            'orderby' => 'date',
            'order' => 'DESC',
          );

          $loop = new WP_Query( $args );
          if( $loop->have_posts() ):
          while( $loop->have_posts() ): $loop->the_post(); global $post;
            echo '<div class="portfolio">';
            echo '<h3>' . get_the_title() . '</h3>';
            echo '<div class="portfolio-image">'. get_the_post_thumbnail( $id ).'</div>';
            echo '<div class="portfolio-work">'. get_the_content().'</div>';
            echo '</div>';
          endwhile;
          endif;
        ?>
      </div><!-- #entry-content -->
      <?php comments_template( ’, true ); ?>
    <?php endwhile; // end of the loop. ?>
  </div><!-- #content -->
</div><!-- #primary -->

<?php get_sidebar(); ?>
<?php get_footer(); ?>
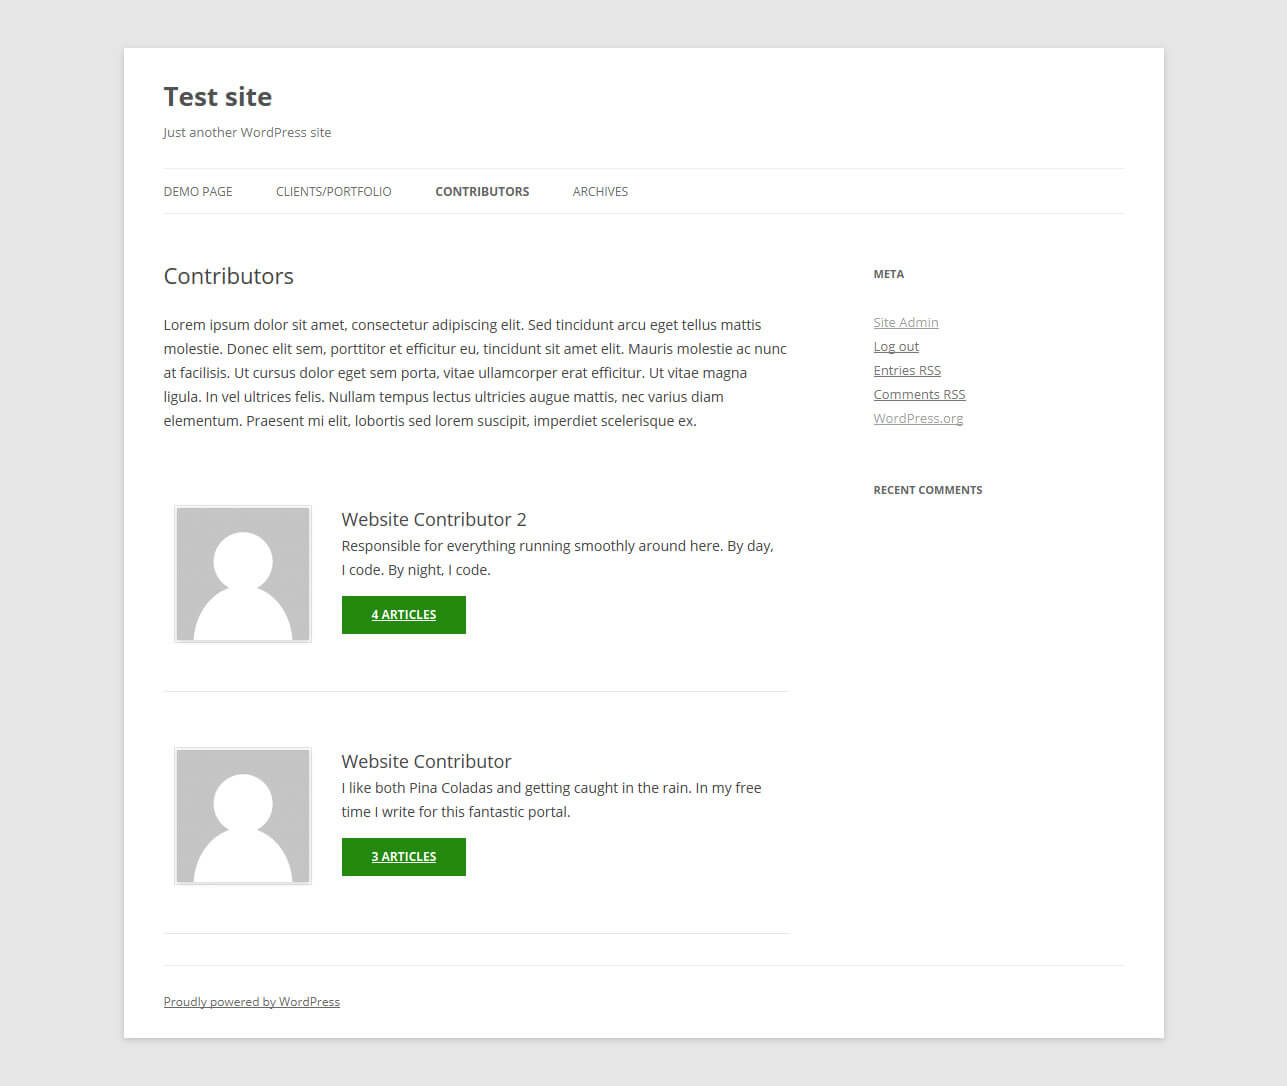
4. Contributor Page With Avatar images
Next up in our page template use cases is a contributor page. We want to set up a list of authors on our website, including their images and the number of posts they have published under their name. The end result will look like this:
We will again start out with our hybrid file from before and add the code for the contributor list to it. But what if you don’t know how to create such a thing? No worries, you can get by with intelligent stealing.
You see, the Twenty Fourteen default theme comes with a contributor page by default. You can find its template in the page-templates folder with the name contributors.php.
When looking into the file, however, you will only find the following call in there: twentyfourteen_list_authors();. Luckily, as an avid WordPress user you now conclude that this probably refers to a function in Twenty Fourteen’s function.php file and you would be right.
From what we find in there, the part that interests us is this:
<?php
// Output the authors list.
$contributor_ids = get_users( array(
  'fields'  => 'ID',
  'orderby' => 'post_count',
  'order'   => 'DESC',
  'who'     => 'authors',
));

foreach ( $contributor_ids as $contributor_id ) :
$post_count = count_user_posts( $contributor_id );
  // Move on if user has not published a post (yet).
  if ( ! $post_count ) {
    continue;
  }
?>

<div class="contributor">
  <div class="contributor-info">
    <div class="contributor-avatar"><?php echo get_avatar( $contributor_id, 132 ); ?></div>
    <div class="contributor-summary">
      <h2 class="contributor-name"><?php echo get_the_author_meta( 'display_name', $contributor_id ); ?></h2>
      <p class="contributor-bio">
        <?php echo get_the_author_meta( 'description', $contributor_id ); ?>
      </p>
      <a class="button contributor-posts-link" href="<?php echo esc_url( get_author_posts_url( $contributor_id ) ); ?>">
        <?php printf( _n( '%d Article', '%d Articles', $post_count, 'twentyfourteen' ), $post_count ); ?>
      </a>
    </div><!-- .contributor-summary -->
  </div><!-- .contributor-info -->
</div><!-- .contributor -->

<?php
endforeach;
?>
We will again add it below the call for the_content() with the following result:
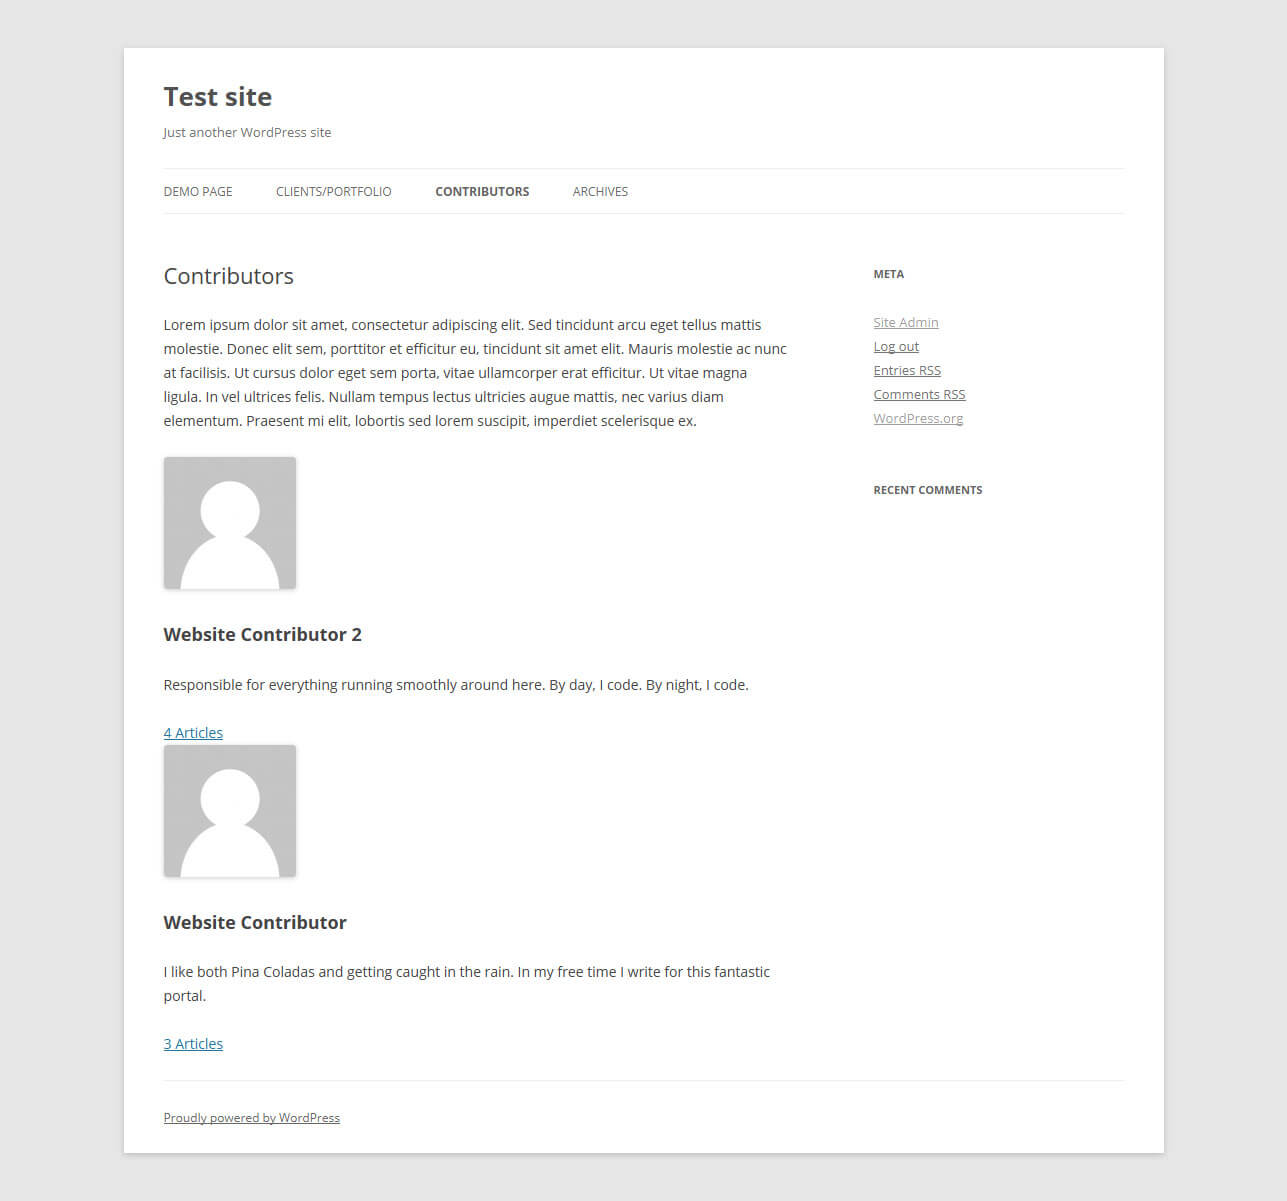
Now for a little bit of styling:
/* Contributor page */

.contributor {
  border-bottom: 1px solid rgba(0, 0, 0, 0.1);
  -webkit-box-sizing: border-box;
  -moz-box-sizing: border-box;
  box-sizing:      border-box;
  display: inline-block;
  padding: 48px 10px;
}
.contributor p {
  margin-bottom: 1rem;
}
.contributor-info {
  margin: 0 auto 0 168px;
}
.contributor-avatar {
  border: 1px solid rgba(0, 0, 0, 0.1);
  float: left;
  line-height: 0;
  margin: 0 30px 0 -168px;
  padding: 2px;
}
.contributor-avatar img{
  border-radius: 0;
}
.contributor-summary {
  float: left;
}
.contributor-name{
  font-weight: normal;
  margin: 0 !important;
}
.contributor-posts-link {
  background-color: #24890d;
  border: 0 none;
  border-radius: 0;
  color: #fff;
  display: inline-block;
  font-size: 12px;
  font-weight: 700;
  line-height: normal;
  padding: 10px 30px 11px;
  text-transform: uppercase;
  vertical-align: bottom;
}
.contributor-posts-link:hover {
  color: #000;
  text-decoration: none;
}
And that should be it. Thanks Twenty Fourteen!
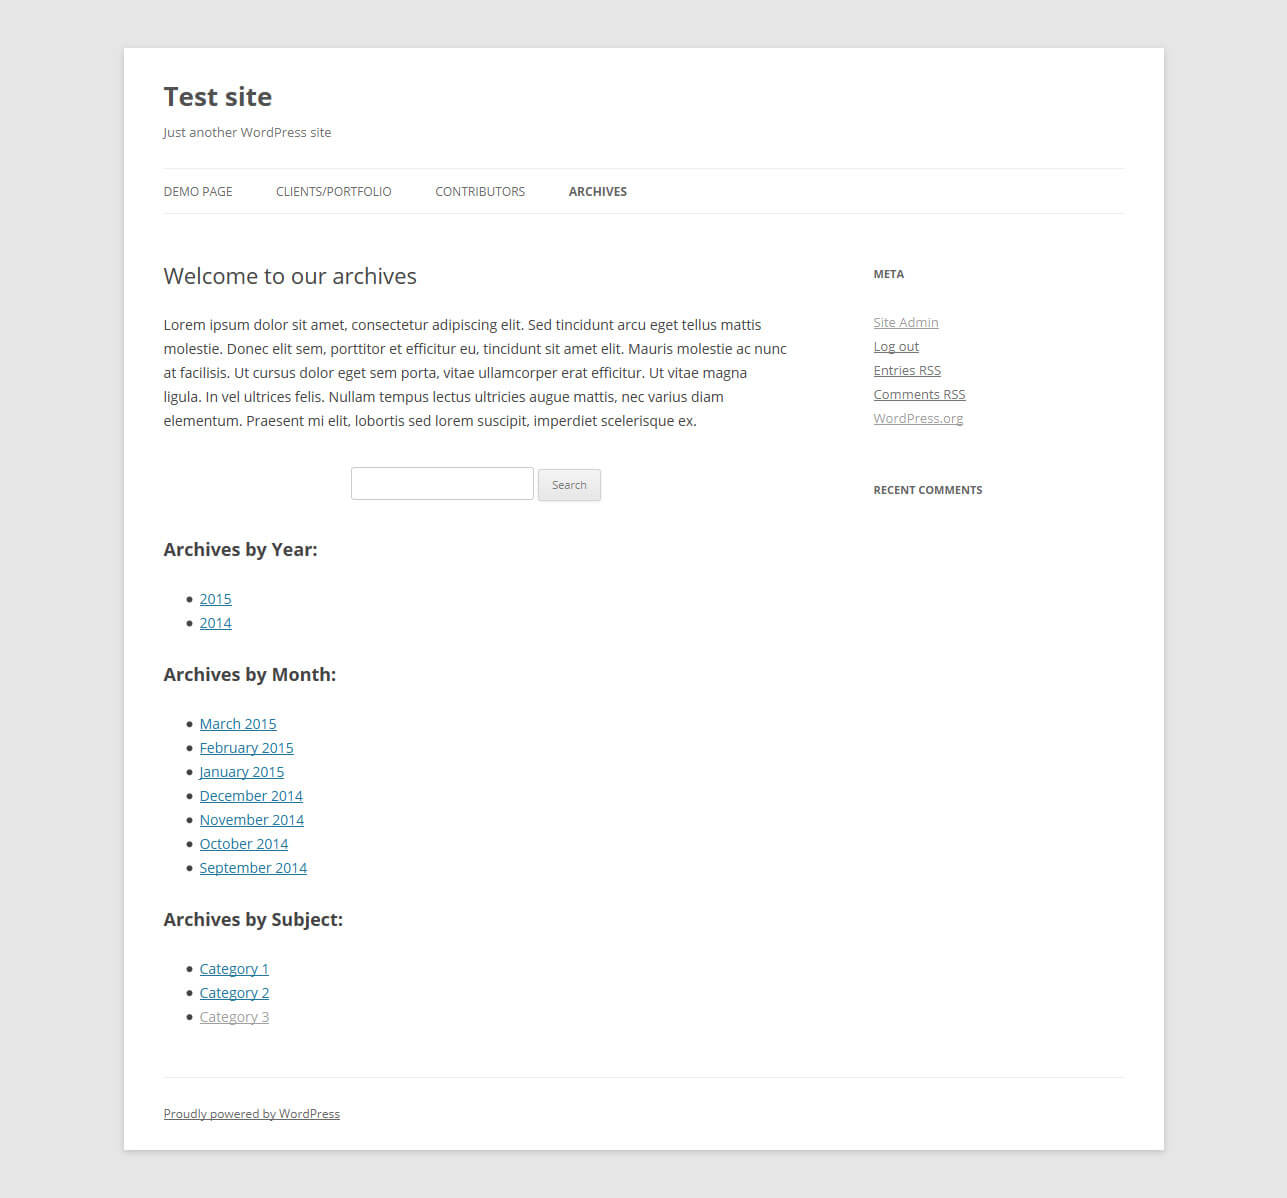
5. Customized Archive Page
Twenty Twelve comes with its own template for archive pages. It will jump into action, for example, when you attempt to view all past posts from a certain category.
However, I want something a little more like what Problogger has done: a page that lets people discover additional content on my site in several different ways. That, again, is done with a page template.
Staying with our mixed template from before, we will add the following below the the_content() call:
<div class="archive-search-form"><?php get_search_form(); ?></div>

<h2>Archives by Year:</h2>
<ul><?php wp_get_archives('type=yearly'); ?></ul>

<h2>Archives by Month:</h2>
<ul><?php wp_get_archives('type=monthly'); ?></ul>

<h2>Archives by Subject:</h2>
<ul> <?php wp_list_categories('title_li='); ?></ul>
Plus, a little bit of styling for the search bar:
.archive-search-form {
  padding: 10px 0;
  text-align: center;
}
And the result should look a little bit like this:
For completion’s sake, here is the entire file:
<?php
/**
 * Template Name: Custom archive template
 *
 */

get_header(); ?>

<div id="primary" class="site-content">
  <div id="content" role="main">

    <?php while ( have_posts() ) : the_post(); ?>

      <header class="entry-header">
        <?php the_post_thumbnail(); ?>
        <h1 class="entry-title"><?php the_title(); ?></h1>
      </header>

      <div class="entry-content">
        <?php the_content(); ?>

        <div class="archive-search-form"><?php get_search_form(); ?></div>

        <h2>Archives by Year:</h2>
        <ul><?php wp_get_archives('type=yearly'); ?></ul>

        <h2>Archives by Month:</h2>
        <ul><?php wp_get_archives('type=monthly'); ?></ul>

        <h2>Archives by Subject:</h2>
        <ul><?php wp_list_categories('title_li='); ?></ul>
      </div><!-- #entry-content -->

      <?php comments_template( ’, true ); ?>
    <?php endwhile; // end of the loop. ?>
  </div><!-- #content -->
</div><!-- #primary -->

<?php get_sidebar(); ?>
<?php get_footer(); ?>
Don’t forget to assign it to a page!
WordPress Page Templates In A Nutshell
On your way to mastering WordPress, learning to use page templates is an important step. They can make customizing your website very, very easy and allow you to assign unique functionality and design to as many or few pages as you wish. From adding widget areas to showing custom post types to displaying a list of your website’s contributors — the possibilities are practically endless.
Whether you use conditional tags, exploit the WordPress template hierarchy, or create page-specific template files is entirely up to you and what you are trying to achieve. Start off small and work your way up to more complicated things. It won’t be long before every part of your WordPress website will answer to your every call.
Do you have experience using page templates in WordPress? What other use cases can you add to the list? Any important details to add? Please tell us about it in the comments.
Image credit: Kevin Phillips
Further Reading
- How To Create And Customize A WordPress Child Theme
- Building A Custom Archive Page For WordPress
- Customizing WordPress Archives
- How To Host A WordPress Site On Amazon Lightsail


