Rapid Front-End Prototyping With WordPress

Email Newsletter
Weekly tips on front-end & UX.
Trusted by 182,000+ folks.

 Custom Web Forms for Angular, React, & Vue. Your backend.
 Celebrating 10 million developers


Prototyping is one of the best things that can happen within a project, yet it is extremely underutilized. Prototyping makes a project better suited to users, elevates user experience, increases the quality of your final code, and keeps clients happy.
The problem is that developers often see prototyping as a waste of time, since high-quality prototypes take considerable effort to make. I want to show you that by using WordPress, highly interactive prototypes with great visuals are not at all that difficult to make.

First, we’ll look at some basic prototyping concepts, then set up a test server from scratch. We’ll continue by converting an HTML template to a WordPress theme and learning how to use its items to create what we need. We’ll also learn how to add front-end and server-side functionality to our prototype.
While all this seems complex, beginners should be able to follow along easily, including the “create your own server” section, which is a cinch!
About Prototyping
“[A] prototype is an early sample, model, or release of a product built to test a concept or process or to act as a thing to be replicated or learned from.” —Wikipedia
This sentence neatly sums up the pros and cons of a prototype. The advantage of creating a prototype is that it lets you test an idea and learn from the process. It allows you to make a reasonable assumption about the feasability of your project before you put in hundreds of hours of work.
One of the downsides is that prototypes are made so that we may learn from them. Often, designers and coders look on this as wasted time. Why make a protoype when we could be working on the real thing? Who is going to pay us for the time we spend prototyping?
To be honest, these are tricky questions. For smaller projects, no one will pay you for it, but your project will be better for it; this, in turn, leads to bigger and better projects. In most cases, the time you spend prototyping is regained while building the product anyway!
It also appears that designers like to prototype a lot more than developers. The root of the issue here is speed. A designer could prototype a design a lot faster than a developer, since the latter needs to build a quick framework, implement a design and do a lot of fiddly things which take time.
Fidelity And Functionality
We can approach prototypes by looking at two key features: fidelity and functionality. Fidelity refers to how detailed the prototype is visually, while functionality refers to the level of interaction possible within the system. Let’s look at how levels of fidelity and functionality in prototypes pair up.
Low-Functionality, Low-Fidelity
These prototypes are easy to make. They could be simple drawings, or Balsamiq mock-ups. There is minimal interaction — or none at all — and visually the prototype has very little to do with the final product.
Low-Functionality, High-Fidelity
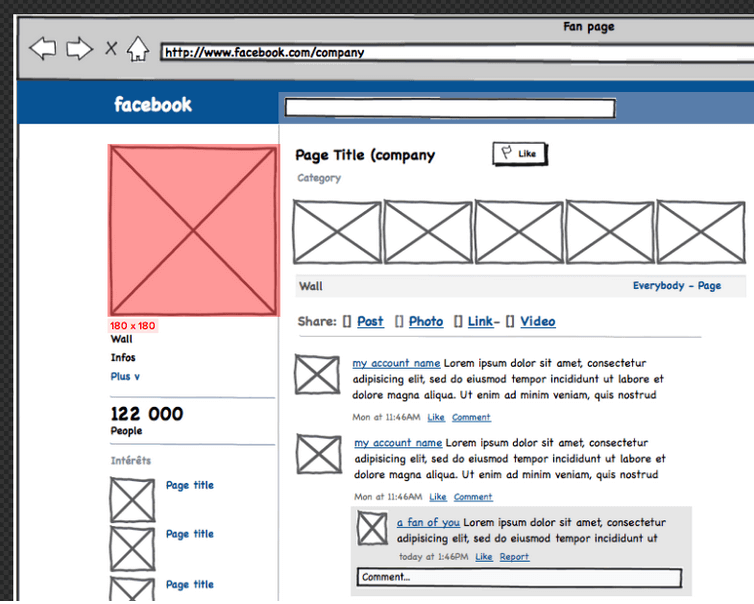
Increasing the fidelity while keeping functionality low is also quite common. A good example would be a Photoshop design file which could contain final design elements. Again, there is next to no interaction here but plenty of visual detail, enough to put it close to the final product in terms of design.
High-Functionality, Low-Fidelity
These prototypes are a bit more difficult but you can still make them without too much effort. Before you create the login/forgot password form for a large website, you might want to test if everything works by just dropping in a form and business logic strictly in HTML and PHP — no CSS, JavaScript or consideration of the context of the form.
Using front-end frameworks like Bootstrap or Foundation can can increase your fidelity somewhat, but you’d need to write a good amount of CSS to make it your own.
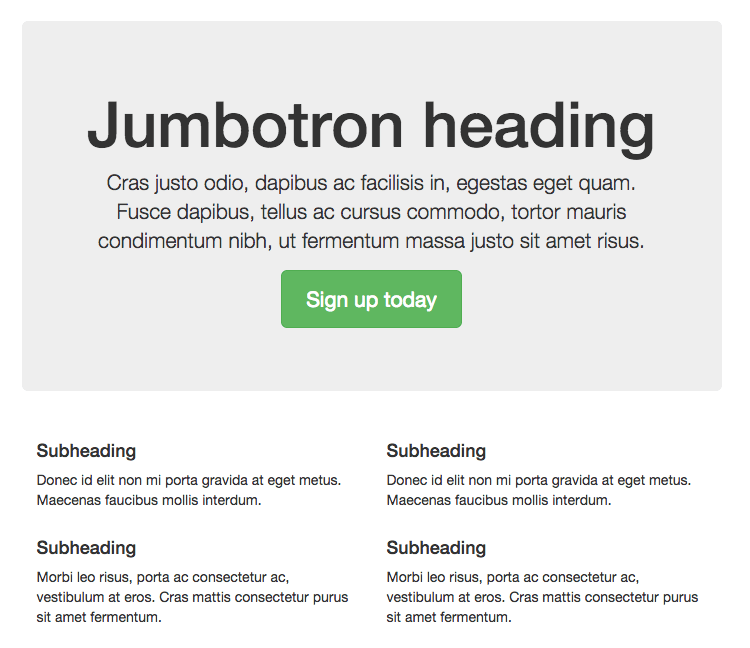
I would still consider these low-fidelity mock-ups because each front-end framework looks generic by default. That’s fine for testing the principle, but it doesn’t increase fidelity to a point where more sensitive clients would be able to visualize what the final product will be like.
High-Functionality, High-Fidelity
Prototypes like this are rarely seen because creating them can take more time than is worth it. Why create something so similar to the website-to-be when you could be working on the actual site?
High-functionality, high-fidelity prototypes contain a high degree of interactivity while also being a much closer facsimile of the final product. Users can follow links, submit forms and do many other things that help them see what the end result will be like.
The real trick is managing the time spent on making such prototypes — which is where WordPress comes in.
Which One To Use
There is, of course, no simple answer to this question. A high-fidelity, high-functionality prototype is closest to the real thing, but it takes time to make; for simpler projects, it may not be worth the time.
Low-fidelity, low-functionality prototypes are simplistic and cannot be interacted with, but for small projects and close-knit teams, perhaps they’re all that is needed.
Several factors need to be considered:
- How well your team works together
- How large your project is
- How visually and technically oriented your client is
- How well you understand the product you are building
- How many people will be involved other than programmers and designers
In my experience, the most important factors are the client and the project’s complexity. Even if I understand the project well, I would like a high-fidelity, high-functionality prototype just in case. One of the fundamental mistakes you can make in projects is thinking you know them well.
For complex, large-scale projects you should always create prototypes with a high degree of freedom. The more systems and subsystems you need to build, the more intertwined they become and the more places things can go wrong.
The client can be an even bigger factor. Often, clients do not know what they want. They may not be design- or code-oriented, which means they will equate a low-fidelity prototype with bad design and missing features — even if you tell them what the prototype is for. As a result, a clearer visual aid is sometimes called for to enhance communication.
Since I will be talking about high-fidelity and high-functionality prototypes from now on, I will be calling them high-quality prototypes. This is not at all a reflection on other prototypes; a low-fideltiy, low-functionality prototype can also be created with high quality.
Considerations For High-Quality Prototypes
There are a number of considerations when making high-quality prototypes. What platform they should be built on, what functions need to be added (or not added), how intricate should we make the design, and so on.
The Platform
The platform chosen should be one which allows you to work fast and quickly add features as well. Bootstrap, Foundation and other frameworks are great, but they offer very little functionality, since they are purely front-end. Using them can still be a good idea, but not on their own.
On the other side of the spectrum, we have PHP frameworks like Laravel, which is excellent for creating high-quality modular code. This is out of the question, though, since we have to write too much business logic ourselves just to get a site up and running.
WordPress strikes a good balance here because it is essentially a bag of useful functions combined with a reasonably flexible way to template pages quickly. I want to stress that you should use a platform you feel comfortable with. If you’re amazing at using Laravel, by all means go with it.
The Design
You can create a simple design framework for yourself, but that also takes quite some time. This is the place to use front-end frameworks to lighten your workload.
What I recommend is getting a good pre-made HTML admin template. Many of these templates use Bootstrap or Foundation anyway, and put a bunch of elements at your fingertips. In addition, they’ve already styled the elements of their frameworks into something less generic, which is just what we need. With a little work they can be converted to WordPress themes and will facilitate extremely quick prototyping.
I don’t use bespoke WordPress themes because they are for presenting content, not creating application architecture. You won’t be able to create a menu or a form anywhere easily, and your code will likely be a mess by the end.
Depth Of Functionality
Depth of functionality is all about interactivity. Since you have control over a CMS you can, in theory, make things work properly — login forms could genuinely log you in. You probably don’t want to spend your time coding in all the functionality. That isn’t really the point here.
For example, is the login form really important? Everyone knows how logging in works. Perhaps the form can be allowed to be blank, and the login button logs you in immediately as a test user.
If you are building a finance management app, however, you may want to spend some time making sure that the “Add transaction” form works as expected. Real data can be listed and submitted adding a great deal of depth to your prototype.
Prototyping With WordPress
I think WordPress is a great choice for prototyping because of the flexibility of templating and the number of functions you have at your disposal. Logging in and out, adding metadata, querying items — a lot of base functionality is already there.
I like to choose a pre-made HTML admin theme that looks close to what we’ll be doing in the final iteration of the design. You can find a large number of premium admin themes on Themeforest but you can also grab some good free ones via a quick Google search. For my examples I will be using a free admin theme called AdminLTE.
When choosing an admin theme try to gauge what features you will need. Concentrate on the rapid aspect of prototyping, not making sure that your prototype looks like the final design.
A Complete Example
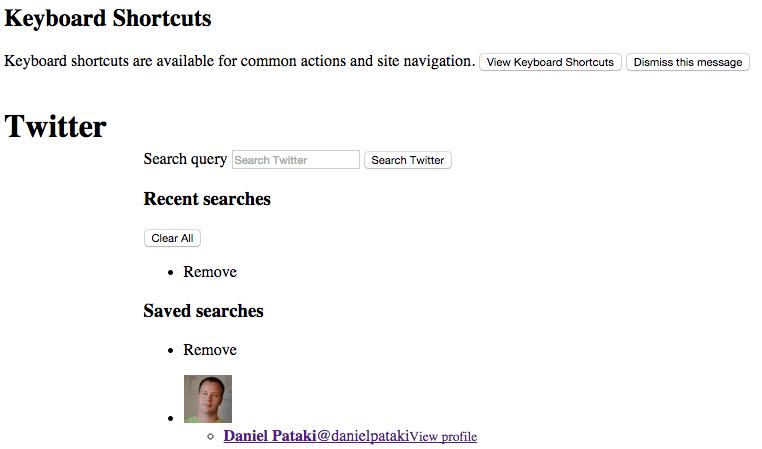
When I started this article, I wanted to provide a complete example of how I use WordPress to prototype. I ended up recording a video of the process and writing about it in a bit more detail. The video below will walk you through my process of creating a prototype of the Twitter front page.
Following the video I’ll go into even more detail, giving you some instruction about setting up test servers, using the WordPress menu system to populate menus, and much more. I recommend watching the video first, and then looking at the details below, as they will be a lot clearer.
An In-Depth Guide To A Prototyping Setup
Step 1: Set Up A Server
This sounds really difficult but don’t worry, it’s all very simple. We’ll use free tools and copy-pastable code to get things done! First of all you’ll need to download and install VirtualBox and Vagrant. In each case simply select your OS and install the downloaded file.
Once done, create a folder anywhere on your computer to hold your website-to-be. Let’s call this prototyper, I’ll put it in my home directory on Mac OS X. This folder will contain all the data for our website, WordPress installation and all.
Open the terminal or the command prompt and navigate to the folder you just created. This can be done with the cd command. In my case, I would type cd ~/prototyper. On Windows you may need to use something like cd C:\users\Username\prototyper.
To set up a Vagrant server you will need a Vagrant file and an optional setup.sh file. Never fear, I’ve created both for you. Download this GitHub Gist and extract it. Copy the contained files into the folder you created previously.
Back in your command prompt or terminal type vagrant up. This will set up the server for you. The first time you do this it may take 10–20 minutes — the box needs to be downloaded and configured and run. Any time you do this again, it will take no more than 15–20 seconds.
Once done, you should be able to go to https://192.168.55.55 in your browser to see your server up and running. We won’t go into configuration details here but you can create multiple sites with one Vagrant server easily, and you can load up your site using prototyper.local instead of an IP address and much more!
Step 2: Install WordPress
This one isn’t difficult. Now that you have a server up and running you should be able to follow the Famous 5-Minute Install from WordPress. Before you can install WordPress you need to have a database created for it, let’s do that now.
Back in the terminal type vagrant ssh. Once that command has run you are now inside your virtual machine, ready to perform some tasks. Type mysql -uroot -p and type root when prompted for the password. You should now be logged into your MySQL console.
Type CREATE DATABASE prototyper; and press Enter. This will create a database named “prototyper” for your WP installation. Don’t forget that the username for your MySQL server is “root” and so is the password.
Continue by going to WordPress.org and downloading the latest WordPress version. Extract the contents of the archive and go into the created WordPress directory. Copy all files and paste them into the html directory which was created in your server’s folder when you first ran vagrant up. If you created the directory at ~/prototyper, the location of the html folder should be ~/prototyper/html.
You now have everything you need and you won’t need to muck about in the terminal any more, I promise! Head on over to 192.168.55.55 and follow the on-screen instructions for the WordPress install. Don’t forget that the database username and password is “root”.
Step 3: Creating A Theme
We’ll be converting an HTML admin template to a WordPress theme but let’s begin by creating an empty theme first. In your themes directory (wp-content/themes/) create a folder named prototyper. In this new directory create two files: index.php and style.css. In the style sheet, paste the following (feel free to modify as you see fit):
/*
Theme Name: Prototyper
Author: Daniel Pataki
Author URI: https://danielpataki.com/
description: >-
  This theme was made for quick prototyping using the AdminLTE HTML admin theme from Almsaeed Studio.
Version: 1.0
License: GNU General Public License v2 or later
License URI: https://www.gnu.org/licenses/gpl-2.0.html

This theme, like WordPress, is licensed under the GPL.
Use it to make something cool, have fun, and share what you've learned with others.
*/
Let’s make sure that this file is loaded on each page. We can do this by creating a functions.php file and enqueueing the style sheet. Don’t worry if you’re not familiar with enqueueing just yet, it’s an easily copy-pastable example.
<?php
function prototyper_styles() {
  wp_enqueue_style( 'prototyper', get_stylesheet_uri() );
}

add_action( 'wp_enqueue_scripts', 'prototyper_styles' );
At this stage you should be able to go to the Appearance section in WordPress and switch to this theme — do so now. Since we haven’t done any coding, the front-end of your site should be completely white. This is perfectly OK, we’ll fill it up with content soon.
Step 4: Converting An Admin Template To A WordPress Theme
This is the most complex step because each admin template is different. In general we’ll be following the following pattern.
- Extract the theme header and footer files
- Replace local resource references with ones that will work
I will be preforming these steps for the AdminLTE HTML template specifically, but the logic would be the same for any other admin template out there.
Extracting The Theme Header And Footer
First of all, download the admin template and extract it. Move all files into the WordPress theme. Delete our empty index.php file and rename the index.html file to index.php and open it up in a text editor.
Our goal now is to extract the header and the footer files. Practically, this means that we want to separate out content which will be loaded on all pages. This would include the header, the footer and the left-hand navigation menu.
This is where a well-coded and properly documented admin theme comes in handy. Since I’ve been doing this for a while I have a feeling that the top bar and the left navigation are at the top of the index file. Then there’s everything in the main area, followed by the footer. To separate off the code which is used everywhere at the top of the file we need to find where the breadcrumb is.
I did a quick search for “breadcrumb” in the file and I found the section which handles the display of the main section. It starts like this:
<!-- Right side column. Contains the navbar and content of the page -->
<aside class="right-side">
Create a header.php file and copy-paste everything in index.php up to and including the code above. Make sure to remove this from the index file so it is only in the header file. Then at the very top of the index file type the following PHP code:
<?php get_header() ?>It’s time to do the same thing with the footer. In our header file we open an element which has a class of right-side. If the admin theme is well documented we may find the closing element for it by searching for this class. If you perform this search you should find the end tag.
Copy everything after and including this end tag and paste it into a new file named footer.php. Make sure to delete the code you copied from the index file and at the very end of the file paste this code:
<?php get_header() ?>Replace Local Resource References
If you load the theme now, it displays a lot of things but it has no styling or JavaScript applied. This is because all our references point to something like css/bootstrap.min.css. We need to make sure that they point to https://192.168.55.55/wp-content/themes/prototyper/css/bootstrap.min.css. We can start using WordPress functions now to make this all better.
Use your text editor to replace all instances of href=” with href="<?php echo get_template_directory_uri() ?>/. This will make sure all references to style sheets work. Now replace all instances of src=” with src="<?php echo get_template_directory_uri() ?>/. You should do this in header.php and index.php but not footer.php.
At this stage you should be able to load the website at 192.168.55.55 and see the correct layout. Some boxes which rely on JavaScript won’t work just yet, but we’ll fix that in a moment.
The footer file has two JavaScript scripts which are loaded from a CDN so they should not be replaced. The first one is jQuery, which is the very first script loaded. The second is a script called Raphaël. Replace all instances of src=” with src="<?php echo get_template_directory_uri() ?>/ in the footer file, except for these two resources.
One last thing to do: add the header and footer hooks. These are used by WordPress to load scripts and styles (among other things) — they are a necessary component of every theme. Add <?php wp_head() ?> just before the closing <head> tag in the header file and <?php wp_footer() ?> right before the closing <body> tag in the footer.
If you’ve done everything correctly you should now see all the boxes intact with graphs and maps galore. Congratulations, you’ve just set up your environment! We’ll continue to make this easily usable but the basics are now there.
Pages And Navigation
The interface should be fully navigable, even though we only have a single index file. If you click on “Widgets” in the sidebar you’ll see all the elements on the widgets page. Note that this is not being served by our theme. It is simply pointing to the widgets.html file within our theme folder structure; it is a static page.
Managing Pages
We’ll need to create pages that are served by WordPress. I recommend leveraging the template hierarchy to create files for specific pages. If you create a page named “Weight Log” it will most likely have the slug: weight-log. This means you can create a page-weight-log.php file which will handle the output for that page.
For every page in your prototype you will need to make a WordPress page. There is some overhead in this, but I find it acceptable. If you need to use page variants you can always use query parameters in the URL.
Navigation
The next thing to think about is the left-hand menu. This can be a bit tricky, especially if you want to display those nice icons and active elements as well. There are three ways to go about this. Hard-coding the menu is easiest but it is less flexible, and dynamically detecting the current menu is a bit more difficult. We can register a menu and use the menu builder but this will only allow for single-level menus. We can also use our own function to build a menu which allows for a complete implementation.
Creating Our Files
We’ll be looking at all three methods mentioned above and we’ll create almost the same menu structure for each. Let’s create the files which will handle our pages now:
- Weight Diary (page-weight-diary.php)
- Your Stats (page-your-stats.php)
- Yearly (page-yearly.php)
- Monthly (page-monthly.php)
- Weekly (page-weekly.php)
- Settings (page-settings.php)
Use the Pages section to create these pages in WordPress, then create a file in the theme for each. The files should contain the following code:
<?php get_header() ?>
  <!-- Content Header (Page header) -->
  <section class="content-header">
    <h1>
      Dashboard
      <small>Control panel</small>
    </h1>
    <ol class="breadcrumb">
      <li><a href="#"><i class="fa fa-dashboard"></i> Home</a></li>
      <li class="active">Dashboard</li>
    </ol>
  </section>

  <!-- Main content -->
  <section class="content">
  Content goes here...
  </section>
<?php get_footer() ?>
I basically copy-pasted this from our index file. The code above pulls in everything from the header and then outputs a title section which you can rewrite to be relevant to the current page. The main content section is then opened and closed; your content for this page should go here. Finally, the content of the footer is retrieved.
Hard-coding Menus
To hard-code our menus we’ll take a look at how the admin template outputs its menus and modify it to suit our needs. There are only three things we need to rewrite: page titles, URLs and icons.
Page titles should be easy. Remember that since we are hard-coding things the page title you write here does not have to be the same as the title you created in the WordPress back-end.
URLs should point to the actual WordPress page. You can copy-paste this from the back-end, or, even better, use the get_template_directory_uri() function and append the page slug to it as I have done in the example below.
Icons use Font Awesome, a very popular free icon font. If you’ll need to replace the fa-dashboard-style classes with the ones you want to use. Visit the link above for a cheatsheet of all the icons and their classes.
<ul class="sidebar-menu">
  <li class="active">
    <a href="<?php echo get_template_directory_uri() ?>">
      <i class="fa fa-dashboard"></i> <span>Dashboard</span>
    </a>
  </li>
  <li>
    <a href="<?php echo get_template_directory_uri() ?>/weight-diary/">
      <i class="fa fa-book"></i> <span>Weight Diary</span>
    </a>
  </li>
  <li class="treeview">
    <a href="<?php echo get_template_directory_uri() ?>/your-stats/">
      <i class="fa fa-bar-chart-o"></i>
      <span>Your Stats</span>
      <i class="fa fa-angle-left pull-right"></i>
    </a>
    <ul class="treeview-menu">
      <li><a href="<?php echo get_template_directory_uri() ?>/your-stats/yearly/"><i class="fa fa-angle-double-right"></i> Yearly</a></li>
      <li><a href="<?php echo get_template_directory_uri() ?>/your-stats/monthly/"><i class="fa fa-angle-double-right"></i> Monthly</a></li>
      <li><a href="<?php echo get_template_directory_uri() ?>/your-stats/weekly/"><i class="fa fa-angle-double-right"></i> Weekly</a></li>
    </ul>
  </li>
  <li>
    <a href="<?php echo get_template_directory_uri() ?>/settings/">
      <i class="fa fa-cog"></i> <span>Settings</span>
    </a>
  </li>
</ul>
Find the sidebar menu in your theme’s header.php file and replace it with the menu above. This will give us the menu structure we need. The pages we link to don’t exist yet but we can go ahead and create them in the admin. Here’s the full list:
- Dashboard (set as the front page in settings->reading)
- Weight Diary
- Your Stats
- Yearly (child of Your Stats)
- Monthly (child of Your Stats)
- Weekly (child of Your Stats)
- Settings
Registering WordPress Menus
When theme authors create themes they usually define the menu location and allow users to create their own menus in them. We will leverage this functionality to automatically output our menus. Open your theme’s functions file and add the following code:
register_nav_menu('left_menu', 'Left hand navigation menu');This tells WordPress to display the Appearance → Menus section in the admin and allow the user to create a menu for the left_menu location. You can go there in the admin and create your menu now. Note that owing to limitations on how WordPress outputs menus, we won’t be able to create multi-level menus with this method, at least not just yet!
The next step is to tell the theme itself where this theme should be added. Paste the following code just above the existing menu in the header file.
<?php wp_nav_menu( array(
  'location' => 'left_menu',
  'container' => false,
  'menu_class' => 'sidebar-menu',
  'menu_id'    => 'sidebar-menu'
)) ?>
The parameters I’ve added make sure the correct location is used, the menu doesn’t have a container, and that the class and ID used for the menu is sidebar-menu. This class name is crucial to mimic the menu style of our admin template as completely as we can.
If you have your menu set up (don’t forget to assign it to the location using the checkbox at the bottom) it should show up. At this point you can delete the large menu that shipped with the template. One thing to note is the lack of icons. We can fix this with some CSS!
#sidebar-menu > li:nth-of-type(1) > a::before {
  content: "\f0e4";
  margin-right:7px;
  font-family:FontAwesome;
}
The code above should be placed in the style.css. It designates the icon used for the first item in the menu. To assign icons to other menu items just increase the number in the parenthesis.
The icon used is dictated by the string value of the content property. To figure out what this is, take a look at the list of available icons and click on the one you’ll need. The Unicode value is shown in the header of the icon’s page.
Building Our Own Menu
The menu structure we have is similar enough to the one the admin template uses to work, but is not the same. As a result, icons had to be added in a different way and subpages won’t work properly. We can fix this by registering and using menus as we did above, but using our own Walker class to output it.
Let’s extend the Walker class with our own. Here’s the code; explanation ensues!
class Prototyper_Walker extends Walker {

  // Tell Walker where to inherit it's parent and id values
  var $db_fields = array(
    'parent' => 'menu_item_parent',
    'id'     => 'db_id'
  );

  /**
   * At the start of each element, output a <li> and <a> tag structure.
   * Note: Menu objects include url and title properties, so we will use those.
   */
  function start_el( &$output, $item, $depth = 0, $args = array(), $id = 0 ) {
    $classes = array();

    if( $item->object_id == get_the_ID() || ( $item->url == site_url() . '/' AND is_home() ) ) {
      $classes[] = 'active';
    }

    if( in_array( 'menu-item-has-children', $item->classes ) ) {
      $classes[] = 'treeview';
    }

    $arrow = ( in_array( 'menu-item-has-children', $item->classes ) ) ? '<i class="fa pull-right fa-angle-left"></i>' : ’;

    $arrow = ( in_array( 'menu-item-has-children', $item->classes ) ) ? '<i class="fa pull-right fa-angle-left"></i>' : ’;

    $output .= sprintf( "\n<li%s><a href='%s'>%s<span>%s</span> %s</a>\n",
    ' class="' . implode(  ' ', $classes ) . '"',
      $item->url,
      $icon,
      $item->title,
      $arrow
    );
  }

  function start_lvl(&$output, $depth) {
    $indent = str_repeat("\t", $depth);
    $output .= "\n$indent<ul class=\"treeview-menu\">\n";
  }

  function end_lvl(&$output, $depth) {
    $output .= "\n</ul>";
  }

  function end_el(&$output) {
    $output .= '</li>';
  }
}
We use the Walker function to modify the output of the start of elements and levels, and the ends of elements and levels. The start_el() method is used to determine how a list item starts.
In our case it should use this template:
<li class="active treeview"><a href="https://oururl.com/tothepage/"><span>Link text</span> <i class="fa pull-right fa-angle-left"></i></a></li>
We need to add some logic to make sure the active and treeview classes are only added when they are needed. The icon at the end of the link is also only needed if the item is a parent element; we account for this within the function.
I also used the value of the attr_title property. This is the title attribute you can set in the menu builder when you click the arrow next to the item’s name. I used this field to add the class names of the Font Awesome icons. This way we also have full control over the icon.
We use the start_lvl() method only to add the treeview-menu class to the list. The end_lvl() and end_el() methods simply close the elements we opened in the other functions.
As the last step, we need to tell our menu to use this Walker class. We do this by modifying the call to wp_nav_menu() in the header, adding a walker parameter. Here’s the full code:
<?php wp_nav_menu( array(
  'location' => 'left_menu',
  'container' => false,
  'menu_class' => 'sidebar-menu',
  'menu_id' => 'sidebar-menu',
  'walker'  => new Prototyper_Walker()
)) ?>Hiding The Test Menu
If you’ve been following along you should now have a hard-coded or a custom function menu, followed by the long menu that shipped with the HTML template. You could delete this as-is but you would then lose the ability to look up elements — something we will rely on heavily soon. You could also leave it there, but it does litter up the place a bit.
My solution to the problem is a bit of JavaScript. Why not leave the menu there but hide it by default, showing it when the user double-presses the letter T on the keyboard. Let’s add a new ID to this menu and hide it using some inline CSS. The opening tag of the menu becomes:
<ul class="sidebar-menu" id='elements-menu' style="display:none">
Next, let’s add a new JavaScript file to our theme using the enqueueing method from earlier. Create a prototyper.js file in your theme’s root directory, and in the functions file add the following:
add_action( 'wp_enqueue_scripts', 'prototyper_scripts' );
function prototyper_scripts() {
  wp_enqueue_script( 'prototyper', get_template_directory_uri() . '/prototyper.js', array('jquery') );
}
The final step is to write the jQuery to make this happen. We’ll need to detect the keypress of the letter T. In addition we’ll make sure that the two keypresses must be within 500ms of each other.
function toggle_menu() {
  jQuery('#elements-menu').toggle();
}

var lastKeypressTime = 0;

jQuery( document ).on( 'keyup', function( e ) {
  if( e.keyCode === 84 ) {
    var thisKeypressTime = e.timeStamp;
    if( thisKeypressTime - lastKeypressTime <= 500 ) {
      toggle_menu();
    }
    lastKeypressTime = thisKeypressTime;
  }
})
Voilà! Our menu is hidden, but by quickly pressing T twice we can get it to reappear or disappear again. Super helpful when finding elements, but out of the way when not needed.
Preserving Test Menu Links
Links in the test menu are relative, which means they won’t work anymore. They will point to https://yoursite.com/pages/calendar.html, for example. In reality, these files are now within your theme folder, so the links should be: https://yoursite.com/wp-content/themes/prototyper/pages/calendar.html
To fix this, simply prepend <?php echo get_template_directory_uri() ?> function to each link’s href attribute in the test menu.
Building Pages
We’ve finally arrived at the step where we can start assembling pages! Let’s create that weight diary I’ve been referring to. This will be a table of foods the user has eaten with an option to add another. You should have a file for this page already created: page-weight-diary.php. Open it now.
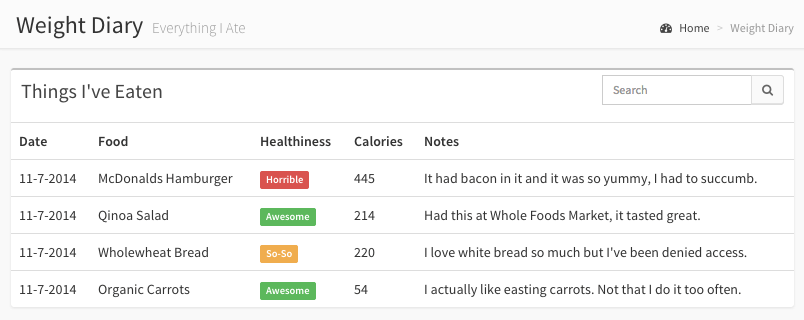
It should contain the HTML we discussed in the “Creating Our Files” section. In the content header section change the title texts as you wish. I am using the following code in case you want to copy-paste:
<?php get_header() ?>
  <!-- Content Header (Page header) -->
  <section class="content-header">
    <h1>
      Weight Diary
      <small>Everything I Ate</small>
    </h1>
    <ol class="breadcrumb">
      <li><a href="<?php echo site_url() ?>"><i class="fa fa-dashboard"></i> Home</a></li>
      <li class="active">Weight Diary</li>
    </ol>
  </section>

  <!-- Main content -->
  <section class="content">

  </section><!-- /.content -->

<?php get_footer() ?>
Tap T twice to bring up the original menu and click the “Tables” entry, followed by “Simple Tables”. Let’s use the bottom-most “Responsive Hover Table” one. You can view this page’s source code to find the HTML rerquired for this table. I like to copy it from the developer tools window.
Right-click somewhere in the table and click on “Inspect Element” (or something similar, depending on your browser). In the window that pops up, navigate up the DOM until you come to the row the table is in and copy the whole row.
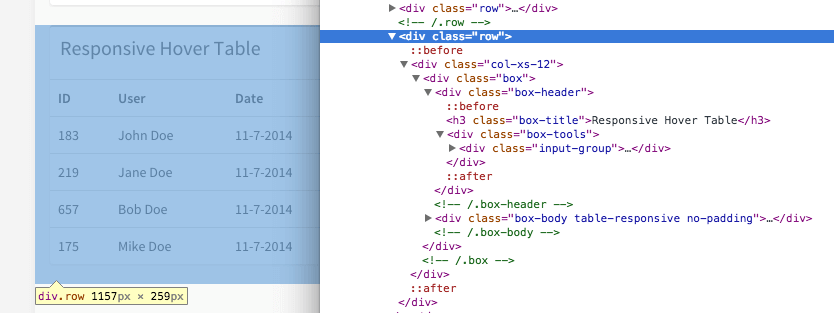
Paste it inside the main content section of the weight diary file and modify the table as you see fit. I decided to add a date, food, calories, healthiness and notes column.
The next step is to add a button users can click to add a new diary entry. We’ll first need to create a box for this for proper spacing. I copy-pasted everything below from the admin template so it took me only a few seconds to create.
<div class="row">
  <div class="col-xs-12">
    <div class='box'><div class='box-body'>
    <a href='<?php echo site_url() ?>/add-weight-entry/' class="btn btn-primary btn-sm">Add New</a>
    </div></div>
  </div>
</div>
Since we are referring to an add-weight-entry page let’s create that in the WordPress admin; create the page-add-weight-entry.php file and paste our little skeleton into it. Once done, I will copy-paste form elements from our HTML template to build the form:
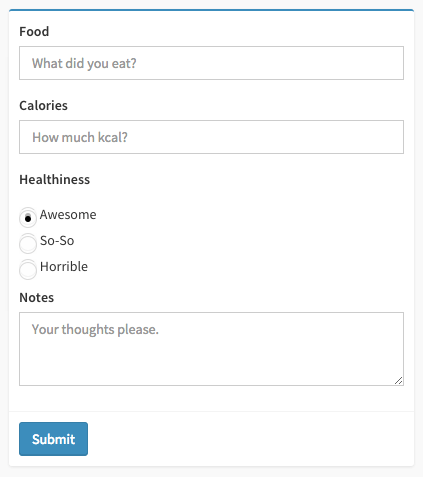
Just like before, I copy-pasted all the elements from the admin template. The only addition I made was to make the form direct back to the diary. I modified the opening tag of the form to look like this:
<form role="form" method='post' action='<?php echo site_url() ?>/weight-diary/?message=added_entry'>
Whenever the form is submitted it will go back to the weight diary. It will contain the additional query parameter message with a value of added_entry. We can leverage this to show a nice little success message back in our weight-diary.php file.

I copy-pasted the HTML for the success display above from UI Elements → General in the HTML template and I placed it between the “Add New” button and the table.
Copy-Pasting Secrets
At this stage you should be able to build out a static site with some dynamic components (menu, page creation). However, the exact element you need to copy-paste may not be so obvious. I’ve had a bit of experience with this so let me take a couple of sentences to help you out!
All proper HTML admin templates will work within a grid system. It is a good idea to always use these rows and columns. When I wanted the whole table for the weight diary, I copied the row which contains the single full-width column and the table.
When I wanted just the button for the “add new” functionality, I just copied the button and created the row and box around it manually. That brings me to another point: container elements — most templates use some sort of boxes as well.
It’s up to you if you want to use these or not. I’ve found that using the exact same structure as the template will help the continuity of your project a great deal. I wouldn’t normally have added a box around my “Add New” button but, since this is how it is positioned properly, I thought this was the best solution.
All in all, be mindful of the grid system that a template uses and use the container elements it provides for maximum efficiency.
Dynamic Front-End Features
Most admin themes, AdminLTE included, use JavaScript extensively. You have a number of elements at your disposal that you may need to set up using JavaScript. Data tables are a good example; they allow for the sorting and searching of data within HTML tables. Let’s replace our diary with a sortable table.
I usually copy-paste JavaScript-heavy things from the source file as opposed to the source code or the DOM. The reason is that once the element has loaded, JavaScript may dynamically change the DOM, meaning that a copy-paste may not be successful; so I will go into pages/tables/data.html and copy-paste the full “Data Table With Full Features” section.
If you take a look around in data.html you may notice that it contains four things that our framework doesn’t just yet. It has one extra style sheet, two extra scripts and a little JavaScript code at the end.
Since data tables aren’t used on every page it makes sense to only load these on pages where they are necessary. While we could also go ahead and do this, our main goal is quick prototyping, not an optimized application. Therefore, I will add the style to the header, the two scripts to the footer, and the JavaScript snippet to the weight diary file.
In your header.php paste the following:
<!-- DATA TABLES -->
  <link href="<?php echo get_template_directory_uri() ?>/css/datatables/dataTables.bootstrap.css" rel="stylesheet" type="text/css" />
In your footer.php paste the following, taking care to paste it exactly before the final script which should be app.js
<script src="<?php echo get_template_directory_uri() ?>/js/plugins/datatables/jquery.dataTables.js" type="text/javascript"></script>
  <script src="<?php echo get_template_directory_uri() ?>/js/plugins/datatables/dataTables.bootstrap.js" type="text/javascript"></script>
The last step is to add the bit of JavaScript code which makes the table a data table. I just put this somewhere below the table in the weight-diary.php file.
<script type="text/javascript">
  jQuery(function() {
    jQuery("#example1").dataTable();
  });
</script>
This methodology can be followed for any JavaScript-heavy element. First, go into the file of the element you need and make sure you add any style sheets or scripts it requires. Then, copy the element followed by any JavaScript snippet which you need to make it work.
Dynamic Server-Side Functionality
The last piece of the puzzle is adding dynamic server-side functionality. This requires a bit more familiarity with WordPress but you can create pretty high-quality prototypes without implementing this bit.
First of all, let’s create our weight diary functionality in the back-end. I’ll use a custom post type to hold my diary entries and use the Advanced Custom Fields (ACF) plugin to create the custom fields. You can grab ACF from the Advanced Custom Fields website, or the plugin repository.
I use the code below in functions.php to create a very quick custom post type:
add_action( 'init', 'weight_diary_post_type' );
function weight_diary_post_type() {
$args = array(
'public' => true,
'label' => 'Weight Diary'
);
register_post_type( 'weight_diary', $args );
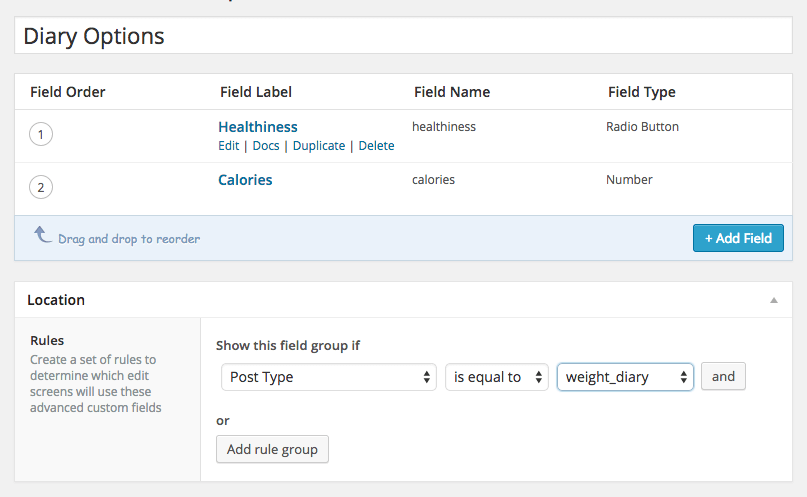
}After this is added, you should see a Weight Diary custom post type in the admin. Now install and activate Advanced Custom Fields and create the two custom fields we need: healthiness and calories. I made the former a radio button with the three values, and the latter a number field.
Go to the Weight Diary custom post type and add some entries. We’ll be using the publication date for the date, the post title for the name of the food, and the post content for the notes. Now, let’s go back to our table and use a WordPress query to populate it. Paste the following code into your table, replacing the content of the tbody tag.
<?php
  $diary = new WP_Query( array(
    'post_type' => 'weight_diary',
    'post_status' => 'publish'
  ));
  if( $diary->have_posts() ) :
    while( $diary->have_posts() ):
      $diary->the_post();
?>
<tr>
  <td><?php the_time( 'F-d-Y' ) ?></td>
  <td><?php the_title() ?></td>
  <td><span class="label label-success"><?php the_field( 'healthiness' ) ?></span></td>
  <td><?php the_field( 'calories' ) ?></td>
  <td><?php the_content() ?></td>
</tr>
<?php endwhile; endif ?>
At this stage the table is populated with the ten most recent diary entries. Note that to retrieve a custom field value from ACF all you need is the the_field() function and the name of the field (which you can look up in the custom fields section).
The next step is enabling users to submit actual data. Let’s go to the page-add-weight-entry.php file and modify its submit location to <?php echo admin_url( 'admin-ajax.php' ) ?>.
In addition, add a hidden field anywhere before the closing <form> tag. This contains a parameter whose value we can use to intercept the user’s action of adding a weight diary entry.
<input type='hidden' name='action' value='add_diary_entry'>We can intercept this action from our functions file using the value of that hidden field. Use the following convention:
add_action( 'wp_ajax_add_diary_entry', 'add_diary_entry' );
add_action( 'wp_ajax_nopriv_add_diary_entry', 'add_diary_entry' );

function add_diary_entry() {
  //code goes here
}
The first action intercepts the addition of an entry for logged-in users; the second intercepts it for logged-out users. If you only need to do this for one or the other, remove the one which isn’t needed. In a real-world scenario we would need to add some more code to check for intent to make sure it’s safe, but for our purposes this will do.
Using the data passed via the $_POST array we can create a WordPress post with the proper details. Once the post is created, we redirect the user back to the diary with the success message.
function add_diary_entry() {

  $data = array(
    'post_type' => 'weight_diary',
    'post_status' => 'publish',
    'post_title' => $_POST['post_title'],
    'post_content' => $_POST['post_content']
  );

  $post_id = wp_insert_post( $data );
  add_post_meta( $post_id, 'calories',$_POST['calories'] );
  add_post_meta( $post_id, 'healthiness',$_POST['healthiness'] );

  header( 'Location: '. site_url() . '/?page_id=9&message=added_entry' );
  die();
}
And So On
At this point it becomes a matter of repetition. To add a static feature, open the menu, find the elements you need, copy-paste them and modify the HTML content as necessary to fit your needs.
If you need any advanced front-end magic, apply some JavaScript; if you need server-side functionality, build out your functions and apply them to the front-end elements already in place.
Using this method you should be able to build a high-quality high-fidelity prototype without too much effort. Your final build will be of much higher quality and your clients will be kept happy throughout the coding phase.
Further Reading
- Optimizing Your Design For Rapid Prototype Testing
- Choosing The Right Prototyping Tool
- Content Prototyping In Responsive Web Design
- Secrets Of High-Traffic WordPress Blogs


