Techniques For Creating Custom Textures In Photoshop

Email Newsletter
Weekly tips on front-end & UX.
Trusted by 200,000+ folks.
 Register!

 Flexible CMS. Headless & API 1st

Textures are everywhere — the concrete of a sidewalk, the fabric on your chair, even the glass (or plastic) surface of the screen you’re staring at right now. It’s natural that textures appeal to us because we see and feel them every day. And it’s no surprise why textures have become such an important element in design — so important, in fact, that I want to share with you the tricks and tools to create your own textures using Photoshop.
Photoshop isn’t just for retouching images or manipulating photos. It can be used for so much more, such as creating your own textures — as long as you know where to look. In this article, I will present a foundation of techniques to help you build custom textures.
I’ll go over three Photoshop features that I rely on to do most of my texturing — filters, layer styles and brushes. Before we jump in, I want to demonstrate the importance of textures. Consider the image below:
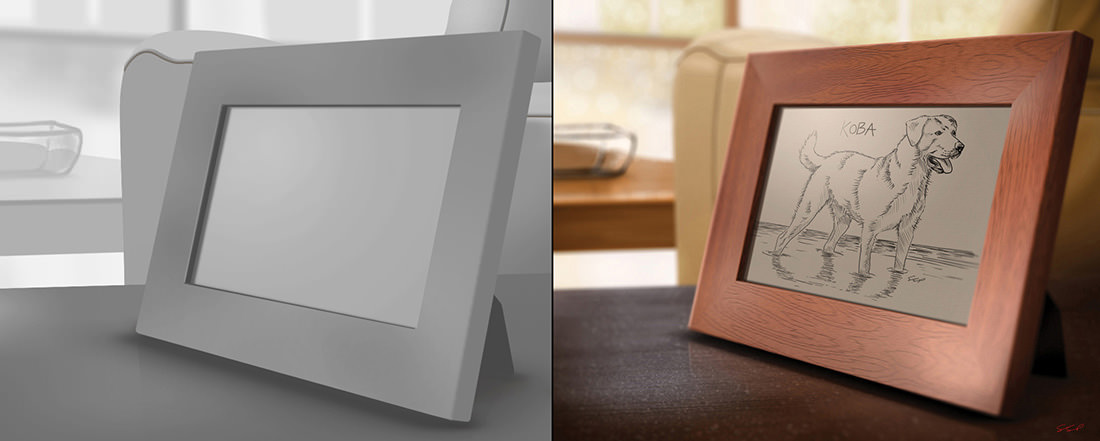
In the image above, we see a scene with no textures. (OK, there is one texture, flat gray. Without at least one texture, the image would not exist.) The second image (right) shows a scene fully textured (the wood on the frame, the dusty table top, the fabric on the chair, etc.). In fact, this entire image was created in Photoshop (without the use of external images), using many of the techniques outlined in this article. Note that this article explores how to create textures, but if you’re interested in learning more about using texture as an element in design, some additional reading is included at the end of this article.
Texturing With Filters
Filters are still viewed by many as cheap gimmicks that have no real applicable function in Photoshop. (I know, I used to be on that side of the fence.) On the contrary, Photoshop filters are extremely powerful effects that, when used properly, can produce some amazing results. If filters are not a part of your normal Photoshop workflow, I encourage you to take another look at these underappreciated effects and use the tips below to get started.
Apply A Filter To A Filter
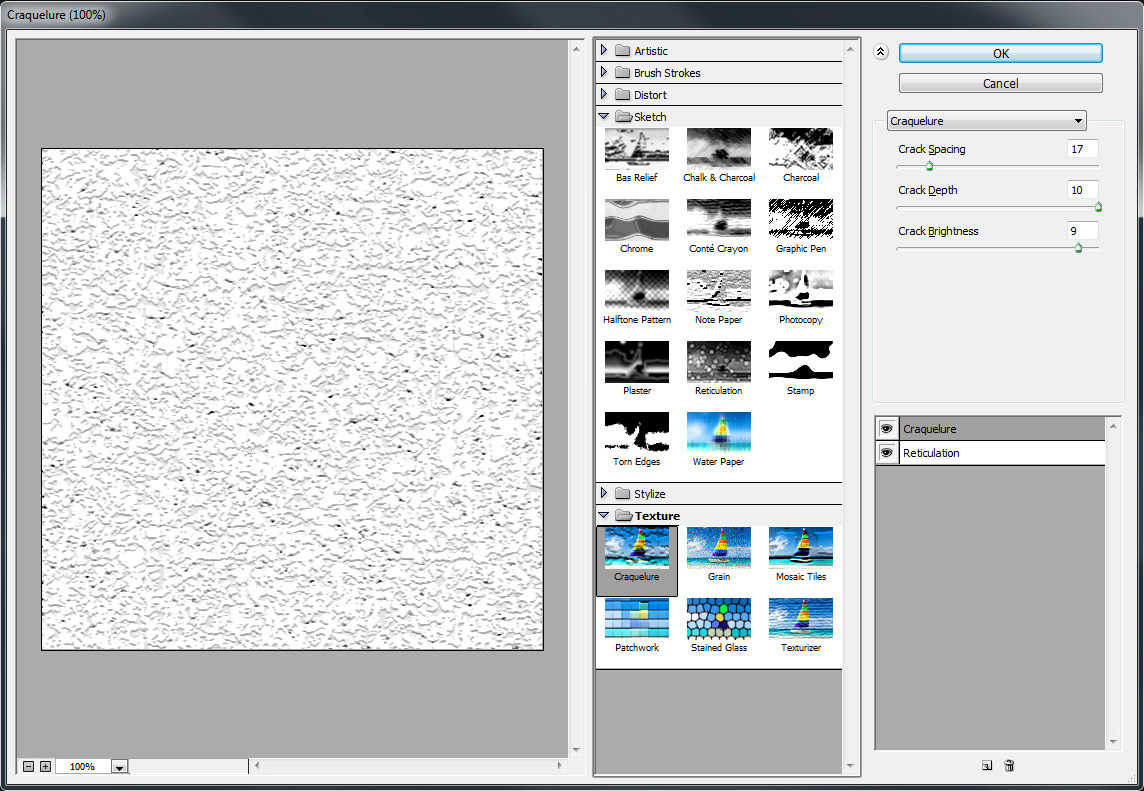
No one ever said that you can apply only one filter. Instead, try adding a second or third or more. Experiment with multiple filters and see how they interact with each other to create new effects. The Filter Gallery panel (Filter → Filter Gallery) even has a filter stack where you can preview how multiple filters work together. The image below demonstrates how the Craquelure filter becomes much more interesting simply by applying it to the Reticulation filter via the Filter Gallery.
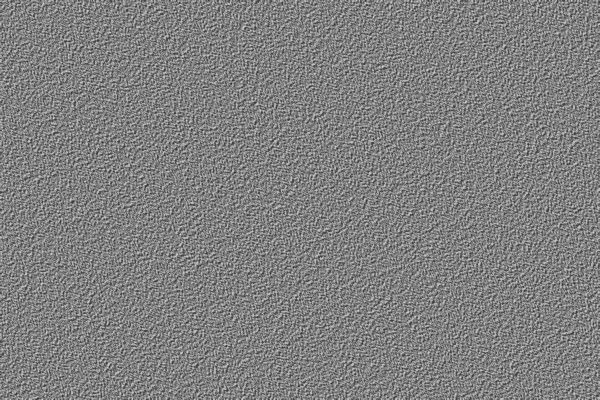
Let’s take another look at how some filters work together to create custom textures. The image below shows a basic example of this.
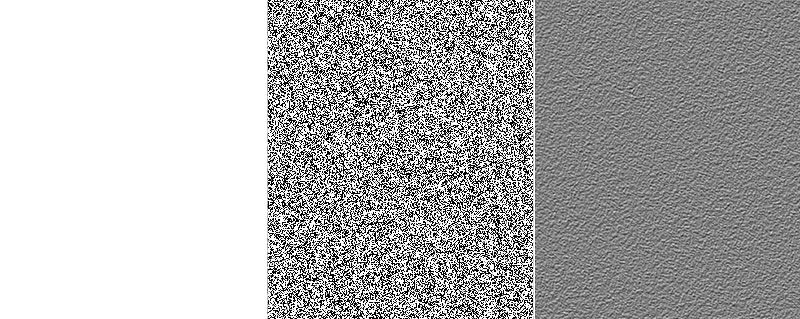
The image below depicts the steps necessary to recreate this texture. The texture begins with a blank canvas (left). Adding the Noise filter (Filter → Noise → Add Noise) (middle) introduces randomness to the scene and sets up a good foundation for the next filter. Because filters work by manipulating the pixels on a layer, the order in which you apply filters is important. So, by applying the Emboss filter (Filter → Stylize → Emboss) on top of the Noise filter, a new texture is created (right).
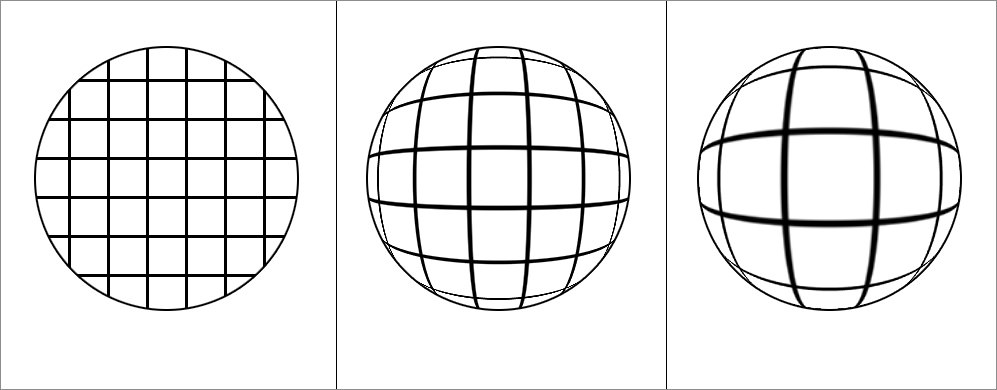
Furthermore, some filters just produce better results when applied more than once. Consider the image below of the circled grid. Applying the Spherize filter (Filter → Distort → Spherize) produces only a mild result (middle). However, applying it a second time creates a more believable sphere (right).
Tip: Convert a layer to a Smart Object before applying a filter to enable Smart Filters. Smart Filters are non-destructive and can be edited on the fly.
Experiment with different combinations of filters to see how they interact with each other. Soon, you’ll be able to predict how a filter might work with another filter to create a particular effect. Lets move on to the next tip.
Some Filters Naturally Tile
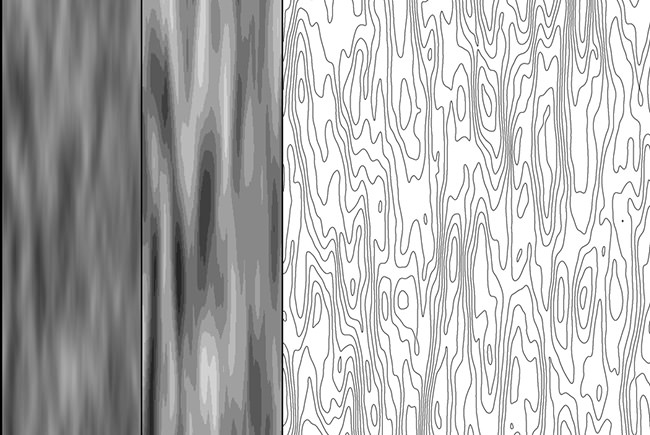
Tiling textures, while desirable, often takes a lot of time and effort — why not let Photoshop do most of the work for you? Some filters (such as Clouds and Noise) will naturally tile when the document is sized in powers of 2 (for example, 256 × 256, 512 × 512, even 512 × 1024). If you start with one of these textures as a base and build on top of it, you’ll find that you can quickly create some complex textures that tile with little or no additional effort. The image below shows an example of a texture that was created by using the Clouds filter as a starting point.
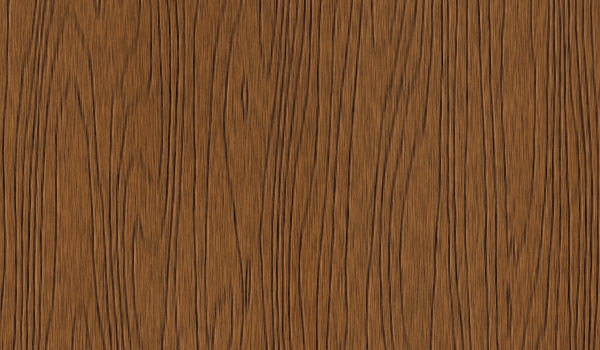
As stated, this texture starts with the Clouds filter (Filter → Render → Clouds) applied to a document that’s sized to 1024 × 1024 pixels. Similar to Noise, the Clouds filter provides some randomness that works nicely with other filters.

At this point, we are free to adjust the dimensions of the image without harming its ability to tile. Therefore, by adjusting the size via Image → Image Size, we can squish the texture while keeping it tileable (left). Now, if we add the Posterize effect (Image → Adjustment → Posterize), we can break up the texture into a number of gray shades with more defined edges (middle). The Find Edges filter (Filter → Stylize → Find Edges) will isolate just those edges, producing the start of a wood grain pattern (right).
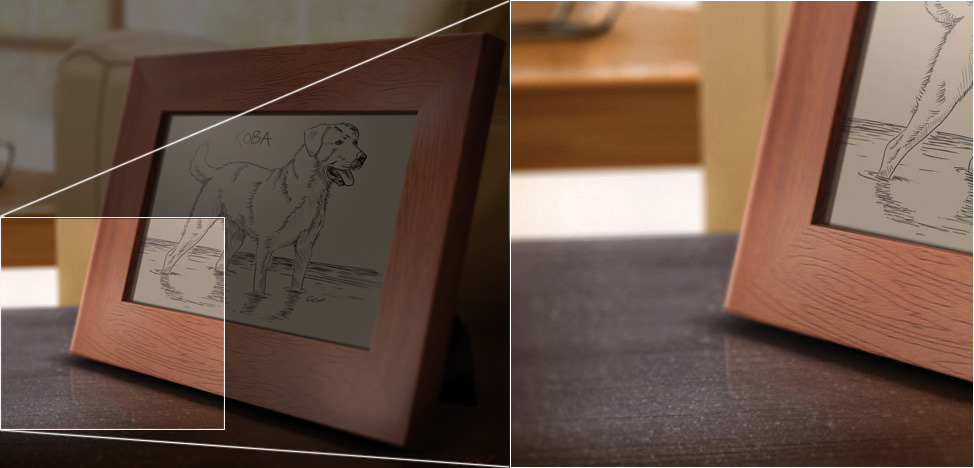
To learn the entire process of how this texture was created, check out my “Custom Wood Texture in Adobe Photoshop” tutorial.
Texturing With Layer Styles
Layer styles are another way to introduce texture into a scene. They offer additional options to embellish the contents of a layer. Experimenting with each setting in the Layer Styles panel in order to learn how they work is always a good practice. Below are some tricks I use when working with layer styles.
Blending Modes
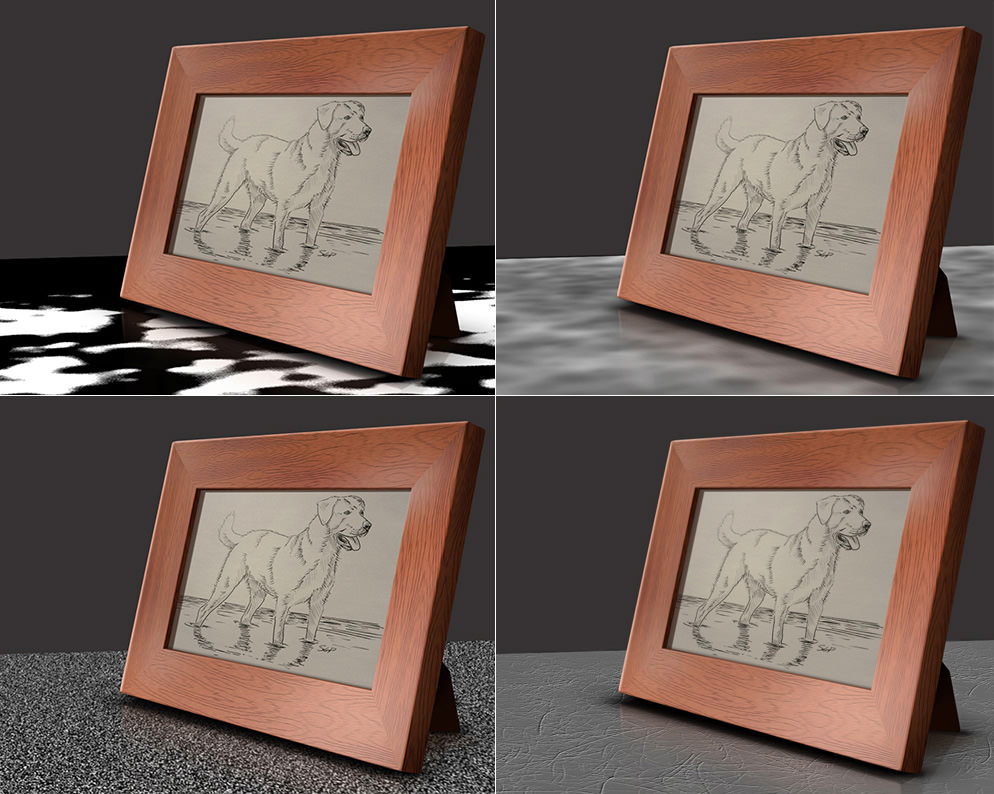
When building textures in Photoshop, blending modes do exactly what they say: blend. Multiple layers of textures can seamlessly blend into a single, complex texture, as seen below:
Tip: Working with grayscale textures when using blending modes makes blending much easier to control (color can always be added later).
When you’re trying to build complex textures, knocking it out in one attempt can be difficult. Instead, try to break down a complex texture into a set of simpler sub-textures. Consider the texture of the tabletop in the four images below. Each image represents a simple texture that was blended together with the others to create a more complex final texture.
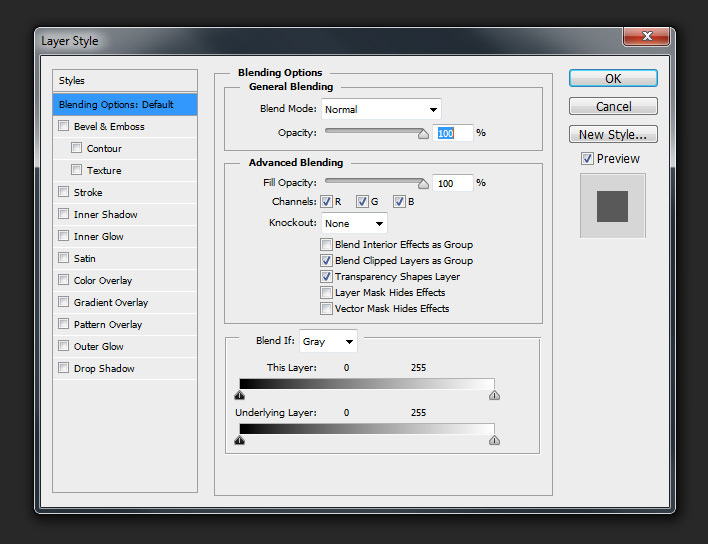
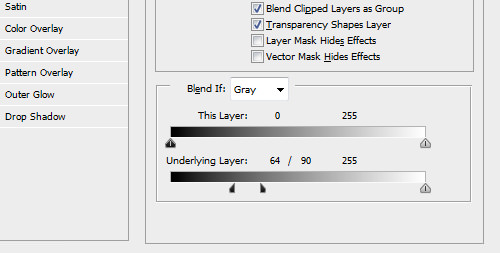
Advanced Blending And “Blend If” Options
Using layer styles might be an obvious choice, but many people often ignore the “Advanced Blending” section in the default Layer Styles panel. Hidden in plain sight are some of the more powerful blending options. Here, you can decide how a layer mask will affect a style: Will it hide a layer style or just confine it to the visible portion of the layer? Towards the bottom of the menu are the “Blend If” sliders. These sliders can easily produce complex blending effects.
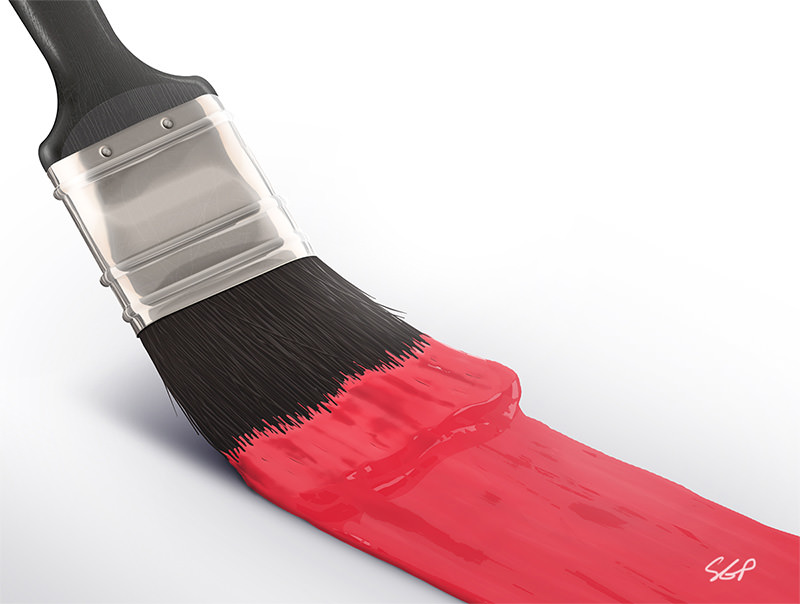
Take the image below. The glossy texture on the paint was created with minimal effort using the “Blend If” sliders.
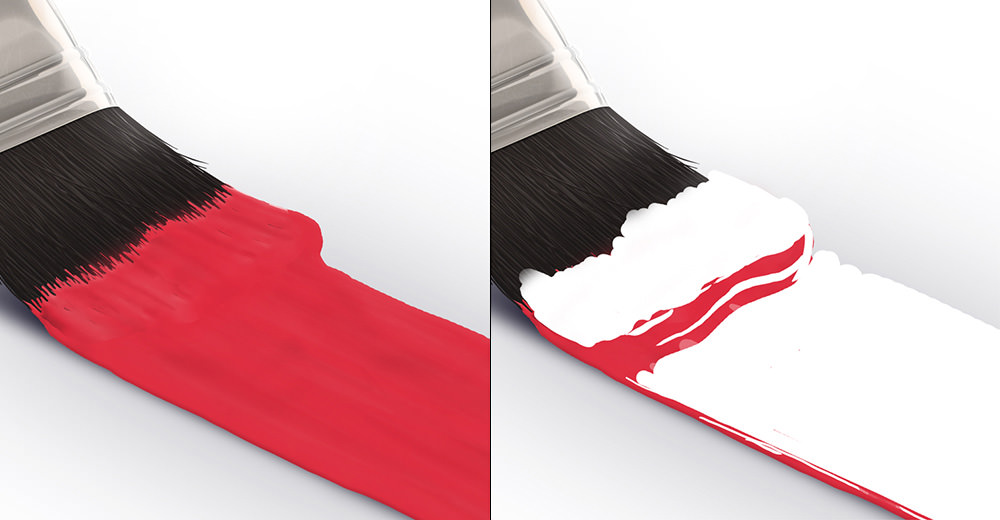
The “Blend If” sliders control how a layer is blended into the layers beneath it, as illustrated in the images below. The initial layer of paint (left) appears too flat but has just enough variation to allow the “Blend If” sliders to work. Next, broad areas of white are painted onto a new layer (right) to define where the blending will take place. Adjusting the “Blend If” sliders of the white layer will produce that glossy effect in the image above.
Tip: When using the “Blend If” sliders, hold Option or Alt while adjusting the sliders to separate them, making for a smoother blend.
To learn more about how this image was created, check out my “Create a Paint Brush in Photoshop” tutorial.
Duplicate Layer Styles
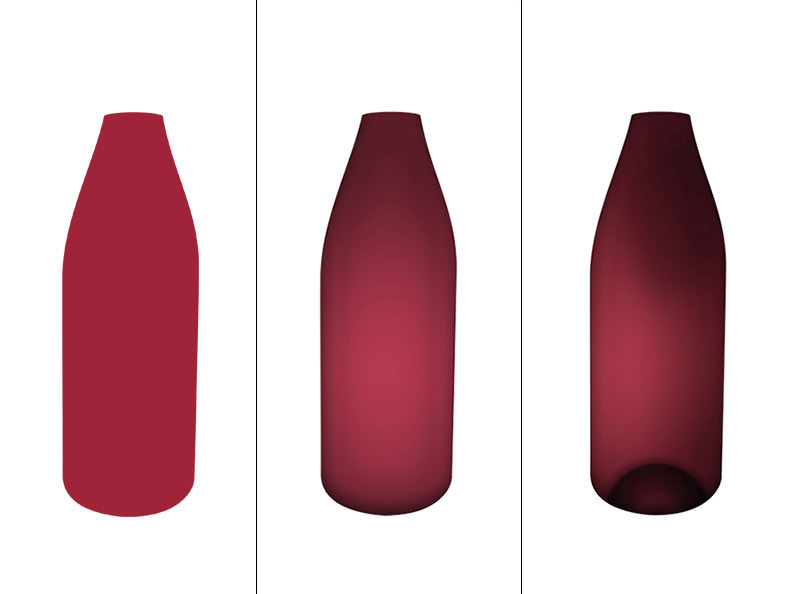
Sometimes a layer will benefit from having two of the same layer styles with different settings. In past versions of Photoshop, accomplishing this without using destructive techniques was difficult. With the introduction of Smart Objects in CS2 — and now with the ability to add layer styles to layer groups in CS6 — Photoshop makes it easy to use and reuse multiple layer styles on the same layer. This technique was used to create the liquid and the glass bottle in the scene below.
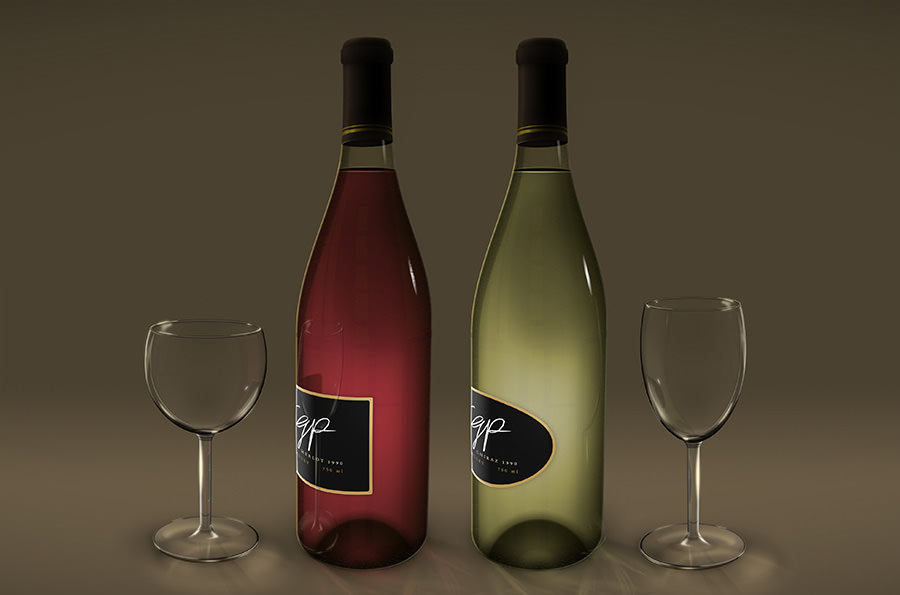
Examining just the liquid from the scene, it starts with a generic shape on its own layer (left). The Inner Shadow and Gradient Overlay layer styles were assigned to the layer (middle). The layer was converted to a Smart Object, which allows you to edit the layer styles in future. Next, the same two layer styles (Inner Shadow and Gradient Overlay) were reapplied to the Smart Object (right) using different settings to achieve a more complex effect.
Examining the image above, you can see how creative we can get with layer styles. For example, in the middle image, the Gradient Overlay layer style was applied as a large, soft gradient that acts almost as a vignette around the top and bottom of the shape. In the last panel, the Gradient Overlay was treated much differently. It’s applied as a small, tight gradient that becomes the traditional bulb shape on the bottom of a wine bottle.
To learn more about how this was created, check out my “Create a Wine Bottle and Glass With Smart Objects” tutorial.
Texturing With Brushes
Using brushes is a great way to apply textures manually. If you’re into digital painting, then you probably know of several techniques using the Brush tool. However, being talented at digital painting is not required to effectively use the Brush tool. The following tips will reveal some more advanced methods of using this tool.
Learn The Brushes Panel
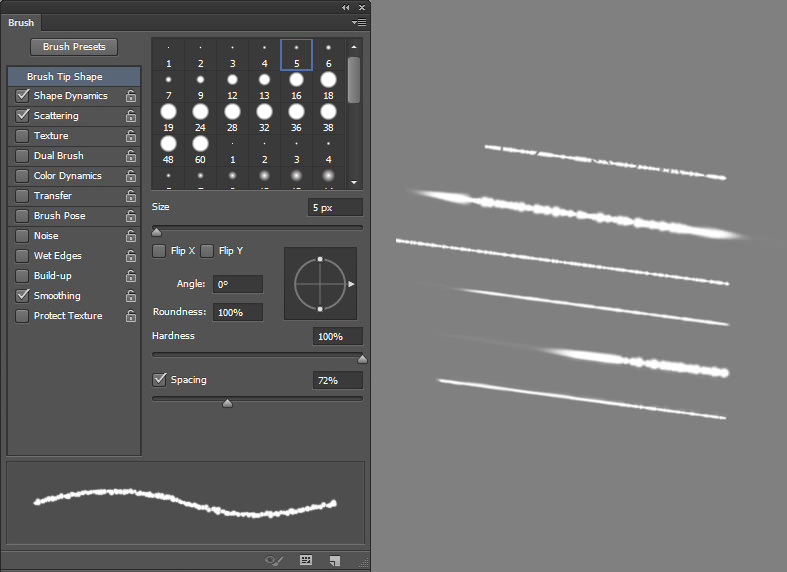
This might sound pretty basic, but many people only stick to the “Hardness” and “Size” settings. Adjusting the settings in the Brushes panel (Window → Brush) can quickly extend the use of any brush. It gives you the options to fine-tune the behavior of a brush, making it more random and, thus, more natural. This is how I created some of the elements in the image below (such as the pencil’s highlights).

To create the realistic highlights, I adjusted the “Shape Dynamics” and the “Scattering” settings in the Brushes panel (left). By changing the settings and size, I was able to produce a number of brush strokes that look more fragmented and more natural (right). Each brush stroke represents a different highlight that went into the pencil.
Tip: Another great feature of the Brushes panel is that it allows you to test the brush while editing it, which makes quick work of setting up the right brush for the job.
To learn more about how this scene was created, check out my “Create a Realistic Pencil Illustration in Adobe Photoshop” tutorial.
Consider Custom Brush Shapes
Sometimes, just tweaking the settings of an existing brush isn’t enough. Creating a new brush shape (via Edit → Define Brush Preset) opens up more possibilities for achieving natural-looking textures. Brush shapes don’t have to be complex to be effective — I typically work with simple shapes and adjust the settings to fit my needs. A good example of this is the scratches that appear on the paintbrush’s wooden handle in the image below.
The scratches were created by drawing a simple shape, just like the one in the image below (left). Selecting Edit → Define Brush Preset will add the brush shape to your brushes library. Using the technique from the previous step and adjusting the “Shape Dynamics” and “Scattering” settings in the Brushes panel, we can create a brush that shows scratches (middle). The image on the right shows the brush in use.

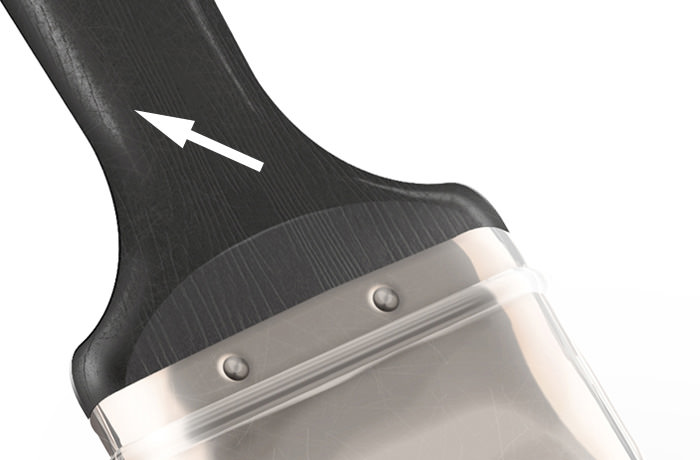
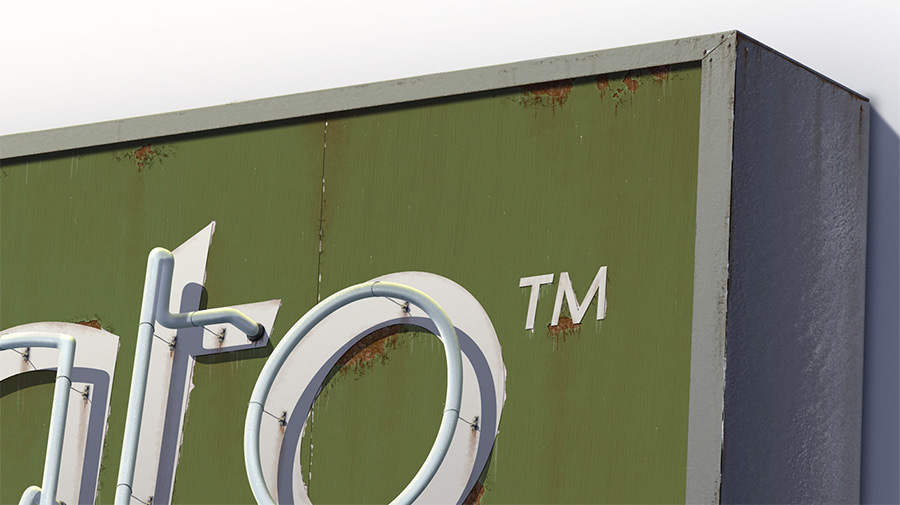
Use The Brush Tool To Paint With Layer Styles
This next technique allows you to literally paint with texture. It combines the Brush tool and layer styles to easily create some complex texturing effects. The trick is to set the layer’s “Fill” setting to 0% in order to hide the brush strokes and focus on the layer style. The image below demonstrates the technique. In this case, I used the technique to paint dents onto the metal frame.
The technique works best when you use a brush shape that already has some variation. This could be a custom brush or one of Photoshop’s several preset brushes, such as the “Charcoal 59 px” brush seen in the image below.
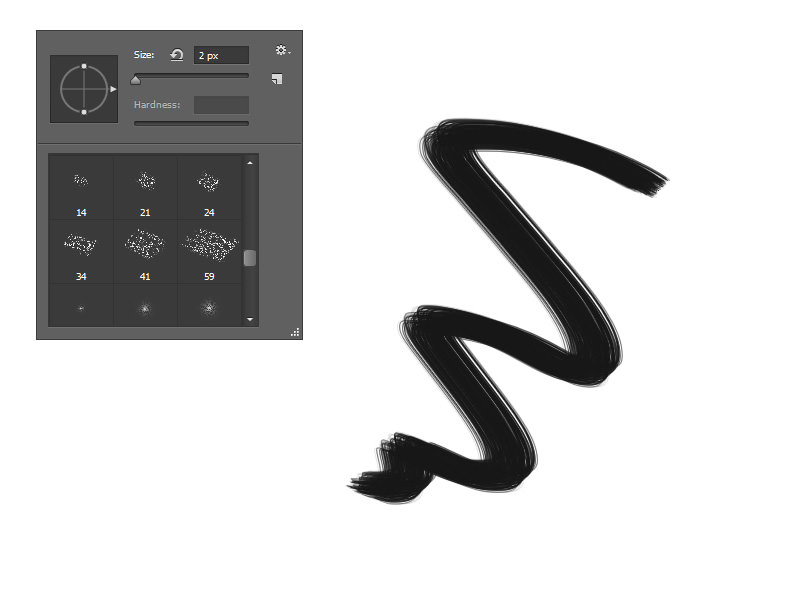
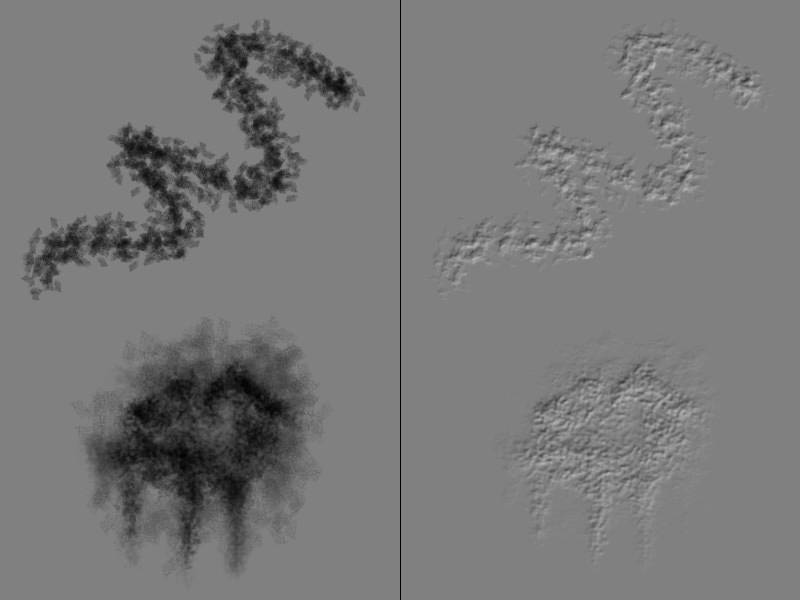
Following one of the previous techniques, I’ve used the Brushes panel to adjust the “Shape Dynamics” and “Scattering” settings to produce more variation in the brush’s actual stroke, as seen in the image below (left). Before using the brush, just create a new layer with a Bevel and Emboss layer style, and then set the “Fill” setting to 0% (which will hide the stroke color but keep the layer style visible). Now, when painting on this layer, you can literally paint with texture (right).
To learn more about how the metal sign was created, check out my “Create a Retro Sign from Scratch Using Advanced Techniques in Photoshop” tutorial.
Texturing With Images
While these textures technically weren’t created from scratch, I thought this was important enough to address. Using textures from existing photos or scans can be a quick and effective way to work. However, the most common pitfalls are using the textures in the wrong perspective, using them with incorrect lighting or making them appear flat. Fortunately, these are easy to avoid and some great articles address this.
Conclusion
As we have seen, creating high-quality textures for art or design doesn’t require the talent of an artisan painter. All it takes is a little understanding of Photoshop and knowledge of the tools and how to manipulate them to get the effect you desire. Hopefully, you’ve learned some new tricks and techniques that will help you in your next project.
Other Resources
- How to Create a Beautiful Mixed Media Illustration, Andreas Preis, Tuts+
- Playing With the Displace Filter in Photoshop, Abduzeedo
Further Reading
- The Whys and the Hows of Texture Design
- How To Use Textures In Web Design
- The Ultimate Guide To Cloning In Photoshop
- 100 Beautiful Free Textures


