How I Mixed Up Illustration: Combining Analog And Digital Techniques

Email Newsletter
Weekly tips on front-end & UX.
Trusted by 182,000+ folks.
 Register for Free
 Celebrating 10 million developers
 Custom Web Forms for Angular, React, & Vue. Your backend.

Sometimes, I paint it completely by hand; sometimes I’ll scan in a pencil drawing. Many of my pieces are 100% analog that I’ll show only at shops or galleries. Use anything you can; if the illustration would work as a wood carving, go that route. There are concrete steps one can take, but they certainly don’t have to be the same every time. My goal is to take a sketch or idea as far as it can go — and also, to get out of my comfort zone and challenge myself with every new job. For this article, I’ll use handcrafted brushes and Photoshop as my tools.
Further Reading on SmashingMag:
- Beautiful Photoshop Illustrations By Artists Around The World
- 50 Clever Tutorials and Techniques on Traditional Drawing
- Drunken Monkey Photoshop Tutorial
Sketching It Out
Concepting for me always starts with pencil and paper. If there is one consistent element through all of my pieces, it’s sketching. I love to draw. If I could establish and execute everything with a single pencil drawing, I would. The best thing to do is keep some type of sketchbook or journal with you as much as possible. Milton Glaser said it best: “Drawing is visual thinking.” Drawing creates many possibilities for any idea you might have. It’s then when the character’s personality starts to emerge. Then, I’ll add some volume to the sketch to show where the textures should really come through.
Researching
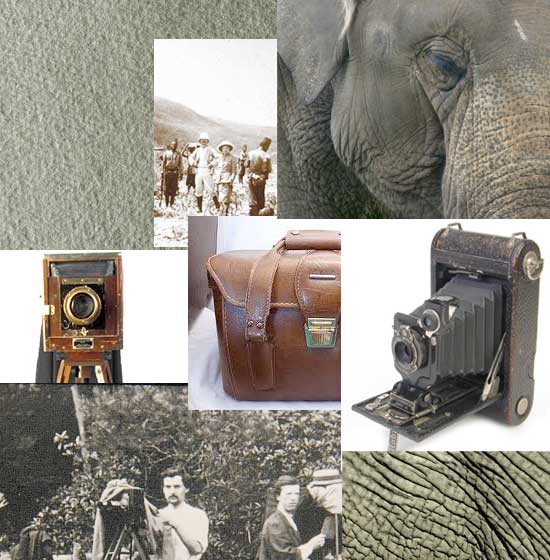
This is the most underestimated part of the process, but one of the most important. Here, we’re assessing the sketch. What textures would work? What colors would work? It helps to look at your influences.
Some artists who always inspire me are Mary Blair, Alice Provensen, Charley Harper, Maurice Noble and Eyvind Earle. And there are so many ways now to catalog and bookmark historical artwork.
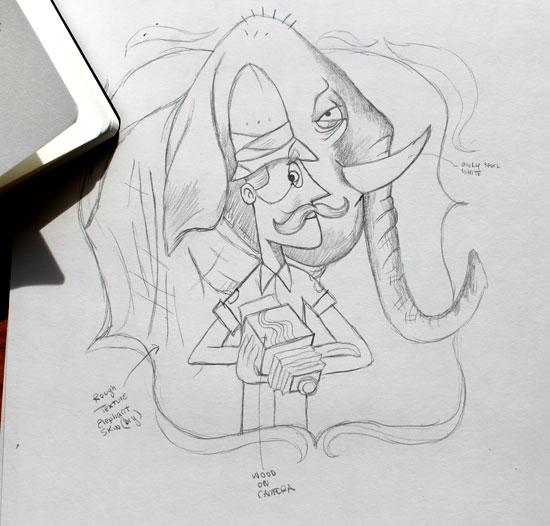
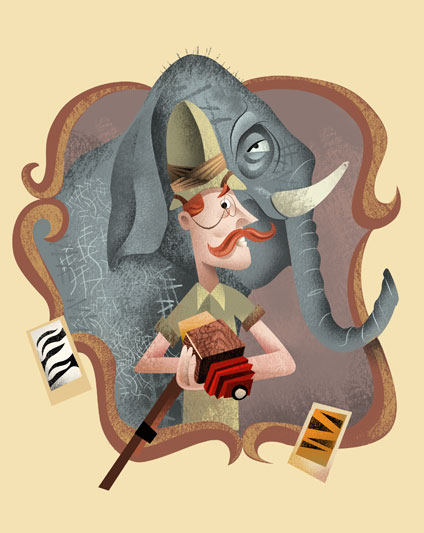
Also, if I’m drawing an elephant’s skin, or wood on a camera, or a band on a helmet, I’ll want to take a close look at the real thing. Google Images is quick, but if I have time I’ll run to the library. Sometimes I do this as soon as I have an idea. Really seeing what you’ll be working with helps.
Crafting Your Own Brushes
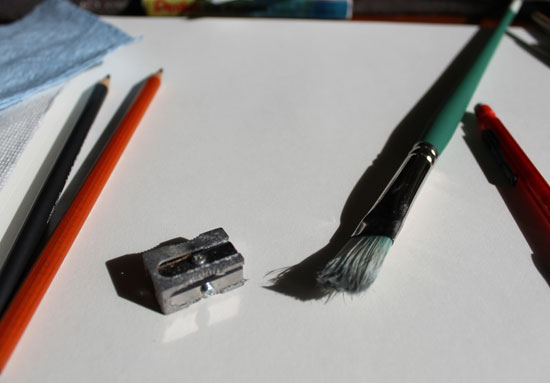
I do this because I want my brushes to be my own. Many great websites out there offer textured brushes for Photoshop. For me, the more unique these brushes, the better. Based on my sketch and research, I will have some idea of what I want to capture. I’ll use oil pastels, paint, paper towels, charcoal and anything else. It’s all about being resourceful — use everything. One more thing: when making brushes, the grittier the paper, the better. The more tooth it has, the more the marks will scan. It is for this reason alone I have to clean my scanner all the time.
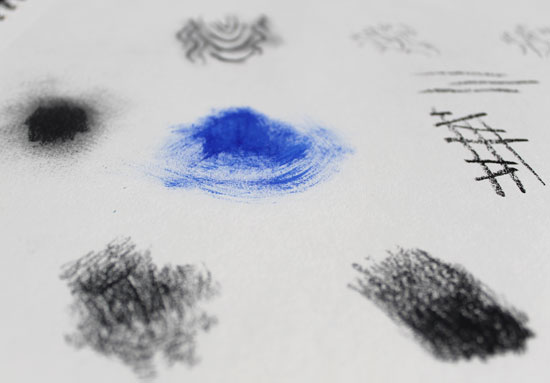
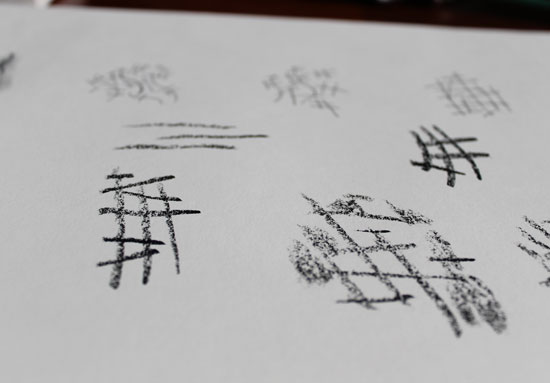
Some rough crosshatching for the elephant’s skin, with an oil pastel on drawing paper.
Scanning It All In
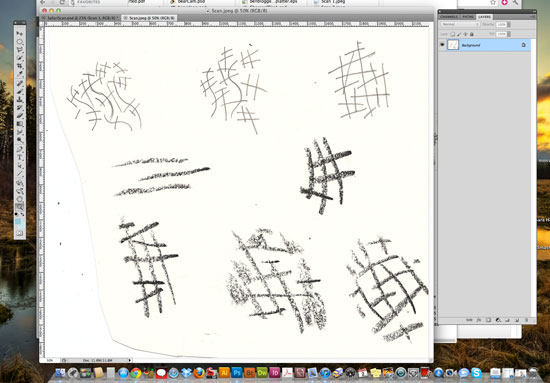
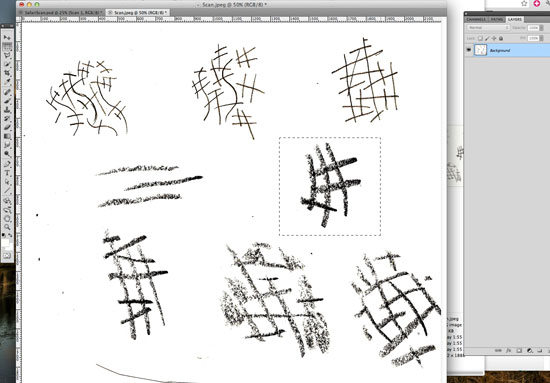
Scan everything: the initial sketch, the textures, anything you’ve made to this point. I’ll keep anything that I don’t use at this point in a library, possibly to use for something else. I’ve set the scanner to 600 DPI at “Millions” of colors. If your scanner has a “Sharpen” setting, crank it to “High.” You can scan the sketches in black and white at 1200 DPI, or in grayscale since the brushes will be black and white. I’ve set the colors to “High” so that I can archive the files and use them for something else. Once everything has been scanned, let’s open the images in Photoshop.
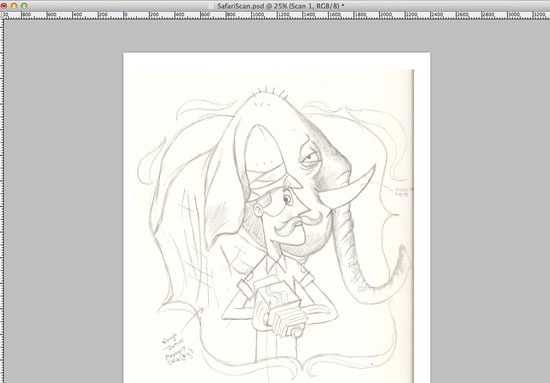
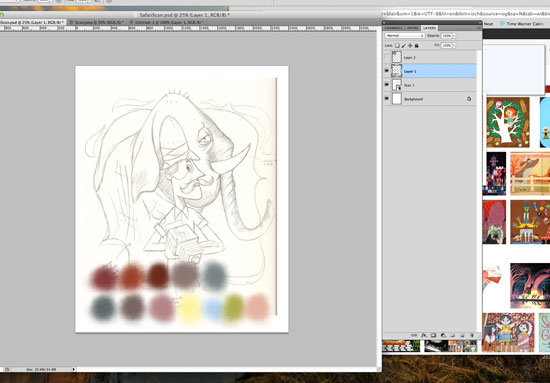
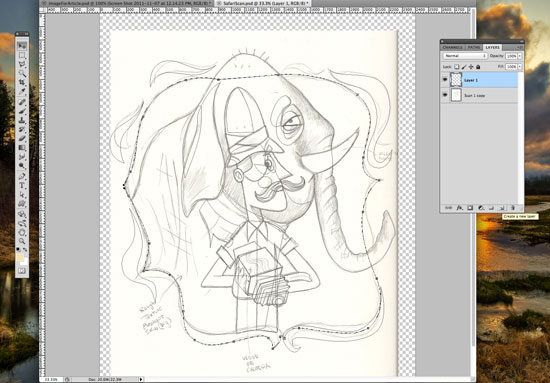
Here is a scan of my original sketch. I scanned it in at 300 DPI because I will eventually be printing this piece.
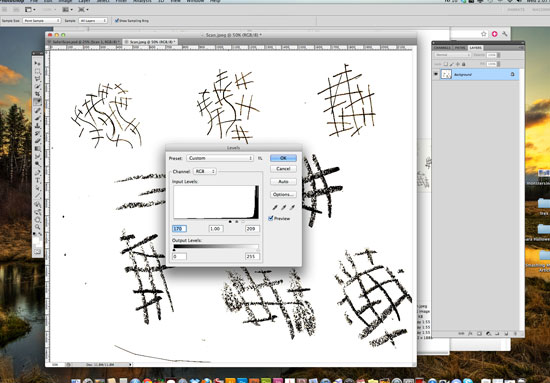
If you scan as black and white, you won’t need to worry about adjusting the levels. I’ve scanned in color, so I’ll increase the black and white values in Photoshop. The levels can be found in Images → Adjustments → Levels.
Defining Brushes In Photoshop
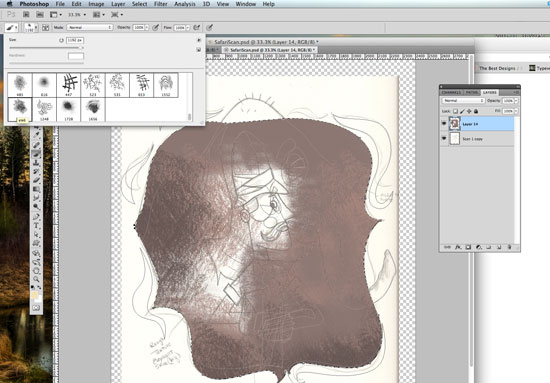
I recommend making each one of these brushes a separate file. For the resolution, you can go up to 2500 × 2500. It really depends on what the finished piece needs to be. For this exercise, I’ll select a portion of the scan and define a brush from it.
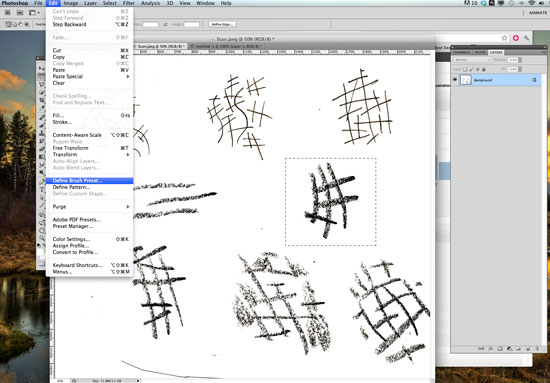
From the menu drop-down, go to “Edit” and then “Define Brush.”
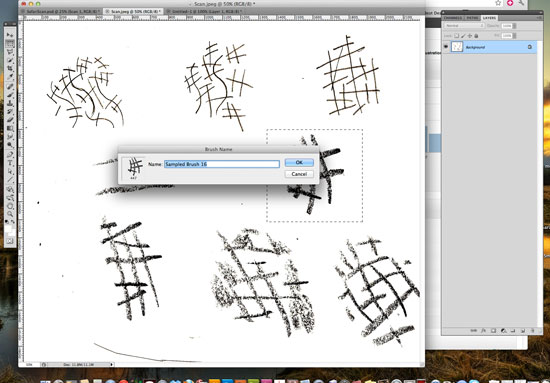
Now that we have created a brush, we can name it. It will be added to our Brush palette.
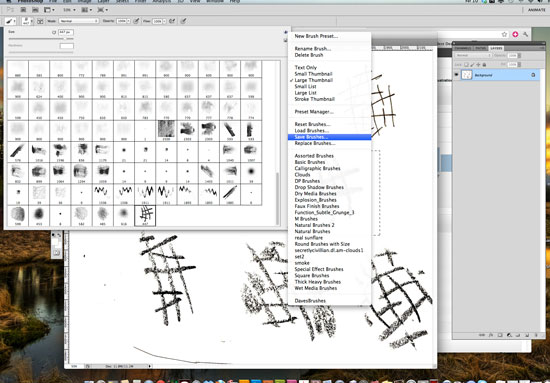
You can view the Brush palette by selecting the Brush tool. Look at the options toolbar, and you’ll see a thumbnail of the brush; you can pull this down to view the entire palette. From the menu arrow in the top right, you can save brushes you’ve created. Brushes are saved in Photoshop’s Presets/Brushes folder. You can also load brushes from this menu as well.
Selecting A Color Palette
Now that our brush set is in order, let’s start painting. For the color palette, I’ve researched my idols. Mary Blair and Alice Provensen are masters of color and shape. I always look at their use of color and design. Again, this is why research is so important. Study the people you admire, and analyze why you admire their work. I really like a somewhat muted palette, with some small areas of intense color. In my scanned sketch, I’ve added another layer and sampled the colors I’d like to use.
Making Shapes And Painting
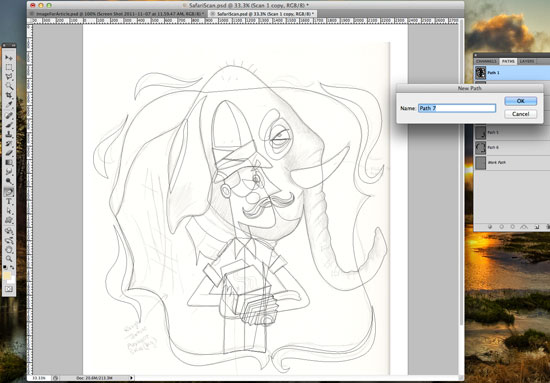
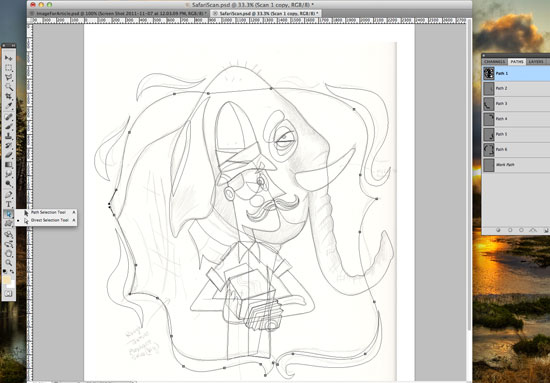
Let’s go to the Paths menu and draw the shapes that we want to paint. From here, we create a “New Path” using the Pen tool, to define the shapes that we established in the sketch. So, let’s open the sketch that we scanned, select the Pen tool from the toolbar, and select “New Path” from the Path menu. Once the Path is saved, we use the Path tool (which is the Pen tool), and start tracing out our shapes. The image below shows all the paths I’ve created that I intend to paint.
Let’s start by painting the shape that will be the background. From the toolbar, select the Path tool, and select a specific path.
Now that we’ve selected a Path, we can create a selection from that path. To do this, select from the pull-down menu on the right in the Paths menu. You’ll see an option named “Make Selection.”
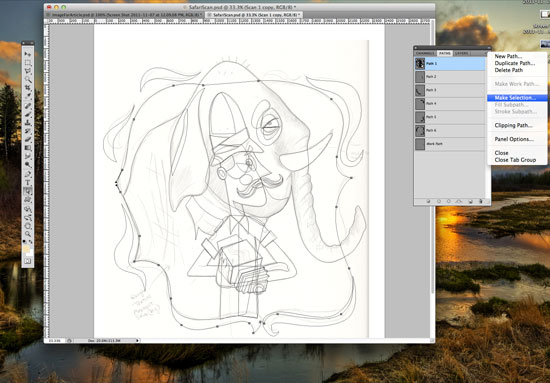
Once that’s selected, a dialog box will pop up asking for a radius to feather the selection; 0 is fine. Also, enable “Anti-aliased” and “New Selection.”

Now that we have a selection, we can “Create a New Layer.” This layer will be specific to this shape. We’ll end up with many layers for each shape, but they will give us the flexibility to edit down the road.
Now that we have a new layer, and the Path is a selection, we can use a brush from the brush set that we created. Also, I’m still using the colors from the palette that I created earlier.
Here’s where the research, brush creation and painting all come together. Let’s paint the path on a “New Layer,” using the steps described above.
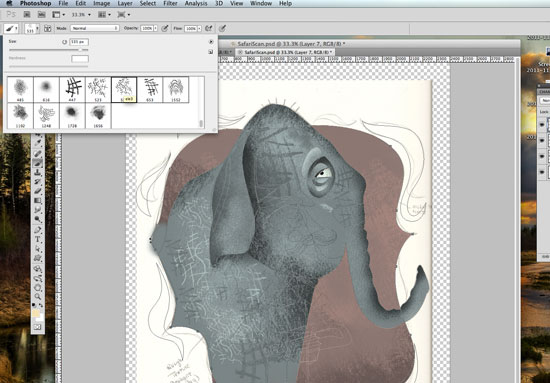
Painting within the shapes you’ve defined is a chance to experiment. You can try all kinds of things, like making the brush more transparent or painting over other textures. For me, it’s a lot of trial and error. This image below is a close-up of the brush I’m painting with.
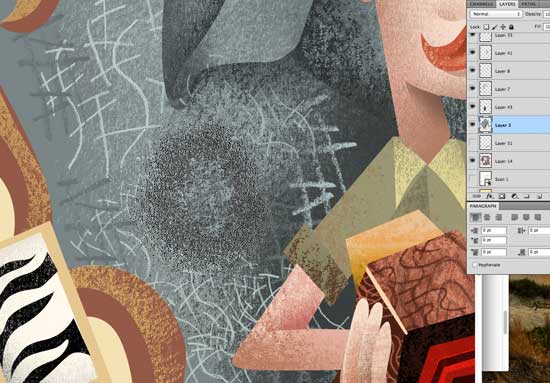
After many painted layers, I end up with a piece that is digitally painted with hand-crafted brushes.
Other Resources
You might be interested in the following articles and related resources:
- Illustrations of Alice and Martin Provensen Alice and Martin Provensen were a husband-and-wife illustration team. They wrote and illustrated numerous children’s books, including many little and giant golden books from the ’40s until Martin’s death in 1987. Alice continues to work as an illustrator.
- “How to Steal Like an Artist” An excellent article on creativity and life by the brilliant Austin Kleon.
- The Drawn Blog A daily source of inspiration for illustration, animation, cartooning, and comic art.
- Today’s Inspiration A great source for inspiration and the history of Illustration by Professor Leif Peng.


