Developing A Design Workflow In Adobe Fireworks

Email Newsletter
Weekly tips on front-end & UX.
Trusted by 182,000+ folks.


 Custom Web Forms for Angular, React, & Vue. Your backend.
 Celebrating 10 million developers

Photoshop, Illustrator, Fireworks and even Web browsers themselves are available to aid us in our work. But with so many choices, how do we determine the right tool to move from concept to functional design?
Over the years, I have come to rely on Adobe Fireworks as the main workhorse among my design applications. It’s built from the ground up to create screen-ready graphics; it’s object-oriented by design; and it’s lightning fast for creating UI elements.
Further Reading on SmashingMag:
- Sketch, Illustrator or Fireworks?
- Switching From Adobe Fireworks To Sketch: Ten Tips And Tricks
- The Present And Future Of Adobe Fireworks
- The Power of Adobe Fireworks: What Can You Achieve With It?
While Photoshop has made great strides lately by adding some vector support, it simply has not been able to match the speed and reusability of Fireworks for production work. Read on to get a glimpse of my project workflow (sketches → wireframes → graphic comps → export) and to see how Fireworks fits into these different stages.
Sketches
Sketching is arguably the most valuable part of my design process. In terms of workflow, this step isn’t specific to Fireworks, but it’s still a crucial part of getting my ideas flowing.
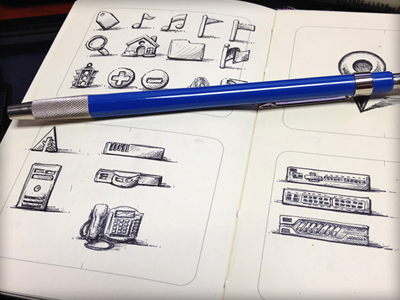
Sketched icons
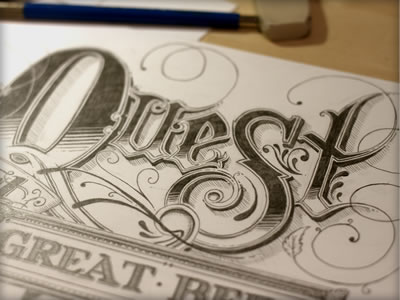
“Quest” (another sketch on paper)
Sketched designs can be done simply with paper and pen or created directly in Fireworks, and they can end up being works of art in and of themselves. I start most projects with sketching in some shape or form, and I use a few different techniques depending on the time and materials available.
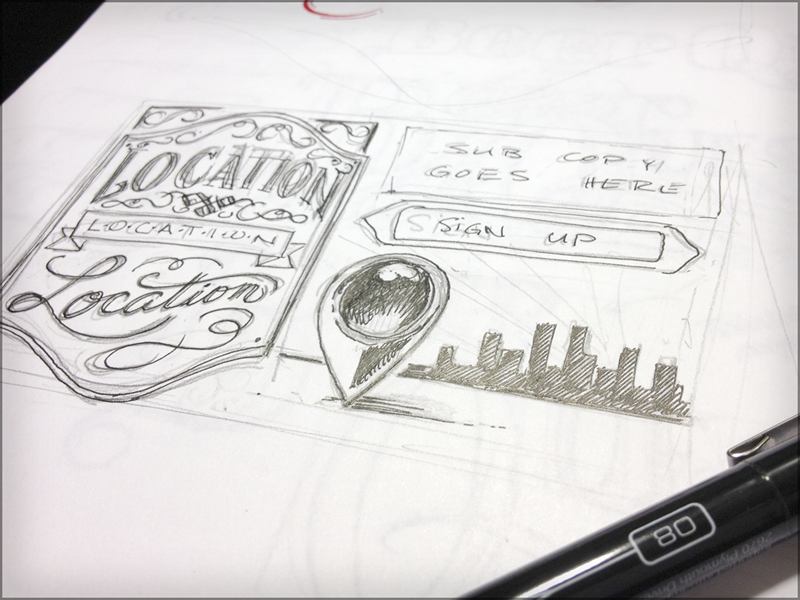
High-Fidelity Sketching
Hi-fi sketching is a great option. It allows the designer to forgo the digital tools and break out the pencil, pens and paper. Peter Buick’s recent post “The Messy Art of UX Sketching” outlines this in far greater detail than we can here, so check it out. Because high-fidelity sketches exist on paper, they have permanence; and collaborating on sketches is easy by passing them around, drawing on them and making notes about necessary changes. But by all means, make copies of your work; I wouldn’t want to get angry emails saying that I told you to let others draw all over your beautiful illustrations!

Hi-fi sketches of mobile screens and interactions
“But why should we start with sketching?” you might ask. The reason is because getting caught up in pixel-precision this early on in a project by going straight to digital is just too easy, and it’ll cost a bit of time in the long run. Remember, Fireworks is all about speed and production, and dropping back to pencil and paper is both a fast and easy way to get your ideas out so that you can start iterating. For those of you who truly enjoy the old-school ways of pencil and paper, here’s a selection of templates built specifically for that purpose. I’ve used these for both mobile and desktop website designs, and they can really help keep your UI consistent and speed your sketching along.
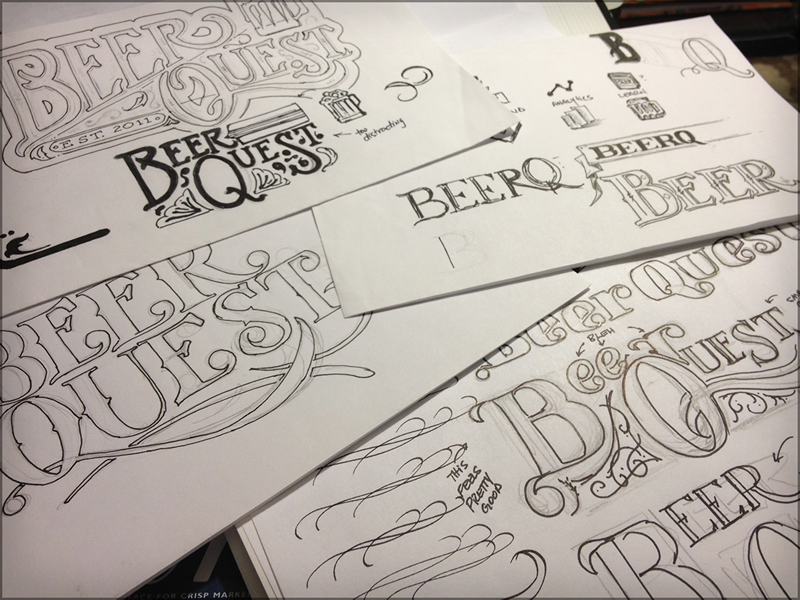
Don’t be afraid to explore many concepts and iterations.
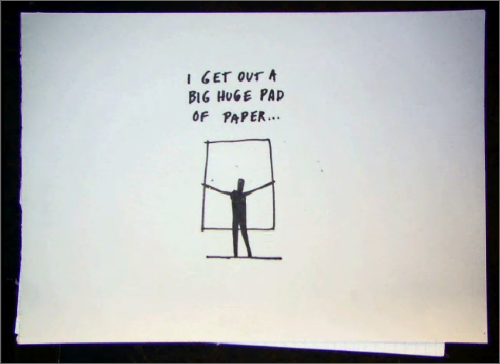
Sharpie and a Big Pad of Paper
Using a simple Sharpie or other marker and a big pad of paper is quick, inexpensive and fairly low-fi (meaning there doesn’t need to be as much detail). This lets you capture big ideas and quickly define broad concepts in the design. You can pick up a Sharpie and a huge pad of paper at a local office-supply shop. Throwing away or recycling these drawings is not a problem either — they’re not exactly pages in a sketchbook.
Quick aside: When David Gray interviewed Jason Fried of 37signals, they spoke about exactly this type of low-fi sketching. Gray drew the notes of their conversation, and this fascinating sketched conversation can be seen on Gray’s website. The “big pads of paper” mentioned by Fried in the video can be found on Edward Tufte’s website.
Jason Fried on design
Pro tip: Sketches can help define site maps and user flows in the absence of a project brief. Are you making a brochure website, a CMS, or a single-page design with tiered layers driven by JavaScript scrolling? Sketching your designs can help cultivate your ideas and reduce design time.
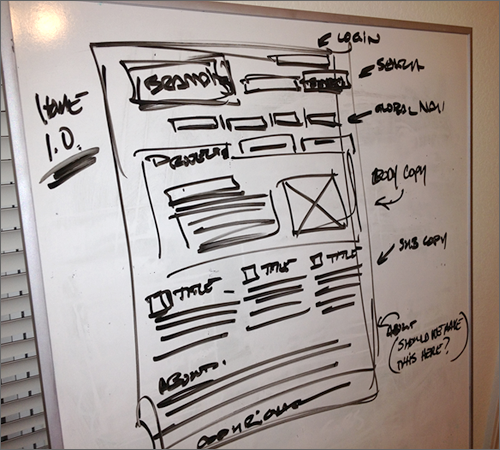
Whiteboard and a Camera
This is the option I usually default to, because a whiteboard offers the same speed as a Sharpie and paper but making changes is easier, and you’re not wedded to particular ideas. A whiteboard is impermanent, and it makes for a great projection surface, with collaborators being able to suggest changes in a meeting room. Large whiteboards can be expensive, but you should be able to find smaller whiteboards at your local office-supply retailer for prices that won’t break the bank. I keep a poster-sized whiteboard (24 × 36 inches) at home for just such occasions.
Your concepts don’t have to carry heavy detail — just capture the big ideas.
Sketch in Adobe Fireworks
One of the most beautiful features of Fireworks is that it allows you to create vector objects but also offers full-featured bitmap editing. Fireworks supports Wacom tablets and pressure sensitivity to a degree, but it’s not nearly as fluid as what’s available in Photoshop. That being said, Fireworks does allow you to “paint” vector strokes, and I’ve done this with varying degrees of success. The advantage here is that, while it may not be quite as free-form as traditional media, you don’t have to jump through additional hoops, and your sketches will already be on a digital canvas.
Pro tip: When using a Wacom tablet for sketching, use a large canvas size, such as 2500 × 2500 pixels. Because tablets are sensitive, drawing on a small canvas accurately can be difficult. With a large canvas, you get better control and can zoom in to add fine detail.
In my typical workflow, I toss my initial ideas onto a whiteboard, snap a photo of the board with my iPhone, and email it to myself (or save it to Dropbox). At that point, it’s easy to pull the sketch into Fireworks to start building a wireframe in layers on top of the photo.
Snap a quick picture of your sketch with your mobile phone, and email it to yourself.
Photos of sketches work well if you don’t have a scanner.
Wireframing
Thinking in Patterns
When building a wireframe in Fireworks, one of the most important things is to think in patterns. This doesn’t mean using the design patterns or common interface conventions that users often look for in a design, such a text box for site-wide search. Rather, it means thinking about whether certain elements should share similar formatting throughout the design? Items in a sidebar, content lists, user profiles and photos are all good candidates. Fireworks can already help by creating these content blocks as reusable UI elements in your document library. You can select a group of objects and convert them into a single symbol (we’ll talk about creating symbols soon), and then simply drag it from the document library onto the design as needed. If changes are needed, simply update the library symbol, which will update all other instances throughout the document.
Pro tip: 960.gs is a popular CSS framework for creating fixed-width designs. A Fireworks extension for 960.gs is available that automatically creates guides spaced out for the framework. If you’ve already made the jump to responsive design, check out Matt Stow’s Export Responsive Prototype, which exports your Fireworks slices to simulate a responsive layout when you create reflowed designs as separate pages. And if you have no idea what the difference is between fixed-width and responsive design, we’ve got that covered, too.
Creating Pages
I’ll typically start with the header, along with other UI elements that repeat through the website, such as the search box and sidebars. I can then take these elements and define them in my “master” page in the Pages panel. By doing this, any new pages I create will share these elements. They remain locked and on their own layer, so I can design more freely and save time by not having to reconstruct them for each new section that I add to the website. To create a master page, right-click on an existing page in the Pages panel and choose “Set as Master Page” in the pop-up menu.
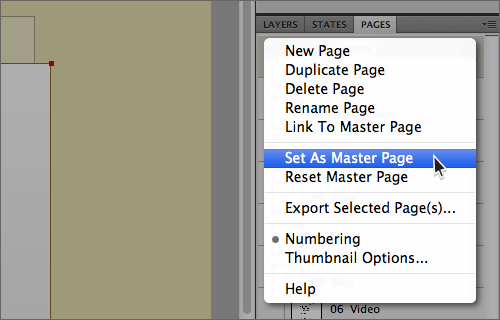
Creating a master page
This is really where pattern-based thinking helps. Will your sidebar have its own background colors and texture? If so, you might want to define this on the master page. However, if some pages will expand to the full width of the design, then defining a sidebar here might not be the best solution. Pages have their own unique properties, including canvas width and height, resolution and exporting options, which we’ll discuss later. Hopefully, these ideas will help you identify good candidates for master pages. Webdesign Tuts+ offers a great video tutorial by Connor Turnbull titled “Getting Started With Fireworks: Using Master Pages, Pages and Web Layers.” Remember that pages can have unique dimensions, which is a huge advantage in Fireworks. Adding your header to the master page is fine, because it is anchored at the top of the browser window, but the page’s length can vary. The footer is probably not something to include on the master page, but it can be used very powerfully as a library symbol, so let’s look at symbols next.

All new pages now include repeatable elements defined on the master page — headers, footers and sidebars that are easy to update.
Creating and Using Symbols
Returning to the concept of reusability, the document library in Fireworks can be an indispensable tool for items you intend to reuse. Library symbols can contain groups of objects, enabling you to quickly replicate blocks for a CMS. Need a log-in form in the form of a modal dialog to appear on multiple pages? Create that as a library symbol, complete with the background overlay in the size of your canvas, and drag it from the library to your canvas to illustrate the effect. If you need to make changes to the log-in modal dialog at that point, those changes will be reflected in every instance of the symbol, on every page, on every layer!
To create a symbol, select the objects that you’d like to include (for example, in the footer), and choose “Convert to Symbol” (Modify → Symbols → Convert to Symbol, or press F8 on your keyboard). The text, shapes and anything else you had selected are now available from the Document Library panel, and you can drag the symbol onto the pages as needed. Later, if you decide to make changes to the footer symbol, just make the changes once and they will propagate to every page on which the symbol appears!

You’ll find any symbols that you have created in the Document Library panel.
Graphic Comps
Once the client has approved the wireframes, we can jump into enhancing the website’s underlying skeleton with high-fidelity design. Fireworks allows us to make this transition without ever leaving the application — we enjoy the same functionality of multiple pages and library objects, but now we can add gorgeous photography, beautiful typography and striking color enhancements, all in this one program.
Vectors and Bitmaps
Now that we’ve created the wireframes, we’re ready to get the color and typography flowing. As mentioned, Fireworks combines both bitmap editing and vector object creation in a single powerful package. I usually create as much as possible in vector format because the files are scalable and can be reused for Web and print. The vector editing tools in Fireworks are easy to use, and many of the features you’ll find in Illustrator for manipulating vector objects are available here, too. Editing tools for bitmap and vector can be found in the Tools toolbar, and there is a separate panel for combining and editing vectors (the Path panel).
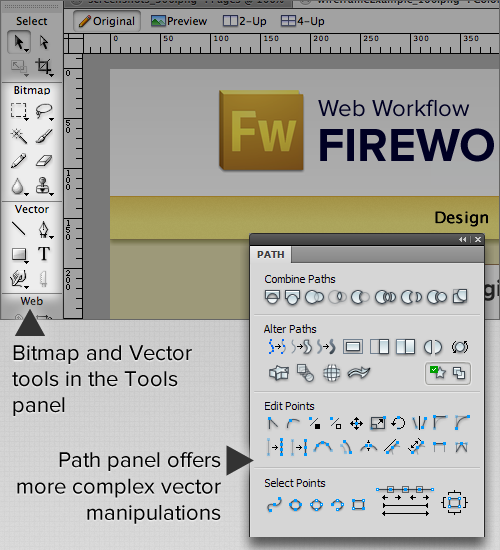
Fireworks offers both bitmap and vector editing tools.
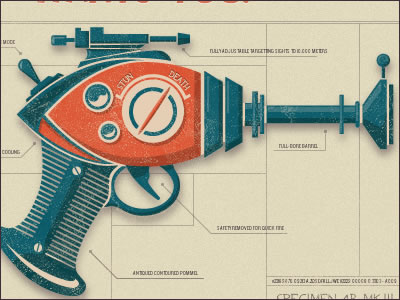
A vector illustration created in Fireworks
Layers, Sub-layers, Groups
In Fireworks, layers work more like they do in Illustrator than in Photoshop, so keep this in mind. Both layers and individual objects can be named, which helps dramatically with exporting if you need to send the graphic files to another designer or developer. I usually name my main layers according to the overall sections of the comp, and then place objects into sublayers to keep them organized. Layer names such as “header” and “twitter block” clearly communicate to other designers which elements of the UI are where in the layout. In addition to layers, Fireworks also supports the grouping of objects and arranging of individual objects and symbols from front to back. This provides an additional level of control when you’re overlapping objects and effects.
Property Inspector Panel
Arguably the single-most powerful UI component in Fireworks is the Property Inspector (PI) panel. The PI panel can be normally found at the bottom of the screen when you first open a new document in Fireworks. Fills, strokes, gradients, patterns, object position, scale and opacity, blending modes, live filters, text properties and much more can all be defined quickly and easily from the PI panel. It’s a convenient place to quickly inspect and change the properties of all kinds of objects! And let’s not forget about Live Filters, which are the secret sauce for making Fireworks a fast tool for production.
Many people ask where the true power of Fireworks lies relative to Photoshop. The answer is the features and behavior of the PI panel. It is your one-stop shop for a vast amount of tweaking. If you’ve ever used Dreamweaver, you’ll be familiar with the panel floating at the bottom of the screen and the myriad of controls it offers.
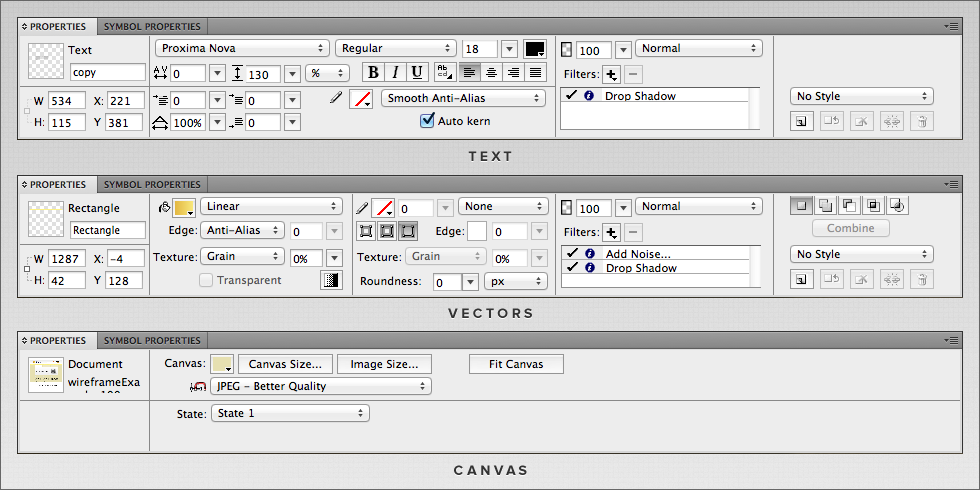
The PI panel provides controls for text, bitmap and vector objects, live filters, compound shapes, the document canvas and more.
Applying (Live) Filters
Just as we apply adjustment layers and effects in Photoshop, we can apply live filters to objects in Fireworks, and these are all assigned in the PI panel. When you use filters in library symbols, such as glows and drop shadows, they are considered a part of the object and can cause the x and y positions of that element to fluctuate. Live filters can also be applied to symbol instances so that their positions better line up with your grid. It really depends on whether you need the filter to appear in every instance of the symbol or not.
Live filters can also be combined and stacked on top of one another, and they’re multiplicative, which means you can apply more than one instance of the same filter to an object. For example, you can create a very thin, heavy glow around an object, and then apply a secondary glow of another color that’s lighter and more diffused, making for an entirely new treatment. Live filters can be edited at any time simply by double-clicking the filter that you’ve applied and changing its settings. Additionally, live filters can be rearranged by dragging them into a new order, giving you substantial control over applied effects.
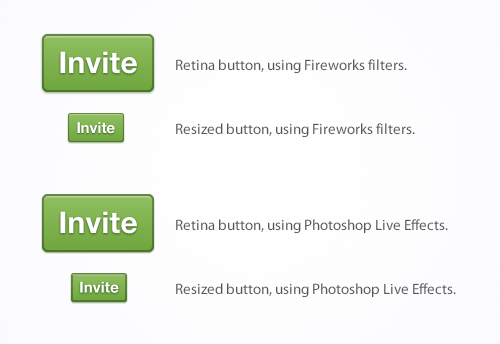
The live filters magic happens in the PI panel.
Keep in mind that using live filters is different than applying filters via Fireworks’ top menu. Live filters remain editable, whereas “regular” filters do not, so I’d recommend using live filters by default. That being said, live filters can affect how much memory Fireworks uses. If your design becomes too complex, you can branch a single UI component or section of the page into its own file to maintain editability, then flatten the layers and bring that object back into your primary comp as a bitmap. Iconography created in Fireworks
Exporting
Now that we’ve converted the wireframe into a high-fidelity full-color design, it’s time for the transition to a fully functional website using HTML and CSS. We’ll use Fireworks’ superior compression and exporting abilities to pick apart different parts of the design to be used as background images for headings, buttons and even tiled backgrounds.
Defining Slices
When the design comp is completed, it’s time to export the image files for use in the browser. Slices work similar to those in Photoshop; they allow you to define a section of the graphic comp as a flat bitmap image to use on the website or in the CSS. But Fireworks has the additional benefit of allowing us to define specific optimizations and file formats in different slices of the same document. GIF, JPG and PNG images can all exist in the same Fireworks document, and you don’t have to leave the app or go through multiple passes of file exporting, as you might in Photoshop or Illustrator.
Slices exist on their own Web layer above the rest of the design, so they’re easily toggled on and off with the number 2 on your keyboard (or using the eye icon next to the Web layer).
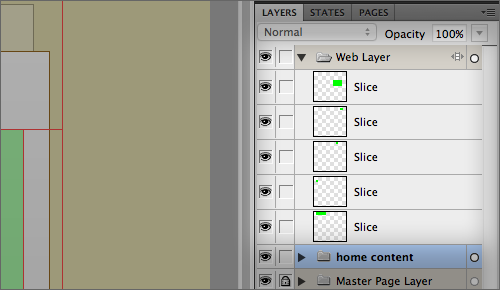
Slices can quickly be toggled on and off in their own layer.
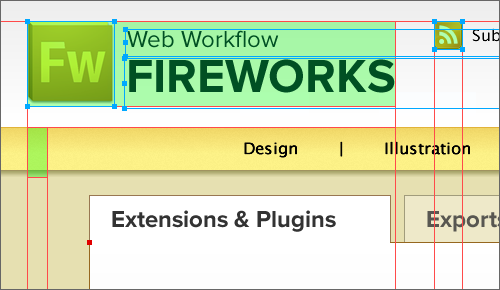
You could manually draw slices with the Slice tool from the default toolbar, but because Fireworks is object-oriented, you can simply select your object or group and choose “Create slice” (Edit → Insert → Rectangular Slice). The slice will be created automatically and set to the size of your object, including any live filters that you’ve applied.
Pro tip: Use the Slice tool to quickly determine the size of an object or icon to ensure that live filters such as glows and drop-shadow filters are not inadvertently cropped out of the final image.
Fireworks slices also enable us to define different parts of the overall comp using unique optimization, naming and file formats, and it gives us one-click exporting options, saving all of these parts in a single location on our computer. No need to get creative with cropping or creating separate files — it’s all done within Fireworks. Simply select your objects and choose Edit → Insert → Rectangular Slice (Alt/Option + Shift + U), then go to the Optimize panel and either select from the presets provided by Fireworks or define your own settings for each slice.
Slices are the secret power of Fireworks, enabling you to quickly define elements in the design for exporting.
Keep in mind that backgrounds are part of the slice, but these items can easily be placed on their own background layer with the visibility toggled off, giving your buttons and other UI elements full alpha transparency, thus maximizing their versatility.
Pro tip: You can quickly export slice objects after having made minor adjustments. Simply right-click the slice and choose “Export selected slice” to send the image out with your pre-defined settings. This also works when selecting multiple slices, each with their own optimization options. Keep in mind when using this technique that if you’ve changed the image “scale” in the exporting options (say, to create a thumbnail or a website preview for a WordPress theme), then you’ll need to go back into the export preview and reset the size to 100%, or else your sliced exports might look squished.
Exporting Defaults
Slices can either inherit the default exporting option for the file format (set in the Optimize panel) or be unique; meaning you can set a single slice to export as a JPG, while the rest of the image exports as PNG or GIF. This affords tremendous control for different parts of your graphic comp. Many times I’ve also created a separate page in my file titled “Exports” for background sprites and toolbars, which keeps my original image intact — very helpful in the event that the client wants to see the proposed changes. Simply select the relevant UI elements from the design, create a new page, and paste your objects into this new canvas. Once you have the UI elements for the sprite, you will easily have the exact pixel locations to plug into the CSS.
Pro tip: Fireworks saves natively in PNG format (with added meta data), which is easily viewable in a browser. I’ve used this feature in a pinch to quickly show graphic comps to clients and coworkers. But beware: multi-page layouts can get pretty big, which affects downloading time. Also note that the first page in a Fireworks document is what’s shown as the default view of the Fireworks PNG.
Exporting Options
Once you’ve created your slices, or if you’re simply exporting the entire comp to show a client, you’ll be taken to the exporting window in Fireworks. This works similar to the “Save for Web and Devices…” preview in Photoshop and Illustrator. Here you can once again change the level of compression, as well as see a live preview of the image in different file formats.
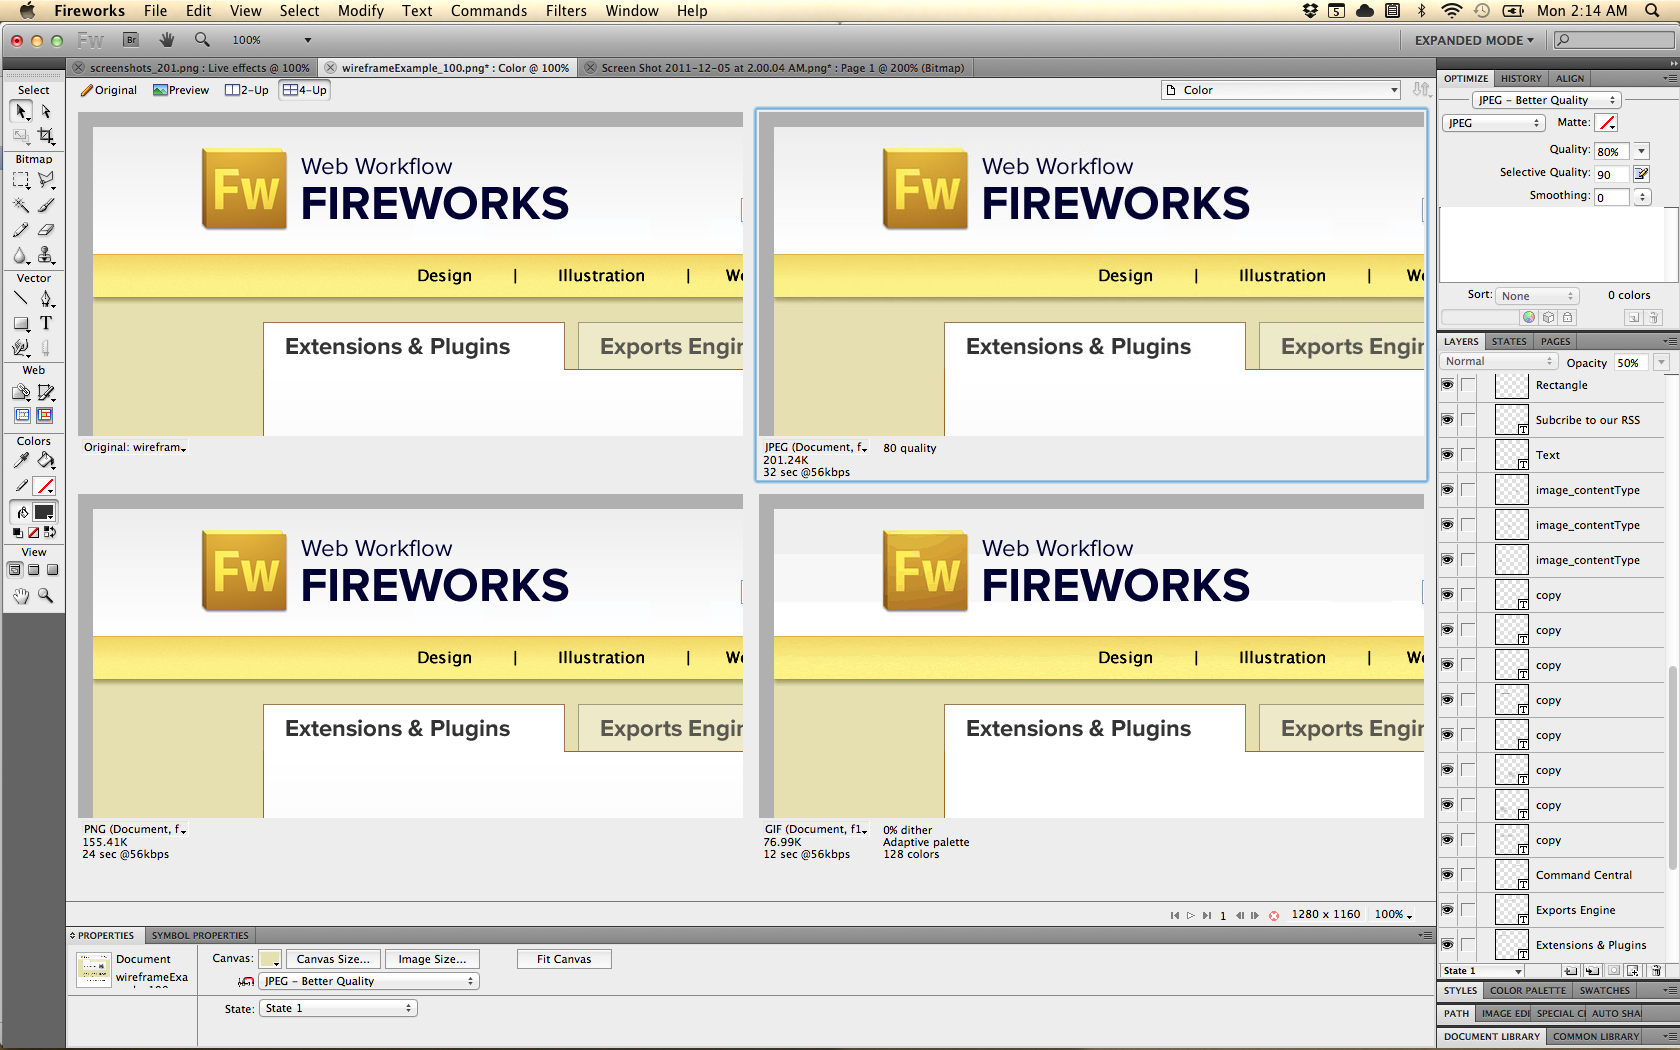
Export Preview gives us a quick look at the size and quality of the exported image.
You can also control the scale of the graphic — very helpful when you’re designing an icon for multiple devices and platforms (the standard and Retina-sized images for the iPhone display come to mind). You can also export HTML along with the images; export with or without slices; and save the file for use in other applications such as Photoshop or Illustrator.
Pro tip: Use the “Constrain proportion” options and scaling in the “File” tab to quickly export snippets of the design for posting to websites such as Dribbble or for promotional images for a feature area.
Try It Out
There you have it: a super-short synopsis of how to take your sketched ideas to wireframes and all the way to full-color graphic comps using Adobe Fireworks. The power of vector and bitmap editing, the easy and fast control over reusable objects, the excellent live filters and the very good compression and exporting options all make Fireworks a powerful tool for any (screen) designer.
Many of you already own a copy of Fireworks, having bought Adobe Creative Suite, but have simply never opened it up. It doesn’t cost anything to fire up this dormant app and see whether it provides some enhancements to your workflow. Why not give it a try? A streamlined workflow awaits!
Further Reading And Resources
- “10 Reasons why I prefer Fireworks to Photoshop for Web Design,” Leigh Howells, Headscape
- “7 Reasons Why I Choose Fireworks Over Photoshop,” Russell McGovern, Webdesigner Depot
- “Fireworks tips and tutorials,” Rogie King, Komodo Media
- “Dragnet (free) website wireframes kit for Adobe Fireworks,” Dragnet.se
- “Interaction Design and Rapid Prototyping With Fireworks,” David Hogue, Adobe Developer Connection
- “ Wireframing and Prototyping With Adobe Fireworks: Resources and Tutorials,” Oleg Mokhov, Speckyboy
- “35 Excellent Wireframing Resources,” Cameron Chapman, Smashing Magazine
- “Refining Your Design In Adobe Fireworks,” Benjamin De Cock, Smashing Magazine
- “Design Better And Faster With Rapid Prototyping,” Lyndon Cerejo, Smashing Magazine
(al) (mb)


