A Deep Dive Into Adobe Edge Reflow

Email Newsletter
Weekly tips on front-end & UX.
Trusted by 200,000+ folks.
 Register!

 Flexible CMS. Headless & API 1st

Most of us were thrown for a loop when responsive design came into being. We tried to jam it into our existing, pixel-perfect, old-as-the-web-itself processes. It’s been a steep learning curve (and still is).
In my previous article “Next-Generation Responsive Web Design Tools: Webflow, Edge Reflow, Macaw” for Smashing Magazine, I didn’t have enough space to dive as deep into those tools, as I wanted. So, in this article, I’m going to dive deep into just one of those tools: Adobe Edge Reflow CC.
Edge Reflow is one in an avalanche of tools that have come out that make it possible to visually design a responsive website. What you do with that design is up to you (and the capabilities of the tool). Edge Reflow was created to address how responsive design has changed our web workflows.
Reflow takes your static Photoshop (PSD) files and breathes responsiveness into them. Instead of having to create 3, 7, 14 or however many Photoshop comps for each necessary device or size, you can let Reflow convert the Photoshop content into HTML and CSS and then visually adjust the design using breakpoints in Reflow.
Where Does Reflow Fit In Our Web Workflow?
This is the question I get most often. As Adobe states, Reflow is meant to “start responsive designs faster and create high-fidelity prototypes through media query breakpoints, precise CSS layouts, grouping and more.” A big plus is that it connects directly with Photoshop, so the thought is that you can go from a static design to a responsive prototype (or at least a starting point) in a few moves.
What can you use Reflow for right now? I’ve seen Reflow used as a simple way to mock up a one-page concept for a client, which can work well. Reflow can also be used to visually resolve a website design problem. It’s a great tool for wireframing. If you want to build a complete responsive website without getting your fingers dirty with code, however, you’ll work too hard to accomplish a goal that other tools do better in less time.
Reflow may be part of a web developer’s toolbox, but it’s not meant to be a one-stop website creation tool. You’ll need to decide if it could (or should) play a part in your workflow based on what it can and can’t do. If you work with designers upstream, or you are a designer, then it might fit. As a developer myself, I’ll cut to the chase and add also that the code it generates is not how I would do it. For starters, it uses IDs for style names and is only optimized for WebKit browsers. Does that mean you throw the code in the trash? Not necessarily, as you’ll see.
You Can Start With Photoshop
Currently, Reflow is being positioned as a visual design tool, which means you can drag and drop content and make formatting edits using panels, but it does require some knowledge of HTML and CSS (at least the basics). If you step into Reflow not knowing what a float is or how margins affect a layout, then the learning curve will be steeper.
There are a few ways to start a responsive design project in Edge Reflow. You could crack open Reflow and choose File → New Project and start jamming on a blank canvas, pulling content from Photoshop or pushing content from Photoshop to Reflow (or a combination of those methods). Adobe focuses on the Photoshop connection because that’s how most designers used to start their designs (and maybe still do, depending on their workflow and distaste for code), so we’ll do the same.
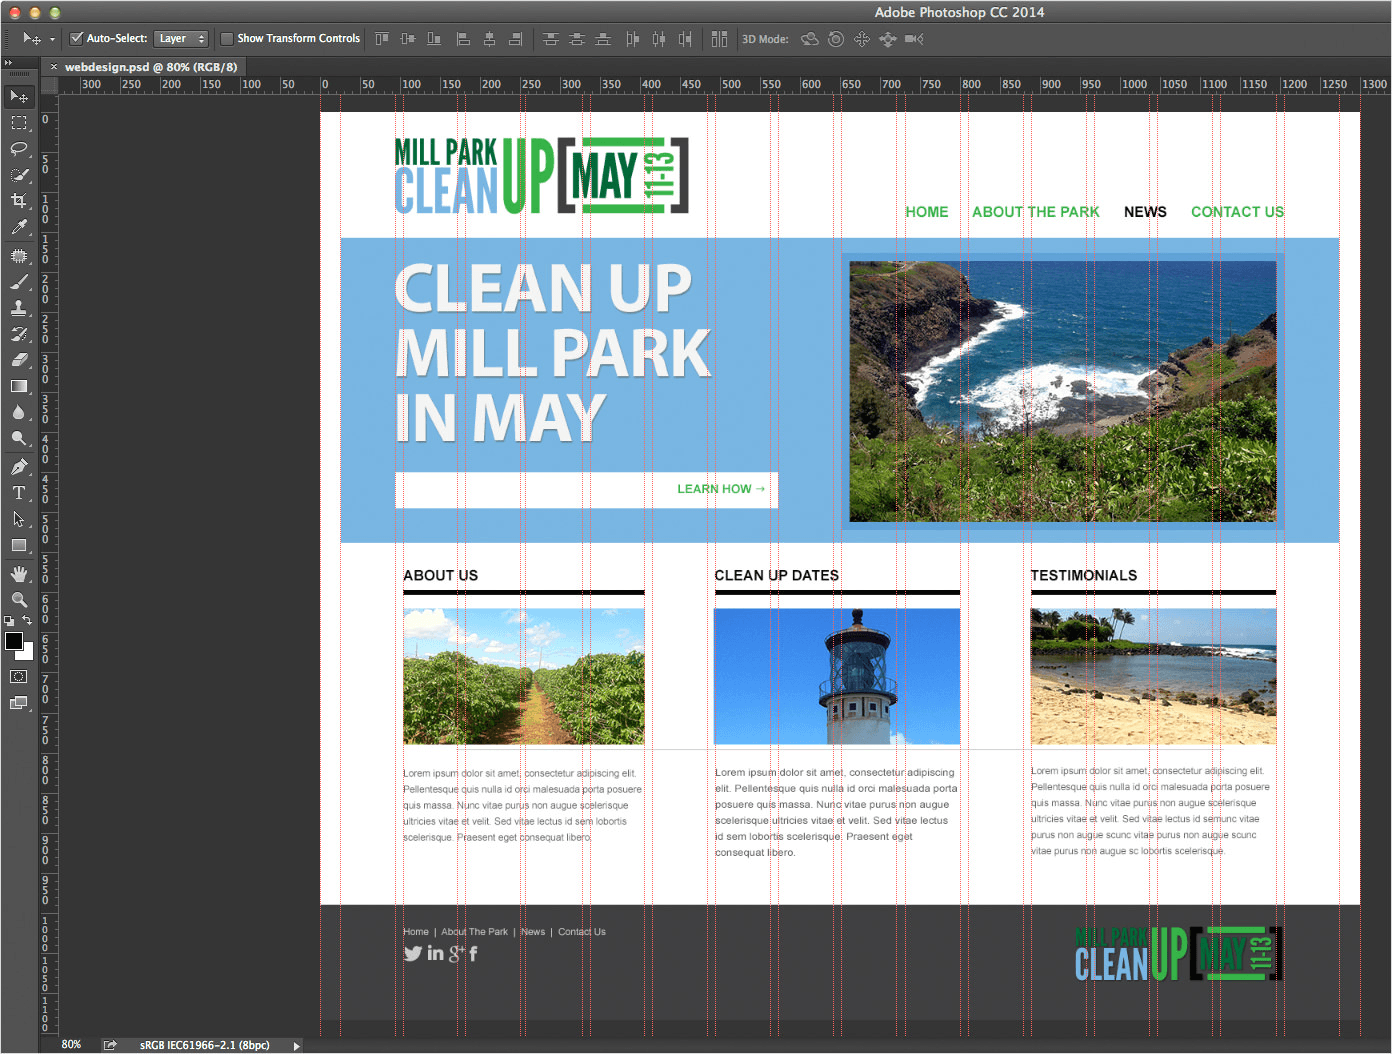
A lot of people I talk to start designing in Photoshop and then push (or export) to Reflow. This way, they use the same design features and knowledge of Photoshop that they’ve always had. That said, here are a few best practices for working with Photoshop if you plan to go to Reflow from it.
- Use smart objects. Smart objects are useful because they link shared content, such as navigation and footer content, to your Photoshop file. Smart objects for images also allow you to keep full-resolution versions for later editing (think non-destructive editing).
- Be careful about linked smart objects. Right after I said to use them, right? Highly suspect, Brian. Currently, any linked smart objects (PSB) files in Photoshop will be simply flattened when exported to Reflow. Suppose you have shared navigation with text — that will become rasterized.
- Set the right size. This doesn’t really need to be said, but start in Photoshop with the size that you are aiming for, whether it’s mobile first or something else.
- Set up Extract Assets. This is a must if you plan to export from Photoshop to Reflow. File → Extract Assets in Photoshop will generate the optimized assets (you’ll learn about this shortly).
- Round your numbers. As with all things web, we try not to keep our formatting values at things like
12.347655893pt. - Use shapes, not filled layers. Shapes become
<div>s in Reflow, and filled layers become nothing (they are dropped when you export). - Organize your layers. The HTML that is generated follows the stacking order in the Layers panel. Content at the top of the Layers panel will appear at the top of the HTML document. In other words, make sure that your footer content isn’t a top layer in the Layers panel, otherwise it will be close to the opening
<body>tag, and you’ll have to use some unsavory methods to position it at the bottom of the page in the HTML. - Mind layered images. Images with content layered on top of them are treated as background images in a
<div>in Reflow. - Think about naming layers. If you name a layer something like image.png, 200% image@2x.png, then two images will be generated. The first image in the list will be placed in the design in Reflow, and the other will be generated and will hang out in the assets folder.
- Mind text objects. Text objects that are drawn in Photoshop as a type area will have a dimension in Reflow. If you simply click with the Type tool in Photoshop, then the paragraph in Reflow will not have a width.
Photoshop Extract Assets
Adobe Photoshop CC has a feature called Extract Assets (File → Extract Assets) which utilizes Adobe Generator. You can generate JPEG, PNG, GIF, or SVG image assets from the contents of a layer or layer group in a PSD file when you export to Reflow. Choosing File → Extract Assets allows you to optimize assets, setting sizes, formats, and more. After setting up the optimization settings, your layer names are altered, adding a supported extension for an image format (PNG, GIF, JPG, or SVG) to a layer name or a layer group name. Generator will create the images used in Reflow and free us from having to slice in most cases (yay!). Even if you wind up not using Reflow, Extract Assets is worth a look. You can then export to Reflow and the optimized assets will be automatically generated.
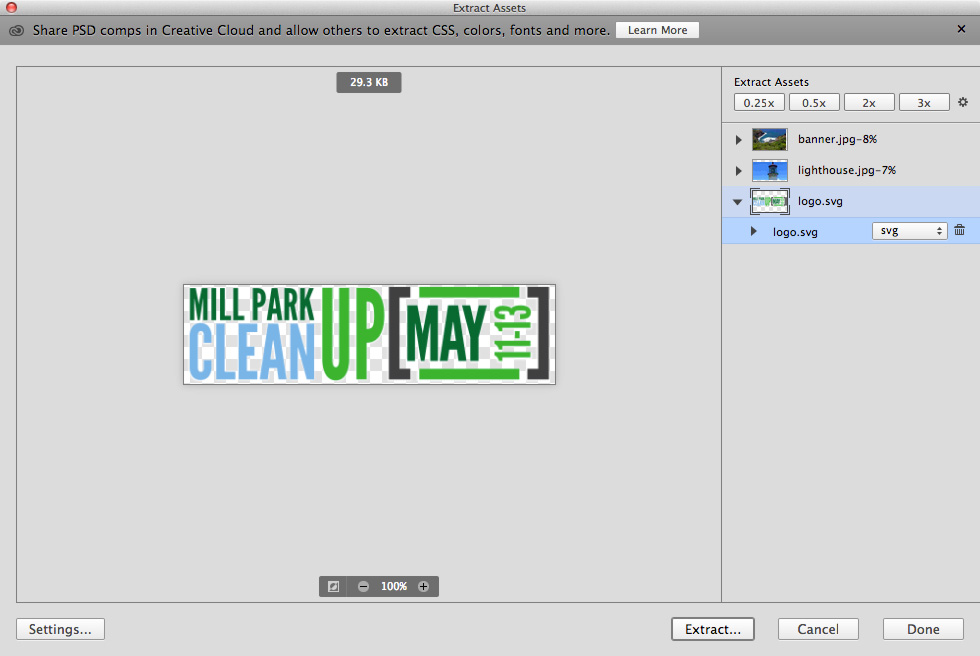
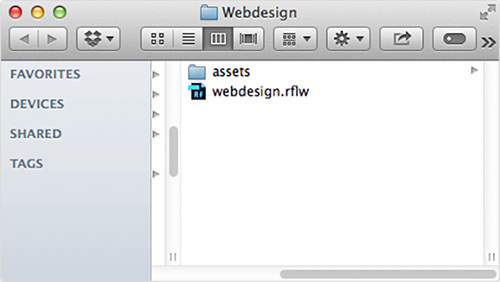
With the content named in the Layers panel, you can finally breathe responsiveness into your Photoshop file by exporting to a Reflow project file (File → Generate → Edge Reflow Project). When it’s complete, a folder will be generated in the same folder as the PSD. This folder contains a Reflow project (.rflw), as well as the generated assets in an assets folder.
Toss It Over To Reflow
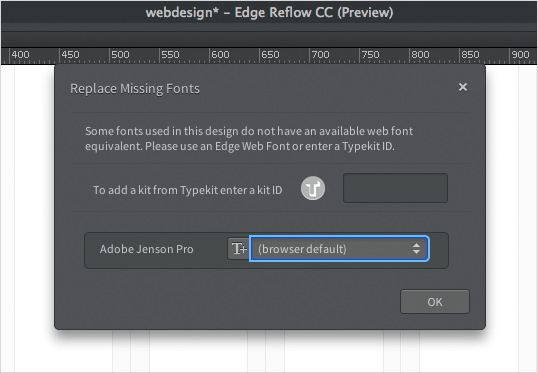
After you export from Photoshop, you can open the Reflow project file (.rflw) in Edge Reflow to see what was created. If any fonts are missing, Reflow will show a prompt allowing you to fix them with Typekit fonts, Edge Web Fonts, web-safe fonts or local fonts.
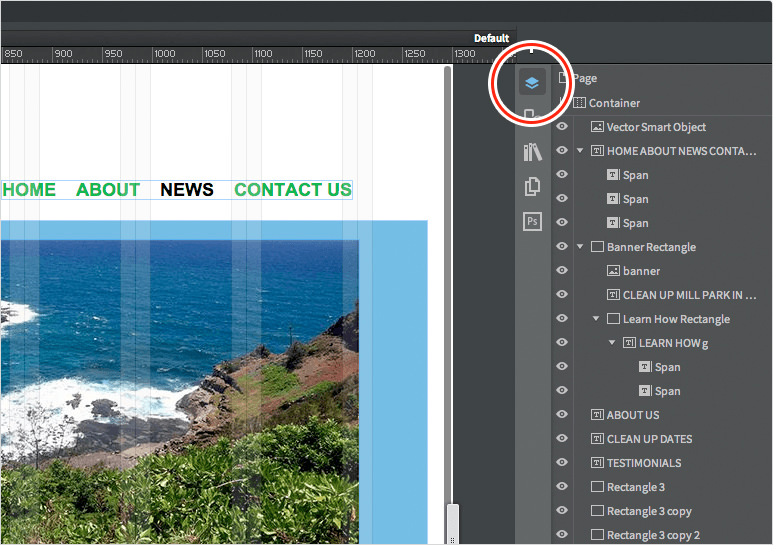
The Photoshop content was converted to HTML and CSS according to the original content (text, vector, raster) and the layer structure in Photoshop. If you click the Elements panel icon on the right, you will see the code (DOM) for the HTML that has been generated. If you look at the structure and naming, you will see that it is loosely based on the Layers panel in Photoshop. You will find that hidden content is ignored and that groups (the folders) are also ignored, but that the content within is not. Also, text is still editable (in most cases), and named vector content and raster content are now raster images.
The code that is generated uses HTML5 Boilerplate for a CSS “normalize” sheet, but the layout really isn’t based on an existing framework, such as Twitter’s Bootstrap. Below is an example of code generated for the <head> of a page when exported.
<!DOCTYPE html>
<html>
  <head>
    <link rel="stylesheet" href="boilerplate.css">
    <link rel="stylesheet" href="page.css">
    <meta charset="utf-8">
    <meta name="viewport" content="initial-scale = 1.0,maximum-scale = 1.0">
  </head>
  <body>
  …
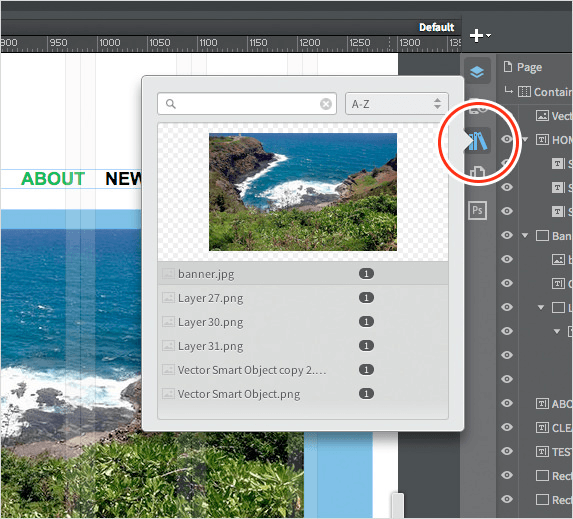
The image content that is generated from your named layers in Photoshop is in the assets folder (as we saw earlier) and can be found in the Asset Library panel on the right in Reflow. The Asset Library panel shows all images in the assets folder, even those not currently in the design, and it functions similarly to the Links panel in InDesign and Illustrator. You can tell which images are not being used in your design because they have a number 0 to the right of their name in the panel. In this panel, you can search for assets, replace assets, update assets and more.
The Photoshop CC Connection
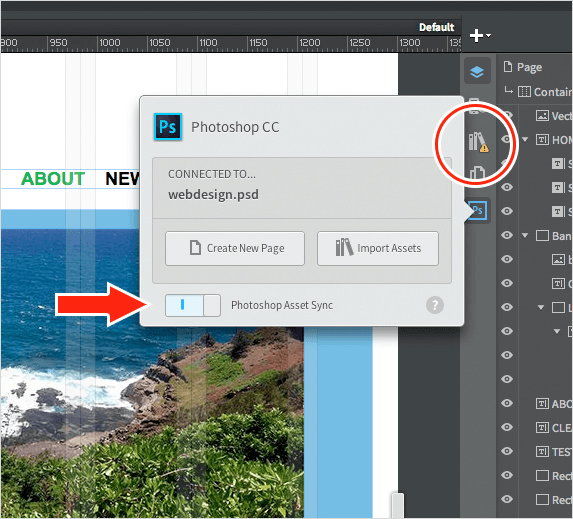
Once you export from Photoshop CC, the connection to your Photoshop design is still somewhat alive in Reflow. I say “somewhat” because any changes to generated image content made in Photoshop (and that you named in the Layers panel) can be updated in Reflow. Text, page elements and other unnamed content will not.
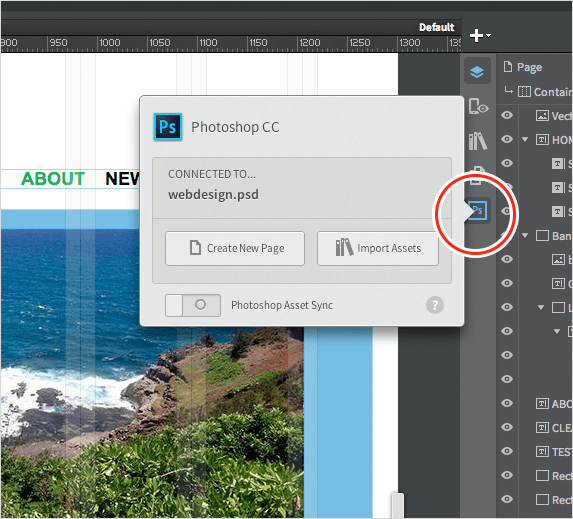
In Reflow, the Photoshop CC Connect panel (on the right) is where you will see the connection to Photoshop. If Photoshop CC is open, then the panel will show you that Reflow is connected to whatever file is open in Photoshop. This threw me at first. You could have a PSD open in Photoshop that has nothing to do with the Reflow design, and it will still show you that it’s connected.
“Connected” can mean a few things. You can open the PSD file that the Reflow project was created from and make updates, which in turn will update the applicable content in Reflow. You can open a different PSD (or even show a different layer comp) — say, for a new page on the website — and create a new page from that PSD content by clicking the “Create New Page” button in Reflow. You can even open a PSD file and simply generate the named layer content and save it into the project’s assets folder (maybe from a PSD that contains icons or other elements) by clicking the “Import Assets” button in Reflow.
To make changes to the design in Photoshop and update the Reflow project, you will first need to turn on “Photoshop Asset Sync” (an arrow is pointing to it in the following screenshot). You can then open the PSD in Photoshop and make changes to the design, and any named layer content that is generated by Photoshop Generator will need to be updated in the Asset Library panel in Reflow (circled below).
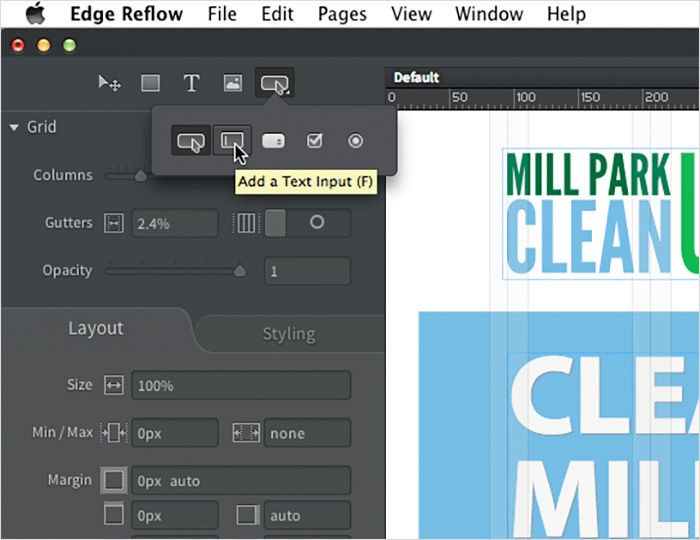
Adding And Editing Breakpoints
By default, your project in Reflow contains no breakpoints (i.e. media queries) and is a purely fluid design (set to percentage widths, with no maximums or minimums). It’s your job to add breakpoints where you see fit (usually where the design falls apart). Clicking the “+” (plus) button in the upper-right corner will add an initial breakpoint (which is a good idea). If you click and hold down “+” in the upper-right corner, a menu will appear that lists all of the breakpoints. Here is where you can edit an existing breakpoint (the value or the label) or delete a breakpoint. You can also set the breakpoints (media queries) to be either minimums or maximums (one or the other).
I really wish Reflow would take media queries further, allowing for a mixture of max/min or other types of media queries (think Retina), but at its core, it’s a visual responsive design tool meant to prototype.
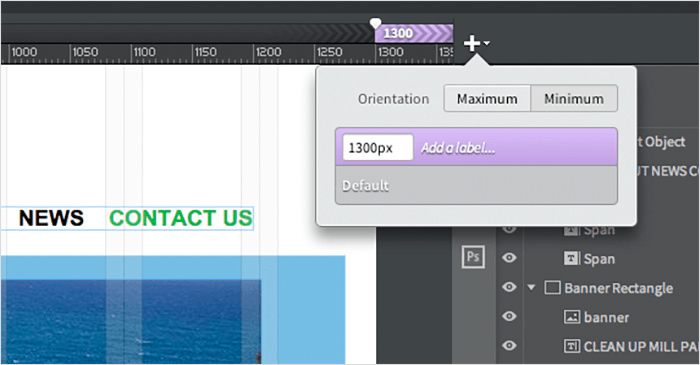
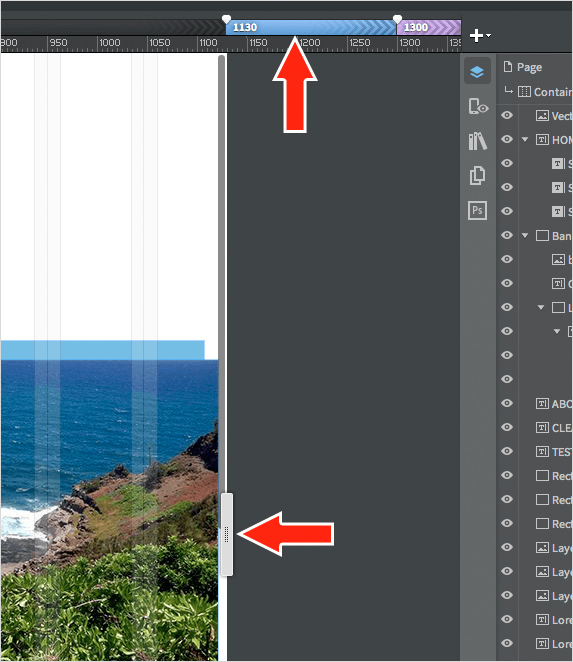
If you drag the gripper bar on the right edge of the page’s content to the right or left, you will see how the design responds. When you need to make a design change, click “+” to set a new breakpoint. Click on the colored bars above the ruler (indicating a breakpoint) to resize the design to that breakpoint.
Adding and deleting breakpoints are easy, but there is a catch in Reflow (and other programs like this). If you go to make a design change, make sure to select the correct breakpoint! If not, it’ll bite you at some point because undoing in Reflow (Edit → Undo) still needs some work.
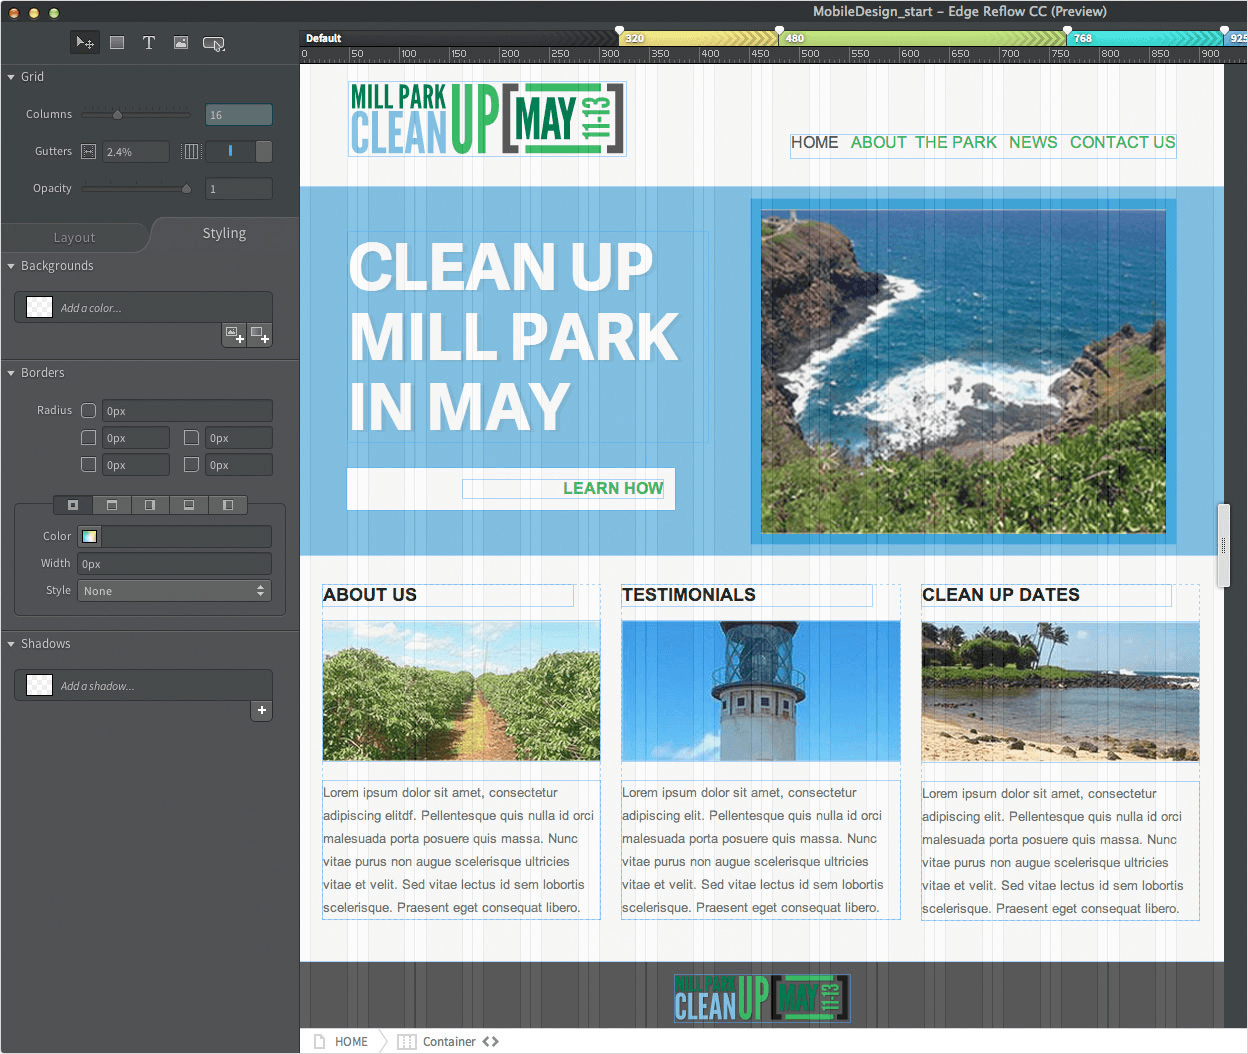
How Reflow Interprets Your Design (Floats, <div>s, Etc.)
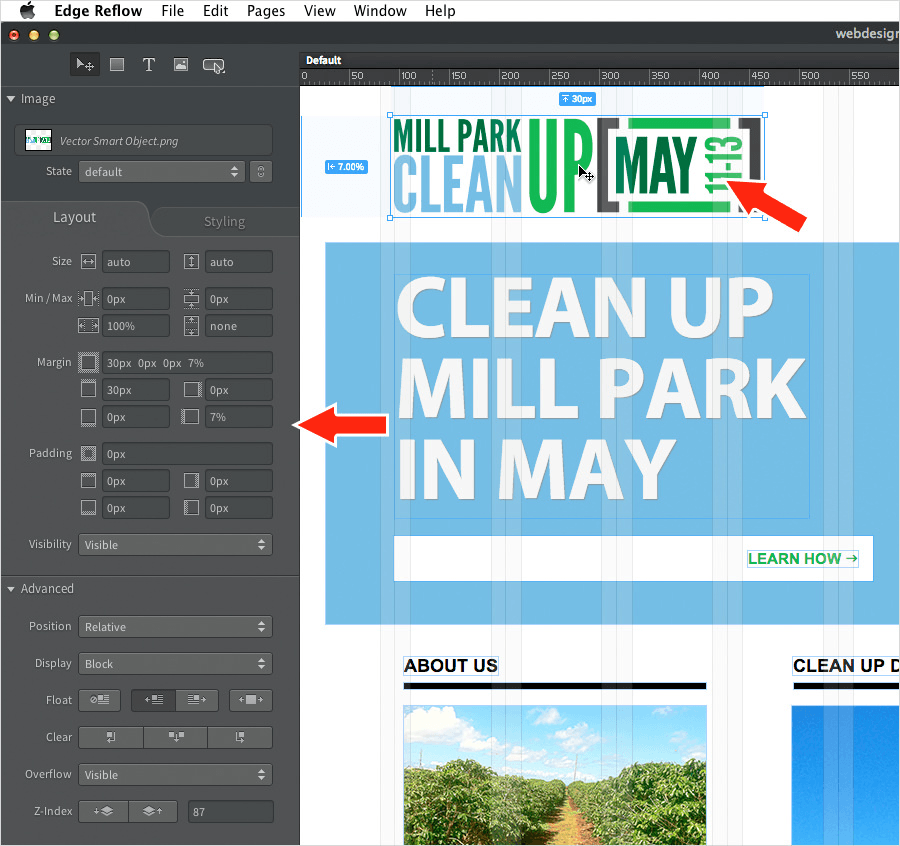
With the Selection tool selected in the Tools panel (by default), you can select content on the page. All of your page’s content lies within a primary container (<div>) that is set to center horizontally and that has a 100% width. Shapes in Photoshop typically become <div>s in Reflow; text becomes <p> elements with styles applied; images become either regular images or background images, and so on. Almost all of the content in your Reflow project will be positioned using the CSS properties float: left and margin. Knowing this is important when you attempt to edit the design in Reflow by simply dragging content. I’ve seen a lot of people get tripped up if they haven’t learned the basics of layout, including margins, padding and floating.
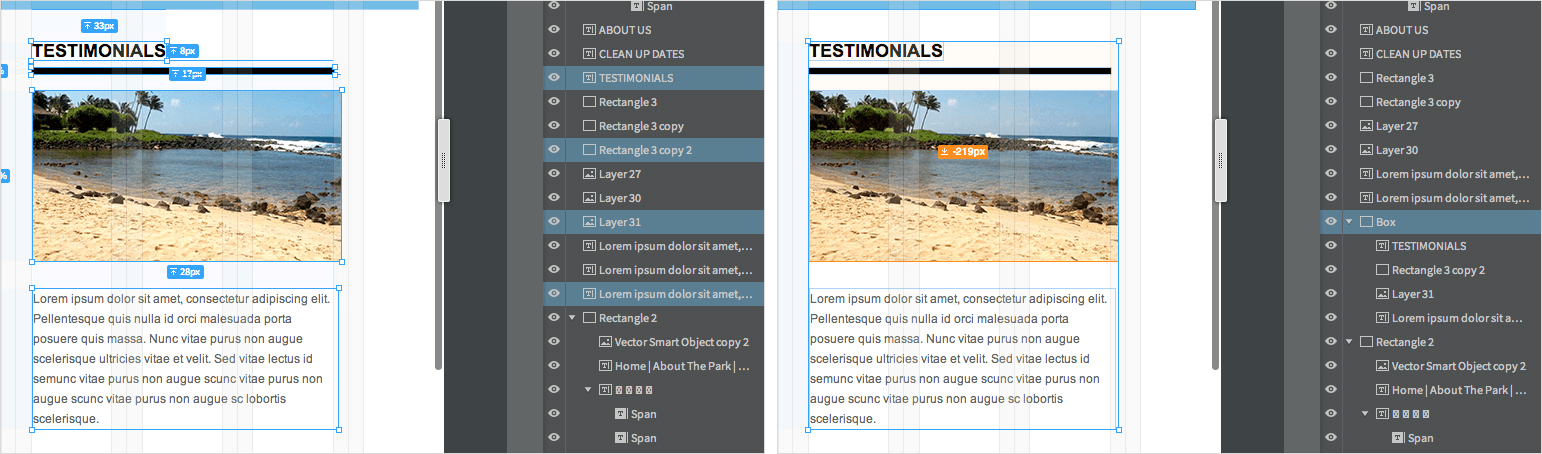
The layout editing and formatting controls are found in the Layout and Styling panels on the left. The Layout panel is where you will find typical CSS properties like sizing (including maximum and minimum widths and heights), margins and padding, positioning, floats, clears and more. The more advanced formatting options are hidden initially in the Advanced section of the Layout panel. In Reflow, most people either use a combination of dragging and sizing the content manually or adjusting the layout options “by the numbers” in the Layout panel.
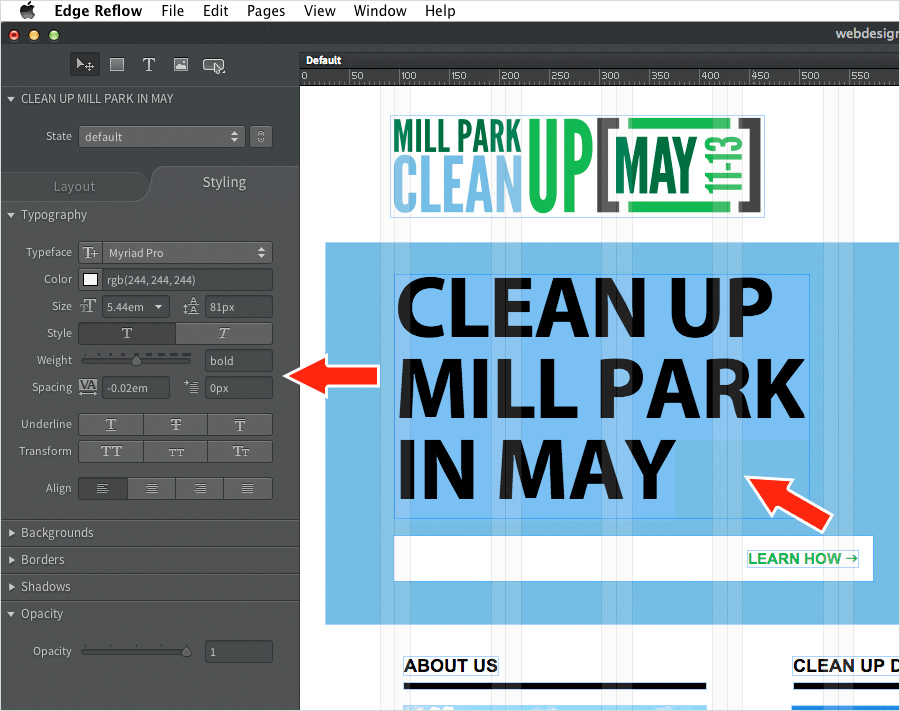
Styling options for text formatting, backgrounds, shadows, rounded corners and more are found in the Styling panel on the left. Text formatting is relatively straightforward, and Reflow allows you to use Edge Web Fonts, web-safe fonts, fonts on your hard drive, and fonts via a Typekit kit that you create. The Styling panel is where you also go to add rounded corners, borders and drop-shadows and to edit the opacity of other objects as well.
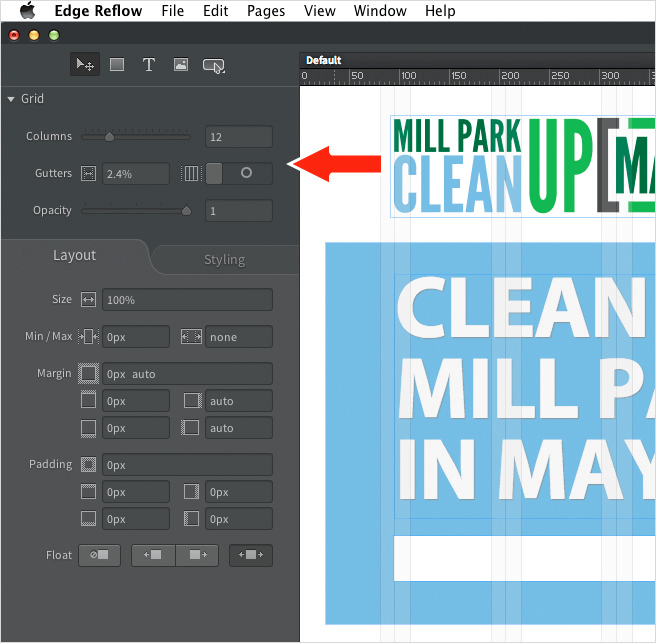
If you’ve designed to a grid in Photoshop or you know that the goal for the project is to work with a particular grid or framework, then you can edit the visible grid in Reflow to match. With nothing selected (by clicking in a blank area of the design area), you will see the grid settings below the Tools panel in the upper-left corner. Of course, the grid in Reflow is merely a guide. It doesn’t generate a series of CSS styles, such as for fluid grids.
Editing The DOM
As mentioned, you can see the HTML structure in the Elements panel on the right side of the workspace. In that panel, you can hover over an element to see the corresponding content in the design (it will be highlighted) and click to select it. The eye icon in the Elements panel is a toggle for the display CSS property. Renaming content in the panel will change the name of the ID applied to the HTML object (as you can see in the screenshot below). Yes, I said ID. Reflow doesn’t generate classes in the CSS, and currently there is no way to add a style name or change the type of style (to a class, for instance). This is limiting, because you can’t inject any code (any code — even JavaScript) or make actual style changes outside of what the program can do. You need to export the code and take it somewhere else with no chance of bringing that code back in.
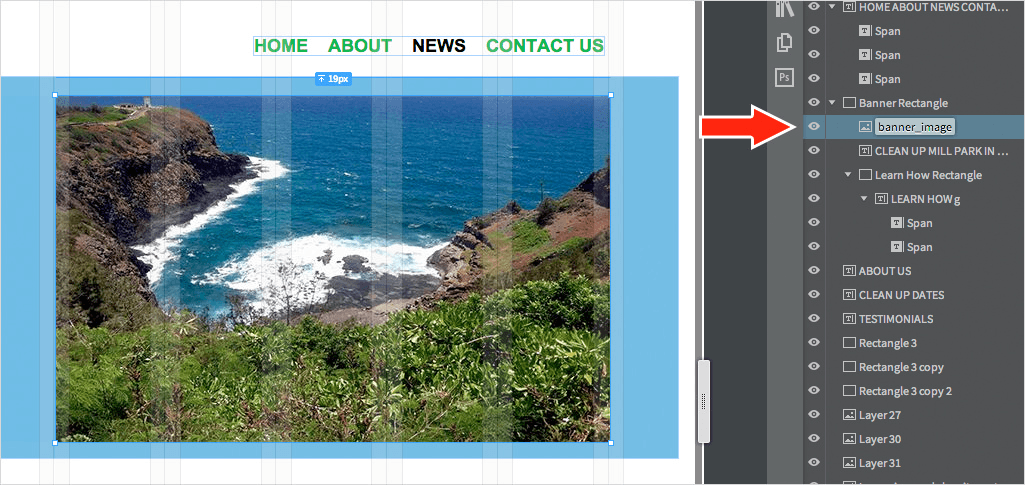
You can also organize content in the Elements panel by dragging content, which will directly affect the HTML’s ordering and layout. You cannot nest content within, say, a new <div> using the Elements panel, but content that is nested may be moved out or moved between those groups. To nest selected content in a parent element (a <div>) to make a column, for instance, you could use the menu item Edit → Add Parent or even group the selected content (Edit → Group).
Note: Clicking the “Page” element in the Elements panel allows you to edit the layout and styling properties of the <body> tag. Clicking the “Container” element allows you to edit the properties of the main containing <div> that all content is within by default.
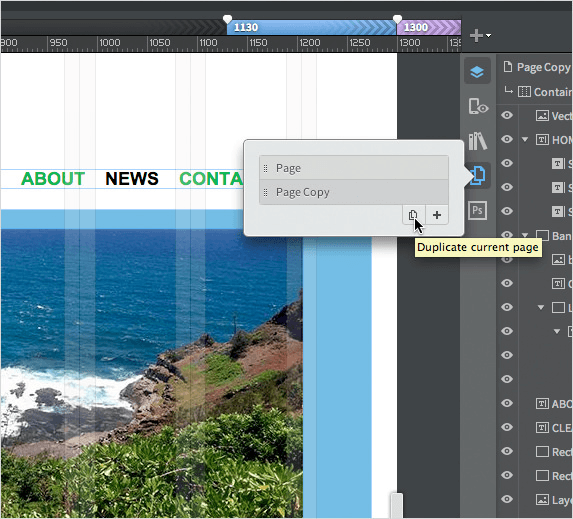
Creating Pages
You can create pages in your Reflow project using the Page menu, Photoshop’s Assets panel (by clicking the “Create New Page” button) or the super-simple Pages panel on the right side of the workspace. In the Pages panel in Reflow, you can either duplicate a page or add a new blank page. If you duplicate a page, it will have no connection to the original page except for the images (which are linked to the same source images). In later builds of Reflow, thankfully, breakpoints are copied in duplicate layouts. If you create a series of pages that share navigation or footer content, the only real way (currently) to update that content on all pages is to go to each and make the changes, or to copy and paste the content from one page to the next. There are no such things as library items, symbols, or whatever you would call them to edit shared content in one place.
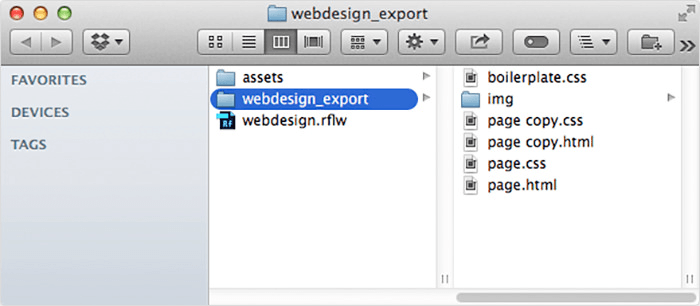
Each page in Reflow becomes a separate HTML page that gets its file name from the page’s name in the Pages panel. Each page has its own CSS file, and formatting that is the same across pages is not pulled into a shared CSS; it’s simply duplicated across multiple CSS files. The screenshot below shows what was generated when I chose File → Export For Code Editor.
Working With Images
Within Reflow, you can insert PNG, GIF, JPEG and SVG images by dragging images into the design from the Assets panel or from a folder on your hard drive or by using the Add An Image tool to click and add an image. If you use the Add An Image tool, then you would choose an image and, with the place gun, click and place the image where you’d like.
Note: The best practice is to put images in the assets folder that was generated by Reflow when you exported from Photoshop. If you insert an image in the design using the Add An Image tool that is outside of the assets folder, then it will be copied there.
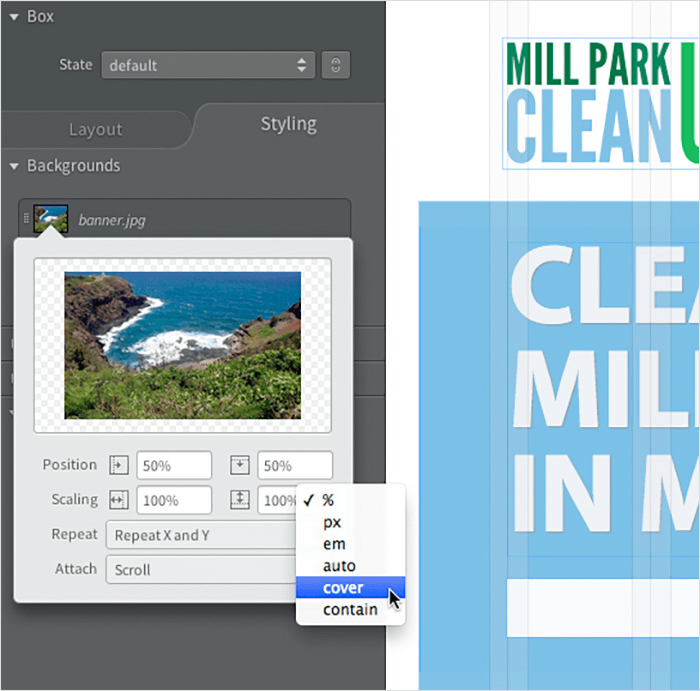
Reflow also allows for multiple layered background images (and solid-color and gradient backgrounds), and it supports the most widely used CSS3 properties for adjusting the background images.
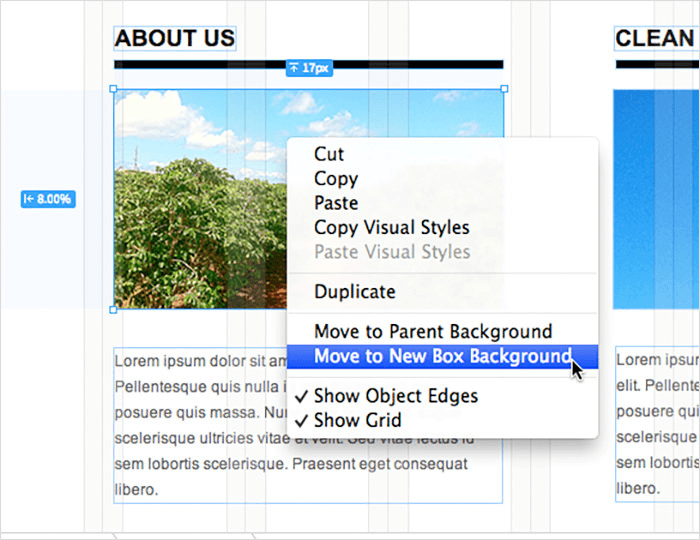
One of my favorite commands in Reflow is to select an image on the page (not a background image), right-click on it and choose “Move to New Box Background.” This will remove the <img> tag from the HTML, insert a <div> instead and creates a style with the same image but as a background image. You can even right-click on an image in the Asset Library panel and choose “Set as Background” for a selected object.
Note: Currently, there is no mechanism for working with Retina images in Reflow.
Creating Forms
I wanted to add a section on working with forms, not to show how to insert them, but to discuss what they are and aren’t. The Form tools are found in the Tools panel. If you click and hold down the “Add a Button” button, you will see them all. By clicking or clicking and dragging, you can position and format each field pretty simply using the same properties as in the Layout and Styling panels.
The form you create in Reflow will not submit data. That’s because the tools will create form tags like <input> and <select> but will not add an actual <form> element to the code, which means you can’t set typical options for the <form> tag in Reflow by default (such as method and action). A form in Reflow can be used only as a visualization or starting point, to be edited in another program later.
Below is an example of code generated for a simple form created in Reflow.
<label id="formgroup">
  <p id="text">Name</p>
  <input id="textinput" type="text" value="Name">
</label>
<label id="formgroup2">
  <p id="text2">Sign up?</p>
  <select id="select" type="select">
    <option>Choose one</option>
    <option>Yes</option>
    <option>No</option>
  </select>
</label>
<input id="input" type="button" value="Submit">
Edge Inspect Testing
Built in to Reflow is the ability to test on devices using Adobe Edge Inspect CC. Edge Inspect allows you to preview Edge Reflow content across multiple devices. Simply test the page, take screenshots from any connected device, and then see real-time results of changes to the design.
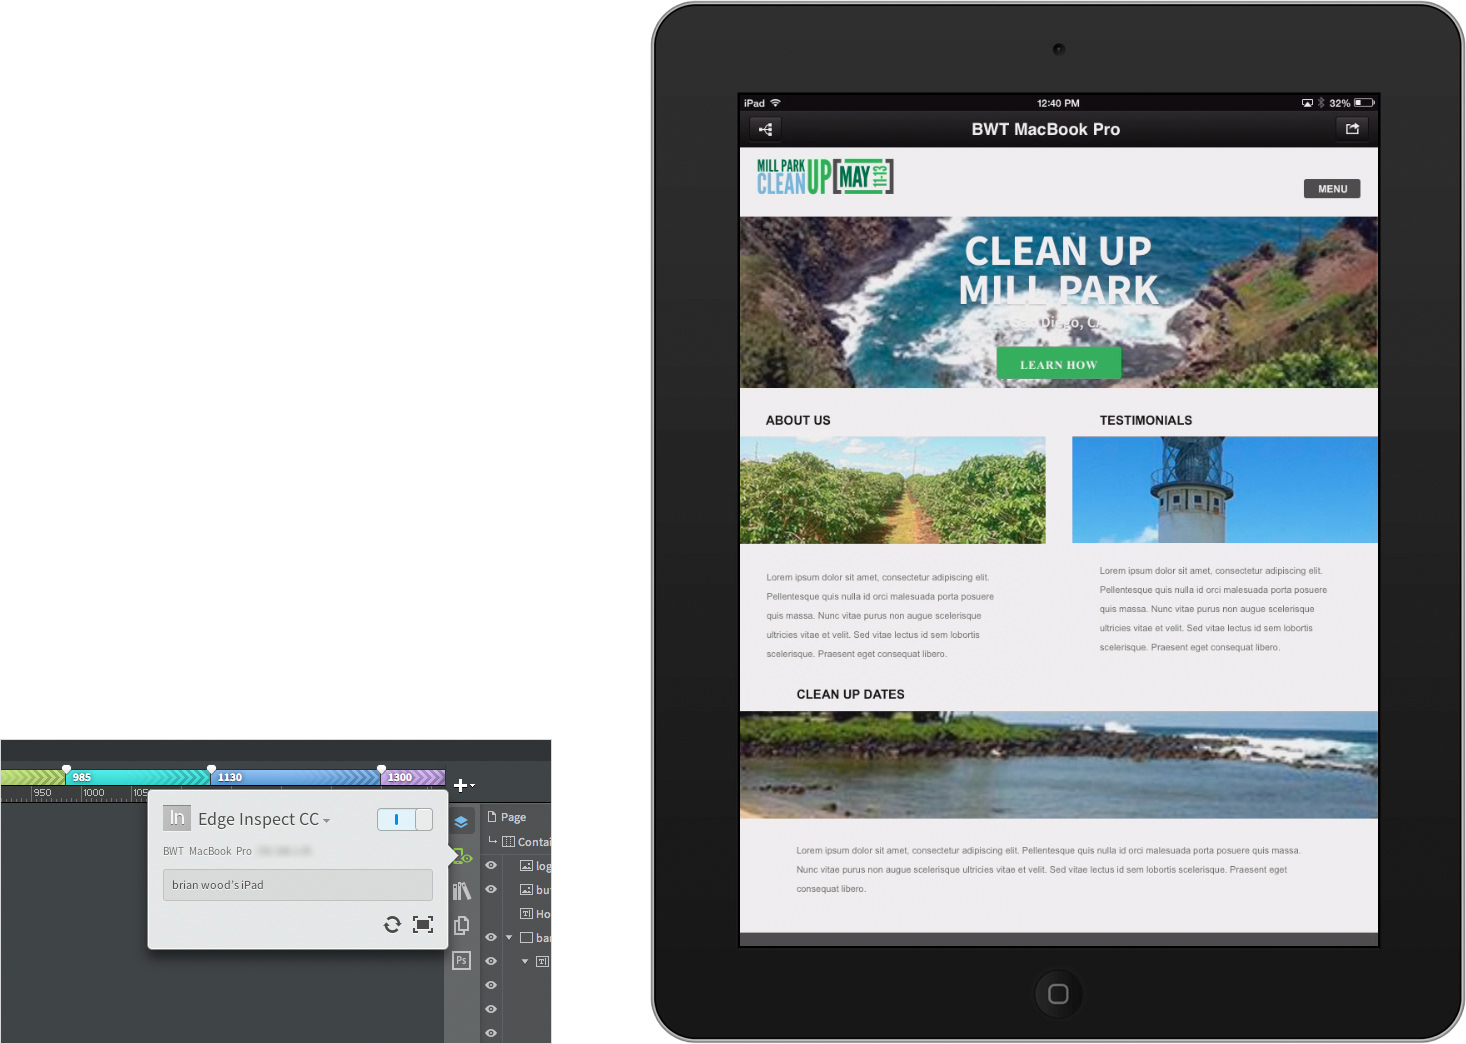
Note: To preview Reflow content on a device, you’ll need to download Edge Inspect to your computer and then install the Edge Inspect CC app on an approved device (iOS, Android or Kindle Fire).
What Reflow Doesn’t Do
If you are using the program to create quick comps as a visual aid, then Reflow might work. But if you dig into the program and want to use the code that is generated, then be aware of what it can and can’t do. The things listed below are the major things it can’t do (as with any program, there are little things we each wish it could do, I know).
What About The Code It Generates?
The styling it generates is not very succinct, and IDs are used for just about everything. You can’t insert your favorite jQuery slideshow or other code in Reflow because code currently can’t be injected. Reflow does not really support much in the way of SEO content (who needs that anyway?), tables or lists. You can’t edit its CSS (the actual code) unless you make changes in the Styling panel. You also can’t add a blog or e-commerce functionality in Reflow (because code can’t be inserted).
Nick Halbakken’s good Q&A with the Adobe Reflow team answers some of these questions.
What Can You Do With The Design?
As you edit a design, you can preview in two WebKit-based browsers (Safari and Chrome) by choosing View → Preview In… The code is not optimized for non-WebKit browsers. When you preview a page, the HTML and CSS are generated (this is how we used to get at the code if we wanted to use what Reflow generates). In later builds of Reflow, you can export the code by selecting File → Export for Code Editor. Exporting the code removes a line from the code stating that it’s only meant to be used for previewing, and then a copy of the content is created in a new folder of your choosing, and an HTML file is dumped in, which you will use as a frame for the pages when previewing.
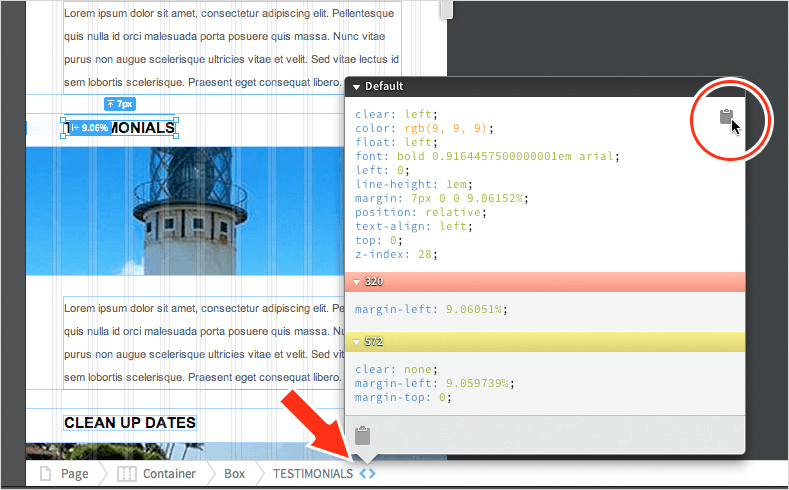
If the code is not suitable for your production environment, then you can copy and paste CSS snippets from within Edge Reflow (this is how I use it, if at all). When you select content, you can click the “< >” icon in the tag selector at the bottom of the document’s window (an arrow is pointing to it in the screenshot below). This will display the CSS associated with the selected object, even giving you the CSS for each media query that affects the selected object. Click the clipboard icon at the bottom of the menu to copy all of the CSS, or click the clipboard icon for the CSS that you hover over to select just that code.
Final Notes
There you have it: a quick-ish tour of the features in Edge Reflow CC. I know that this program can be polarizing, especially for those of us who can code. But I do have a use for this program in some of my projects. Would I use the code? Most likely not. But that’s also because my themes and frameworks are dialed in to how I like to create websites. I find it useful for my designers to use for quick prototypes or wireframing, mostly when they start the design in Photoshop. I also like to use it to see those niggly little text formatting properties that designers pore over, like line-height.
The program has a long way to go before its code can be used as is in a production workflow. I can’t tell you the ultimate direction it’s headed in — will it eventually integrate with an existing framework as a building point, or will it let you inject code? Will it survive the crush of tools coming out today or be an experiment that gets scrapped? — it’s a risk we all take with tools these days. In my opinion, for it to be a one-stop shop tool to build sites in, it would have to come a long way from where it is now.
Where to go from here? Here are some resources to learn more about working with Edge Reflow CC:
- Lynda.com
- Brian Wood Training (video channel), YouTube
Further Reading
- Responsive Web Design Techniques, Tools and Strategies
- Responsive Web Design: What It Is And How To Use It
- Using Sketch For Responsive Web Design
- Photoshop Etiquette For Responsive Web Design


