Creating A Complete Web App In Foundation For Apps

Email Newsletter
Weekly tips on front-end & UX.
Trusted by 182,000+ folks.
 Custom Web Forms for Angular, React, & Vue. Your backend.


 Celebrating 10 million developers
Foundation for Apps is a new single-page app framework from Zurb that is closely related to Foundation 5 (also known as Foundation for Sites, a widely used front-end framework). It’s built around AngularJS and a flexbox grid framework. It’s intended to make creating a web app very quick and simple, enabling us to quickly start writing the code that’s unique to our application, rather than boilerplate.
Because Foundation for Apps was only released at the end of 2014, it hasn’t yet seen widespread usage, so there are few good sources of information on using the framework. This article is meant to be a comprehensive guide to building a functional web app with Foundation for Apps from start to finish. The techniques detailed here are fundamental to building practically any kind of app for any client, and this tutorial also serves as a strong introduction to the wider world of AngularJS and single-page apps.
In light of the new film being released later this year, we’ll be building a Star Wars knowledge base. It will be a responsive web application, using a RESTful API, caching and many of the features that Foundation for Apps and AngularJS offer.
Prefer to skip to the good stuff?
- View demo
- View on GitHub
- Download files
Getting Started
Take a quick squiz through the official documentation, which explains the styling aspects well but doesn’t go into detail about application functionality. Also, keep AngularJS’ excellent documentation handy, bearing in mind that Foundation for Apps includes some services that aren’t standard and that some AngularJS functions might not work out of the box. Keep in mind also that, natively, AngularJS and Foundation for Apps aren’t particularly well suited to apps that need significant SEO, since most content is loaded via AJAX.
Our app will get its data from the handy Star Wars API found at SWAPI. Take a look through SWAPI’s documentation to get a feel for the data served and its structure. Our application will be based on that structure for simplicity.
First, let’s install Foundation for Apps and create our project. Make sure that Ruby (already on OS X by default) and Node.js are installed, and then follow the four-step process detailed in the documentation. It’s pretty straightforward, even if you haven’t used the command line before. Once you’ve finished the process, your browser should display the default home page of your application at https://localhost:8080/#!/.

Let’s get acquainted with the project’s files and folders.
The only file in our app’s base directory that we need to pay attention to is gulpfile.js, which gives instructions to the Gulp process that we’ve already used to start the server for our app. Gulp is a build system, and it’s very similar to Grunt. Later on, if we want to add some AngularJS modules or plugins, we’ll need to update this Gulp file with references to the JavaScript or CSS files for those modules or plugins.
The client folder is where we’ll find all of the other files we’re concerned with:
clients/assets/js/app.js is where our controller, directives and custom filters will be for this application;clients/assets/scss, naturally;clients/index.html is the base template for our application;clients/templates/ is where we’ll find the template for all of our pages, most of which haven’t been created yet.Let’s start building! First, modify the index.html page, which doesn’t start out very well optimized for a real application. We’ll add an off-canvas menu for small screens, a button to toggle its opening, and a nice fade effect using classes from Foundation for Apps’ “Motion UI.” You can copy the code from the index.html file in our repository.
We’ll add some SCSS variables to our _settings.scss file to set our colors, fonts and breakpoints:
$primary-color: #000;
$secondary-color: #ffe306;
$body-background: $secondary-color;
$breakpoints: (
  small: rem-calc(600),
  medium: rem-calc(900),
  large: rem-calc(1200),
  xlarge: rem-calc(1440),
  xxlarge: rem-calc(1920),
);
$h1-font-size: rem-calc(80);
$body-font-family: "brandon-grotesque", Helvetica, Arial, sans-serif;
$header-font-family: "flood-std", Helvetica, sans-serif;
Now we’ll trick out app.scss to add a bit of pizzazz. You can use the file in the repository as an example.
Let’s quickly overwrite the default home.html file in clients/templates/ with a simple menu of links to all of the pages we’ll build:
---
name: home
url: /
---
<div class="grid-content">
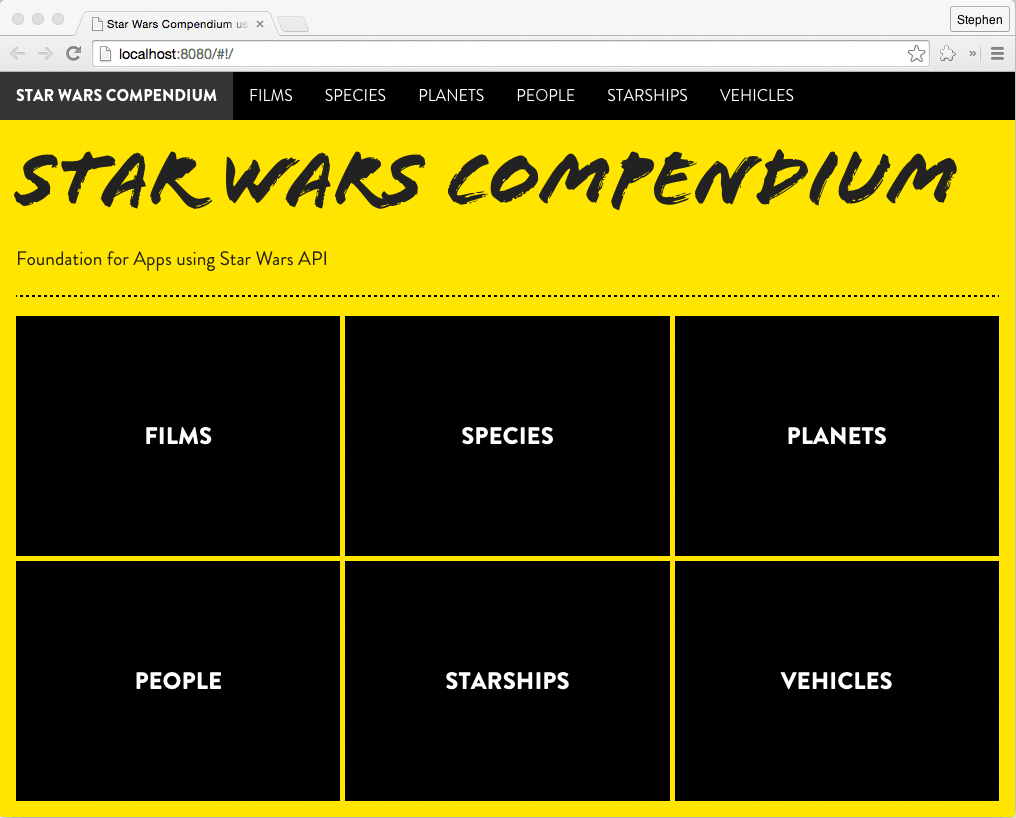
<h1>Star Wars Compendium</h1>
<p class="lead">Foundation for Apps using Star Wars API</p>
<hr>
<ul class="home-list">
<li><a ui-sref="films">Films</a></li>
<li><a ui-sref="species">Species</a></li>
<li><a ui-sref="planets">Planets</a></li>
<li><a ui-sref="people">People</a></li>
<li><a ui-sref="starships">Starships</a></li>
<li><a ui-sref="vehicles">Vehicles</a></li>
</ul>
</div>
Our template is now looking pretty unique to us now — no cookie-cutter Foundation at this point:
Creating A List Of Films
Now we’re cooking with gas. In our templates folder, create a template file for our first subpage: films.html. Paste this snippet at the top:
---
name: films
url: /films/:id?p=
controller: FilmsCtrl
---
This tells our app three things:
- In links to this page, we’ll refer to the page as
films - The URL will have two possible parameters:
id(the ID of the film, according to our data) andp(the page number in the listing of all films). - We’ll be using our own custom AngularJS controller, called
FilmsCtrl, instead of the default blank one that Foundation for Apps creates automatically.
Because we’re using our own controller, let’s go ahead and create one in app.js. Look through the controller below, which we’ll be using for both our list of films and our single-film pages. You can see that this controller keeps track of URL parameters, figures out what page of results we’re on, gets the necessary data (either a list of films or details of an individual film, depending on the URL’s parameters) from our external API, and returns it to our view using the $scope variable. Add it to app.js after the angular.module declaration closes:
controller('FilmsCtrl',
  ["$scope", "$state", "$http",function($scope, $state, $http){
  // Grab URL parameters - this is unique to FFA, not standard for
  // AngularJS. Ensure $state is included in your dependencies list
  // in the controller definition above.
  $scope.id = ($state.params.id || ’);
  $scope.page = ($state.params.p || 1);

  // If we're on the first page or page is set to default
  if ($scope.page == 1) {
    if ($scope.id != ’) {
      // We've got a URL parameter, so let's get the single entity's
      // data from our data source
      $http.get("https://swapi.co/api/"+'films'+"/"+$scope.id,
          {cache: true })
        .success(function(data) {
          // If the request succeeds, assign our data to the 'film'
          // variable, passed to our page through $scope
          $scope['film'] = data;
        })

    } else {
      // There is no ID, so we'll show a list of all films.
      // We're on page 1, so the next page is 2.
      $http.get("https://swapi.co/api/"+'films'+"/", { cache: true })
        .success(function(data) {
          $scope['films'] = data;
          if (data['next']) $scope.nextPage = 2;
        });
    }
  } else {
    // Once again, there is no ID, so we'll show a list of all films.
    // If there's a next page, let's add it. Otherwise just add the
    // previous page button.
    $http.get("https://swapi.co/api/"+'films'+"/?page="+$scope.page,
      { cache: true }).success(function(data) {
        $scope['films'] = data;
        if (data['next']) $scope.nextPage = 1*$scope.page + 1;
      });
      $scope.prevPage = 1*$scope.page - 1;
  }
  return $scope;

}])  // Ensure you don't end in a semicolon, because more
     // actions are to follow.
After saving app.js, you may need to restart your server using the terminal (Control + C to cancel the operation and then foundation-apps watch again) to ensure that your app includes the new template file you’ve created along with the new controller.
And just like that, we have a fully functional controller that gets data from an external RESTful API source, caches the result in the browser’s session and returns the data to our view!
Open up films.html again, and let’s start building the view of the data that we can now access. Begin by adding the base view, which will show a list of films. We can access all properties that we’ve added to our $scope variable, without prefixing them with $scope, such as (in this case) films, prevPage and nextPage. Add the following below the template’s existing content:
<div class="grid-content films" ng-show="films">
  <a class="button pagination"
    ng-show="prevPage"
    ui-sref="films({ p: prevPage })">
    Back to Page {{prevPage}}
  </a>

  <div class="grid-content shrink">
    <ul class="menu-bar vertical">
      <li ng-repeat="film in films.results">
        {{film.title}}
      </li>
    </ul>
  </div>

  <a class="button pagination"
    ng-show="nextPage"
    ui-sref="films({ p: nextPage })">
    To Page {{nextPage}}
  </a>
</div>
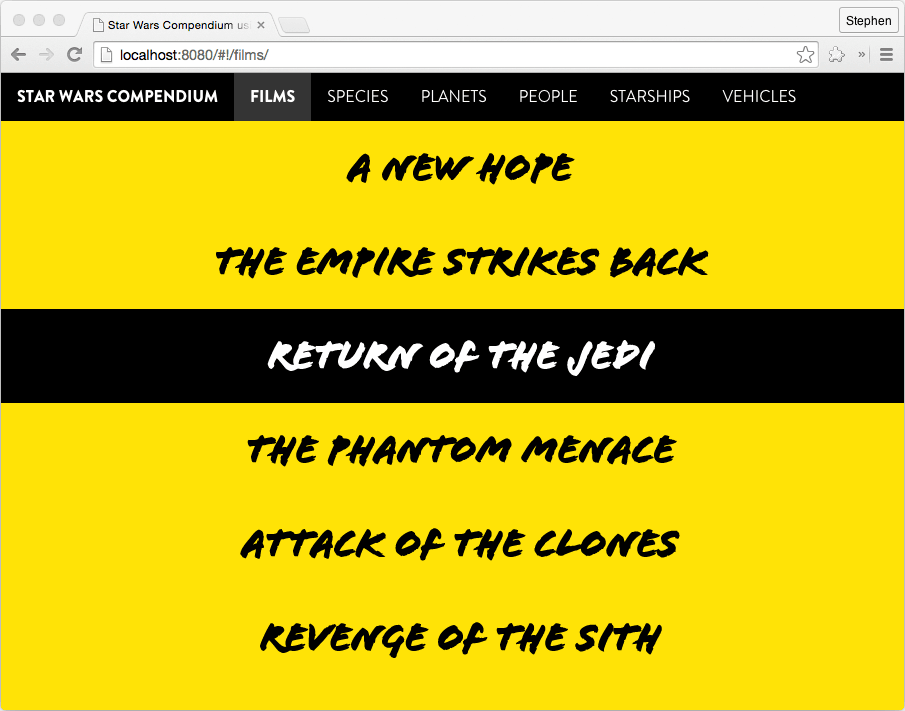
Bodacious! We’ve got a list of film names as well as pagination if there are multiple pages of data. But that’s not especially useful yet — let’s turn the film’s name into a link to that film’s page in our app.
We plan to use the film’s ID as the id parameter in our URL, and we have access to the film’s url attribute, which happens to have the film’s ID as its last parameter before the final slash. But how do we grab only the ID out of the URL that we have access to? AngularJS makes it easy with custom filters. Let’s wrap our {{film.title}} in a link, add a ui-sref attribute (which sets up an internal link) and use our film.url data with a custom filter applied to it:
<a ui-sref="films({ id:( film.url | lastdir ), p:’ })">
  {{film.title | capitalize}}
</a>
Well, now our page is broken because our app doesn’t know what the lastdir and capitalize filters are. We need to define those filters in our app.js file, placed just after our controller:
.filter('capitalize', function() {
  // Send the results of this manipulating function
  // back to the view.
  return function (input) {
    // If input exists, replace the first letter of
    // each word with its capital equivalent.
    return (!!input) ? input.replace(/([^\W_]+[^\s-]*) */g,
      function(txt){return txt.charAt(0).toUpperCase() +
        txt.substr(1)}) : ’;
  }
})
.filter('lastdir', function () {
  // Send the results of this manipulating function
  // back to the view.
  return function (input) {
    // Simple JavaScript to split and slice like a fine chef.
    return (!!input) ? input.split('/').slice(-2, -1)[0] : ’;
  }
})
Bingo! We now have a list of films, each of which links to its respective film page.
However, that link just takes us to an empty page at the moment, because films.html hasn’t been set up to show a specific film, rather than the whole list. That’s our next step.
Displaying Details Of A Single Film
We’ve already set up all of the data we need for the single-film page in our FilmsCtrl controller in the $scope.film variable (which is the same as $scope['film']). So, let’s reuse films.html and add another section that’s visible only when the singular film variable is set. We’ll set each key-value pair to use `
- ` because we’re not unsemantic swine. Remember also that some of
- Star Wars Compendium, Foundation for Apps demo
- Star Wars Compendium Using Foundation for Apps, GitHub
- Download source files (ZIP)
- A Beginner’s Guide To Progressive Web Apps
- The Building Blocks Of Progressive Web Apps
- Building A First-Class App That Leverages Your Website
- A Few Interesting Ways To Use CSS Shadows For More Than Depth
film’s fields, such as characters, have multiple values in an array, so we’ll need to use ng-repeat for those to display each value. To link each character to its character page, we’ll use the same method that we used in the listing of films: Using our lastdir filter, we link to each character’s people page by his/her/its ID.
<div class="grid-content film"
  ng-show="film" ng-init="crawl = 'false'">
  <h1>Episode {{film.episode_id | uppercase}}:
    {{film.title}}</h1>
  <hr>
  <dl>
    <dt>Opening Crawl</dt>
    <dd ng-class="{'crawl':crawl === true}"
      ng-click="crawl === true ? crawl = false : crawl = true">
      {{film.opening_crawl}}</dd>
    <dt>Director</dt>
    <dd>{{film.director | capitalize}}</dd>
    <dt>Producer</dt>
    <dd>{{film.producer | capitalize}}</dd>
    <dt>Characters</dt>
    <dd ng-repeat="character in film.characters"
      ui-sref="people({ id:(character | lastdir), p:’})">
      {{character}}
    </dd>
  </dl>
</div>
But look, when we view a film’s entry now, the list of characters shows just a URL relating to the character, rather than the character’s name.
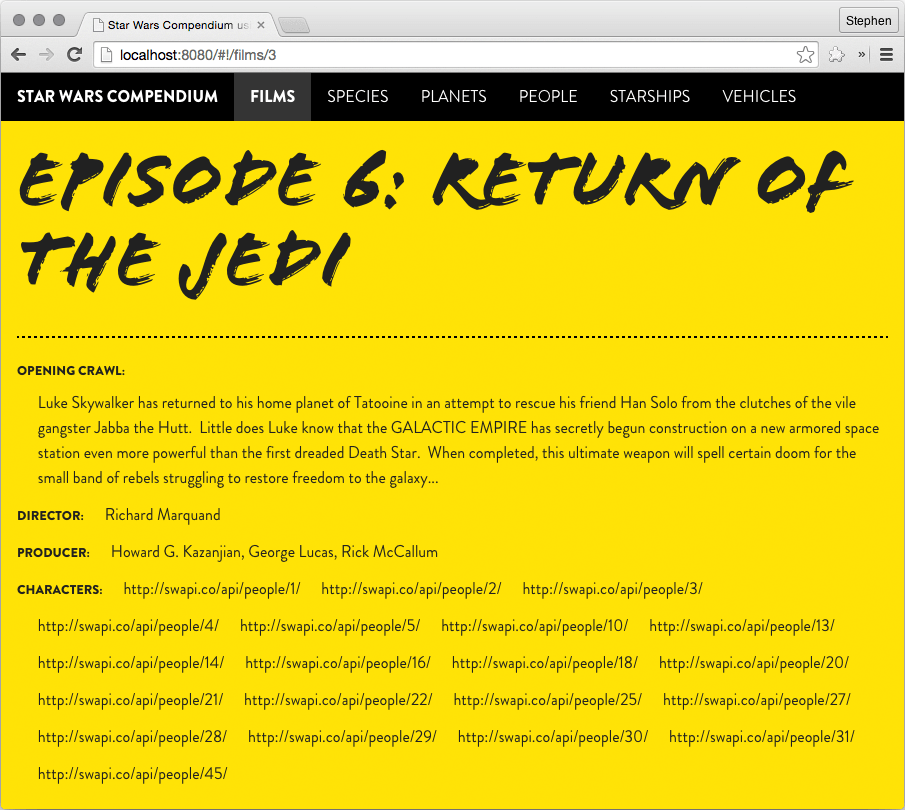
We need to replace that text with the character’s name, but we don’t have that critical piece of data. Perhaps we could look up that URL using the same method we used to get our film in the first place — then, the data we receive from the call would contain the character’s name. Let’s open up app.js again and add a directive, which we’ll call getProp.
.directive("getProp", ['$http', '$filter', function($http, $filter) {
  return {
    // All we're going to display is the scope's property variable.
    template: "{{property}}",
    scope: {
      // Rather than hard-coding 'name' as in 'person.name', we may need
      // to access 'title' in some instances, so we use a variable (prop) instead.
      prop: "=",
      // This is the swapi.co URL that we pass to the directive.
      url: "="
    },
    link: function(scope, element, attrs) {
      // Make our 'capitalize' filter usable here
      var capitalize = $filter('capitalize');
      // Make an http request for the 'url' variable passed to this directive
      $http.get(scope.url, { cache: true }).then(function(result) {
        // Get the 'prop' property of our returned data so we can use it in the template.
        scope.property = capitalize(result.data[scope.prop]);
      }, function(err) {
        // If there's an error, just return 'Unknown'.
        scope.property = "Unknown";
      });
    }
  }
}])
getProp returns a single property from the data resulting from our $http.get call, and we can specify which property we want. To use this directive, we need to add it to the area within our ng-repeat, like so:
<span get-prop prop="'name'" url="character">{{character}}</span>
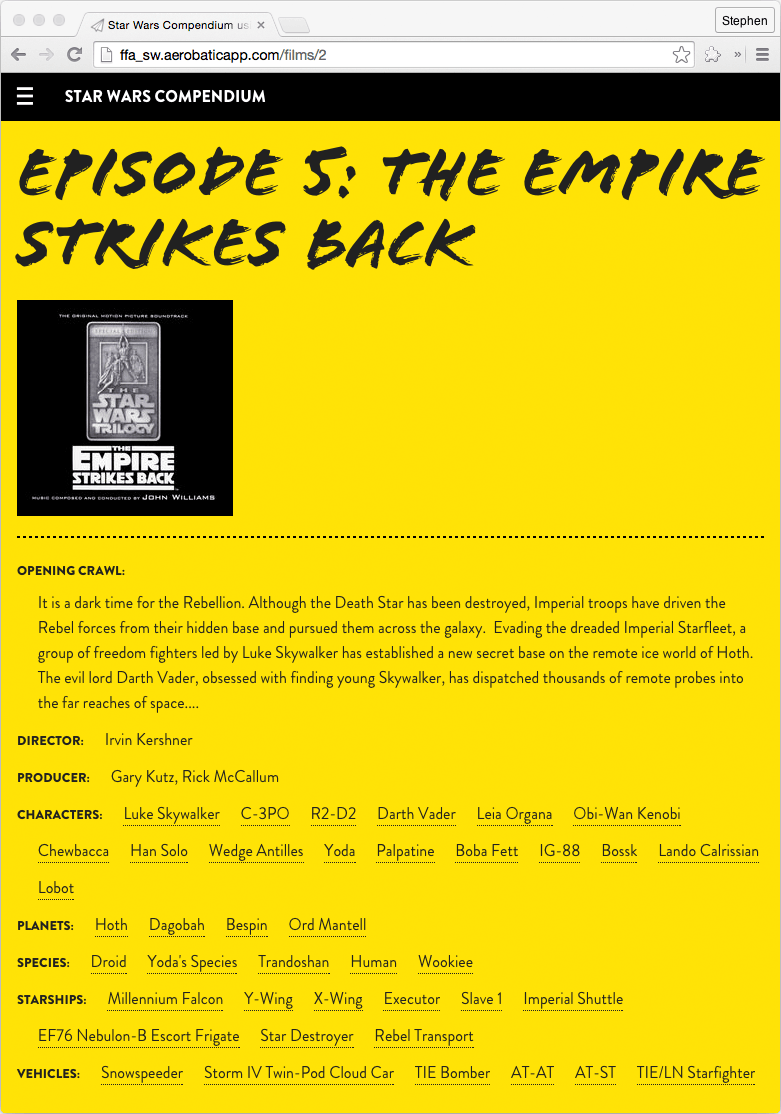
Nice. We now have each character’s name instead of just a wild URL, and each links to its respective page. Now our single film view will be complete once the rest of the data fields are added to the view (see films.html in the repository for the rest).

Refactoring Our Code For Reuse
Looking through SWAPI’s documentation and our plans for the rest of the application, we clearly see that our controllers for all other pages will be extremely similar to this one, varying only in the category of data we’re getting.
With that in mind, let’s move the code inside our films controller to its own function, called genericController, placed just before the last closing brackets of app.js. We also need to replace every instance of the string 'films' with the variable multiple (five instances) and 'film' with single (one instance), because they represent the multiple and singular forms of the entity of each page. This allows us to create very DRY, reusable code that’s also easier to read and understand.
Now we can add a call in our FilmsCtrl controller to our new genericController function with our two variables (multiple and single versions of our data), passed as parameters:
.controller('FilmsCtrl', function($scope, $state, $http){
  $scope = genericController($scope, $state, $http, 'films', 'film');
})
Excellent! We have a reusable controller that grabs the data we need for any given page and puts it in a usable format! We can now easily create our other pages’ controllers just after FilmsCtrl in the same way:
.controller('SpeciesCtrl', function($scope, $state, $http){
  $scope = genericController($scope, $state, $http, 'species', 'specie');
})
.controller('PlanetsCtrl', function($scope, $state, $http){
  $scope = genericController($scope, $state, $http, 'planets', 'planet');
})
.controller('PeopleCtrl', function($scope, $state, $http){
  $scope = genericController($scope, $state, $http, 'people', 'person');
})
.controller('StarshipsCtrl', function($scope, $state, $http){
  $scope = genericController($scope, $state, $http, 'starships', 'starship');
})
Go ahead and create the template HTML files for planets, species, people, starships and vehicles in the same way we created films.html but referencing the fields in SWAPI’s docs for each respective category of data.
Voila! All of our pages now show the correct data and interlink with one another!
Final Notes
Our application is complete! Our demo (linked to below) is hosted by Aerobatic, which exclusively targets front-end web applications. You’ll see in our repository that we’ve added some domain-specific options to take advantage of Aerobatic’s API gateway, which sets up a proxy that caches the API’s data on the server once we request it. Without caching, the application would be both latency-limited and request-limited (SWAPI allows only so many requests per domain, as do most other APIs), and because our data isn’t likely to change often, that server caching makes everything very speedy after the first load. Because we’ve limited our onload requests and images, even the first load will be acceptable on a slow connection, and on each page load, the header menu will stay on the page, making the application feel fast.
In the demo and repository, you can see that we’ve also added another API call on the details pages, which grabs an image URL for each entity from a Google custom search that we set up to trawl Wookieepedia and StarWars.com. So, we’ve now got dynamic, highly relevant images showing up on each detail page.
Take a look at the demo below, or look through the source code for some hidden goodies and more Foundation-specific tricks, or download the repository and build on it locally with your own improvements.


