Making A WordPress Plugin That Uses Service APIs, “From Soup To Nuts”

Email Newsletter
Weekly tips on front-end & UX.
Trusted by 182,000+ folks.
 Celebrating 10 million developers

 Custom Web Forms for Angular, React, & Vue. Your backend.

An increasingly large number of publicly available APIs provide powerful services to expand the functionality of our applications. WordPress is an incredibly dynamic and flexible CMS that powers everything from small personal blogs to major e-commerce websites and everything in between. Part of what makes WordPress so versatile is its powerful plugin system, which makes it incredibly easy to add functionality.
We will walk through how I made GitHub Pipeline, a plugin that allows you to display data from the GitHub API on WordPress pages using shortcodes. I’ll give specific examples and code snippets, but consider the technique described here a blueprint for how to consume any service API with a plugin.
We’ll start from the beginning, but a degree of familiarity with WordPress and plugin development is assumed, and we won’t spend time on beginner topics, like installing WordPress or Composer.
You’ll need:
- a PHP environment, with a fresh installation of WordPress;
- a GitHub account (or another API provider if you want to improvise);
- Composer (recommended).
Choosing An API
The first step in writing this kind of plugin is to choose an API. In this tutorial, we’ll use the GitHub API. If you’re thinking of using another API, consider a few important factors that can affect how rewarding your project will be.
One of the first things I look at is the thoroughness and quality of the API’s documentation. If it’s sparse or outdated, be prepared to spend time sifting through the source code to answer your own questions. Also, consider how mature the API is and how responsibly the provider has versioned it. Nothing is worse than investing time in creating something great, only for it to break because of changes to the upstream API. Look for a versioning system in the endpoint URLs.
// good
https://api.stable.com/v1/user/

// danger
https://api.dodgy.com/user/
At the risk of stating the obvious, programming against a third-party API involves a trust relationship, and not all APIs are created equal.
Shopping For A Library
Established brands often distribute libraries or SDKs to make it easier to work with their API. If this is not the case, remember to research whether someone else has written a library already before you go and reinvent the wheel. Google and GitHub are two great places to start your research. The number of stars or forks on GitHub is a good indication of how effective a library is. The age of the most recent commits and/or the number of open issues are an indication of how actively it is maintained. In my case, I was lucky to find the lovely PHP GitHub API, by KNP Labs.
Writing Your Own With Guzzle
If there is no satisfactory library for your provider, you still shouldn’t start from scratch because tools like Guzzle make working with HTTP requests much easier. Guzzle wraps PHP’s cURL library and removes many of the headaches typically associated with configuring and making requests manually. Even if you’re making only one or two requests, I’d still recommend using it because it will make your code more robust, and installing it with Composer is a piece of cake.
Setting Up The Plugin
We will begin with the basic skeleton of a minimal WordPress plugin, a directory with two files. Choosing a descriptive and unique folder name is important to avoid conflicts with other plugins. If the name of your plugin is somewhat generic, consider adding a unique prefix.
github-api/
   readme.txt
   github-api.php
The readme.txt contains the meta data for your plugin that will appear on wordpress.org if you decide to publish it there. Read about publishing WordPress plugins in the documentation, or check out the comprehensive sample readme.txt.
The PHP file also contains some meta data in the header that will be used to display info about your plugin in the dashboard. Start with a header that looks like this:
<?php
/**
Plugin Name: GitHub API
description: >-
  Add GitHub project information using shortcode
Version: 1.0
Author: Your Name
License: GPLv2 or later
Text Domain: github-api
*/
For security reasons, it’s also a good idea to deny direct access to the file, like this:
defined( 'ABSPATH' ) or die( 'No script kiddies please!' );
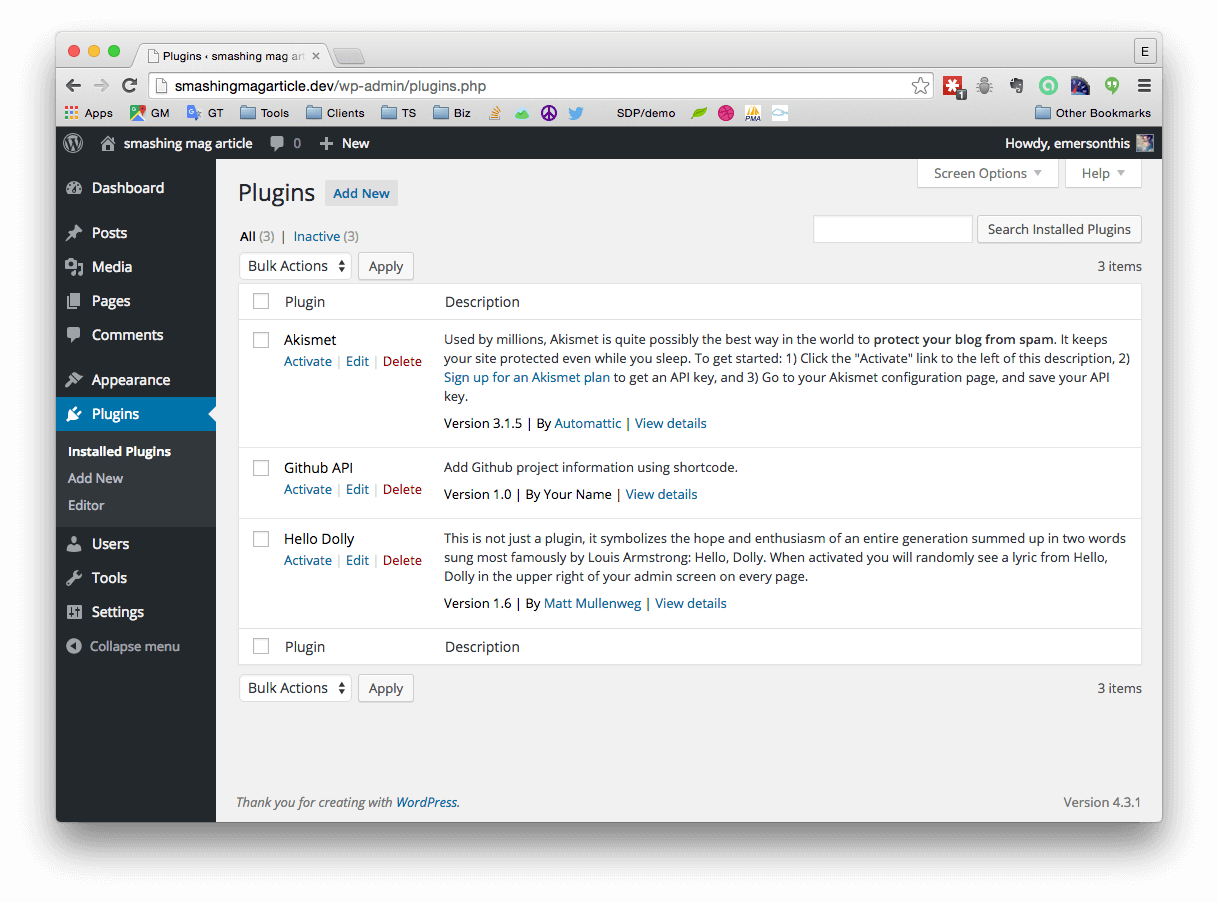
At this point, the plugin won’t do anything, but when you copy the files to wp-content/plugins, it should appear in the plugins list and you should be able to activate it.
Next, we’ll want to include the library that will handle the API requests. In the following code example, we’re including KNP Labs’ PHP GitHub API, but you can include any dependency by substituting knplabs/github-api with the package you’re using.
$ cd wp-content/plugins/github-api
$ composer require knplabs/github-api
Now, your file structure should look as follows:
github-api/
   composer.json
   composer.lock
   github-api.php
   readme.txt
   vendor/
Now that the files are in place, we need to require the vendor/autoload.php that was created when you installed it.
require_once 'vendor/autoload.php';If everything was set up correctly, you should be able instantiate a class from the library without a fatal error being thrown.
$testing = new \Github\Client();But this is just a quick way to test that your dependencies are available. I recommend defining a new class that extends the library.
class MyGithub extends \Github\Client {};This isn’t critical, but it makes your code more flexible in a couple ways. The most obvious way is that you can alter or add new functionality if you need to. But it also makes life easier should you ever want to switch libraries in the future, because you’ll have to make the changes in only once place, rather than throughout your code.
WordPress Shortcodes
Now it’s time to set up our first shortcode, which is a special snippet that allows you to generate content by placing it in a post or page. If you’re completely new to shortcodes or you want a deeper understanding of how they work, check out the official shortcode documentation. In my example, I’m going to display a list of GitHub issues wherever the author places this shortcode: [github_issues]
As we did before, let’s start with a minimal example to make sure the shortcode is registered correctly before we work on making the API call.
function github_issues_func( $atts ) {
   return "Hello world!";
}
add_shortcode( "github_issues", "github_issues_func" );
Now, if you publish a page containing [github_issues], you should see “Hello world” when you visit the page. Now that this is working, let’s set up the API call.
In the previous section, we set up autoloading for our GitHub library and defined our own class to extend it. Now, we can start using it to make API calls. So, we’ll add it to the shortcode’s callback function. As a proof of concept, let’s fetch all of the issues in the GitHub Pipeline repository. Documentation for this method is available.
function github_issues_func( $atts ) {

   // Instantiate our class
   $gh = new MyGithub();

   // Make the API call to get issues, passing in the GitHub owner and repository
   $issues = $gh->api('issue')->all('TransitScreen', 'wp-github-pipeline');

   // Handle the case when there are no issues
   if ( empty($issues) )
      return "<strong>" . __("No issues to show", 'githup-api') . "</strong>";

   // We're going to return a string. First, we open a list.
   $return = "<ul>";

   // Loop over the returned issues
   foreach( $issues as $issue ) {

      // Add a list item for each issue to the string
      // (Feel free to get fancier here)
      // Maybe make each one a link to the issue issuing $issue['url] )
      $return .= "<li>{$issue['title']}</li>";

   }

   // Don't forget to close the list
   $return .= "</ul>";

   return $return;

}
add_shortcode( 'github_issues', 'github_issues_func' );
Now you should be able to view the same page that we used above to test the shortcode, and this time you should see an unordered list of issues. But wait! Before moving on, let’s make one optimization so that our code is easier to test. (You are testing, right?!) Instead of using new in our function to instantiate the GitHub library class, let’s pass it in as a parameter and instantiate it only if we have to.
function github_issues_func( $atts, $gh=null ) {

   // Conditionally instantiate our class
   $gh = ( $gh ) ? $gh : new MyGithub();

   …
This modification resembles the dependency injection pattern, which makes our function much easier to test. WordPress unit testing is beyond the scope of this tutorial, but it’s easy to see how this new version makes it easy for us to pass “fake” API data to the function so that our test’s assertions know exactly what to expect.
What we’ve made so far is well and good for an internal project that will only be used on a single repository, but it would be much more useful if users could configure which repository to fetch issues from. Let’s set that up.
First, we’ll use a WordPress hook to register our new settings page, and the callback function will define the menu’s labels and titles. We’ll use the same incremental approach to get it working.
// Register the menu.
add_action( "admin_menu", "gh_plugin_menu_func" );
function gh_plugin_menu_func() {
add_submenu_page( "options-general.php", // Which menu parent
"GitHub", // Page title
"GitHub", // Menu title
"manage_options", // Minimum capability (manage_options is an easy way to target administrators)
"github", // Menu slug
"gh_plugin_options" // Callback that prints the markup
);
}
// Print the markup for the page
function gh_plugin_options() {
if ( !current_user_can( "manage_options" ) ) {
wp_die( __( "You do not have sufficient permissions to access this page." ) );
}
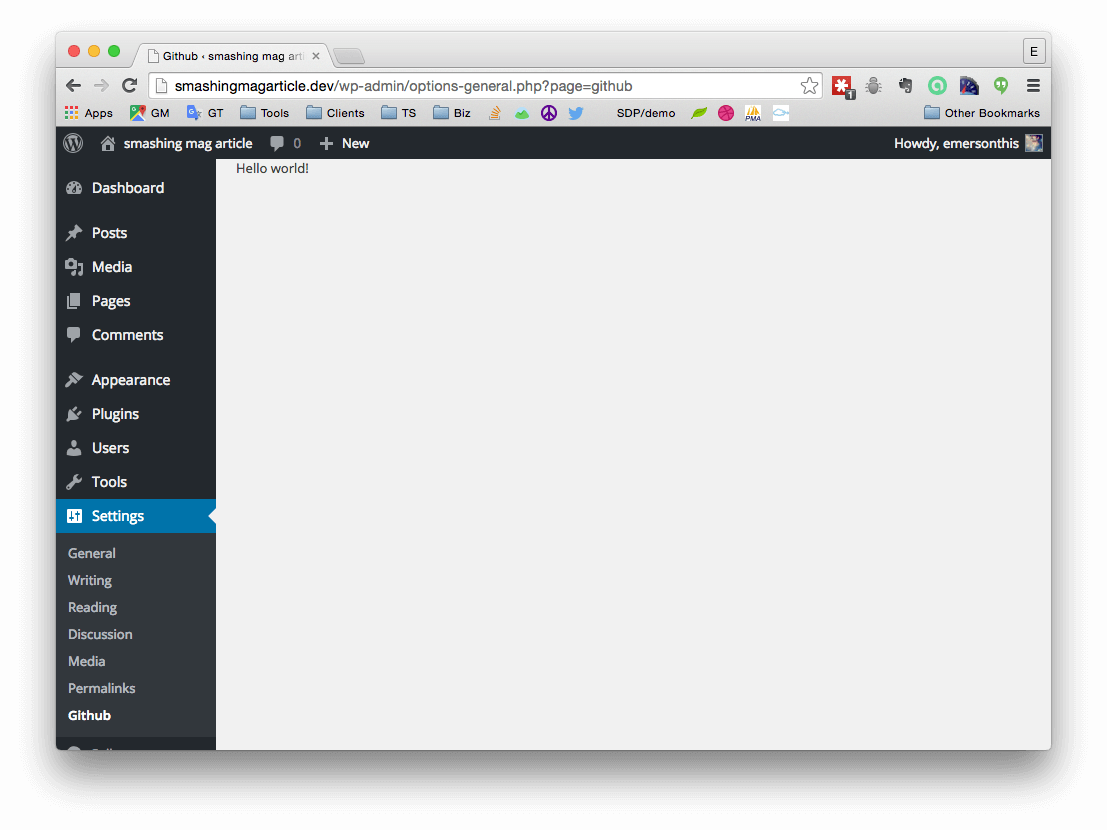
echo "Hello world!";
}
Now you should be able to log into the dashboard and see the new GitHub menu under “Settings” and then click it to see a blank settings page with “Hello world!”
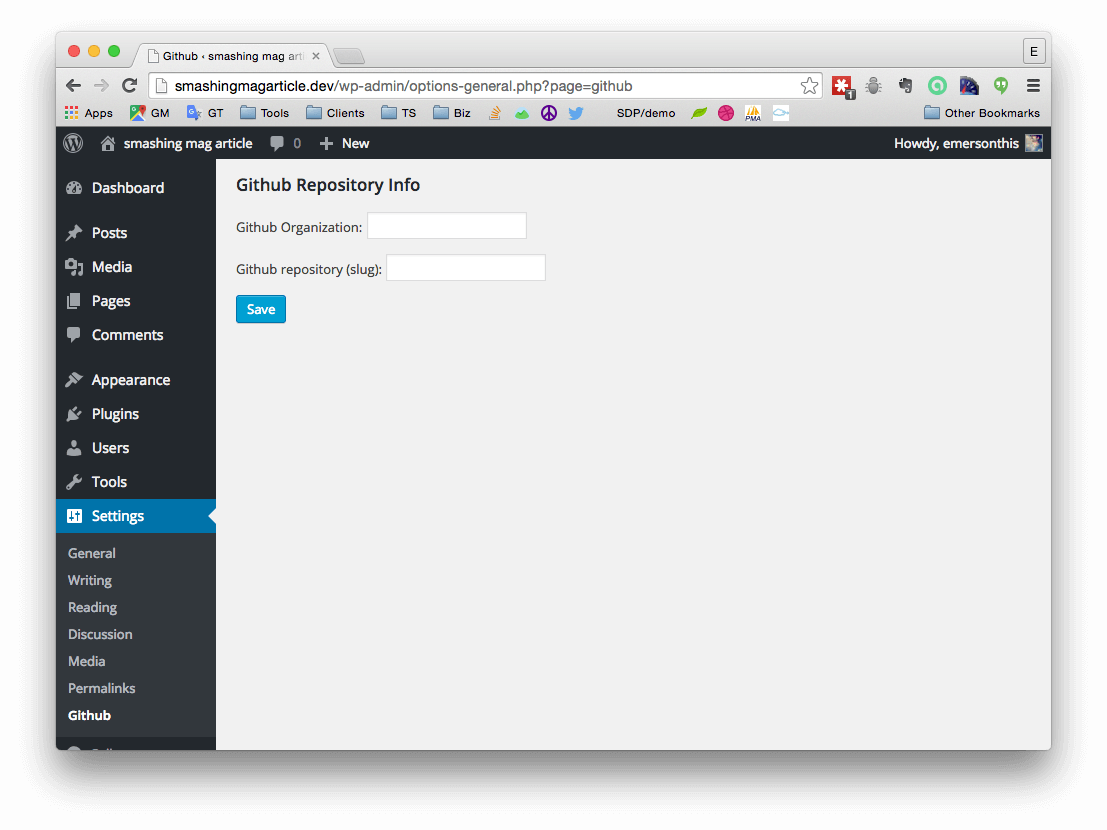
Next, we will replace Hello word with the form’s actual markup. I’ll give you a barebones example that you can style as little or as much as you like.
?>
<form method="post" action="<?php echo admin_url( 'admin-post.php'); ?>">

   <input type="hidden" name="action" value="update_github_settings" />

   <h3><?php _e("GitHub Repository Info", "github-api"); ?></h3>
   <p>
   <label><?php _e("GitHub Organization:", "github-api"); ?></label>
   <input class="" type="text" name="gh_org" value="<?php echo get_option('gh_org'); ?>" />
   </p>

   <p>
   <label><?php _e("GitHub repository (slug):", "github-api"); ?></label>
   <input class="" type="text" name="gh_repo" value="<?php echo get_option('gh_repo'); ?>" />
   </p>

   <input class="button button-primary" type="submit" value="<?php _e("Save", "github-api"); ?>" />

</form>
<?php
The CSS classes I’ve included match those used by WordPress’ core, which is a nice way to get your custom options page to look decent with no additional effort.
There are two important things to understand about this form. First, the endpoint it submits to must be /wp-admin/admin-post.php. You could hardcode this path, but if the website is installed in a subdirectory it won’t work. So, we use the built-in admin_url() to create it dynamically.
Secondly, notice the hidden input with the name action. This field is how WordPress knows what to do with the post request that gets submitted by the form. The value corresponds to the name of the action hook we will use to set the callback function. The name of the action we’ll hook into will be this value, prefixed with adminpost. So, in our case, we need to add this:
add_action( 'admin_post_update_github_settings', 'github_handle_save' );
I find this to be one of the quirkier, less intuitive aspects of creating custom administration menus, but once you get used to it, it’s pretty painless. As you may have guessed, the second parameter of add_action() is the name of our callback function that will actually save the values to the database.
function github_handle_save() {

   // Get the options that were sent
   $org = (!empty($_POST["gh_org"])) ? $_POST["gh_org"] : NULL;
   $repo = (!empty($_POST["gh_repo"])) ? $_POST["gh_repo"] : NULL;

   // Validation would go here

   // Update the values
   update_option( "gh_repo", $repo, TRUE );
   update_option("gh_org", $org, TRUE);

   // Redirect back to settings page
   // The ?page=github corresponds to the "slug"
   // set in the fourth parameter of add_submenu_page() above.
   $redirect_url = get_bloginfo("url") . "/wp-admin/options-general.php?page=github&status=success";
   header("Location: ".$redirect_url);
   exit;
}
The example is also quite minimal. In a production setting, you would probably want to add some validation. Also, in this example, we’re automatically passing back status=success to the URL. The form’s markup doesn’t actually use it yet. To conditionally show a success message, add something like the following above the form in gh_plugin_options():
if ( isset($_GET['status']) && $_GET['status']=='success') {
?>
   <div id="message" class="updated notice is-dismissible">
      <p><?php _e("Settings updated!", "github-api"); ?></p>
      <button type="button" class="notice-dismiss">
         <span class="screen-reader-text"><?php _e("Dismiss this notice.", "github-api"); ?></span>
      </button>
   </div>
<?php
}
If you add validation, use this same pattern to pass back different statuses and messages so that the user knows if and why their submission of the form failed.
Now you should be able to save new owner and repository values. Test it by entering the owner and repository of any public project on GitHub. The final step is to go back to the shortcode callback function github_issues_func() and replace the hardcoded owner and repository values.
…
$issues = $gh->api("issue")->all(get_option("gh_org"), get_option("gh_repo"));
…
Once this is in place, revisit the page where you added the shortcode. You should now see issues from whichever project you set.
Bonus Round: OAuth 2.0 Authentication
The approach we used above works great for public repositories, but what if we want to use this plugin with a private repository that requires authentication? The GitHub API authenticates using the OAuth 2.0 protocol, which is what you will encounter working with most popular APIs these days. The basic OAuth 2.0 workflow goes like this:
- You register an application (sometimes called a “client”) with the provider and receive a unique ID and secret key.
- Your application makes a request to the provider’s authentication endpoint, passing the credentials above as well as a redirect URL that the provider uses to redirect the request back to an endpoint of your application.
- The user is then prompted to accept your request for access. If they do, the provider uses the URL you sent with the request to redirect the user back to your application, along with a temporary code.
- Your application captures this code and then makes a second request, passing this code back to the provider. The provider responds with an access token, which your application then uses to authenticate with the provider.
We’ll start by registering an application with GitHub. As with most popular APIs, this section is located in the developer area of the website.
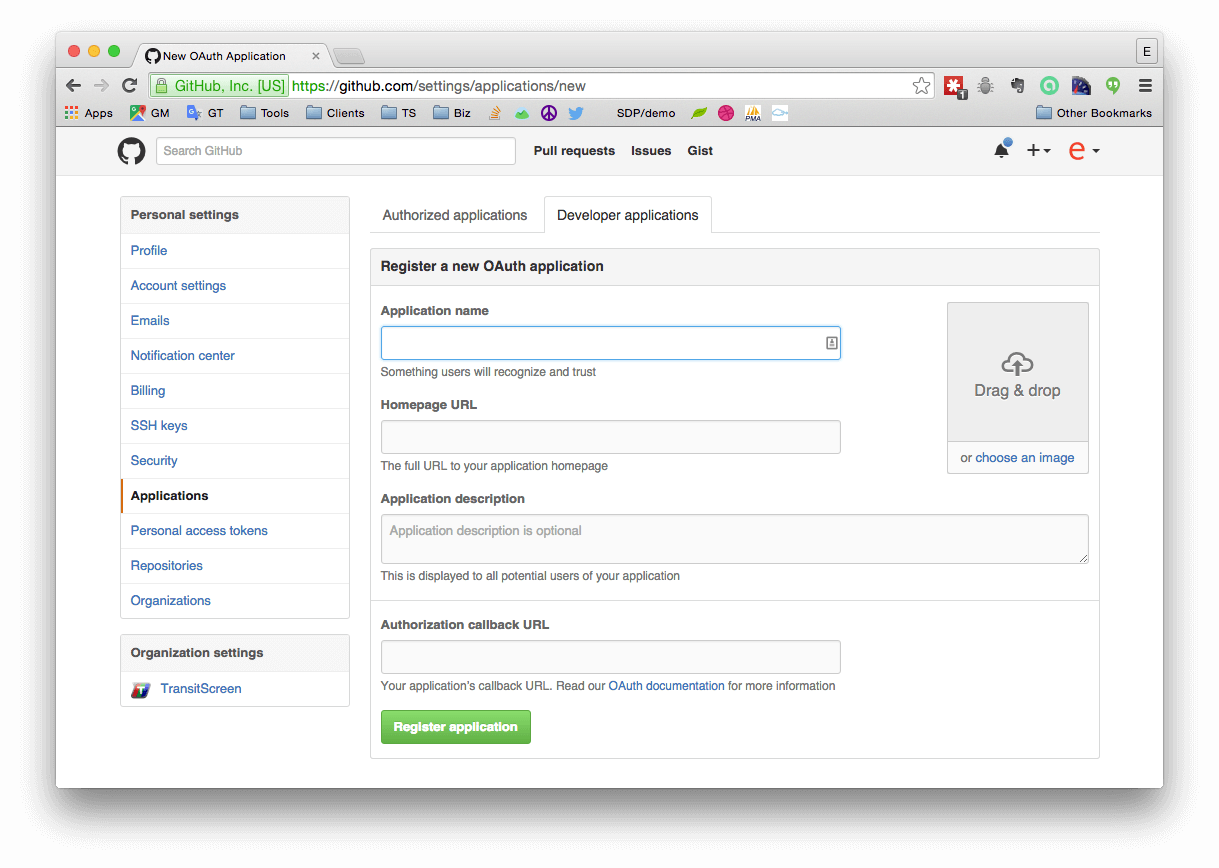
The most important thing here is the authorization callback URL. The redirect URL passed in step three must match what you enter here, or include it. So, during development, I usually enter the home page of the website. This way, my app can redirect to any path.
Next, we’ll add a second form to our settings page, in gh_plugin_options(), for submitting the application’s client ID and secret.
<form method="post" action="<?php echo admin_url( 'admin-post.php'); ?>">

   <input type="hidden" name="action" value="oauth_submit" />

   <h3>Oauth 2.0</h3>

   <p>
      <label><?php _e("GitHub Application Client ID:", "github-api"); ?></label>
      <input class="" type="text" name="client_id" value="<?php echo get_option('client_id')?>" />
   </p>
   <p>
      <label><?php _e("GitHub Application Client Secret:", "github-api"); ?></label>
      <input class="" type="password" name="client_secret" value="<?php echo get_option('client_secret')?>" />
   </p>

   <input class="button button-primary" type="submit" value="<?php _e("Authorize", "github-api"); ?>" />

</form>
To make life easier, I’ll use the GitHub Provider for OAuth 2.0 Client by The League of Extraordinary Packages. So, first, let’s use Composer again to add the dependency:
composer require league/oauth2-github
Note that the GitHub library from KNP Labs also has OAuth 2.0 support built in. So, in my specific example, this is somewhat redundant. But I wanted to introduce this library because it belongs to a suite of provider-specific OAuth 2.0 client libraries that all extend the same framework maintained by the mighty League of Extraordinary Packages. You can view a complete list of supported providers or read instructions on how to extend the framework to support a new provider.
Let’s create a function to request and save the token when the user submits the form. Because GitHub is one of the providers already supported, I can copy the example in its documentation with only a couple modifications.
function handle_oauth() {

   // If the form was just submitted, save the values
   // (Step 1 above)
   if ( isset($_POST["client_id"]) &&
         isset($_POST["client_secret"])
   ) {

   update_option( "client_id", $_POST["client_id"], TRUE );
   update_option("client_secret", $_POST["client_secret"], TRUE);

   }

   // Get the saved application info
   $client_id = get_option("client_id");
   $client_secret = get_option("client_secret");

   if ($client_id && $client_secret)
   {
      $provider = new League\OAuth2\Client\Provider\Github([
         "clientId"          =>  $client_id,
         "clientSecret"      =>  $client_secret,
         "redirectUri"       => admin_url("options-general.php?page=github"),
      ]);

   }

   // If this is a form submission, start the workflow
   // (Step 2)
   if (!isset($_GET["code"]) && $_SERVER["REQUEST_METHOD"] === "POST") {

      // If we don't have an authorization code, then get one
      $authUrl = $provider->getAuthorizationUrl();
      $_SESSION["oauth2state"] = $provider->getState();
      header("Location: ".$authUrl);
      exit;

   // Check given state against previously stored one to mitigate CSRF attack
   // (Step 3 just happened and the user was redirected back)
   } elseif (empty($_GET["state"]) || ($_GET["state"] !== $_SESSION["oauth2state"])) {

      unset($_SESSION["oauth2state"]);
      exit("Invalid state");

   } else {

      // Try to get an access token (using the authorization code grant)
      // (Step 4)
      $token = $provider->getAccessToken("authorization_code", [
         "code" => $_GET["code"]
      ]);

      // Save the token for future use
      update_option( "github_token", $token->getToken(), TRUE );

   }
}
And, just as we did with the other form, we need to add the action hook so that the function is called when the form is saved.
add_action( "admin_post_oauth_submit", "handle_oauth" );
Saving the form should now send you to the authorization page of the API provider. After authorization, your application can use the saved token to request data from private repositories to which you have access. The library I’m using by KNP Labs has a handy method for this.
$gh = new MyGithub();
$gh->authenticate( get_option("github_token"), NULL, Github\Client::AUTH_HTTP_TOKEN);
Libraries will differ on precisely how they handle authentication, but one way or another, you will pass in the token, which will then make authenticated requests on behalf of a user.
Conclusion
We’ve covered a lot of ground, and I’ve tried to keep the examples as minimal as possible so that the overall workflow remains clear. The complete source code from this tutorial is available. I hope you now have a clear understanding of the moving pieces involved in creating a WordPress plugin that consumes third-party service APIs, and hopefully you are inspired to write your own WordPress API plugin.
Final Notes
- WordPress Codex (documentation)
- GitHub API (documentation)
- OAuth 2.0 (documentation)
- Composer (documentation)
- The League of Extraordinary Packages
- Guzzle Documentation
Further Reading
- WordPress Essentials: How To Create A WordPress Plugin
- How To Deploy WordPress Plugins With GitHub Using Transients
- Three Approaches To Adding Configurable Fields To Your Plugin
- The Problem With WordPress Is Positioning, Not Plugins


