How To Create Icons In Adobe XD

Email Newsletter
Weekly tips on front-end & UX.
Trusted by 182,000+ folks.


 Celebrating 10 million developers
 Custom Web Forms for Angular, React, & Vue. Your backend.
Released in March this year, Adobe Experience Design is a new all-in-one tool that lets you design and prototype websites and mobile apps. XD is still in beta and available for Mac with a Windows version on track for a release later in 2016. It is bound to provide a fast and efficient way to create new user interfaces, wireframes, and visual designs with various devices in mind.
As an icon creator, I tried to use XD to create icons from scratch and to apply them to a new user interface. In this tutorial, I want to guide you through the steps it took so you can follow along. We’ll take a look at how to create a set of office icons for a new app. Plus, I’m going to show you how you can use XD’s features to interact with your newly-created user interfaces during the prototyping phase. So, let’s get started.
Table Of Contents
In this tutorial, you’ll learn how to:
- Set up your document for Icon Design (Artboard, Color Palette)
- Design with Rectangle Tool,
- Create a prototype,
- Export and share your icons.
So without a further ado, let’s get started!
Preparing Artboards
First off, we are going to create a new office icon set, taking some examples from my previous icon set which was published as a freebie here on Smashing Magazine. First, we’ll create the icons, then we’ll create a simple app user interface with them.
Open Adobe Experience Design, and you’ll see this:
Choose “Custom Size” and click “Open”.
In the new window, click on the Artboard Tool (A) in the toolbar on the left. Once clicked, you’ll see some UI settings showing in the Property Inspector on the right. Since we’ll begin with our icon set, we will create a custom artboard first.
Click and drag to create a 512×512 px artboard. To have more control over its size, you can also enter the width and height values directly in the dimensions section in the Property Inspector on the right.
Double-click on the artboard name on top of your artboard and name it “Icon-01”.
We need another three artboards identical to the one we already created. To create a new artboard with the same dimensions of the first one, you just need to do Cmd + C and Cmd + V.
(Note: if you just click on the gray space on the right-hand side next to your first artboard instead of doing Cmd + C, XD will also add a new artboard but with the dimensions of the first device that is listed in the Property Inspector on the right, in this case iPhone 6.)
Every new artboard will be positioned in the same row, but you can easily drag and drop artboards four and five under the first two. Name them “Icon-01”, “Icon-02”, “Icon-03”, “Icon-04”.
At this point, save your project via File → Save as and name it “Office-Icons”.
Creating A Color Palette
Now, let’s create a swatches palette to position above our artboards. Click on the Rectangle Tool ® and create a square with the dimensions 120×120 px. You’ll need to create four more squares with the same dimensions. Just do Cmd + C and Cmd + V. Contrary to copying and pasting artboards, Adobe Experience will paste objects like these on top of instead of next to each other. So select and drag them to the right.
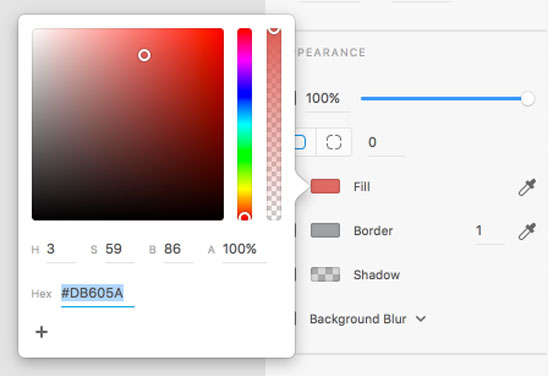
To choose a color for your square, click on it and go to the Property Inspector on the right and there to the Appearance section where it says “Fill”.
Using Fill Tool, you will be able to do three things:
- Opening the swatches palette by clicking on the white rectangle displayed next to “Fill” and then choosing a color from the various palettes it contains (color wheel, color sliders, color palettes, image palettes, pencils).
- Using the color picker to pick a color from a source.
- Adding picked colors to the swatch in the color pick
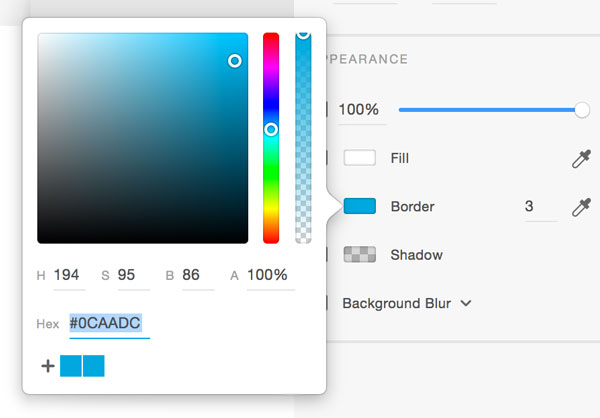
If you prefer, you can also manually enter a hex value in the color picker.
Now, I will use the color picker to choose a color for every square from my palette image. After you’re done, select all your swatches palette squares and get rid of their border color by unchecking “Border” in the Property Inspector.
Here is my palette. You can use it to drag and drop it into your XD window.
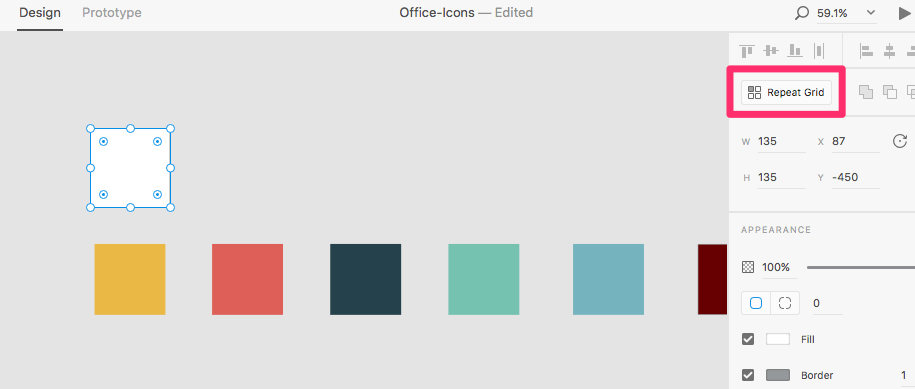
Let’s see how to add these colors to XD watches. Create a square above palette colors and click on “Repeat Grid”.
Drag to create other five squares.
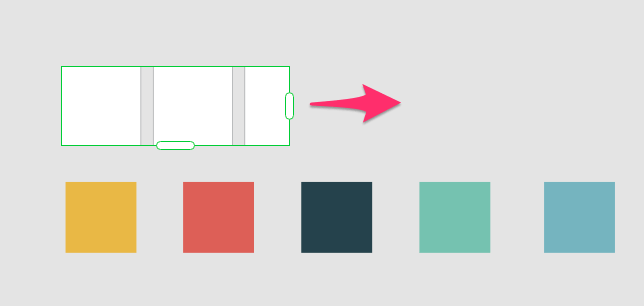
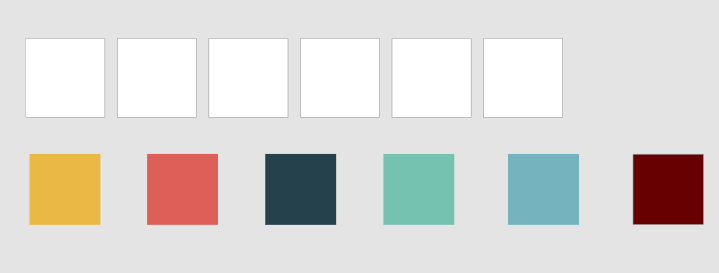
Now, with all squares selected, click on “Ungroup Grid”. Click on the first square, then grab the Color Picker and pick the color from the first colored square of our palette.
Let’s see how to add colors to the swatch, in the video below. It shows you how to get rid of swatches, too.
After that, you are free to delete squares palette colors we created before.
Creating Icons
Let’s begin to draw our icons! First, we need to see a grid on our artboards. Click on your first artboard and check “Grid” in the Property Inspector. Set the size of the grid to 30. Now all your shapes will snap to the grid.
Icon Nr. 1: Clipboard
Our first icon will be a clipboard.
Click on the Rectangle Tool ® and draw a rectangle as shown in the image below.
Select the color picker next to “Border” in the Appearance panel, and click on the blue square in your swatches palette. Then set the border size to 20 and set “Fill” to white.
Drag your rectangle downwards, so that it goes over the border of your artboard. The overlapping part of your rectangle will disappear once you click anywhere outside the artboard.
Grab your Rectangle Tool ® again, and draw a little rectangle at the top of the board. Take the “Fill” color picker and select the yellow color from our palette. Uncheck “Border”.
Click on the last rectangle you created. You will four rounded corner handles showing up. Click on one of them and drag it inwards a little to create rounded corners. Alternatively, you can also insert a value directly into the corner radius box.
This will be the result:
Now, create another rectangle following the previous steps and position it right above the last one. “Fill” will be the same yellow color, no border.
Let’s create a little shadow. Select the last rectangle you created and copy and paste it on top of it (Cmd + C / Cmd + V). Drag the top border of the new rectangle downwards and set the fill color to black, opacity 20%.
Again, with the Rectangle Tool ® create a little box to represent a checkbox. Set the border color to blue and size to 7. Leave the fill color white.
Now, draw some lines near the box to represent text lines. Set the fill color to blue and uncheck border color.
Grab the Pen (P) and draw a little V inside the checkbox.
Set the border width of the checkmark to 8 and select the green from our palette to color it.
When you create something with the Pen tool, you can always go back and modify. Just double click on the V shape and you will see little circles showing up. Drag and drop them to modify your shape.
After that, select both the checkbox and the lines on the right (holding down Shift while clicking) and group them. Then, go on the Appearance Panel and click on Repeat Grid button. Drag and drop the handle group down and you’ll get your group repeated. Let’s repeat it three times.
Now, create a circle. Click on Ellipse (E) and, holding down Shift + Alt to contain proportions, click and drag to create a circle. Set its dimensions to 512×512 px.
Select the circle and set its color to our red tone using the “Fill” eyedropper.
Select the circle again and move it behind the clipboard through Object → Arrange → Send to Back.
Once again, select the circle and hit Cmd + C / Cmd + V to copy and paste it. You will now see the circle on the top.
Select all objects and go to Object → Mask with Shape. Your icon will be masked with the circle. Uncheck the grid to see the result.
Icon Nr. 2: Coffee & Cookies
On our second artboard, let’s create a yellow ellipse just like you’ve seen it in the previous step.
Then click again on Ellipse (E) and create a white circle positioned half in the yellow circle, half out of it.
With the white circle selected, hit Cmd + C / Cmd + V to copy and paste to the front. Press Shift + Alt and drag it inwards to create a smaller circle. Set “Fill” to the brown color from our palette.
Select the brown circle and copy and paste it twice to create two more circles on top of each other. Position the top one as shown in the image below. Then select both shapes and click on “Subtract”.
Click on the new shape (a half moon) and set its fill color to black by double-clicking on “Fill”.
Now, set its opacity to 50%.
Again, create another circle with the Ellipse (E) Tool, this one smaller than the other. Then create two small white circles on the edge of that.
With all three circles selected, hit “Subtract”. The result is a bitten cookie.
Draw some little brown circles onto the cookie to simulate chocolate chips.
Select the chocolate circles and the cookie and group them through Object → Group.
Make the coffee cup a little bigger and closer to the cookie.
Select the yellow circle in the background and hit Cmd+ C / Cmd + V, then select everything and mask through Object → Mask with shape.
Here the result:
Icon Nr. 3: Drawers
On to the third artboard.
Select the Rectangle tool and draw a rectangle. Press Cmd + D to duplicate it and move the duplicate to the right. Set the fill of both to yellow.
Double-click on the rectangle on the left, then select its top right angle point and drag it downwards. Do the same with the top left angle point of the rectangle on the right. The result should look like this:
Now, grab the Pen (P) and draw a rhombus on the top. It will become the top surface of our file cabinet.
Set the fill color to yellow, then double click on fill color to move the brightness handle a little to the right:
This is the result:
Select the right rectangle and change its fill color as I showed you in the previous step.
Select both rectangles and hit Cmd + D to duplicate them. Drag the two duplicated rectangles to the left and resize them as shown below:
Double-click on the rectangles and move their bottom left and bottom right points upwards.
Resize them and create a rhombus on the top with the Pen (P).
Grab the Pen (P) again and draw a sheet coming out from the drawer. Fill it with white.
Now, click on the Line (L) Tool and draw a line for the drawer handle:
Set its border width to 6 and its color to gray.
With the line selected, add a shadow as shown below.
Create a circle with the Ellipse (E) Tool, fill it with the green from our palette and position it in the background with Object → Arrange → Send to back.
Select the green circle, copy and paste it to the front, then select everything and go to Object → Mask with Shape.
Icon Nr. 4: Office Plant
Let’s continue with our fourth artboard.
Grab the Ellipse (E) Tool and create two shapes like I did. Use the eyedropper to set the fill color of the circle to the blue and the ellipse to the red of our palette.
Hit Cmd + D to duplicate the red shape and move it downwards:
Select the Pen (P) and draw a little triangle on the right to fill the empty space between the two ellipses, then set its fill color with the same red. Uncheck border option.
Repeat the same on the left side.
Now, select all your red shapes and click on “Add” to unify them.
Grab the Ellipse (E) Tool again and draw another ellipse like the one in the image below.
Select both shapes and center them using “Align Horizontally”.
Select the ellipse we have just created and set its fill color to the same red as the bottom shape. Then double-click on “Fill” and set the red brightness handle a little to the right to make the red darker.
Select the darker ellipse and hit Cmd + D twice to clone the shape twice. Move the top shape downwards.
Select the two ellipses on the top and click on “Intersect”.
Then select the shape you obtained and fill it with a darker red like I showed you in the previous step.
With the rectangle tool, draw the bottom part of the plant pot.
Now, copy both the rectangle and the ellipse shapes and move them next to your artboard so we can create another shape to do a shadow effect.
Keeping both shapes selected, click on “Intersect”, like in the previous step. The result will look like this:
Set a darker red as the fill color of the newly-created shape by double-clicking on its fill. Then move it to the flower pot:
Bring it behind the ellipse shape by clicking on Object → Arrange → Send Backward. This action is also possible using the context menu (via right click).
On to the last steps. Create a green rectangle like the one I show you here:
Take the Ellipse (E) Tool and draw a squashed, white ellipse.
Hit Cmd + D to duplicate it and set rotation to 90°.
Unify the shapes by clicking “Add”, then duplicate them with Cmd + D. Set rotation to 45°.
Unify the shapes by clicking on “Add” and set its color to gray by double clicking on “Fill”.
Holding down Shift and Alt, drag a handle inwards to make the shape smaller.
Now, draw a yellow circle in the center.
To create the leaves, draw a little green circle on the left.
Double-click on it and drag the top and bottom handles apart from each other.
Then double-click on the top and bottom points of the leaf to create a sharp angle.
Rotate the shape by 307°.
Hit Cmd + D to duplicate the shape and fill the duplicate with a darker green.
Click on the left handle point of the leaf and delete it.
Duplicate the leaf and move the copy to the right of the stem.
Select the blue circle and copy and paste it.
Select everything and click on Object → Mask with shape.
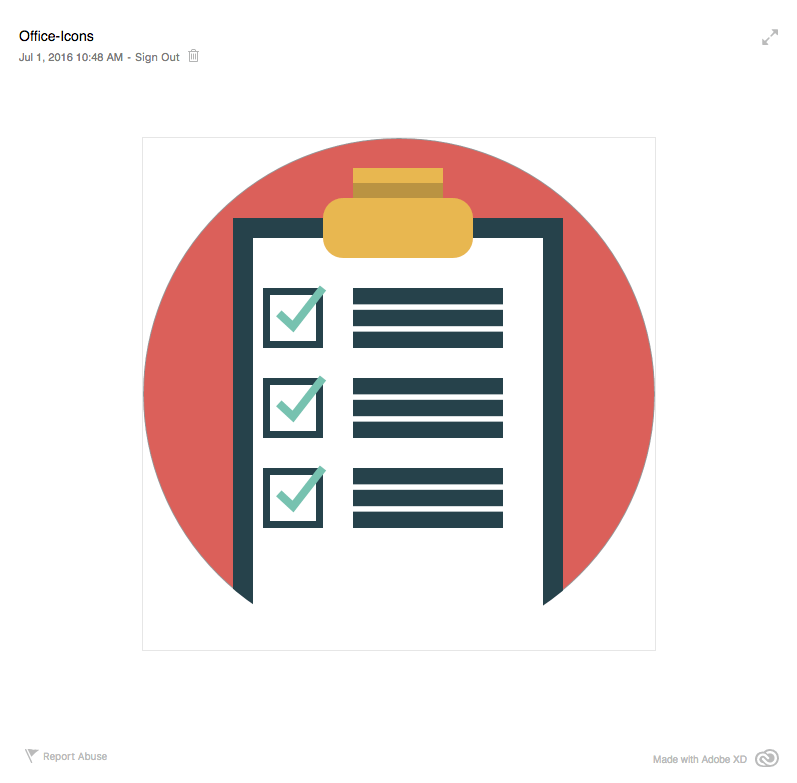
Ta-daa! Our icons are ready.
Export Your Icons
After that, you will be able to export your icons to PNG and SVG. Click on File > Export. A popup window will let you choose the way to export your icons. You can choose to export for web, iPhone and Android. Additionally, you can decide in which format (PNG and SVG) and which dimensions (1x, 2x, 3x and more) to export them.
Creating A Prototype
This is the final step of this tutorial — and the best part of Adobe Experience. Click on the top label “Prototype”.
Prototype is the section where you can organize your presentation of the work. You can organize it in slides, interact with them, and record the interaction. In our case, we just need to do few things to present our icons. Let’s see how to do that.
You can share your presentation by sharing a link. Go on File > Share. Click on Create Link button of popup window, and click "Copy Link":![]()
![]()
Now, paste the URL in the browser and can click on the icon to traverse through all icons.
Conclusion
We now have created an icon set entirely in Adobe XD — something I usually do in Illustrator. I hope you enjoyed this tutorial and that it inspired you to take your first steps with this new tool.
You can download download my sample file and find more tutorials on the Adobe blog, too.
Further Reading
- Useful Prototyping Tricks in Adobe XD
- Animated Microinteractions In Mobile Apps
- How Prototyping Made Us More Efficient
- How Prototyping Made Us More Efficient


