I Contributed To An Open-Source Editor, And So Can You

Email Newsletter
Weekly tips on front-end & UX.
Trusted by 182,000+ folks.


 Custom Web Forms for Angular, React, & Vue. Your backend.
 Celebrating 10 million developers
A few months ago, Jason Grigsby’s post about autocompletion in forms made the rounds. I loved the idea of allowing users to fill in their credit card details by taking a picture of their card. What I didn’t love was learning all of the possible values for autofill by heart. I’m getting lazy in my old age.
Lately, I’ve gotten spoiled from using an editor that does intelligent autocompletion for me, something that in the past only massive complex IDEs offered. Opening my editor of choice, I created an input element and added an autocomplete attribute, only to find that the code completion offered me the state of on or off. Disappointing.
What I wanted was the following:
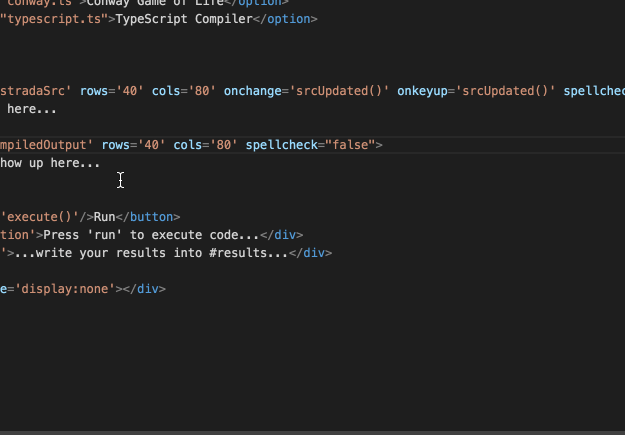
autocomplete offered by this editorThe great thing about our development environments these days is that we build the tools we use in the technologies that we use them to write. Yes, this sounds confusing — we’ve reached code Inception. Node.js allows us to run JavaScript on the back end, and with Electron we can create installable applications for all platforms using HTML, CSS and JavaScript.
Atom was the first editor to use this technology and to allow for contributions by being open source, closely followed by Microsoft’s Visual Studio Code.
Almost all of the other editors in use allow us to write extensions, plugins or snippet collections in various formats. I deliberately didn’t want to write a plugin or extension, but rather wanted to add this functionality to the core of the editor. Plugins, extensions and snippets have their merits; for example, they are easy to update. The problem is that they need to be found and installed per user. I considered autocompletion too important and wanted to hack the editor itself instead.
Both Atom and Visual Studio Code are available on GitHub and come with instructions on how to extend them. The challenge is that this can feel daunting. I’m here today to show you that it isn’t as tough as you might think. Visual Studio Code is my current editor, and it features amazing autocompletion. That’s what I wanted to tackle.
Extensible and customizable tools are nothing new. Most of what we use can be extended in one way or another, whether in the form of add-ons, plugins or specialist languages. The first editor I used in anger was Allaire and Macromedia’s HomeSite, which had funky languages like VTML, WIZML and JScript, the Windows version of JavaScript at the time. I wrote a lot of extensions and toolbars for that editor, which very much boosted the productivity of my company back then.
Thankfully, these days, companies understand that offering specialist languages is time wasted, when the web stack has grown to become much more interesting to build applications with.
If you download Visual Studio Code now, you will see that my autocomplete feature is a part of it. And here is how I did that.
1. Complain
My first step was to go to Visual Studio Code’s GitHub repository and file an issue requesting this feature for the editor. This could also be your final step if you don’t want to do it yourself. Someone else who is looking for something to do for the project might find your complaint and tackle it for you. In my case, I wanted to find out more.
2. Fork The Code
Instead of just filing an issue, I went to the GitHub repository and forked the code. I used my personal account for this. You don’t need to be affiliated with Microsoft or get added to a special group. The repository is public and open. Everybody is welcome. There is even a code of conduct for contributions, which means that people should be playing nice. I downloaded the code to my hard drive and followed the instructions on how to build the editor locally.
3. Get The Development Workflow In Place
Visual Studio Code is written in Node.js and TypeScript. The development flow starts with a script provided by the team, which gives me a development version of Visual Studio Code running next to the one I am using. A script running on the command line ensures that my changes are captured and that every time I save my code, the development version of the editor restarts and I can test the changes. All of this is nicely documented, from building and running the code from source to setting up the development workflow. And it is independent of platform — you get instructions for Windows, Linux and Mac OS X.
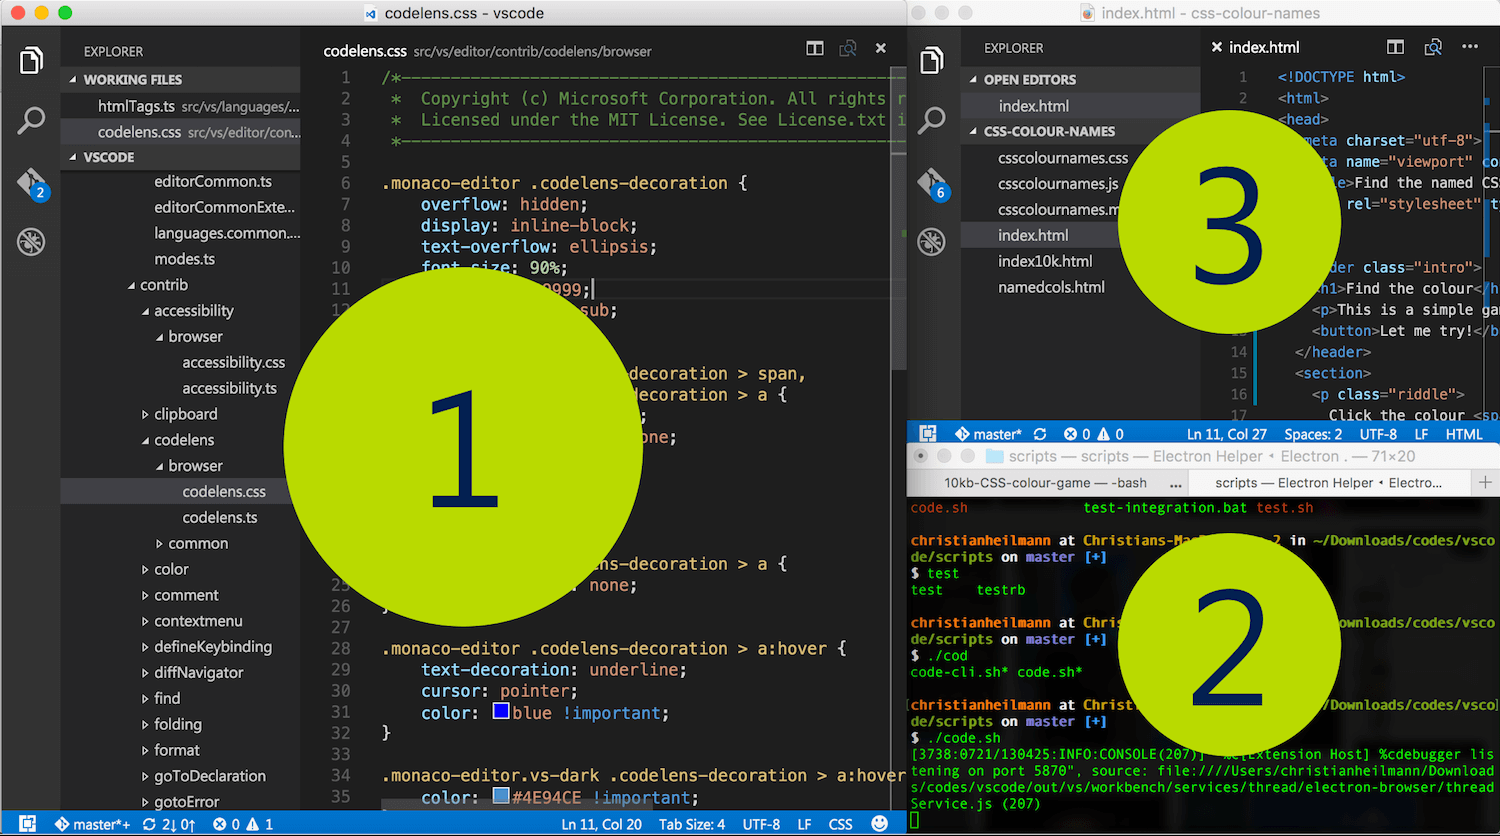
You can see what this looks like on my computer in the following screenshot. The large-view editor (1) is the one I use to code the other; the one on the right (3) is the development edition; and on the bottom (2) is the script creating the new version of the development edition. Writing an editor in an editor does feel odd, but you get used to it.
Don’t get discouraged if all of this doesn’t work for you on the first go. I hit a few snags and had to turn to Google and StackOverflow for solutions. The Node.js community was very helpful.
4. Write The Functionality
Next, I was ready to go all in and use TypeScript to write some clever code. I understood that this is where a lot of people throw in the towel, considering it too tough to continue.
My biggest issue was that I had no idea where to begin with this functionality. So, I did what we all do: I did a full text search for autocomplete in the whole project. Using this highly scientific approach, I found an htmlTags.ts file full of tag definitions and arrays of attribute values. I looked up the input element and found this:
input: new HTMLTagSpecification(
        nls.localize('tags.input', 'The input element represents a typed data field, usually with a form control to allow the user to edit the data.'),
        ['accept', 'alt', 'autocomplete:o', 'autofocus:v', 'checked:v', 'dirname', 'disabled:v', 'form', 'formaction', 'formenctype:et', 'formmethod:fm', 'formnovalidate:v', 'formtarget', 'height', 'inputmode:im', 'list', 'max', 'maxlength', 'min', 'minlength', 'multiple:v', 'name', 'pattern', 'placeholder', 'readonly:v', 'required:v', 'size', 'src', 'step', 'type:t', 'value', 'width']),
That autocomplete:o looked interesting, so I checked where o is defined. Here’s what I found:
var valueSets: IValueSets = {

…

    o: ['on', 'off'],

…

}
That looked like what was happening when I added an autocomplete attribute. To change that, I went to the standard definition of possible autocomplete values and copied them.
I created a new value set named inputautocomplete and pasted in the values:
var valueSets: IValueSets = {

…

    inputautocomplete: ['additional-name', 'address-level1', 'address-level2', 'address-level3', 'address-level4', 'address-line1', 'address-line2', 'address-line3', 'bday', 'bday-year', 'bday-day', 'bday-month', 'billing', 'cc-additional-name', 'cc-csc', 'cc-exp', 'cc-exp-month', 'cc-exp-year', 'cc-family-name', 'cc-given-name', 'cc-name', 'cc-number', 'cc-type', 'country', 'country-name', 'current-password', 'email', 'family-name', 'fax', 'given-name', 'home', 'honorific-prefix', 'honorific-suffix', 'impp', 'language', 'mobile', 'name', 'new-password', 'nickname', 'organization', 'organization-title', 'pager', 'photo', 'postal-code', 'sex', 'shipping', 'street-address', 't].sort()el-area-code', 'tel', 'tel-country-code', 'tel-extension', 'tel-local', 'tel-local-prefix', 'tel-local-suffix', 'tel-national', 'transaction-amount', 'transaction-currency', 'url', 'username', 'work'],

…

}
I then went to all of the definitions of elements that support autocomplete and replaced the o with my own inputautocomplete:
input: new HTMLTagSpecification(
        nls.localize('tags.input', 'The input element represents a typed data field, usually with a form control to allow the user to edit the data.'),
        ['accept', 'alt', 'autocomplete:inputautocomplete' … ]),
I saved my changes; the script rebuilt the editor; I tried the development version of the editor; and autocomplete worked the way I wanted it to.
5. Send A Pull Request
That was that. I committed my changes to Git (inside Visual Studio Code), went to GitHub and added a pull request. A few days later, I got a comment saying that my pull request went through and that what I did would be part of the next build.
6. Be Baffled
Frankly, I didn’t think this was amazing enough to warrant a change to the core of the editor. I just wanted to play around. Many of you might think the same about the work you do. And that’s the thing: We’re wrong. Contributing to open-source projects doesn’t require you to be an amazing developer. Nor does it require you to be famous or part of the in-crowd. Sometimes all you need to do is look at something, analyze it and find a way to improve it.
It is up to us to make the tools we use better. If you see a way to contribute to an open-source project, don’t be shy. You might be the one who comes up with an idea so obvious and so simple that others have overlooked it. You might be the one who makes something more usable or nicer to look at. We all have skills to contribute. Let’s do more of that.
Further Reading
- So You’ve Decided To Open-Source A Project At Work
- A Short Guide To Open Source Licenses
- How To Start An Open-Source Project
- The Case For Open-Source Design


