How To Choose The Right Prototyping Tool

Email Newsletter
Weekly tips on front-end & UX.
Trusted by 182,000+ folks.
 Try ProtoPie AI free →


 Celebrating 10 million developers
 Register Free Now
When it comes to creating prototypes, so many tools and methods are out there that choosing one is no easy task. But which one is the best?
Spoiler alert: There is no “best” because it all depends on what you need at the moment! This article presents some insights into what to consider when you need to pick up a prototyping solution.
I’ve always wanted to stay up to date on the latest design and prototyping tools, testing them shortly after they launch, just to see if any of them might improve my workflow and enable me to achieve better results. In the beginning, a few years ago, I think it was easier than it is now to decide whether a new tool was useful. Nowadays, apps are being released every day, and it’s kind of difficult to give them all a proper try.
In a desperate attempt to become more conscious about each prototyping tool’s features and characteristics, and to better decide which to try next, I started to compile a short list of prototyping tools. Gradually, as I added more and more items to the list, it got out of control — a reliable sign that too many solutions exist.
Perhaps it’s because of this situation that, quite often, after having presented at a conference or taught a class, some of the attendees would ask for my advice, wanting to know which is the best tool out there. Honestly, I don’t feel capable of giving a straight answer, because, as with choosing a pair of running shoes, the “best” often depends on your needs at that particular moment and on what outcome you want to achieve.
I guess after a while, I have developed a kind of sixth sense for design — an ability to understand (or, at least, believe — I’m not Superman, after all) whether a given tool is worth trying just by giving it a quick look.
Luckily for you, you don’t need a sixth sense or any other superpowers in order to choose a prototyping tool. There are other, more objective means of choosing one. It all depends on your current priorities, so let’s start there.
1. Learning Curve
The most effective methods of learning take advantage of previous knowledge, so that we don’t have to start from scratch. This is what we call “knowledge transfer”: applying previously acquired knowledge to a new situation. It is also useful when you’re learning how to use a new prototyping tool: The ones with a familiar interface and a familiar set of tools will probably be easier to learn than ones that are new in every aspect.
This is especially true for Adobe’s suite, in which every app is designed to resemble the others. You know where the panels and dialogs will be, and the similarities make it easier to learn new apps within the suite or to switch between apps — for example, from Illustrator to Photoshop.
But also compare how much time you expect to invest in learning a new tool with how much time you expect to actually be using that tool in your design process. The ideal situation would be to dedicate a little time to learning a tool that you will use frequently or even every day.
2. Support For Teamwork
I need my prototyping tool to consolidate feedback from clients about my designs, so that I can use the information to improve my work and then share a new, better version.
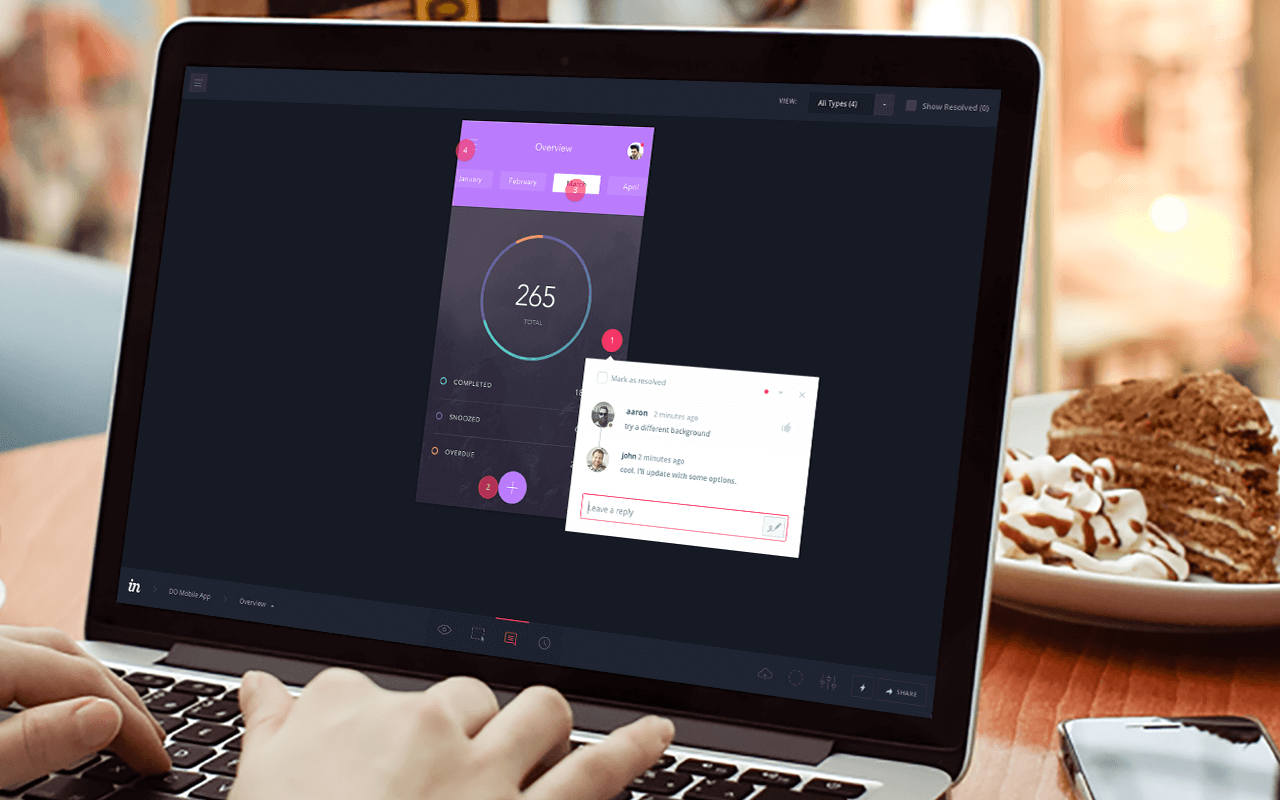
To achieve this, I’ll usually upload my design screens to InVision, where the client can add comments about a particular feature in the exact spot they’re referring to. Then, I’ll have a chance to reply to the comment or close it if the issue has been resolved.
But if you work in a company, then not only should the client feel like a part of the team, so should your fellow designers. It’s important to have a tool that enables your workmates to share and upload their own versions of your design screens, so that that everybody stays on the same page while contributing to the project. Tools such as InVision present the general activity of a project in a kind of timeline view, so that you can stay up to date and keep track of all changes.
3. Level Of Fidelity
From day one, when we have only a basic idea of what a product will be, our prototype starts to evolve, fueled by learning. That’s why we design in iterations, and in each phase we test different things according to our priorities.
For example, at the very beginning, when we don’t know whether an idea is valid, it is not advisable to focus on design details, such as color palette or grid system. Instead, we should be prototyping. And the prototyping tool we choose will depend on the fidelity we’re aiming for (i.e. how close the prototype should be to the intended final product).
Fidelity can build incrementally: low when we simply want to test the idea (the tool should allow navigation from one screen to another), medium when we’re focusing on layout, information and interaction design (the tool should be capable of more precise design), and high when the most important things are visual design, animation and micro-interactions (the tool should be capable of adding motion and transitions).
Each tool should help us to achieve the prototype we need — and perhaps not much more — and then enable us to move quickly to the next stage, where that tool might not be needed anymore.
Low Fidelity
When I merely want to test the idea for a digital product, an app that gives me a lot of control over the design is not convenient, because I will easily get distracted by details that are not relevant during that stage. More important is being able to navigate from one screen to another, without wondering about whether elements of the interface have the proper size or layout. (Yes, I know it’s difficult to resist the temptation to align elements, but believe me, it’s not crucial at this point.)
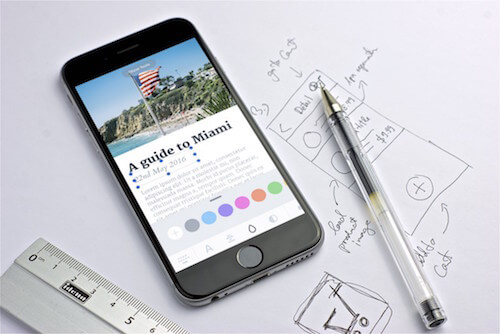
When I have just come up with an idea and go straight to the computer, I often find myself asking questions such as what size should the design document be or what colors should I choose — when I don’t even know whether the concept is on the right track. That’s why, in moments like these, I prefer to use the oldest and most basic option: pen and paper.
The idea is not new:
""But why should we start with sketching?" you might ask. The reason is because getting caught up in pixel-precision this early on in a project by going straight to digital is just too easy, and it’ll cost a bit of time in the long run.[…] Dropping back to pencil and paper is both a fast and easy way to get your ideas out so that you can start iterating."
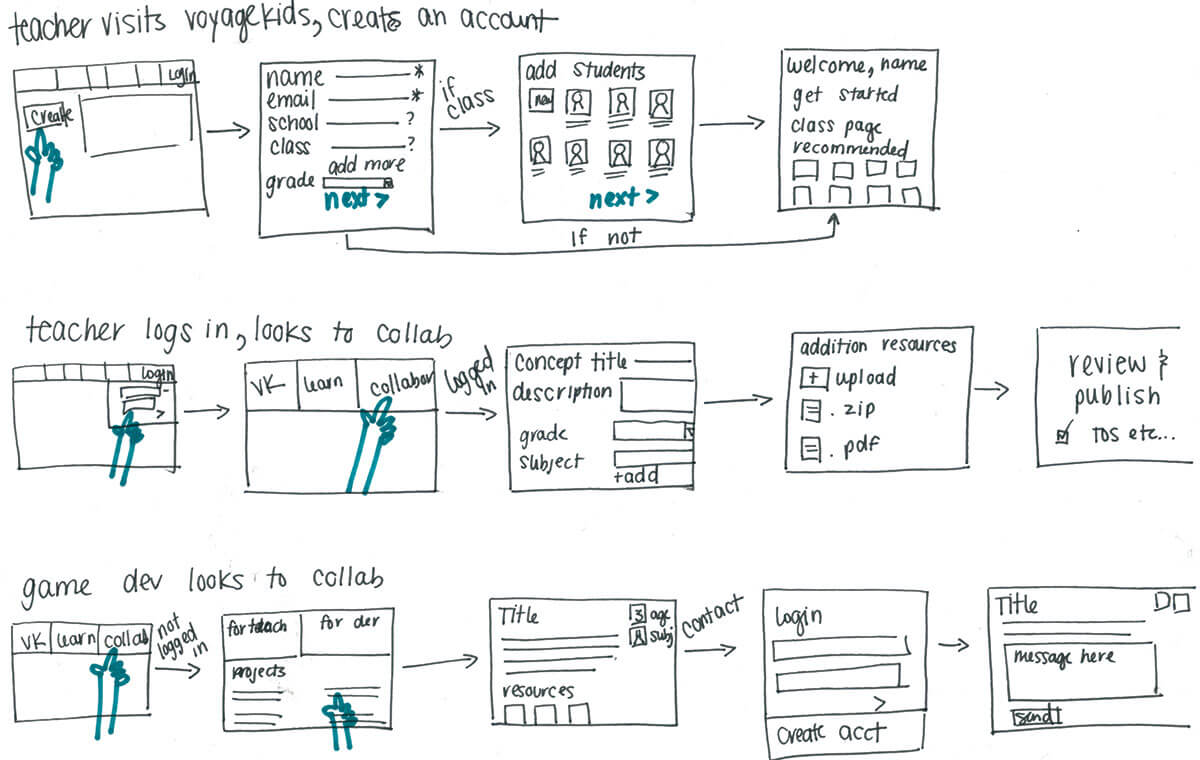
Using pen and paper, I won’t be worried about any of the design-specific details that I mentioned before. Instead, I can focus on the idea.
I can quickly draw a design to commit what I have in mind, and then, using a tool such as Marvel or POP, take pictures of it to build a working prototype that includes gestures and transitions, in order to test some basic flows. The good thing about prototyping in this way is that if the concept fails (but you have to continue working on that million-dollar idea), you won’t feel attached to your work, and restarting with a different approach will be very easy.
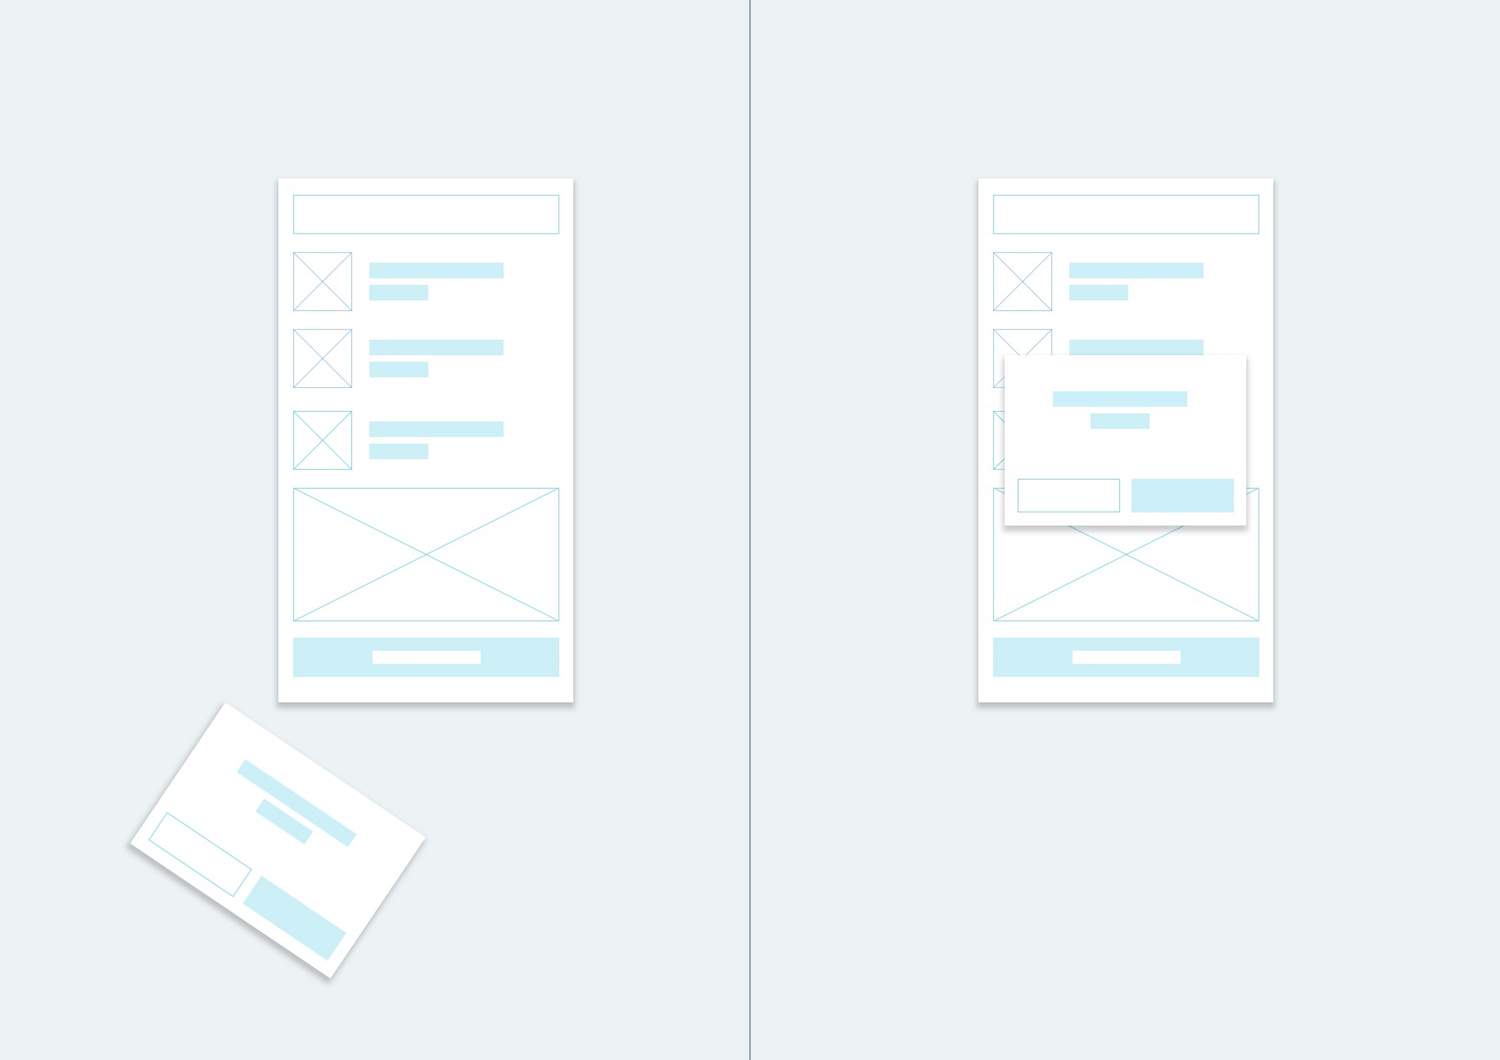
Tip: If you are designing temporary views, such as alerts, tooltips or short feedback messages, you can draw them separate from the main interface. Then, cut one of the messages with scissors, and put the little piece of paper on top of the main design. This way, you can take one picture with the message, and another without. You’ll have two screens for the price of one and without having to draw the two versions by hand!
Medium Fidelity
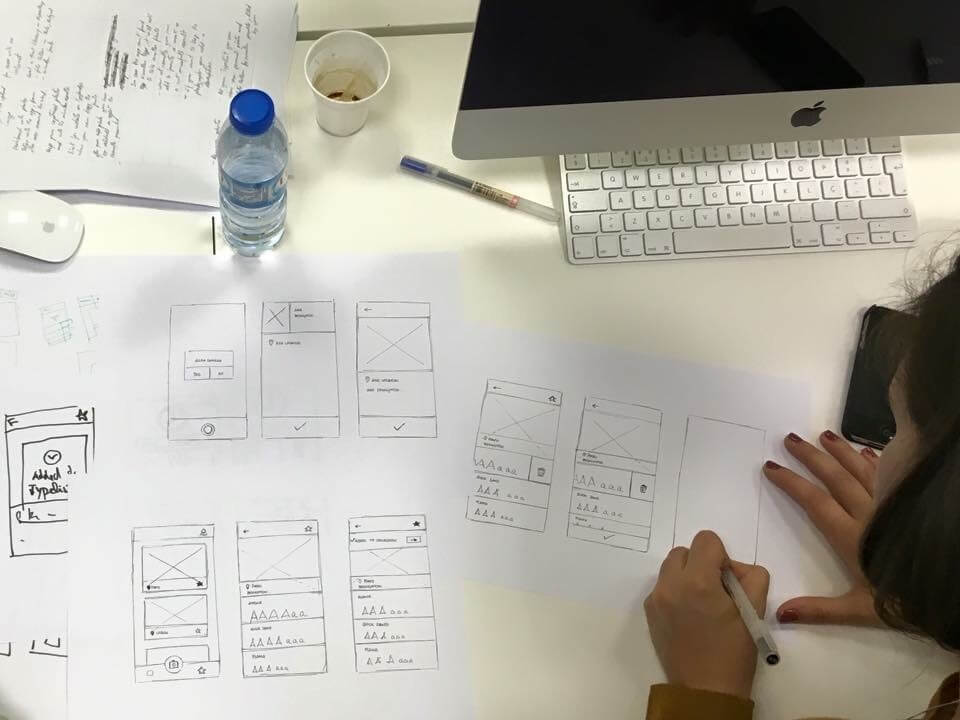
Pen and paper are fine, but there comes a point in the design process when they’re not enough. When I’m sure about the app’s core concept and I have already made some basic prototypes on paper, I need a different tool to move forward. Normally, when we talk about medium-fidelity prototypes, we are referring to wireframes whose primary purpose is to convey interaction and information.
When I design wireframes, I try to use real information as much as possible. However, I don’t always have all of the data at my disposal at this stage. So, I usually have to approximate the final text, graphics and colors, because these are tied to branding. (Don’t blame me: Those guys are always late!). At least I can focus on achieving a convincing layout and interaction.
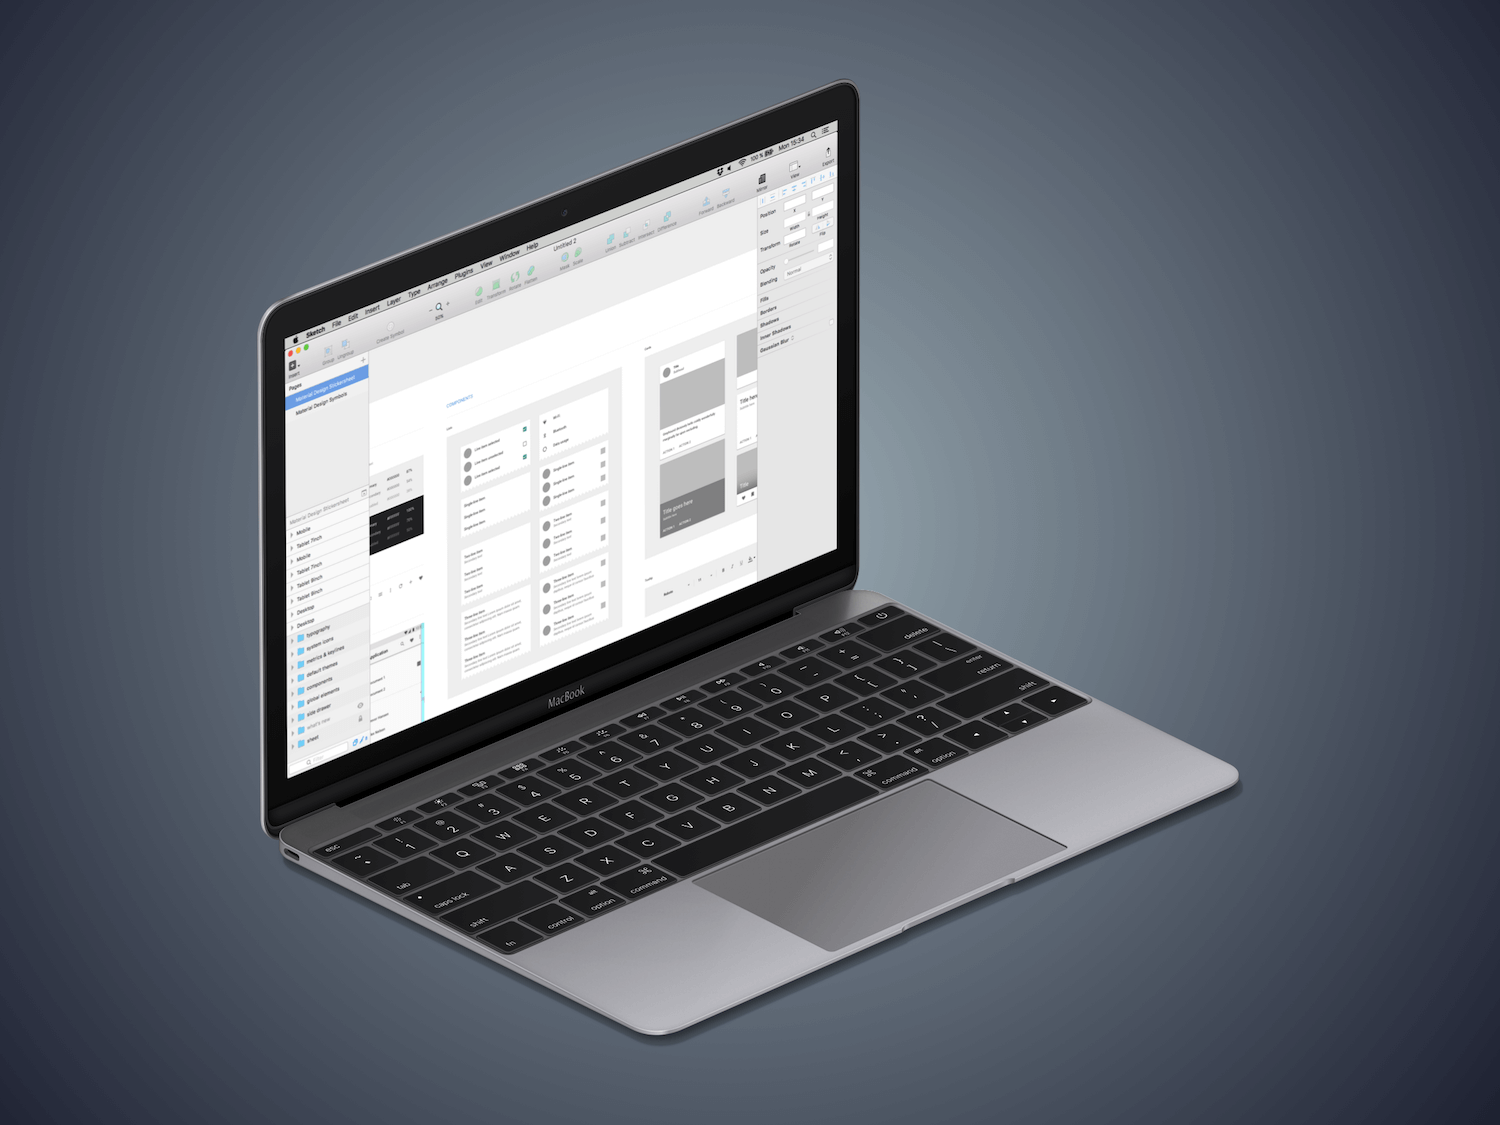
During this stage, I normally use Sketch. This tool is relatively easy to use and helps me take my paper design concept to the next level. Using Sketch, I can easily reuse UI elements, so that I don’t have to start from scratch, and I can benefit from many standard UI components. There are also plenty of additional interface components that you can use to build layouts, like the ones found on Sketch App Sources. As my process keeps going, I can also control the degree of customization of those elements and decide where to pause for user testing.
Using these design components is also good idea if you want to align with expectations and not over-design. Normally, designing everything from scratch will take a lot more time (and developers will take more time, too, when they implement your design). That’s why it’s better to reuse common UI elements, such as lists, dialogs, forms and tabs.
But (yes, there’s always a “but”) Sketch is a Mac-only tool; so, if you are using Windows, you’ll have to rely on something else. Balsamiq and Omnigraffle are well known and have been available for a while. A couple of new UI design tools are web-based (and so don’t need any setup or installation): Gravit and Figma.
High Fidelity
When your prototype grows and get closer to being a viable product, you will need to design components that were less relevant before, like infrequent dialogs, some feedback messages (error messages and messages that show the result of an action), empty states, disabled buttons and so on.
Basically, during the earlier stages of low- and medium-fidelity prototyping, we were focused on structure, information and flow and on a small set of core use cases. As the design matures, we need to consider more:
- additional use cases (often, less frequent ones);
- edge cases and contingencies (for example, what happens in a check-out flow if a credit card is rejected?);
- error prevention and handling.
All of these use cases are important to consider for a good UX, but they shouldn’t be the first things we design. We start with the core use cases and focus on the most relevant and salient aspects of the design. Then, we include the edge conditions in order to complete and validate the design.
At this stage, then, it becomes increasingly important to choose a tool that gives you granular control over the components of the design, so that you can determine the aspect and behavior of each one of the elements of the UI.
A while ago, I used Axure for these types of tasks. In fact, in one of my first job interviews in Barcelona, they asked me if I knew how to use it, because it was being used widely across that company. Of course, I said yes in order to get the job, and in the days before starting work, I learned it from the inside out. It was then when I discovered its full potential, using features such as conditionals, which enable you to show and hide dialogs, banners and other temporary blocks of information, depending on the user’s interaction. This might come in handy because it minimizes the number of screens to be designed completely from scratch.
If you have been reading carefully, you have probably realized by now that I have been focused mostly on static designs. What about animation? This is becoming more and more important, not only because animation can be found everywhere in modern interfaces, but also because it is very hard to communicate with the rest of the team how you want something to move or fly without showing a sample.
When it comes to prototyping animations, micro-interactions and transitions, I divide prototyping tools into two groups:
- tools that have familiar UIs and that don’t require you to learn any code;
- tools with which you get your hands dirty with at least a few lines of code.
In the first group, a few new tools have appeared, such as Pixate, Principle and Flinto. In many situations, you would use these tools to prototype not the whole app, but only a subset of screens, to see how different elements will be displayed or how to transition from one state (or screen) to another.
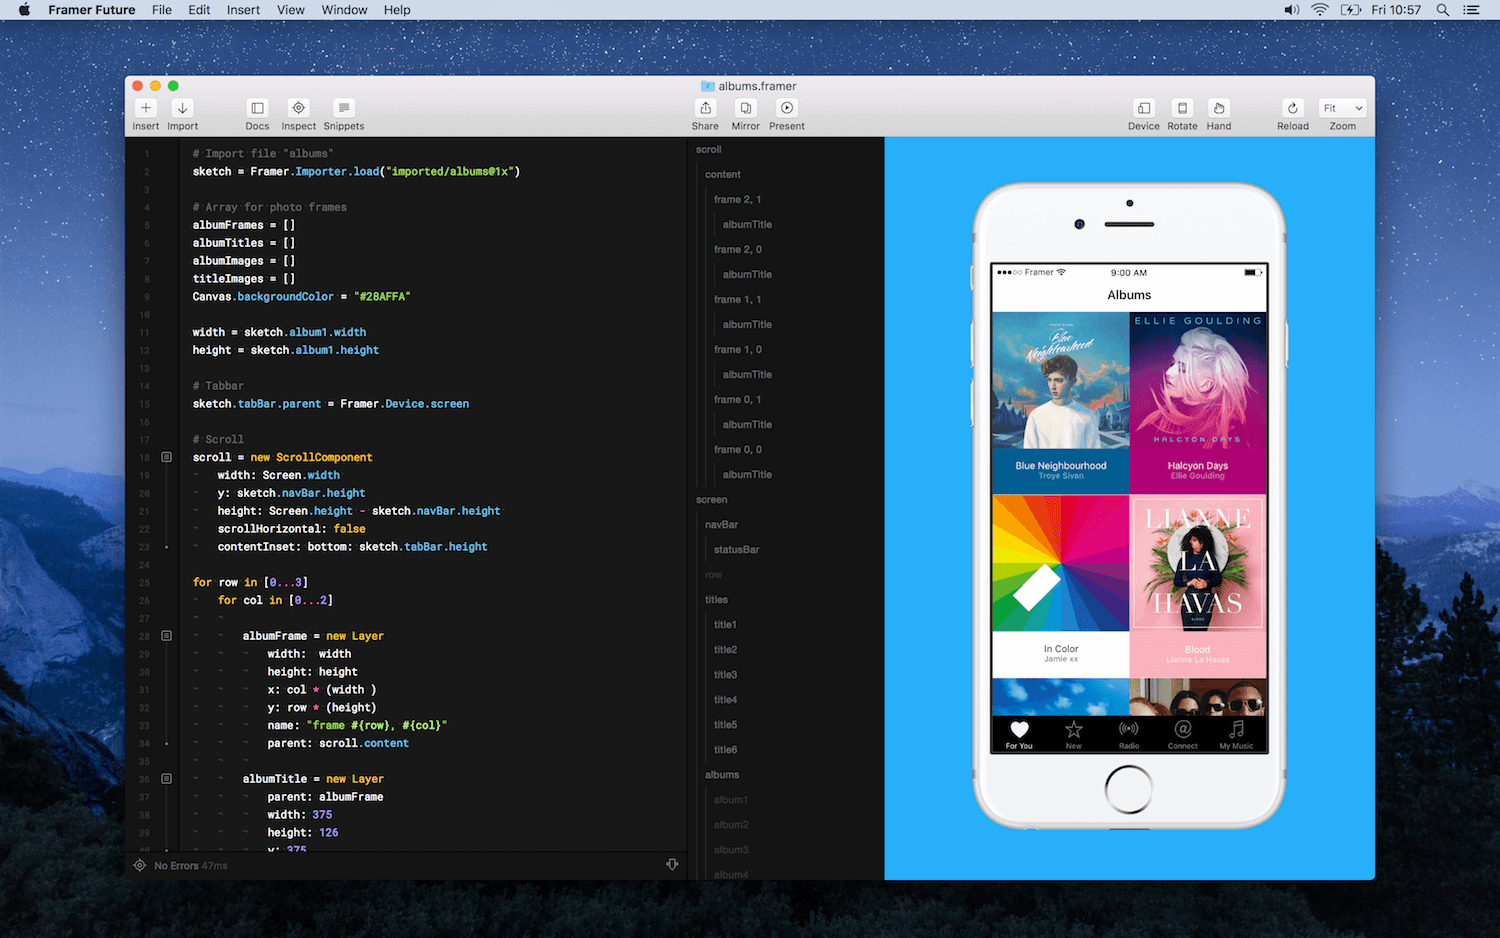
If you want to go a step further, you might opt for the second group. This set of apps might look less familiar to designers, but you will have more precise control over animations. Also, in many cases, you can use native components to achieve a more realistic outcome, thereby making the move from prototype to final code easier. If you’d like to go even further, I would suggest trying Framer (which is based on JavaScript) or Facebook Origami, whose accompanying Origami Studio will be released later this year, allowing you to export code snippets that can be sent to developers.
For iOS, you could use Interface Builder, which enables you to design interfaces using native iOS components in a visual environment. (This solution is completely code-free — yay!). For Android, there’s Android Studio.
4. Integration With Your Workflow
Another point to consider when choosing a prototyping tool is how well it fits your design process and other tools you regularly use. Prototyping is part of a much broader process that includes researching users, testing, gathering metrics, communicating the idea to stakeholders, and sharing designs with developers for final implementation.
You probably won’t find one tool that does everything (more on this later), but prototyping tools should at least help you move through the process smoothly, especially when you are expected to iterate under tight deadlines.
For example, if you are designing in Photoshop, Illustrator or Sketch, it would be great if your prototyping software could directly use the files produced by these apps without requiring you to export assets separately and then build everything from scratch to create the interactions.
Personally, I’m pretty satisfied with Sketch (again). I can export images and even use the original, editable Sketch file and upload it to a different tool to complete my prototype. When I want to add interactions, I upload files to Marvel, and when I need to animate, to Framer or Flinto.
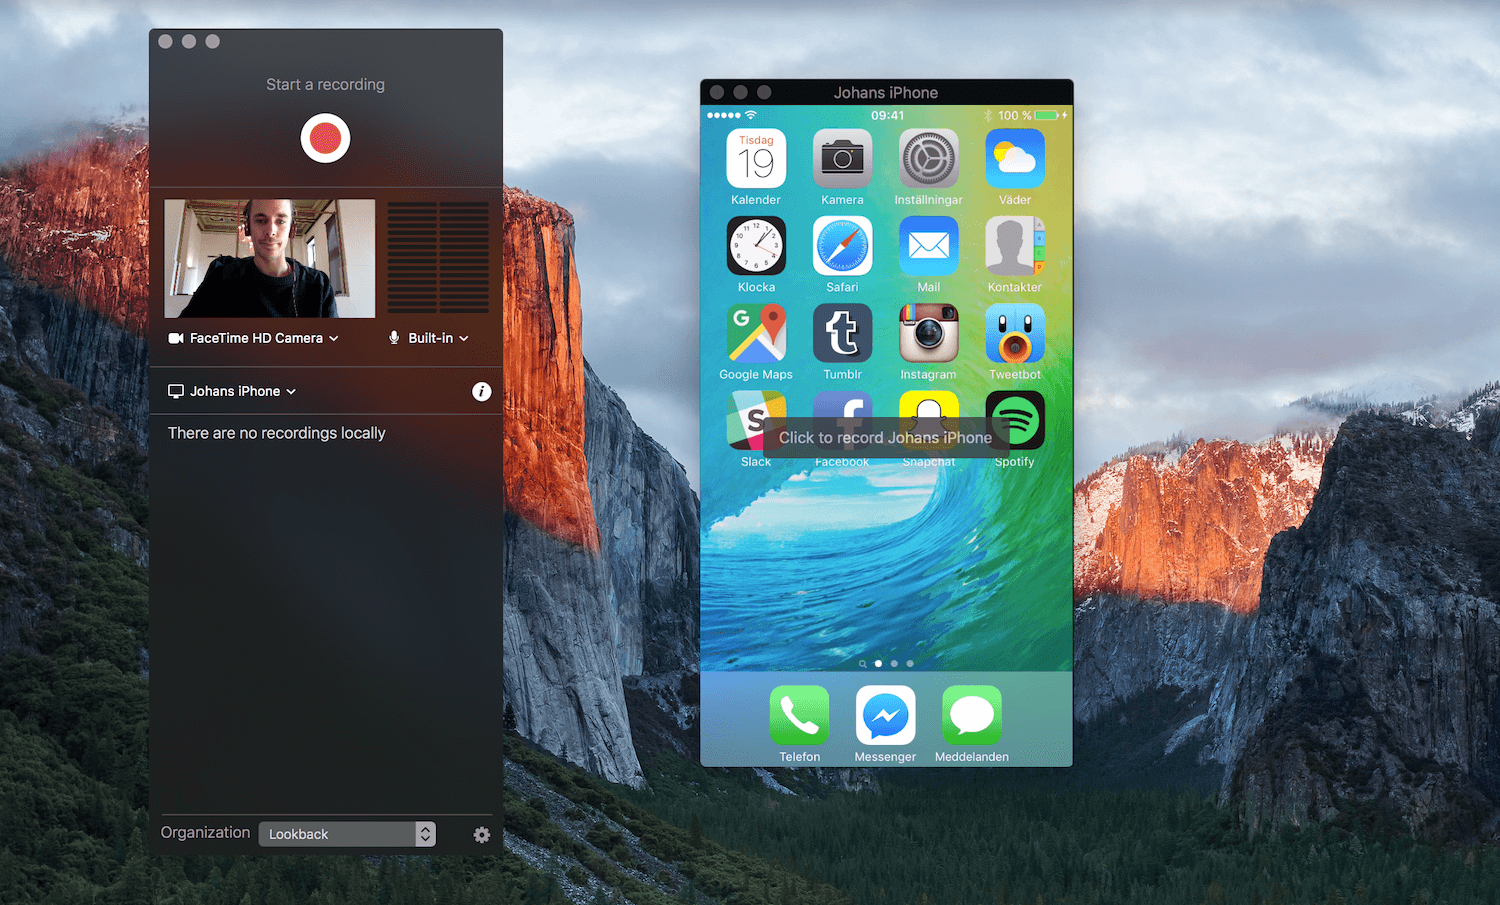
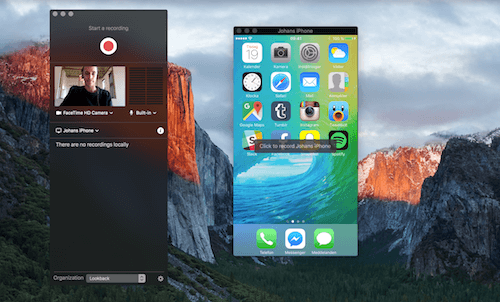
One of the last (and most important) steps when building a prototype is testing it and gathering information (gestures, taps and responses) from real users so that you can improve the product. Tools such as InVision and Marvel connect with Lookback, enabling you to test the app and record video at the same time, so that you can analyze the data with the rest of the team.
5. Ease Of Use And Comfort
Finally, how you feel with a prototyping tool is important! If you are going to be using it every day — and sometimes even on Saturdays and Sundays if your are a freelancer, like me — it should feel good, right?
This is personal, so my advice here is limited. Look for a tool that satisfies you, not one that makes your work harder, puts hurdles in your way, slows you down, adds extra steps or forces you to find workarounds.
Conclusion
Given that so many design and prototyping tools are out there today (and I didn’t even mention them all), you might feel intimidated. Perhaps that’s why we are starting to expect the appearance of “one tool to rule them all” — an app that enables us to create all kinds of designs and even make prototypes.
In a way, we are starting to see this with Adobe Experience Design CC (a new design tool that allows you to link between design screens) and Sketch (when used with plugins such as Craft Prototype for interactions and AnimateMate for animations).
What does the future of design and prototyping tools hold? I’m not sure, but I think that if we go in this direction, we might end up with an overly complex tool, like a Swiss Army knife that has plenty of little tools, but none of which are truly useful. Also, other professionals, including surgeons and mechanics, use different tools depending on the occasion. Why should we designers be any different? One of the most important things is to identify which tool is most suitable for the given job.
In any case, don’t obsess about the tools so much. They are supposed to help us shape our ideas; they should not determine or constrain how our products look or behave.
I also understand that the guidelines above will be pretty useless if your corporation forces you to use a particular tool (as did mine once). If that is the case, you could try to persuade your team to at least try something different, if your reasoning is clear and logical. Perhaps some of the points above would support your argument.
Lastly, be wary when someone tells you that a certain tool is “the best” or “the easiest to learn.” This is highly subjective, and you should discover it on your own. In the end, you, like me and everybody else, are different.
Useful Resources
- “The Right Tool for the Job: Picking the Best Prototyping Software for Your Project,” Fabricio Teixeira, Smashing Magazine
- “Quick UX Prototyping With Adobe XD Shortcuts (PDF Cheat Sheet),” Cosima Mielke, Smashing Magazine
- “Faster Web Design With Rapid Paper Prototyping,” Lauren Johnson, Creative Bloq
- “A Year Using Sketch: An Honest Review,” Sagi Shrieber, Hacking UI
- Prototyping Tools (beta) A website that helps you to compare design prototyping tools for apps and websites.
- “Get Started,” Framer A collection of examples for you to learn the basics of Framer right away.
- “Design + Sketch App,” Medium An excellent collection of articles, tips, tutorials and stories on designing and prototyping with Sketch and beyond.
- “Learn Sketch 3,” Meng To A comprehensive overview of the main aspects that you need to know about Sketch.
- “Tutorials,” Origami, Facebook A series of step-by-step videos explaining how to create prototypes with Origami.
- “Mobile App Prototyping: Designing Custom Interactions,” Noah Levin, Skillshare This class teaches you how to design a high-fidelity prototype using Framer.
Further Reading
- Picking The Best Prototyping Software For Your Project
- 12 Factors In Selecting A Mobile Prototyping Tool
- The Skeptic’s Guide To Low-Fidelity Prototyping
- Using Sketch For Responsive Web Design


