How My API-Driven Website Helps Me Travel The World

Email Newsletter
Weekly tips on front-end & UX.
Trusted by 182,000+ folks.
(This is a sponsored post.) Recently, I decided to rebuild my personal website, because it was six years old and looked — politely speaking — a little bit “outdated.” The goal was to include some information about myself, a blog area, a list of my recent side projects, and upcoming events.
As I do client work from time to time, there was one thing I didn’t want to deal with — databases! Previously, I built WordPress sites for everyone who wanted me to. The programming part was usually fun for me, but the releases, moving of databases to different environments, and actual publishing, were always annoying. Cheap hosting providers only offer poor web interfaces to set up MySQL databases and an FTP access to upload files was alwa’s the worst part. I didn’t want to deal with this for my personal website.
So the requirements I had for the redesign were:
- An up-to-date technology stack based on JavaScript and frontend technologies.
- A content management solution to edit content from anywhere.
- A good performing site with fast results.
In this article I want to show you what I built and how my website surprisingly turned out to be my daily companion.
Defining A Content Model
Publishing things on the web seems to be easy. Pick a content management system (CMS) that provides a WYSIWYG editor (What You See Is What You Get) for every page that’s needed and all the editors can manage the content easily. That’s it, right?
After building several client websites, ranging from small cafés to growing startups, I figured out that the holy WYSIWYG editor is not always the silver bullet we’re all looking for. These interfaces aim to make building websites easy, but here comes the point:
Building Websites Is Not Easy
To build and edit the content of a website without constantly breaking it, you have to have intimate knowledge of HTML and at least understand a tiny bit of CSS. That’s not something you can expect from your editors.
I’ve seen horrible complex layouts built with WYSIWYG editors and I ca’’t begin to name all the situations when everything falls apart because the system is too fragile. These situations lead to fights and discomfort where all parties are blaming each other for something that was inevitable. I always tried to avoid these situations and create comfortable, stable environments for editors to avoid angry emails screaming, “Help! Everything is broken.”
Structured Content Saves You Some Trouble
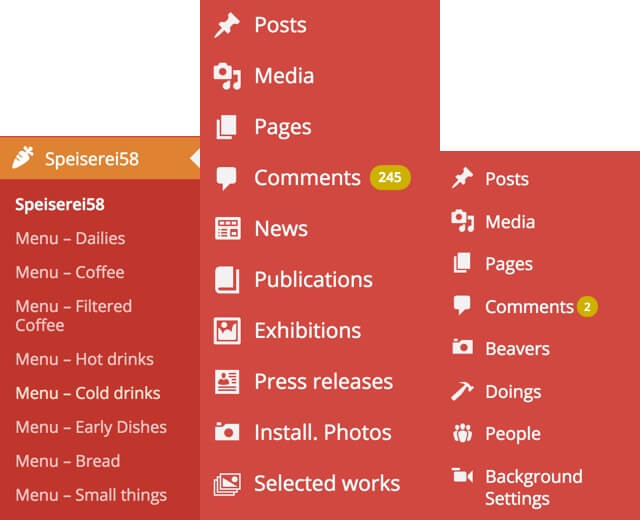
I learned rather quickly that people rarely break things when I split all the needed website content into several chunks, each related to each other without thinking of any representation. In WordPress, this can be achieved using custom post types. Each custom post type can include several properties with their own easy to grasp text field. I buried the concept of thinking in pages completely.
My job was to connect the content pieces and build web pages out of these content blocks. This meant that editors were only able to do little, if any, visual changes on their websites. They were responsible for the content and only the content. Visual changes had to be done by me — not everyone could style the site, and we could avoid a fragile environment. This concept felt like a great trade-off and was usually well received.
Later, I discovered that what I was doing was defining a content model. Rachel Lovinger defines, in her excellent article “Content Modelling: A Master Skill,” a content model as follows:
“A content model documents all the different types of content you will have for a given project. It contains detailed definitions of each content type’s elements and their relationships to each other.”
Beginning with content modeling worked fine for most clients, except for one.
“Stefan, I’m Not Defining Your Database Schema!”
The idea of this one project was to build a massive website that should create a lot of organic traffic by providing tons of content — in all variations displayed across several different pages and places. I set up a meeting to discuss our strategy to approach this project.
I wanted to define all the pages and content models that should be included. It didn’t matter what tiny widget or what sidebar the client had in mind, I wanted it to be clearly defined. My goal was to create a solid content structure that makes it possible to provide an easy-to-use interface for the editors and provides reusable data to display it in any thinkable format.
It turned out, the idea of this project was not very clear, and I couldn’t get answers to all of my questions. The project lead didn’t understand that we should start with proper content modeling (not design and development). For him, this was just a ton of pages. Duplicated content and huge text areas to add a massive amount of text, didn’t seem to be a problem. In his mind, the questions I had about structure were technical, and they shouldn’t have to worry about them. To make a lo’g story short, I didn’t do the project.
The important thing is, content modeling is not about databases.
It’s about making your content accessible and future-proof. If you c’n’t define the needs for your content at project kick-off, it will be very hard, if not impossible, to reuse it later on.
Proper content modeling is the key to present and future websites.
Contentful: A Headless CMS
It was clear that I wanted to follow a good content modeling for my site as well. However, there was one more thing. I didn’t want to deal with the storage layer to build my new website, so I decided to use Contentful, a headless CMS, on which (full disclaimer!) I’m currently working on. “Headless” means that this service offers a web interface to manage the content in the cloud and it provides an API which will give me my data back in JSON format. Choosing this CMS helped me be productive right away as I had an API available in minutes and I did not have to deal with any infrastructural setup. Contentful also provides a free plan which is perfect for small projects, like my personal website.
An example query to get all blog posts looks like this:
<a href="https://cdn.contentful.com/spaces/space_id/entries?access_token=access_token&content_type=post">https://cdn.contentful.com/spaces/space_id/entries?access_token=access_token&content_type=post</a>
And the response, in a shortened version, looks like this:
{
  "sys": {
    "type": "Array"
  },
  "total": 7,
  "skip": 0,
  "limit": 100,
  "items": [
    {
      "sys": {
        "space": {...},
        "id": "455OEfg1KUskygWUiKwmkc",
        "type": "Entry",
        "createdAt": "2016-07-29T11:53:52.596Z",
        "updatedAt": "2016-11-09T21:07:19.118Z",
        "revision": 12,
        "contentType": {...},
        "locale": "en-US"
      },
      "fields": {
        "title": "How to React to Changing Environments Using matchMedia",
        "excerpt": "...",
        "slug": "how-to-react-to-changing-environments-using-match-media",
        "author": [...],
        "body": "...",
        "date": "2014-12-26T00:00+02:00",
        "comments": true,
        "externalUrl": "https://4waisenkinder.de/blog/2014/12/26/handle-environment-changes-via-window-dot-matchmedia/"
      },
      {...},
      {...},
      {...},
      {...},
      {...},
      {...}
    ]
  }
}
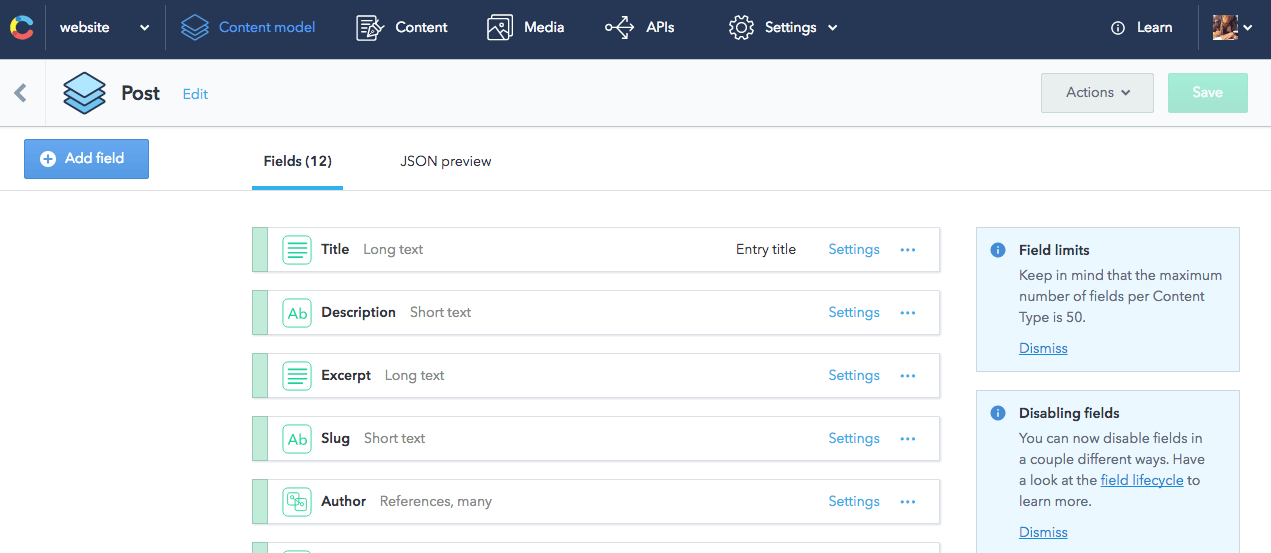
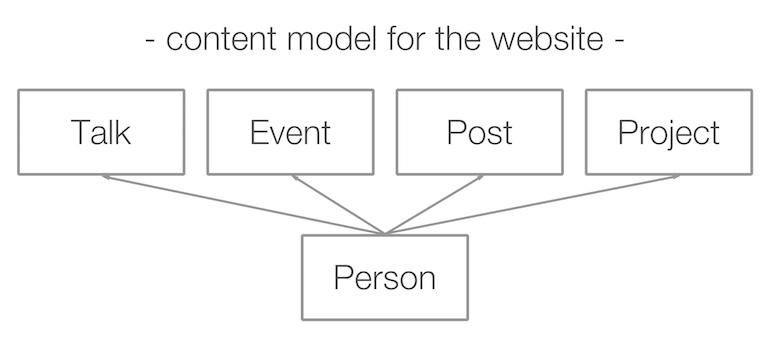
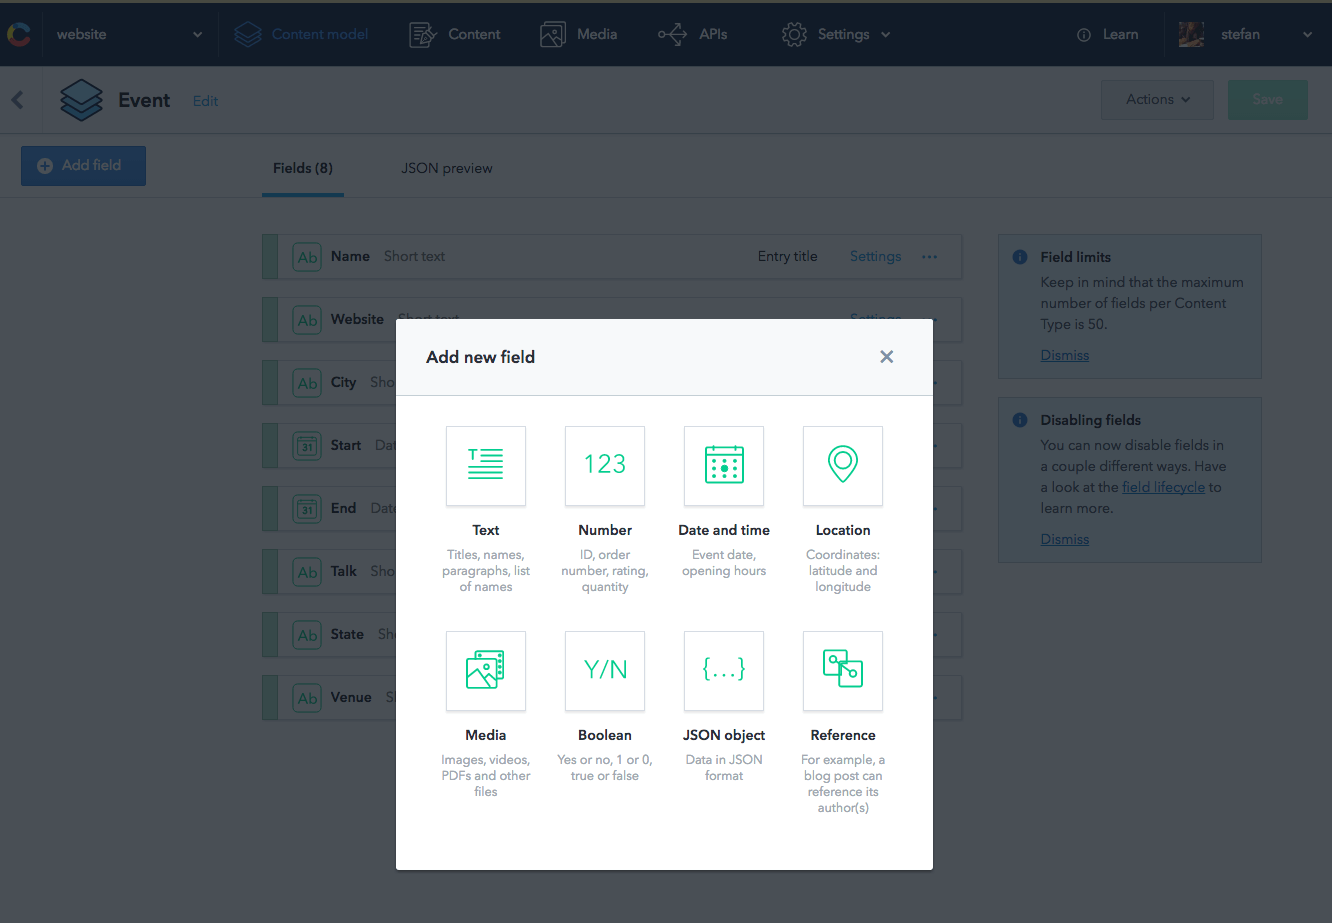
The great part about Contentful is that it is great at content modeling, which I required. Using the provided web interface, I can define all the needed content pieces quickly. The definition of a particular content model in Contentful is called a content type. A great thing to point out here is the ability to model relationships between content items. For example, I can easily connect an author with a blog post. This can result in structured data trees, which are perfect to reuse for various use cases.
So, I set up my content model without thinking about any pages I may want to build in the future.
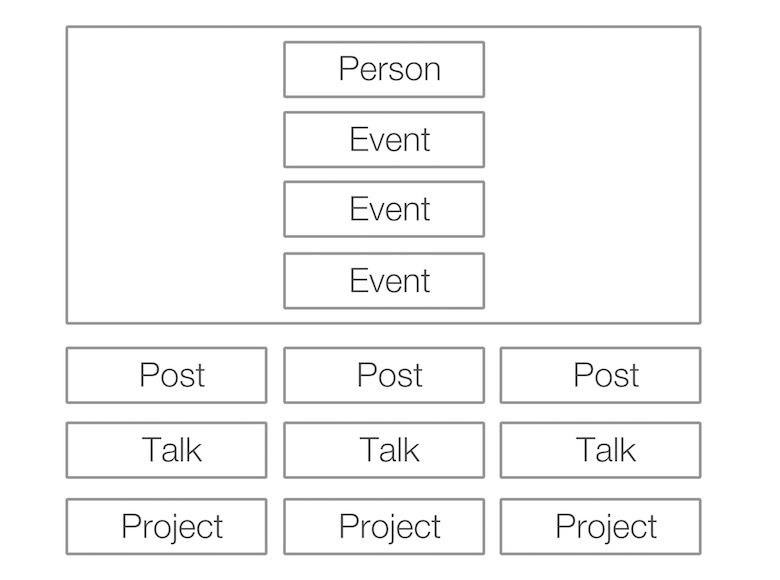
The next step was to figure out what I wanted to do with this data. I asked a designer I knew, and he came up with an index page of the website with the following structure.
Rendering HTML Pages Using Node.js
Now came the tricky part. So far, I didn’t have to deal with storage and databases, which was a great achievement for me. So, how can I build my website when I only have an API available?
My first approach was the do-it-yourself approach. I started writing a simple Node.js script which would retrieve the data and render some HTML out of it.
Rendering all the HTML files upfront fulfilled one of my main requirements. Static HTML can be served really fast.
So, let’s have a look at the script I used.
'use strict';

const contentful = require('contentful');
const template = require('lodash.template');
const fs = require('fs');
// create contentful client with particular credentials
const client = contentful.createClient({
  space: 'your_space_id',
  accessToken: 'your_token'
});

// cache templates to not read
// them over and over again
const TEMPLATES = {
  index : template(fs.readFileSync(`${__dirname}/templates/index.html`))
};
// fetch all the data
Promise.all([
  // get posts
  client.getEntries({content_type: 'content_type_post_id'}),
  // get events
  client.getEntries({content_type: 'content_type_event_id'}),
  // get projects
  client.getEntries({content_type: 'content_type_project_id'}),
  // get talk
  client.getEntries({content_type: 'content_type_talk_id'}),
  // get specific person
  client.getEntries({'sys.id': 'person_id'})
])
.then(([posts, events, projects, talks, persons]) => {
  const renderedHTML = TEMPLATES.index({
    posts,
    events,
    projects,
    talks,
    person : persons.items[0]
  })

  fs.writeFileSync(`${__dirname}/build/index.html`, renderedHTML);
  console.log('Rendered HTML');
})
.catch(console.error);
<!doctype html>
<html lang="en">
    <head>
        <!-- ... -->
    </head>
    <body>
        <!-- ... -->
        <h2>Posts</h2>
        <ul>
          <% posts.items.forEach( function( talk ) { %>
            <li><%- talk.fields.title %>
          <% }) %>
        </ul>
        <!-- ... -->
    </body>
</html>
This worked fine. I could build my desired website in a completely flexible way, making all the decisions about the file structure and functionality. Rendering different page types with completely different data sets was no problem at all. Everybody who has fought against rules and structure of an existing CMS that ships with HTML rendering knows that complete freedom can be an excellent thing. Especially, when the data model becomes more complex over time including many relations — flexibility pays off.
In this Node.js script, a Contentful SDK client is created and all the data is fetched using the client method getEntries. All provided methods of the client are promise-driven, which makes it easy to avoid deeply nested callbacks. For templating, I decided to use lodash’s templating engine. Finally, for file reading and writing, Node.js offers the native fs module, which then is used to read the templates and write the rendered HTML.
However, there was one downside to this approach; it was very bare-bones. Even when this method was completely flexible, it felt like reinventing the wheel. What I was building was basically a static site generator, and there are plenty of them out there already. It was time to start all over again.
Going For A Real Static Site Generator
Famous static site generators, for example, Jekyll or Middleman, usually deal with Markdown files which will be rendered to HTML. Editors work with these, and the website is built using a CLI command. This approach was failing one of my initial requirements, though. I wanted to be able to edit the site wherever I was, not relying on files sitting on my private computer.
My first idea was to render these Markdown files using the API. Although this would have worked, it didn’t feel right. Rendering Markdown files to transform to HTML later were still two steps not offering a big benefit compared to my initial solution.
Fortunately, there are Contentful integrations, for e.g. Metalsmith and Middleman. I decided on Metalsmith for this project, as it’s written in Node.js a’d I didn’t want to bring in a Ruby dependency.
Metalsmith transforms files from a source folder and renders them in a destination folder. These files don’t necessarily have to be Markdown files. You can also use it for transpiling Sass or optimizing your images. There are no limits, and it is really flexible.
Using the Contentful integration, I was able to define some source files which were taken as configuration files and could then fetch everything needed from the API.
---
title: Blog
contentful:
  content_type: content_type_id
  entry_filename_pattern: ${ fields.slug }
  entry_template: article.html
  order: '-fields.date'
  filter:
    include: 5
layout: blog.html
description: >-
  Recent articles by Stefan Judis.
---
This example configuration renders the blog post area with a parent blog.html file, including the response of the API request, but also renders several child pages using the article.html template. File names for the child pages are defined via entry_filename_pattern.
As you see, with something like this, I can build up my pages easily. This setup worked perfectly to ensure all the pages were dependent on the API.
Connect The Service With Your Project
The only missing part was to connect the site with the CMS service and to make it re-render when any content was edited. The solution for this problem — webhooks, which you might be familiar with already if you are using services like GitHub.
Webhooks are requests made by software as a service to a previously defined endpoint which notify you that something has happened. GitHub, for example, can ping you back when someone opened a pull request in one of your repos. Regarding content management, we can apply the same principle here. Whenever something happens with the content, ping an endpoint and make a particular environment react to it. In our case, this would mean to re-render the HTML using metalsmith.
To accept webhooks I also went with a JavaScript solution. My choice hosting provider (Uberspace) makes it possible to install Node.js and use JavaScript on the server side.
const http = require('http');
const exec = require('child_process').exec;
const server = http.createServer((req, res) => {
  res.setHeader('Content-Type', 'text/plain');
  // check for secret header
  // to not open up this endpoint for everybody
  if (req.headers.secret === ‘YOUR_SECRET') {
    res.end('ok');

    // wait for the CDN to
    // invalidate the data
    setTimeout(() => {
      // execute command
      exec('npm start', { cwd: __dirname }, (error) => {
        if (error) {
          return console.log(error);
        }

        console.log('Rebuilt success');
      });
    }, 1000 * 120 );
  } else {
    res.end('Not allowed');
  }
});

console.log('Started server at 8000');
server.listen(8000);
This scripts starts a simple HTTP server on port 8000. It checks incoming requests for a proper header to make sure that it’s the webhook from Contentful. If the request is confirmed as the webhook, the predefined command npm start is executed to re-render all the HTML pages. You might wonder why there is a timeout in place. This is required to pause actions for a moment until the data in the cloud is invalidated because the stored data is served from a CDN.
Depending on your environment this HTTP server may not be accessible to the internet. My site is served using an apache server, so I needed to add an internal rewrite rule to make the running node server accessible to the internet.
# add node endpoint to enable webhooks
RewriteRule ^rerender/(.*) https://localhost:8000/$1 [P]
API-First And Structured Data: Best Friends Forever
At this point, I was able to manage all my data in the cloud and my website would react accordingly after changes.
Repetition All Over The Place
Being on the road is an important part of my life, so it was necessary to have information, such as the location of a given venue or which hotel I booked, right at my fingertips — usually stored in a Google spreadsheet. Now, the information was spread over a spreadsheet, several emails, my calendar, as well as on my website.
I had to admit, I created a lot of data duplication in my daily flow.
The Moment Of Structured Data
I dreamed of a single source of truth, (preferably on my phone) to quickly see what events were coming up, but also get additional information about hotels and venues. The events listed on my website didn’t have all the information at this point, but it is really easy to add new fields to a content type in Contentful. So, I added the needed fields to the “Event” content type.
Putting this information into my website CMS was never my intention, as it shouldn’t be displayed online, but having it accessible via an API made me realize that I could now do completely different things with this data.
Building A Native App With JavaScript
Building apps for mobile has been a topic for years now, and there are several approaches to this. Progressive Web Apps (PWA) are an especially hot topic these days. Using Service Workers and a Web App Manifest, it is possible to build complete app-like experiences going from a home screen icon to managed offline behavior using web technologies.
There is one downside to mention. Progressive Web Apps are on the rise, but they are not completely there yet. Service Workers, for example, are not supported on Safari today and only “under consideration” from Apple’s side so far. This was a deal-breaker for me as I wanted to have an offline-capable app on iPhones, too.
So I looked for alternatives. A friend of mine was really into NativeScript and kept telling me about this fairly new technology. NativeScript is an open source framework for building truly native mobile apps with JavaScript, so I decided to give it a try.
Getting To Know NativeScript
The setup of NativeScript takes a while because you have to install a lot of things to develop for native mobile environments. You’ll be guided through the installation process when you install the NativeScript command line tool for the first time using npm install nativescript -g.
Then, you can use scaffolding commands to set up new projects: tns create MyNewApp
However, this is not what I did. I was scanning the documentation and came across a sample groceries management app built in NativeScript. So I took this app, dug into the code, and modified it step by step, fitting it to my needs.
I don’t want to dive too deep into the process, but to build a go’d looking list with all the information I wanted, didn’t take long.
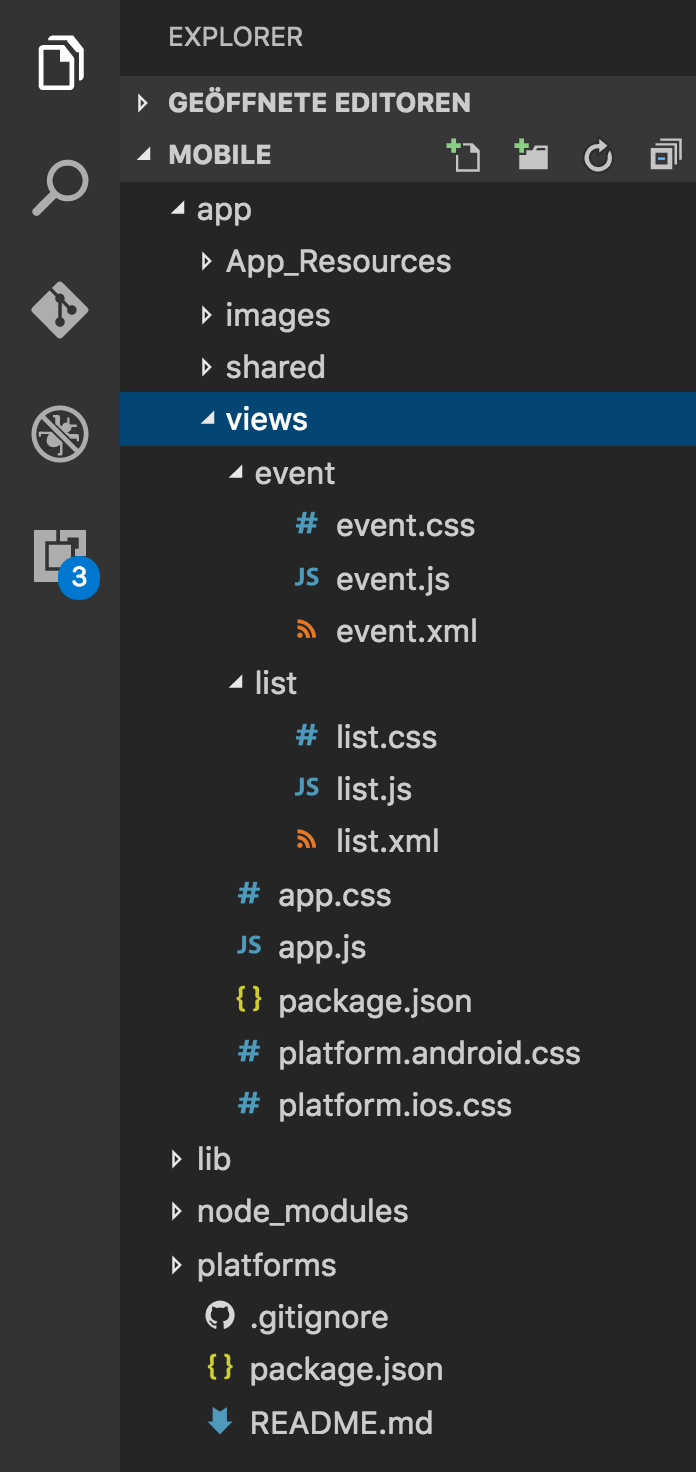
NativeScript plays really well together with Angular 2, which I didn’t want to try this time as discovering NativeScript itself felt big enough. In NativeScript you have to write “Views.” Each view consists of an XML file defining the base layout and optional JavaScript and CSS. All these are defined in one folder per view.
Rendering a simple list can be achieved with an XML template like this:
<!-- call JavaScript function when ready -->
<Page loaded="loaded">
  <ActionBar title="All Travels" />
  <!-- make it scrollable when going too big -->
  <ScrollView>
    <!-- iterate over the entries in context -->
    <ListView items="{{ entries }}">
      <ListView.itemTemplate>
        <Label text="{{ fields.name }}" textWrap="true" class="headline"/>
      </ListView.itemTemplate>
    </ListView>
  </ScrollView>
</Page>
The first thing happening here is defining a page element. Inside of this page, I defined an ActionBar to give it the classic Android look as well as a proper headline. Building things for native environments can be a bit tricky sometimes. For example, to achieve working scroll behavior you have to use a ‘ScrollView.’ The last thing is to then, simply iterate over my events using a ListView. Overall, it felt pretty straightforward!
But where are these entries coming from that are used in the view? It turns out that there is a shared context object that can be used for that. When reading the XML for the view, you may have noticed already that the page has a loaded attribute set. By setting this attribute, I tell the view to call a particular JavaScript function when the page is loaded.
This JavaScript function is defined in the depending JS file. It can be made accessible by simply exporting it using exports.something. To add the data binding, all we have to do is to set a new Observable to the page property bindingContext. Observables in NativeScript emit propertyChange events which are needed to react to data changes inside of the ’iews, but you don’t have to worry about that, as it works out of the box.
const context = new Observable({ entries: null});
const fetchModule = require('fetch');

// export loaded to be called from
// List.xml when everything is loaded
exports.loaded = (args) => {
  const page = args.object;
  page.bindingContext = context;

  fetchModule.fetch(
`https://cdn.contentful.com/spaces/${config.space}/entries?access_token=${config.cda.token}&content_type=event&order=fields.start`,
      {
        method: "GET",
        headers: {
          'Content-Type': 'application/json'
        }
      }
    )
    .then(response => response.json())
    .then(response => context.set('entries', response.items));
}
The last thing is to fetch the data and set it to the context. This can be done by using the NativeScript fetch module. Here, you can see the result.
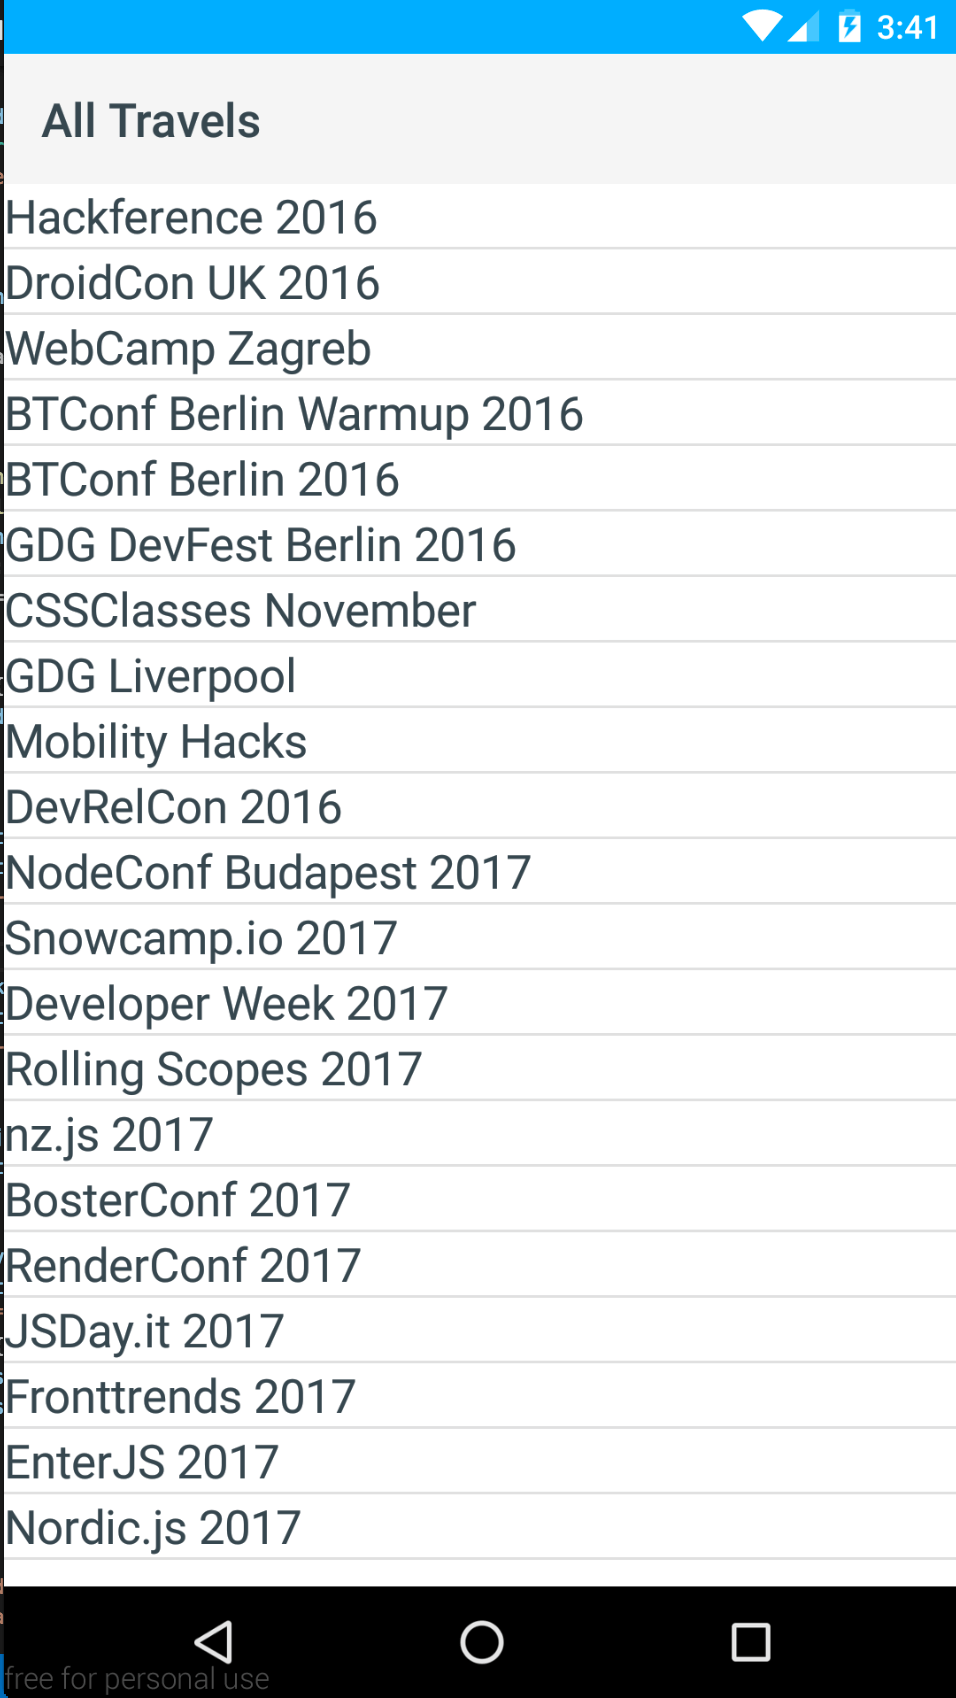
So, as you can see — building a simple list using NativeScript is not really hard. I later extended the app with another view as well as additional functionality to open given addresses in Google Maps and web views to look at the event websites.
One thing to point out here is, NativeScript is still pretty new, which means that the plugins found on npm usually do not have a lot of downloads or stars on GitHub. This irritated me at first, but I used several native components (nativescript-floatingactionbutton, nativescript-advanced-webview and nativescript-pulltorefresh) which helped me achieve a native experience and all worked perfectly fine.
You can see the improved result here:

The more functionality I put into this app, the more I liked it and the more I used it. The best part is, I could get rid of data duplication, managing the data all in one place while, being flexible enough to display it for various use cases.
Pages Are Yesterday: Long Live Structured Content!
Building this app showed me once more that the principle of having data in page format is a thing of the past. We don’t know where our data will go — we have to be ready for an unlimited number of use cases.
Looking back, what I achieved is:
- Having a content management system in the cloud
- Not having to deal with database maintenance
- A complete JavaScript technology stack
- Having an efficient static website
- Having an Android app to access my content every time and everywhere
And the most important part:
Having my content structured and accessible helped me to improve my daily life.
This use case might look trivial to you right now, but when you think of the products you build every day — there are always more use cases for your content on different platforms. Today, we accept that mobile devices are finally overtaking the old school desktop environments, but platforms like cars, watches and even fridges are already waiting for their spotlight. I can not even think of the use cases that will come.
So, let’s try to be ready and put structured content in the middle because at the end it’s not about database schemas — it’s about building for the future.
Further Reading
- Web Scraping With Node.js
- Sailing With Sails.js: An MVC-style Framework For Node.js
- 40 Travel Icons To Spruce Up Your Designs
- A Detailed Introduction To Webpack