How To Build A SpriteKit Game In Swift 3 (Part 2)

Email Newsletter
Weekly tips on front-end & UX.
Trusted by 200,000+ folks.


Have you ever wondered what it takes to create a SpriteKit game? Does collision detection seem like a daunting task? Do you want to know how to properly handle sound effects and background music? Game-making has never been easier on iOS since the introduction of SpriteKit. In part two of this three-part series, we will explore the basics of SpriteKit.
If you missed out on the previous lesson, you can catch up by getting the code on GitHub. Remember that this tutorial requires Xcode 8 and Swift 3.
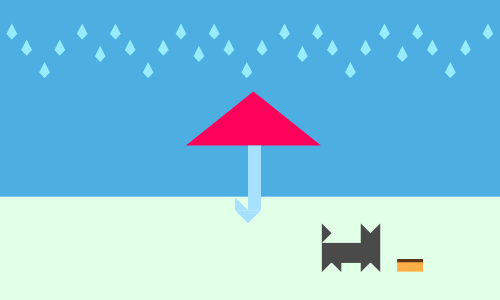
In the last lesson, we created a floor and a background, randomly generated raindrops and added the umbrella. The umbrella sprite has a custom SKPhysicsBody, generated with a CGPath, and we enabled touch detection so that we could move it around the screen. We hooked up collision detection by leveraging categoryBitMask and contactTestBitMask. We removed collision on raindrops when they hit anything, so that they don’t pile up, but rather fall through the floor after one bounce. Finally, we set up a world frame to remove any SKNode that comes into contact with it.
Today, we will focus on the following:
- Spawn the cat.
- Implement cat collision.
- Spawn food.
- Implement food collision.
- Move the cat toward the food.
- Animate the cat.
- “Damage” the cat when it comes into contact with the rain.
- Add sound effects and music.
Get The Assets Again
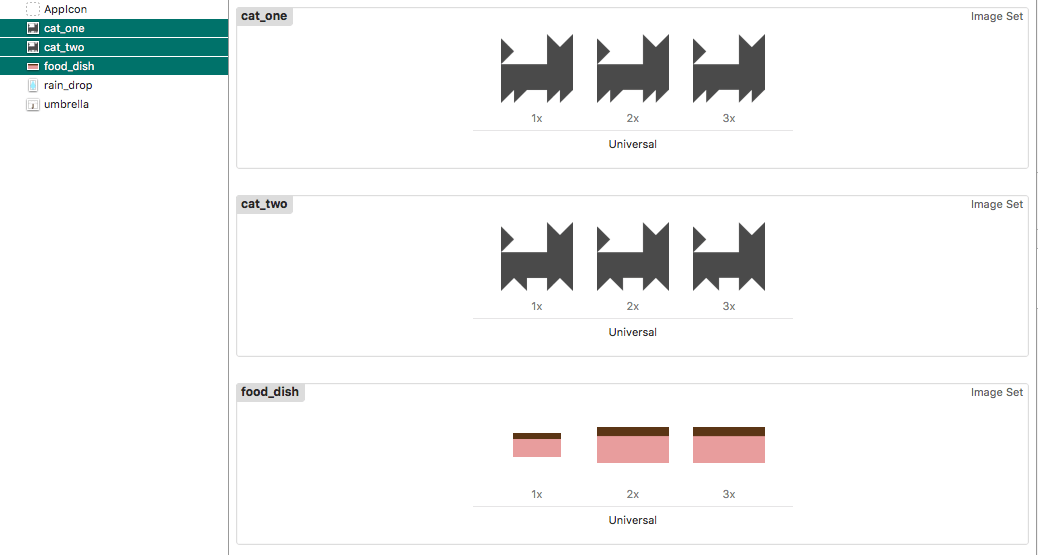
You can get the assets needed for this lesson on GitHub (ZIP). Download and add the images to your Assets.xcassets file by dragging them all in at once. You should now have an asset for the cat animation and the food dish. We will add in the sound effects and music later on.
Cat Time!
We begin the lesson by adding the protagonist of the game. Start out by creating a new file under the “Sprites” group, named CatSprite.
Update the code in CatSprite.swift to this:
import SpriteKit

public class CatSprite : SKSpriteNode {
  public static func newInstance() -> CatSprite {
    let catSprite = CatSprite(imageNamed: "cat_one")

    catSprite.zPosition = 5
    catSprite.physicsBody = SKPhysicsBody(circleOfRadius: catSprite.size.width / 2)

    return catSprite
  }

  public func update(deltaTime : TimeInterval) {

  }
}
We’ve stubbed out the file with a static initializer that returns a generated cat sprite. We’ve also stubbed out another update function. If we need to update more sprites, we should look into making this function a part of a protocol for our sprites to conform to. One thing to note here: For the cat sprite, we are using a circular SKPhysicsBody. We could use the texture to create the physics body, as we did with the raindrops, but this is an “artistic” decision. When the cat is hit by the raindrops or the umbrella, it would be much more amusing for the cat to roll around in a fit of despair, instead of just sitting still.
We will need callbacks for when the cat comes into contact with the rain or falls off the world. Moving to the Constants.swift file, we can add the following line to it, to act as a CatCategory:
let CatCategory : UInt32 = 0x1 << 4The code above will be the constant used to determine which SKPhysicsBody is the cat. Let’s move back to CatSprite.swift and update the sprite to include categoryBitMask and contactTestBitMask. Add the following lines before we return the catSprite in newInstance():
catSprite.physicsBody?.categoryBitMask = CatCategory
catSprite.physicsBody?.contactTestBitMask = RainDropCategory | WorldCategory
Now, we will get a callback when the cat is hit by rain or when it comes into contact with the edge of the world. After adding this, we need to add the cat to the scene.
At the top of GameScene.swift, below where we initialized umbrellaSprite, add the following line:
private var catNode : CatSprite!We can create a cat right away in sceneDidLoad(), but we want to spawn the cat from a separate function in order to reuse the code. The exclamation point (!) tells the compiler that it does not need to be initialized in an init statement, and that it probably will not be nil. We do this for two reasons. First, we don’t want to include an init() statement for only one variable. Secondly, we don’t want to initialize it right away, only to reinitialize and position the cat when we hit spawnCat() the first time. We could have it as an optional (?), but after we hit the spawnCat() function the first time, our cat sprite will never be nil again. To get around this and the headache of unwrapping it every time we want to use it, we’ll say that it is safe to automatically unwrap using the exclamation pont. If we touch our cat object before initializing it, our app would crash, because we told it that it was safe to unwrap when it wasn’t. We need to initialize it before using it, but in the proper function.
Next, we will create a spawnCat() function in GameScene.swift, so that we can initialize our cat sprite. We’ll break this out into its own function to be able to reuse the code and to make sure that only one cat is in the scene at a time.
Add the following code near the bottom of the file, just under our spawnRaindrop() function:
func spawnCat() {
  if let currentCat = catNode, children.contains(currentCat) {
    catNode.removeFromParent()
    catNode.removeAllActions()
    catNode.physicsBody = nil
  }

  catNode = CatSprite.newInstance()
  catNode.position = CGPoint(x: umbrellaNode.position.x, y: umbrellaNode.position.y - 30)

  addChild(catNode)
}
Walking through this function, we’re first checking whether the cat is not nil. Then, we’re checking whether the scene contains a cat. If the scene does contain a cat, we remove it from the parent, remove any actions that the cat is currently performing, and clear out the SKPhysicsBody of the cat. This will only trigger if the cat comes into contact with the edge of the game world. After this, we initialized a new cat and set the position to 30 pixels below the umbrella. We could spawn the cat anywhere, but I thought that this would be a clever place, instead of dropping the cat from the sky.
Finally, in sceneDidLoad(), after we position and add the umbrella, call the spawnCat() function:
umbrellaNode.zPosition = 4
addChild(umbrellaNode)

spawnCat()
Now we can run the app, and voilà!
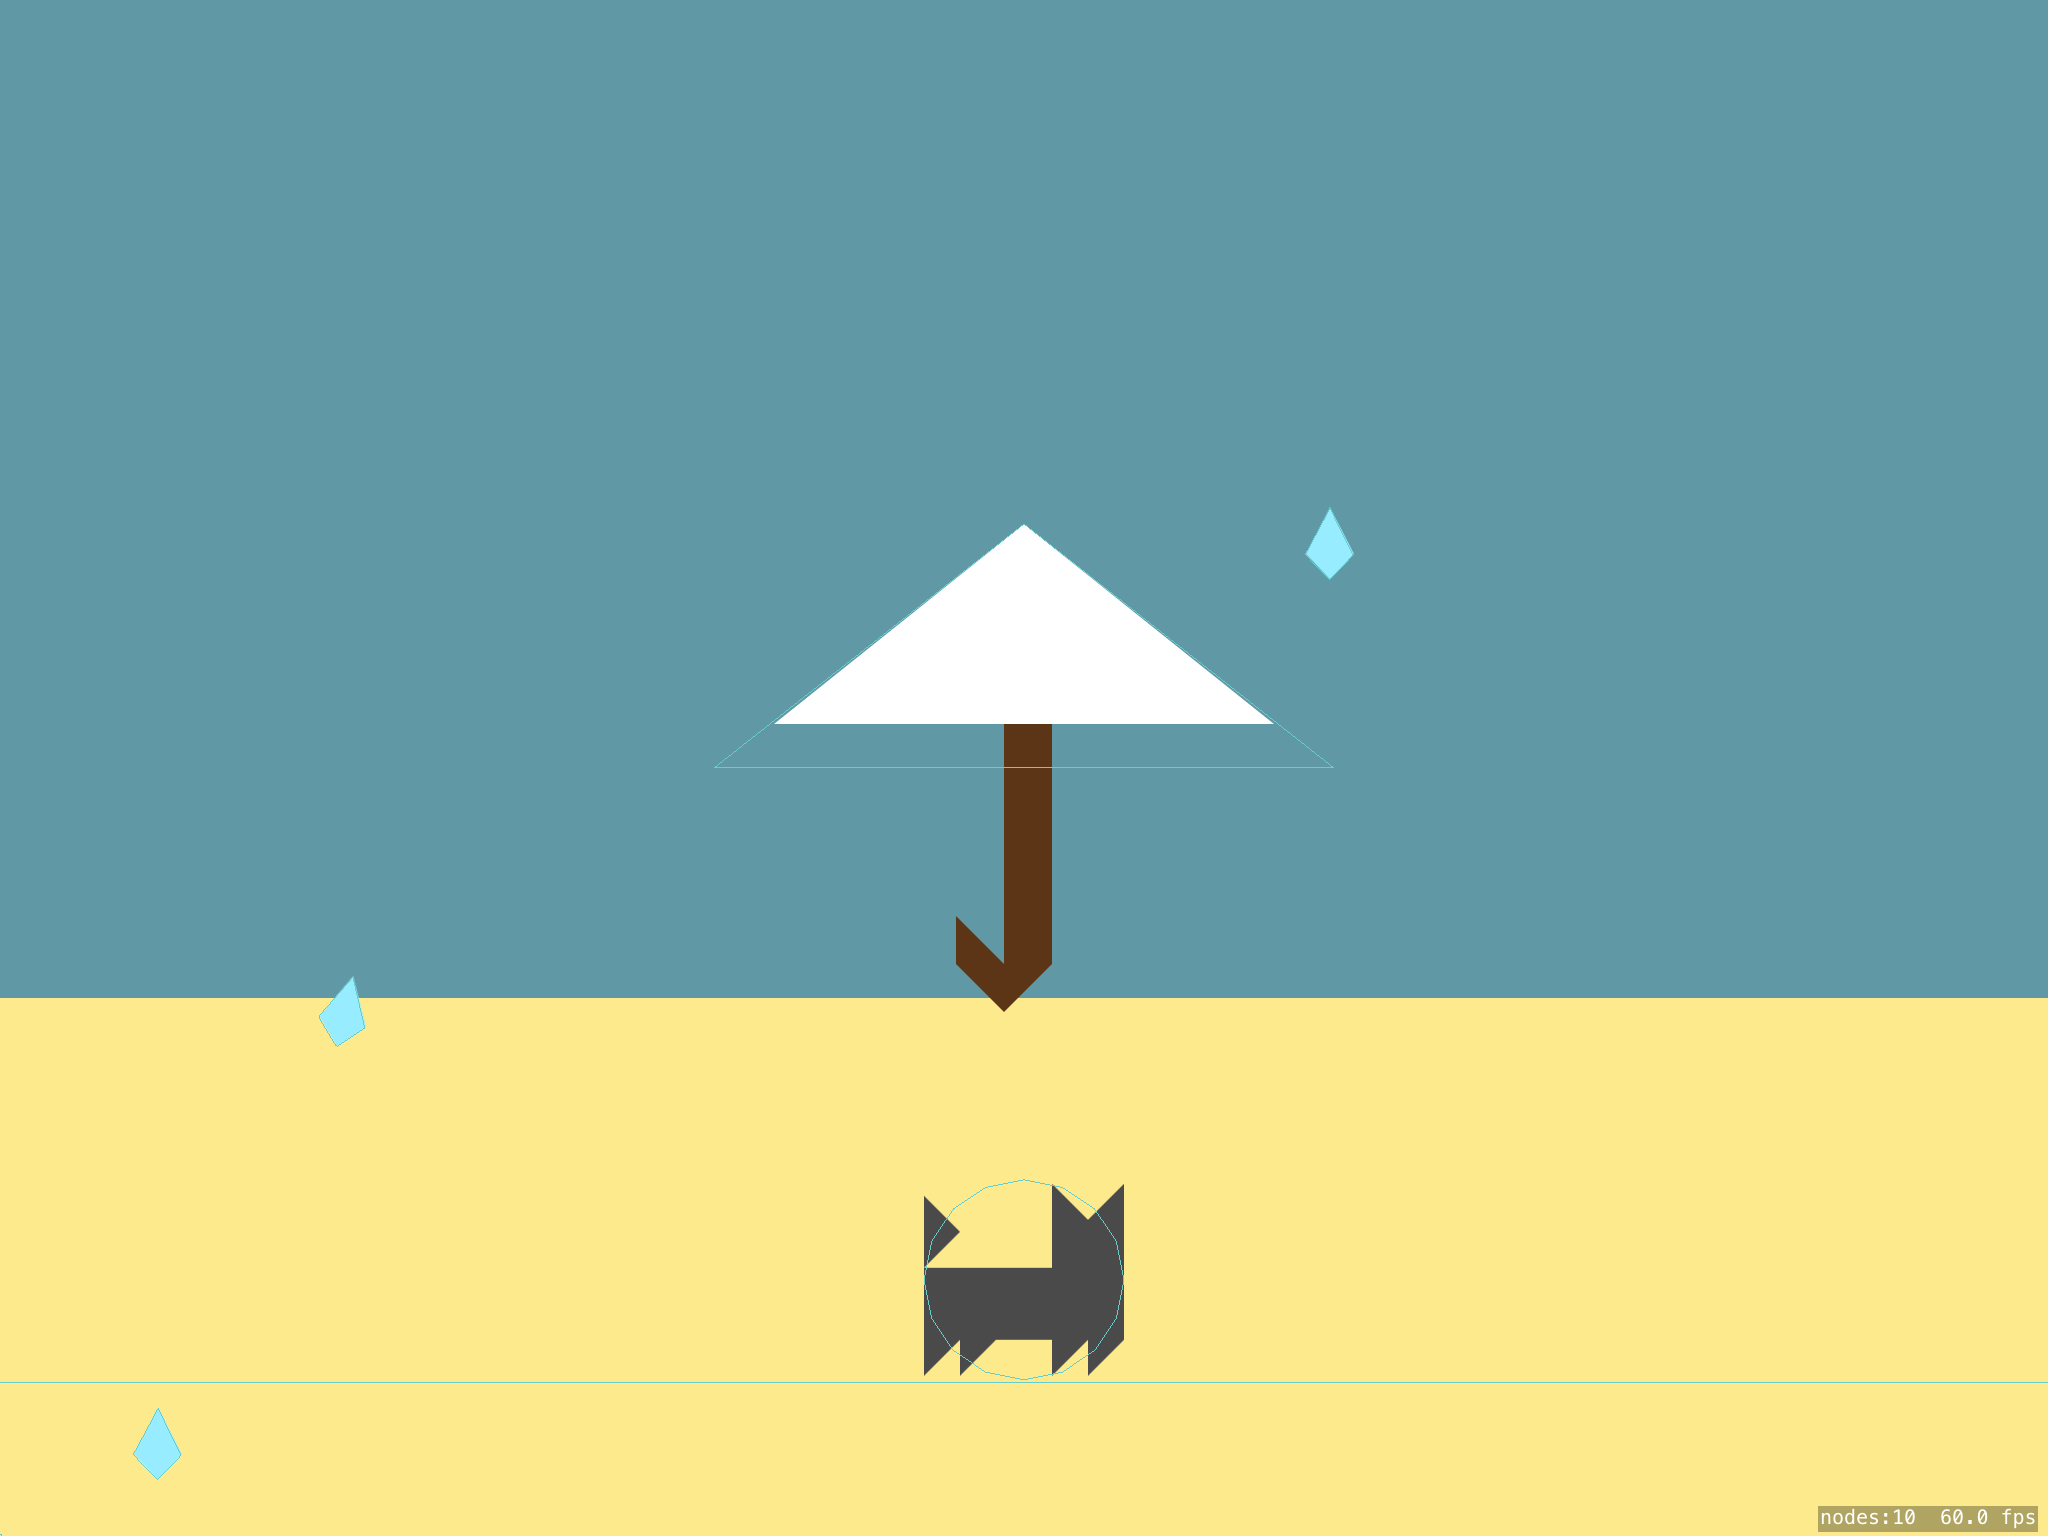
If the cat now comes into contact with raindrops or the umbrella, it will roll around. At this point, the cat can roll off screen and would be deleted as soon as it hits the world edge; so, we will need to respawn the cat. Because a callback is currently in place for when the cat comes into contact with raindrops and the game world, we can handle the collision in the didBegin(_ contact:) function.
We want to differentiate between when a raindrop hits the cat and when the cat hits the world frame, so let’s break out the logic into a new function. At the bottom of GameScene.swift, below didBegin(_ contact:), enter the code below:
func handleCatCollision(contact: SKPhysicsContact) {
  var otherBody : SKPhysicsBody

  if contact.bodyA.categoryBitMask == CatCategory {
    otherBody = contact.bodyB
  } else {
    otherBody = contact.bodyA
  }

  switch otherBody.categoryBitMask {
  case RainDropCategory:
    print("rain hit the cat")
  case WorldCategory:
    spawnCat()
  default:
    print("Something hit the cat")
  }
}
In this block of code, we are looking for the physics body that is not the cat. Once we have the other body, we need to figure out what hit the cat. For now, if a raindrop hits the cat, we just print out to the console that the collision occurred. If the cat hits the edge of the game world, we will respawn the cat.
We need to call this function if contact occurs with the cat object. So, let’s update didBegin(_ contact:) to the following code:
func didBegin(_ contact: SKPhysicsContact) {
  if (contact.bodyA.categoryBitMask == RainDropCategory) {
    contact.bodyA.node?.physicsBody?.collisionBitMask = 0
  } else if (contact.bodyB.categoryBitMask == RainDropCategory) {
    contact.bodyB.node?.physicsBody?.collisionBitMask = 0
  }

  if contact.bodyA.categoryBitMask == CatCategory || contact.bodyB.categoryBitMask == CatCategory {
    handleCatCollision(contact: contact)

    return
  }

  if contact.bodyA.categoryBitMask == WorldCategory {
    contact.bodyB.node?.removeFromParent()
    contact.bodyB.node?.physicsBody = nil
    contact.bodyB.node?.removeAllActions()
  } else if contact.bodyB.categoryBitMask == WorldCategory {
    contact.bodyA.node?.removeFromParent()
    contact.bodyA.node?.physicsBody = nil
    contact.bodyA.node?.removeAllActions()
  }
}
We snuck in a condition between where we remove collision from raindrops and where we cull off-screen nodes. This if statement checks whether either body is the cat, and then we handle the cat behaviors in the handleCatCollision(contact:) function.
We can now test our cat’s respawning function by pushing the cat off screen with the umbrella. The cat will now respawn below the umbrella! Note that if the umbrella’s bottom is beneath the floor, the cat will fall off screen for as long as the umbrella stays beneath the floor. This isn’t a huge issue for now, but we should figure out a way around this later on.
Spawning Food
Now seems like a good time to spawn some food for our cat to eat. Sure, the cat can’t move by itself, but we can fix that later. Before creating the food sprite, we can add a new category for food in our Constants.swift file. Add the following line below the CatCategory.
let FoodCategory : UInt32 = 0x1 << 5
The code above will be the constant used to determine which SKPhysicsBody is the food. Create a file exactly how we created the CatSprite.swift file, but this time named FoodSprite.swift, under the “Sprites” group. Add the following code to the new file:
import SpriteKit

public class FoodSprite : SKSpriteNode {
  public static func newInstance() -> FoodSprite {
    let foodDish = FoodSprite(imageNamed: "food_dish")

    foodDish.physicsBody = SKPhysicsBody(rectangleOf: foodDish.size)
    foodDish.physicsBody?.categoryBitMask = FoodCategory
    foodDish.physicsBody?.contactTestBitMask = WorldCategory | RainDropCategory | CatCategory
    foodDish.zPosition = 5

    return foodDish
  }
}
This is a static function that, when called, will initialize a FoodSprite and return it. We set the physics body to a rectangle of the sprite’s size. This is fine because the sprite itself is a rectangle. Then, we set the category to the FoodCategory that we just created, and added it to the object that we want collisions with (the world frame, the raindrops and the cat). The zPositions of the food and the cat are the same, and they’ll never overlap, because as soon as they come into contact, the food will be deleted and the player will earn a point.
Heading back to GameScene.swift, we will need to add functionality to spawn and remove the food. At the top of the file, beneath the rainDropSpawnRate variable, we can add this line:
private let foodEdgeMargin : CGFloat = 75.0
This will act as a margin when spawning food. We don’t want to spawn it too close to either the left or right side of the screen. We place it at the top of the file, so that we won’t have to search all over to change this value if we need to later on. Next, below our spawnCat() function, we can add our spawnFood function:
func spawnFood() {
  let food = FoodSprite.newInstance()
  var randomPosition : CGFloat = CGFloat(arc4random())
  randomPosition = randomPosition.truncatingRemainder(dividingBy: size.width - foodEdgeMargin * 2)
  randomPosition += foodEdgeMargin

  food.position = CGPoint(x: randomPosition, y: size.height)

  addChild(food)
}
This function acts almost exactly like our spawnRaindrop() function. We create a new FoodSprite, then place it in a random x location on the screen. We use the margin variable that we set earlier to shrink the amount of screen space where the food sprite can spawn. First, we get a random location from 0 to the width of the screen, minus the margin, multiplied by 2. Then, we offset the start by the margin. This prevents food from spawning anywhere between 0 and 75 from each side of the screen.
Near the top of the file in sceneDidLoad(), let’s add the following code beneath our initial call of spawnCat():
spawnCat()
spawnFood()
Now when the scene loads, we will spawn an umbrella, a cat from the umbrella, some raindrops and food falling from the sky. Currently, the rain can interact with the food, possibly moving it around. The rain will act in the same way relative to the food as the umbrella and the floor, bouncing once and then losing all of its collision until it interacts with the edge of the game world and is deleted. We also need some interaction between the food and the cat.
At the bottom of the file in GameScene.swift, we will add our code for the food collision. Add the following below handleCatCollision():
func handleFoodHit(contact: SKPhysicsContact) {
  var otherBody : SKPhysicsBody
  var foodBody : SKPhysicsBody

  if(contact.bodyA.categoryBitMask == FoodCategory) {
    otherBody = contact.bodyB
    foodBody = contact.bodyA
  } else {
    otherBody = contact.bodyA
    foodBody = contact.bodyB
  }

  switch otherBody.categoryBitMask {
  case CatCategory:
    //TODO increment points
    print("fed cat")
    fallthrough
  case WorldCategory:
    foodBody.node?.removeFromParent()
    foodBody.node?.physicsBody = nil

    spawnFood()
  default:
    print("something else touched the food")
  }
}
With this function, we will handle the food’s collision in the same way we handle the cat’s collision. First, we identify which physics body is the food, and then we run a switch statement on the other body. Then, we add cases for CatCategory — this is a stub so that we can later update our score. Then we fallthrough to hit the WorldFrameCategory, where we remove the food sprite from the scene, and also the physicsBody associated with it. Finally, we spawn the food again. When it hits the world boundary, we just remove the sprite and physicsBody. If anything else is detected, our default case will trigger and send a generic statement to the console. Currently, the only thing that can hit this statement is RainDropCategory. As of now, we don’t care what happens when the rain hits the food. We just want the rain to act the same as it does when it hits the floor or the umbrella.
To get everything wired up, we will add in a few lines to didBegin(_ contact). Add the following code above the check for CatCategory:
if contact.bodyA.categoryBitMask == FoodCategory || contact.bodyB.categoryBitMask == FoodCategory {
  handleFoodHit(contact: contact)
  return
}
The final code for didBegin(_ contact) should look like the following code snippet:
func didBegin(_ contact: SKPhysicsContact) {
  if (contact.bodyA.categoryBitMask == RainDropCategory) {
    contact.bodyA.node?.physicsBody?.collisionBitMask = 0
  } else if (contact.bodyB.categoryBitMask == RainDropCategory) {
    contact.bodyB.node?.physicsBody?.collisionBitMask = 0
  }

  if contact.bodyA.categoryBitMask == FoodCategory || contact.bodyB.categoryBitMask == FoodCategory {
    handleFoodHit(contact: contact)

    return
  }

  if contact.bodyA.categoryBitMask == CatCategory || contact.bodyB.categoryBitMask == CatCategory {
    handleCatCollision(contact: contact)

    return
  }

  if contact.bodyA.categoryBitMask == WorldCategory {
    contact.bodyB.node?.removeFromParent()
    contact.bodyB.node?.physicsBody = nil
    contact.bodyB.node?.removeAllActions()
  } else if contact.bodyB.categoryBitMask == WorldCategory {
    contact.bodyA.node?.removeFromParent()
    contact.bodyA.node?.physicsBody = nil
    contact.bodyA.node?.removeAllActions()
  }
}
Let’s run the app again. The cat won’t be running anywhere right now, but we can test our method by pushing the cat food off screen or by rolling the cat onto the cat food. Either case should now delete the food node, and one should respawn from off screen.
Let’s Get Moving
Now it’s time to get this kitty moving. What motivates RainCat to move? Food, of course! We just spawned food, and now we need to get the cat to move towards it. Currently, our food sprite is added to the scene and forgotten about. We need to fix this. If we keep a reference to the food, we can know its location at any given time, and thus we can tell the cat where the food is in the scene. The cat can know where it is in the scene by checking its position. With all of this information in place, we can now move the cat towards the food.
Going back to GameScene.swift, let’s add a variable to the top of the file, beneath our local cat variable:
private var foodNode : FoodSprite!
Now, we can update the spawnFood() function to set this variable every time the food is spawned.
Update spawnFood() to the following:
func spawnFood() {
  if let currentFood = foodNode, children.contains(currentFood) {
    foodNode.removeFromParent()
    foodNode.removeAllActions()
    foodNode.physicsBody = nil
  }

  foodNode = FoodSprite.newInstance()
  var randomPosition : CGFloat = CGFloat(arc4random())
  randomPosition = randomPosition.truncatingRemainder(dividingBy: size.width - foodEdgeMargin * 2)
  randomPosition += foodEdgeMargin

  foodNode.position = CGPoint(x: randomPosition, y: size.height)

  addChild(foodNode)
}
This will change the scope of the food variable from the spawnFood() function to that of the GameScene.swift file. The way we’ve coded things, we have only one FoodSprite spawning at a time, and we’re keeping a reference to it. Because we have this reference, we can detect where the food is at any given time. We also have a single cat on screen at any time, and we also keep a reference to it.
We know the cat wants the food; we just need to provide a means for the cat to move. We need to edit the CatSprite.swift file in order to know in which direction it needs to travel toward the food. For it to get to the food, we need to know the rate of speed it can move towards it. At the top of the CatSprite.swift file, we can add the following line above the newInstance() function.
private let movementSpeed : CGFloat = 100
This line is our movement speed, which is a simple solution to a complex problem. It’s a simple linear equation, ignoring any complexities that friction or acceleration brings into the mix.
Now we need to do something with our update(deltaTime:) method. Because we will know where the food is, we need to move toward that location. Replace the update function in CatSprite.swift with the following code:
public func update(deltaTime : TimeInterval, foodLocation: CGPoint) {
  if foodLocation.x < position.x {
    //Food is left
    position.x -= movementSpeed * CGFloat(deltaTime)
    xScale = -1
  } else {
    //Food is right
    position.x += movementSpeed * CGFloat(deltaTime)
    xScale = 1
  }
}
We’ve updated the signature of the function! We needed to give the cat the location of the food, so instead of only sending in the delta time, we’ve added the food location as well. Because many things can affect the location of the food, we need to update it constantly so that we are always moving in the right direction. Let’s also look at the function here. In the new update function, we take in the delta time, which will be pretty short, about 0.166 seconds or so. We also take in the food’s location, which is a CGPoint. If the food location’s x position is less than the cat’s x position, then we’ll know that the food is to the left. If not, then the food will be either on top or to the right. If we move left, then we take the cat’s x position and subtract the movement speed, multiplied by the delta time. We need to cast it from a TimeInterval to a CGFloat, since our position and movement speed use those units, and Swift is a strongly typed language.
What this does exactly is nudge the cat left at a pretty constant rate to make it appear as if it is moving. In case the delta time is 0.166 seconds, we position the cat sprite 16.6 units to the left of its previous location. This is because our movementSpeed variable is 100, and 0.166 × 100 = 16.6. The same will happen when going right, except that we position the cat 16.6 units to the right of its previous location. Next, we edit the xScale property of our cat. This governs the width of our sprite. The default value is 1.0; so, if we set the xScale to 0.5, the cat will be half its original width. If we double it to 2.0, then the cat will be double its original width, and so on. Because the original sprite is looking to the right, when moving right, the scale will be set to its default value of 1. If we want to “flip” the cat, we set the scale to -1, which sets its frame to a negative value and renders it backwards. We keep it at -1 to maintain the proportions of the cat. Now, when moving left, the cat will face left, and when moving right, will face right!
Now we will move toward the food dish’s location at a constant rate of speed. First, we check which direction to move in, then we move in that direction on the x-axis. We should also update the xScale, because we want to face the correct direction while moving… unless, of course, we want our cat to do the moonwalk! Finally, we need to tell the cat to update in our game scene.
Moving to the GameScene.swift file, navigate to our update(_ currentTime:) function, and beneath the update umbrella call, enter the following line:
catNode.update(deltaTime: dt, foodLocation: foodNode.position)
Run the app, and we should have success! Mostly, at least. Currently, the cat does indeed move toward the food, but it can get into some interesting situations.
Next, we can add the walking animation! After that, we’ll circle back to fix the cat’s rotation after it gets hit. You may have noticed an unused asset named cat_two. We need to pull this texture in and alternate it to make it appear as if the cat is walking. To do this, we will add our first SKAction!
Walking With Style
At the top of CatSprite.swift, we will add in a string constant so that we can add a walking action associated with this key. This way, we can stop the walking action without removing all of the actions that we may have on the cat later on. Add the following line above the movementSpeed variable:
private let walkingActionKey = "action_walking"
The string itself is not really important, but it is unique to this walking animation. I also like adding something meaningful to the key for debugging purposes down the line. For example, if I see the key, I will know that it is a SKAction and, specifically, that it is the walking action.
Beneath the walkingActionKey, we will add in the frames. Because we will be using only two frames, we can do this at the top of the file without it looking messy:
private let walkFrames = [
  SKTexture(imageNamed: "cat_one"),
  SKTexture(imageNamed: "cat_two")
]
This is just an array of the two textures that we will switch between while walking. To finish this off, we will update our update(deltaTime: foodLocation:) function to the following code:
public func update(deltaTime : TimeInterval, foodLocation: CGPoint) {
  if action(forKey: walkingActionKey) == nil {
    let walkingAction = SKAction.repeatForever(
      SKAction.animate(with: walkFrames,
                       timePerFrame: 0.1,
                       resize: false,
                       restore: true))

    run(walkingAction, withKey:walkingActionKey)
  }

  if foodLocation.x < position.x {
    //Food is left
    position.x -= movementSpeed * CGFloat(deltaTime)
    xScale = -1
  } else {
    //Food is right
    position.x += movementSpeed * CGFloat(deltaTime)
    xScale = 1
  }
}
With this update, we’ve checked whether our cat sprite is already running the walking animation sequence. If it is not, we will add an action to the sprite. This is a nested SKAction. First, we create an action that will repeat forever. Then, in that action, we create the animation sequence for walking. The SKAction.animate(with: …) takes in the array of animation frames, along with the time per frame. The next variable in the function checks whether one of the textures is of a different size and whether it should resize the SKSpriteNode when it gets to that frame. Restore checks whether the sprite should return to its initial state after the action is completed. We set both of these to false so that we don’t get any unintended side effects. After we set up the walking action, we tell the sprite to start running it with the run() function.
Run the app again, and we will see our cat walking intently toward the food!
If the cat gets hit, it will rotate but still move toward the food. We need to show a damaged state for the cat, so that the user knows they did something bad. Also, we need to correct the cat’s rotation while moving, so that it is not walking on its side or upside down.
Let’s go over the plan. We want to show the user that the cat has been hit, other than by just updating the score later on. Some games will make the unit invulnerable while flashing. We could also do a damage animation if we get the textures for this. For this game, I want to keep things simple, so I will add in some functionality for “flailing.” This cat, when hit by rain, will become stunned and just sort of roll onto its back in disbelief; the cat will be shocked that you would let this happen. To accomplish this, we will set up a few variables. We need to know for how long the cat will be stunned and for how long it has been stunned. Add the following lines to the top of the file, below the movementSpeed variable:
private var timeSinceLastHit : TimeInterval = 2
private let maxFlailTime : TimeInterval = 2
The first variable, timeSinceLastHit holds how long it has been since the cat was hit last. We set it to 2 because of the next variable, maxFlailTime. This is a constant, saying that the cat will be stunned for only 2 seconds. Both are set to 2 so that the cat does not start out stunned when spawned. You can play with these variables later to get the perfect stun time.
Now we need to add in a function to let the cat know it’s been hit, and that it needs to react, by stopping moving. Add the following function below our update(deltaTime: foodLocation:) function:
public func hitByRain() {
  timeSinceLastHit = 0
  removeAction(forKey: walkingActionKey)
}
This just updates the timeSinceLastHit to 0, and removes the walking animation that we set up earlier. Now we need to overhaul update(deltaTime: foodLocation:), so that the cat doesn’t move while it is stunned. Update the function to the following:
public func update(deltaTime : TimeInterval, foodLocation: CGPoint) {
  timeSinceLastHit += deltaTime

  if timeSinceLastHit >= maxFlailTime {
    if action(forKey: walkingActionKey) == nil {
      let walkingAction = SKAction.repeatForever(
        SKAction.animate(with: walkFrames,
                         timePerFrame: 0.1,
                         resize: false,
                         restore: true))

      run(walkingAction, withKey:walkingActionKey)
    }

    if foodLocation.x < position.x {
      //Food is left
      position.x -= movementSpeed * CGFloat(deltaTime)
      xScale = -1
    } else {
      //Food is right
      position.x += movementSpeed * CGFloat(deltaTime)
      xScale = 1
    }
  }
}
Now, our timeSinceLastHit will constantly be updated, and if the cat hasn’t been hit in the past 2 seconds, it will walk toward the food. If our walking animation isn’t set, then we’ll set it correctly. This is a frame-based animation that just swaps out the texture every 0.1 seconds to make it appear as though the cat is walking. It looks exactly like how real cats walk, doesn’t it?
We need to move over to GameScene.swift to tell the cat that it has been hit. In handleCatCollision(contact:), we will call the hitByRain function. In the switch statement, look for the RainDropCategory and replace this…
print("rain hit the cat")
… with this:
catNode.hitByRain()
If we run the app now, the cat will be stunned for 2 seconds once rain touches it!
It works, but the cat seems to get into a rotated state and looks funny. Also, it looks like the rain really hurts — maybe we need to do something about that.
For the raindrop problem, we can make a slight tweak to its physicsBody. Under spawnRaindrop and below where we initialize physicsBody, we can add the following line:
raindrop.physicsBody?.density = 0.5
This will halve the density of the raindrop from its normal value of 1.0. This will launch the cat a little less.
Moving to CatSprite.swift, we can correct the rotation of the cat with an SKAction. Add the following to the update(deltaTime: foodLocation:) function. Make sure that it is inside the if statement that checks whether the cat is flailing.
Find this line:
if timeSinceLastHit >= maxFlailTime {
And add the following code to correct the angular rotation:
if zRotation != 0 && action(forKey: "action_rotate") == nil {
  run(SKAction.rotate(toAngle: 0, duration: 0.25), withKey: "action_rotate")
}
This block of code checks whether the cat is rotated, even in the slightest. Then, we check currently running SKActions to see whether we are already animating the cat to its standing position. If the cat is rotated and not animating, we run an action to rotate it back to 0 radians. Note that we are hardcoding the key here, because we currently don’t need to use this key outside of this spot. In the future, if we need to check the animation of our rotation in another function or class, we would make a constant at the top of the file, exactly like the walkingActionKey.
Run the app, and you will see the magic happen: Cat gets hit, cat probably rotates, cat fixes itself, cat is then happy to eat more. There are still two problems, though. Because we are using a circle for the cat’s physicsBody, after the cat corrects itself the first time, you might notice that the cat gets jittery. It is constantly rotating and correcting itself. To get around this, we need to reset the angularVelocity. Basically, the cat is rotating from getting hit, and we’ve never corrected the velocity that was added. The cat also does not update its velocity after being hit. If the cat is hit and tries to move in the opposite direction, you might notice that it goes slower than normal. The other problem is when the food is directly above the cat. The cat will quickly turn around endlessly while the food is above it. We can fix these issues by updating our update(deltaTime :, foodLocation:) function to the following:
public func update(deltaTime : TimeInterval, foodLocation: CGPoint) {
  timeSinceLastHit += deltaTime

  if timeSinceLastHit >= maxFlailTime {
    if action(forKey: walkingActionKey) == nil {
      let walkingAction = SKAction.repeatForever(
        SKAction.animate(with: walkFrames,
                         timePerFrame: 0.1,
                         resize: false,
                         restore: true))

      run(walkingAction, withKey:walkingActionKey)
    }

      if zRotation != 0 && action(forKey: "action_rotate") == nil {
        run(SKAction.rotate(toAngle: 0, duration: 0.25), withKey: "action_rotate")
      }

      //Stand still if the food is above the cat.
      if foodLocation.y > position.y && abs(foodLocation.x - position.x) < 2 {
        physicsBody?.velocity.dx = 0
        removeAction(forKey: walkingActionKey)
        texture = walkFrames[1]
      } else if foodLocation.x < position.x {
        //Food is left
        physicsBody?.velocity.dx = -movementSpeed
        xScale = -1
      } else {
        //Food is right
        physicsBody?.velocity.dx = movementSpeed
        xScale = 1
      }

    physicsBody?.angularVelocity = 0
  }
}
Run the app yet again, and much of the herky-jerky action will be corrected. Not only that, but the cat will now stand still when the food is directly above it.
Now Add Sound
Before we start the programming, we should look into finding sound effects. Generally, when looking for sound effects, I just search for a phrase like “cat meow royalty free.” The first hit is usually SoundBible.com, which generally has a good selection of royalty-free sound effects. Make sure to read the licenses. If you plan to never release the app, then pay no concern to licensing, since the app is for personal use. However, if you wish to sell this in the App Store, distribute it or the like, then make sure to attach a Creative Commons Attribution 3.0 licence or something similar. A lot of licenses are out there, so find out what the license is for a sound or image before using someone else’s work.
All of these RainCat sound effects are Creative Commons-licensed and are free to use. For the next step, move the SFX folder that we downloaded earlier into the RainCat folder.
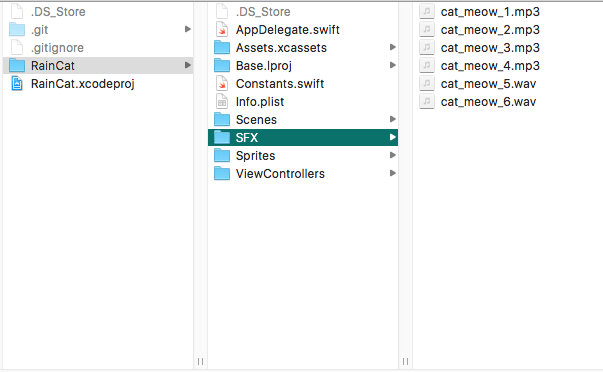
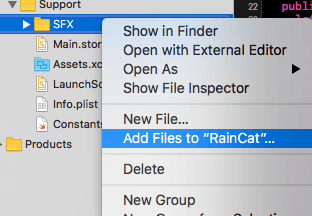
After you add the files to the project, add them to your project in Xcode. Create a group under “Support” named “SFX.” Right-click on the group and click “Add Files to RainCat…”
Find your “SFX” folder, select all of your sound-effect files, and click the “Add” button. Now you have sound effects to play with. Moving to CatSprite.swift, we can add in an array of the sound-effect file names so that we can play them on the hit of a raindrop. Add the following array below the walkFrames variable up at the top of the file:
private let meowSFX = [
  "cat_meow_1.mp3",
  "cat_meow_2.mp3",
  "cat_meow_3.mp3",
  "cat_meow_4.mp3",
  "cat_meow_5.wav",
  "cat_meow_6.wav"
]
We can have the cat make sounds by adding two lines to the hitByRain function:
let selectedSFX = Int(arc4random_uniform(UInt32(meowSFX.count)))
run(SKAction.playSoundFileNamed(meowSFX[selectedSFX], waitForCompletion: true))
The code above selects a random number, with the minimum being 0 and maximum being the size of the meowSFX array. Then, we pick the sound effect’s name from the string array and play the sound file. We will get to the waitForCompletion variable in a bit. Also, we’ll use SKAction.playSoundFileNamed for our short-and-sweet sound effects.
And we have sound! Too much sound! We have sounds playing over other sounds. Right now, we’re playing one of the sound effects every time the cat gets hit by rain. This gets annoying fast. We need to add more logic around when to play the sound, and we also shouldn’t play two clips at the same time.
Add these variables to the top of the CatSprite.swift file, below the maxFlailTime variable:
private var currentRainHits = 4
private let maxRainHits = 4
The first variable, currentRainHits, is a counter for how many times the cat has been hit, and maxRainHits is the number of hits it will take before meowing.
Now we will update the hitByRain function. We need to apply the rules for currentRainHits and maxRainHits. Replace the hitByRain function with the following:
public func hitByRain() {
  timeSinceLastHit = 0
  removeAction(forKey: walkingActionKey)

  //Determine if we should meow or not
  if(currentRainHits < maxRainHits) {
    currentRainHits += 1

    return
  }

  if action(forKey: "action_sound_effect") == nil {
    currentRainHits = 0

    let selectedSFX = Int(arc4random_uniform(UInt32(meowSFX.count)))

    run(SKAction.playSoundFileNamed(meowSFX[selectedSFX], waitForCompletion: true),
          withKey: "action_sound_effect")
  }
}
Now, if the currentRainHits is less than the maximum, we just increment the currentRainHits and return before we play the sound effect. Then, we check whether we are currently playing the sound effect by the key we provided: action_sound_effect. If we are not running the action, then we select a random sound effect to play. We set waitForCompletion to true because the action will not complete until the sound effect is completed. If we set it to false, then it would count the sound-effect action as completed as soon as it begins to play.
Adding Music
Before we create a way to play music in our app, we need something to play. Similar to our search for sound effects, we can search Google for “royalty free music,” and we will generally find something. Additionally, you can go to SoundCloud and talk to artists there. See if you can reach an agreement, either by using the music for free with attribution or by paying for a license to use it in your game. For this app, I happened across Bensound, which had some music I could use, under the Creative Commons license. To use it, you must follow its licensing agreement. Pretty straightforward: Either credit Bensound or pay for a license.
Download all four tracks, or move them over from the “Music” folder that we downloaded earlier. We will use them and cycle between each track to keep things fresh. Another thing to consider is that these tracks don’t loop correctly, so you will know when each starts and ends. Good background music will loop or morph one track into another really well.
Once you download the tracks, create a folder named “Music” in the “RainCat” folder, the same way you created the “SFX” folder earlier. Move the tracks to that folder.
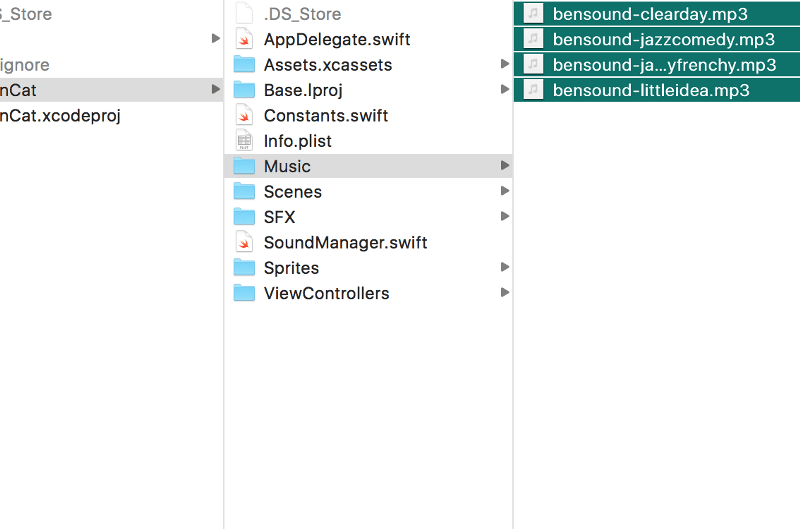
Then, create a group in the “Support” group of our project’s structure, named “Music.” Add our tracks to the project by right-clicking on the “Music” group and clicking “Add Files to RainCat”. This is the same procedure that we used when adding our sound effects.
Next, we will create a new file named SoundManager.swift, as you may have seen in the picture above. This will act as the single source of music tracks to be played. For sound effects, we don’t care if one plays over another, but it would sound terrible if two music tracks played at the same time. Finally, we can implement the SoundManager:
import AVFoundation

class SoundManager : NSObject, AVAudioPlayerDelegate {
  static let sharedInstance = SoundManager()

  var audioPlayer : AVAudioPlayer?
  var trackPosition = 0

  //Music: https://www.bensound.com/royalty-free-music
  static private let tracks = [
    "bensound-clearday",
    "bensound-jazzcomedy",
    "bensound-jazzyfrenchy",
    "bensound-littleidea"
  ]

  private override init() {
    //This is private, so you can have only one Sound Manager ever.
    trackPosition = Int(arc4random_uniform(UInt32(SoundManager.tracks.count)))
  }

  public func startPlaying() {
    if audioPlayer == nil || audioPlayer?.isPlaying == false {
      let soundURL = Bundle.main.url(forResource: SoundManager.tracks[trackPosition], withExtension: "mp3")

      do {
        audioPlayer = try AVAudioPlayer(contentsOf: soundURL!)
        audioPlayer?.delegate = self
      } catch {
        print("audio player failed to load")

        startPlaying()
      }

      audioPlayer?.prepareToPlay()

      audioPlayer?.play()

      trackPosition = (trackPosition + 1) % SoundManager.tracks.count
    } else {
      print("Audio player is already playing!")
    }
  }

  func audioPlayerDidFinishPlaying(_ player: AVAudioPlayer, successfully flag: Bool) {
    //Just play the next track.
    startPlaying()
  }
}
Going through the new SoundManager class, we are making a singleton class that handles playback of the large track files and continuously plays them in order. For longer-format audio files, we need to use AVFoundation. It is built for this, and SKAction cannot load the file in quickly enough to play it in the same way it could load in a small SFX file. Because this library has been around forever, the delegate still depends on NSObjects. We need to be the AVAudioPlayerDelegate to detect when the audio player completes playback. We’ll hold class variables for the current audioPlayer for now; we will need them later to mute playback.
Now we have the current track’s location, so we know the next track to play, followed by an array of the names of the music tracks in our project. We should attribute it to Bensound to honor our licensing agreement.
We need to implement the default init function. Here, we choose a random track to start with, so that we don’t always hear the same track first. From then on, we wait for the program to tell us to start playing. In startPlaying, we check to see whether the current audio player is playing. If it is not, then we attempt to start playing the selected track. We’ll attempt to start the audio player, which can fail, so we need to surround it in a try/catch block. After that, we prepare playback, play the audio clip, and then set the index for the next track. This line is pretty important:
trackPosition = (trackPosition + 1) % SoundManager.tracks.count
This sets the next position of the track by incrementing it and then performing a modulo on it to keep it within the bounds of the tracks’ array. Finally, in audioPlayerDidFinishPlaying(_ player:successfully flag:), we implement the delegate method, which lets us know when the track finishes. Currently, we don’t care whether it succeeds or not — we just play the next track when this is called.
Just Press Play
Now that we are done explaining the SoundManager, we just need to tell it to start, and we’ll have music playing on a loop forever. Quickly run over to GameViewController.swift and place the following line of code below where we set up the scene the first time:
SoundManager.sharedInstance.startPlaying()
We do this in GameViewController because we want the music to be independent of the scene. If we run the app at this point, and everything has been added to the project correctly, we will have background music for our game!
In this lesson, we’ve touched on two major topics: sprite animation and sound. We used a frame-based animation to animate our sprite, used SKActions to animate, and used methods to correct our cat after it is hit by rain. We added sound effects using SKActions and assigned them to play when the cat gets hit by rain. Finally, we added initial background music for our game.
For those who have made it this far, congratulations! Our game is nearing completion! If you missed a step or got confused along the way, please check out the completed code for this lesson on GitHub.
How did you do? Does your code look almost exactly like mine? What has changed? Did you update the code for the better? Let me know in the comments below.
Lesson 3 is coming up next!
Further Reading
- Gamification And UX: Where Users Win Or Lose
- Playful UX Design: Building A Better Game
- Combining UX Design And Psychology To Change User Behavior
- A Swift Transition From iOS To macOS Development


