Exploring Animation And Interaction Techniques With WebGL (A Case Study)

Email Newsletter
Weekly tips on front-end & UX.
Trusted by 182,000+ folks.


 Custom Web Forms for Angular, React, & Vue. Your backend.
 Celebrating 10 million developers
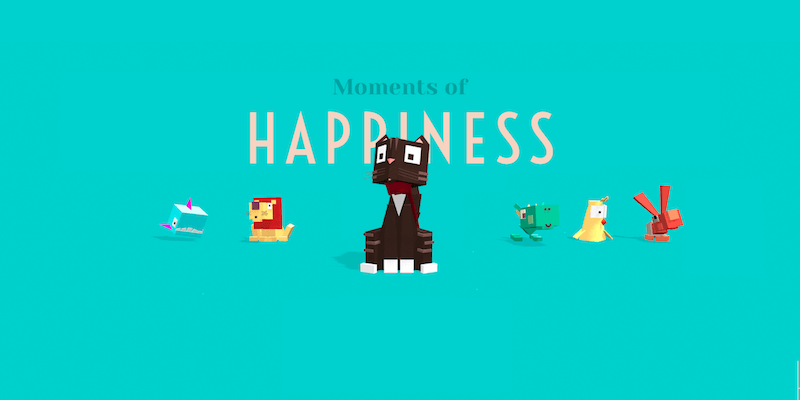
Two years ago, I decided to start a series of short WebGL experiments on Codepen. Earlier this year, I finally found the time to compile them all together on a single website named “Moments of Happiness”. Since its incarnation, I’ve found ways to explore and learn different animation and interaction techniques, which I’ve implemented in these interactive toys.
As you’ll see, the gameplay is very different in each one, but all of the experiments share one principle: The behavior of each character responds programmatically to user input. No precalculated animation — every movement is defined at runtime. Breathing life into these characters with only a few lines of code was the main challenge.
Defining Animations And Explaining Their Purpose
When an animation doesn’t fit a functional purpose, it usually feels awkward or annoying. Well, there are nine logical purposes that can help you validate functional animation. Read a related article →
A Process Of Constraints
Mainly built using three.js and GreenSock libraries, these experiments were completely hand-coded, with no resort to any 3D or animation software.
The process consisted of shaping the characters programmatically, one cube at a time. Most of my effort was spent refining the proportions, the positions and the overall rendering by tweaking the values in the code, and then, finally, moving each part according to user input (moving the mouse, clicking, dragging, etc.).
The advantage of this process isn’t obvious. But it enables me to use only a text editor to create the whole experiment, thereby avoiding all of the struggle of exporting assets and adjusting the properties of the characters using many tools. Taking advantage of the live preview offered by Codepen made the whole process very flexible.
That being said, the process came with its own set of constraints to keep things manageable: The characters had to be built with as few parts as possible; each part consisted of a very low number of vertices; and the animations had to target a limited number of behaviors.
Note: To be clear, this process works for me, but if you are comfortable with a 3D app, you’d better use it to make your models. It’s all about finding the right balance between your own skills to be as effective as possible. In my case, I’m much more efficient when I keep all of my processes in a single tool.
Turning Constraints Into Opportunities
The minimalism required by this process was, in the end, a great opportunity to find the most accurate movement to depict each behavior (comfort, joy, disappointment, etc.).
Every cube and every movement was subject to questioning: Do I really need this one? Does it make the experience better, or is it just the whim of a wannabe character designer?
I ended up with very simple toys, all living in muted and minimalist environments.
Animating things programmatically was probably the biggest challenge. How do you build natural and organic movement without any animation software or visual timeline? How do make this animation respond to user input while keeping it natural?
Step 1: Observation
Before starting any of these experiments, I spent some time observing, remembering and conjuring the feelings I wanted to convey.
By the time I made Chill the Lion, petting my dog had become a great source of inspiration; I observed how he closed his eyes for pleasure and exposed his neck to ask for a scratch. Finding the right algorithm to programmatically translate this was a mix of empathy and basic math skills.
For the “paranoid birds” (below), I remember imitating an uncomfortable-looking guy who had a fleeting look, trying to make the behaviour look convincing by figuring out how much time separated his eye and head movement.
But sometimes, you can’t just rely on your own experience; visual inspiration is sometimes necessary to catch a particular trait. Fortunately, there is Giphy, where you can find subtle expressions of any kind. I also spent a lot of time on YouTube and Vimeo looking for the right movements.
Let’s see an example.
Observing A Running Cycle
One of the trickiest animations I had to make in Moments of Happiness was the rabbit fleeing from the wolf.
To achieve this, it was first important to understand how a running cycle works. I looked at some of the most exciting slow-motion GIFs available on Giphy, and I came across this one:

What is interesting to note in this GIF is that a running cycle is not just about moving legs. It is about the whole body, including the smallest parts of it, moving in perfect synchronization. Look at the ears, the mouth and even the tongue participating to enhance the feeling of speed and gravity.
The truth is that there are as many possible running cycles as there are animals and reasons to run. It wouldn’t be a bad idea to have other more accurate references to look at if you want to dig into running cycles. Two useful resources are the “Run Cycle” collection on Pinterest and the awesome “Quadruped Locomotion Tutorial” video.
If you look at these studies, the mechanics behind each running cycle become clearer. Your brain will start to catch on to the relationship between each part of the body, and the sequence and rhythm in the race will reveal a cyclic, repeated and reproducible form.
Now, we need a technical solution to achieve this.
Observing Automatas
Being fascinated by automatas, those mechanical toys that come alive in complex movement as you rotate a single handle, I wanted to try a similar technique and explore a code-based solution that fits my process better than a timeline and keyframes.
The idea is that a looping movement, simple or complex, depends entirely on the progress of one main cycle.
In a running cycle, this entails that each leg, ear, eye, body and head movement is driven by the same main cycle. In some cases, the rotation generated is converted into a horizontal movement and, in other cases, into a vertical one.
When it comes to converting a circular movement into a linear one, trigonometry seems to be the best option.
Step 2: Sharpen Your Weapons, Learn Trigonometry
Don’t run away! The kind of trigonometry needed here is very basic. Most of the formulas will look like this:
x = cos(angle)*distance;
y = sin(angle)*distance;
This is basically used to convert the polar coordinates of a point (angle, distance) to Cartesian coordinates (x, y).
By varying the angle, we can make the point rotate around the center.
Thanks to trigonometry, we can do much more sophisticated movement, just by playing around with the different values of the formulas. The beauty of this technique is the smoothness you get in the movement.
Here are some examples:
Now, You Practice
To understand trigonometry, you’ll have to get your hands dirty. Theory without experience is mere intellectual play.
In order to implement some of the formulas above, we’ll need to set up a basic environment. This can be done using canvas, SVG or any library with a graphics API, such as three.js, PixiJS or BabylonJS.
Let’s walk through a very basic three.js setup.
First, download the latest version of three.js, and import the library in the html head:
<script type="text/javascript" src="js/three.js"></script>
Then, add a container, which will hold the whole experiment:
<div id="world"></div>
Make this container cover the screen by adding a CSS style:
#world {
    position: absolute;
    width: 100%;
    height: 100%;
    overflow: hidden;
    background: #ffffff;
}
The JavaScript part is a bit longer, but not that complicated:
// Initialize variables.
var scene, camera, renderer, WIDTH, HEIGHT;
var PI = Math.PI;
var angle = 0;
var radius = 10;
var cube;
var cos = Math.cos;
var sin = Math.sin;

function init(event) {
  // Get the container that will hold the animation.
  var container = document.getElementById('world');

  // Get window size.
  HEIGHT = window.innerHeight;
  WIDTH = window.innerWidth;

  // Create a three.js scene; set up the camera and the renderer.
  scene = new THREE.Scene();
  camera = new THREE.PerspectiveCamera( 50, WIDTH / HEIGHT, 1, 2000 );
  camera.position.z = 100;
  renderer = new THREE.WebGLRenderer({ alpha: true, antialias: true });
  renderer.setSize(WIDTH, HEIGHT);
  renderer.setPixelRatio(window.devicePixelRatio ? window.devicePixelRatio : 1);
  container.appendChild(renderer.domElement);

  // Create the cube.
  var geom = new THREE.CubeGeometry(16,8,8, 1);
  var material = new THREE.MeshStandardMaterial({
    color: 0x401A07
  });
  cube = new THREE.Mesh(geom, material);

  // Add the cube to the scene.
  scene.add(cube);

  // Create and add a light source.
  var globalLight = new THREE.AmbientLight(0xffffff, 1);
  scene.add(globalLight);

  // Listen to the window resize.
  window.addEventListener('resize', handleWindowResize, false);

  // Start a loop that will render the animation in each frame.
  loop();
}

function handleWindowResize() {
  // If the window is resized, we have to update the camera aspect ratio.
  HEIGHT = window.innerHeight;
  WIDTH = window.innerWidth;
  renderer.setSize(WIDTH, HEIGHT);
  camera.aspect = WIDTH / HEIGHT;
  camera.updateProjectionMatrix();
}

function loop(){
  // Call the update function in each frame to update the cube position.
  update();

  // Render the scene in each frame.
  renderer.render(scene, camera);

  // Call the loop function in next frame.
  requestAnimationFrame(loop);
}

// Initialize the demo when the page is loaded.
window.addEventListener('load', init, false);
Here, we have basically created a scene, a camera, a light and a cube. Then, we started a loop to update the position of the cube at each frame.
Now, we need to add the update() function, where we can insert some trigonometry formulas to play around with:
function update(){
  // The angle is incremented by 0.1 every frame. Try higher values for faster animation.
  angle += .1;

  // Try modifying the angle and/or radius for a different movement.
  cube.position.x = cos(angle) * radius;
  cube.position.y = sin(angle) * radius;

  // You might want to use the same principle on the rotation property of an object. Uncomment the next line to see what happens.
  //cube.rotation.z = cos(angle) * PI/4;

  //Or vary the scale. Note that 1 is added as an offset to avoid a negative scale value.
  //cube.scale.y = 1 + cos(angle) * .5;

  /*
  Your turn! You might want to:
  - comment or uncomment the lines above to try new combinations,
  - replace cos by sin and vice versa,
  - replace radius with an other cyclic function.
  For example :
  cube.position.x = cos(angle) * (sin(angle) *radius);
  ...

  */
}
If you feel lost, you can find this setup ready to use on Codepen. Play around with the sine and cosine functions to make the cube move in different ways and to better understand how to take advantage of trigonometry for your animations.
Or you can just move on to the next demo and use it as a starting point to make your own walking or running cycle.
How To Make A Walking Or Running Cycle Using Trigonometry
Now, as we learned how to make a cube move with code, by using the same principles, we’re going to make a simple walking cycle, step by step.
We are mostly using the same setup as before, the main difference being that we need more cubes to make the different body parts.
With three.js, it is possible to embed groups of objects inside other groups. For example, we can create a body group that holds the legs, arms and head.
Let’s see how our main character is made:
Hero = function() {
  // This will be incremented later at each frame and will be used as the rotation angle of the cycle.
  this.runningCycle = 0;

  // Create a mesh that will hold the body.
  this.mesh = new THREE.Group();
  this.body = new THREE.Group();
  this.mesh.add(this.body);

  // Create the different parts and add them to the body.
  var torsoGeom = new THREE.CubeGeometry(8,8,8, 1);//
  this.torso = new THREE.Mesh(torsoGeom, blueMat);
  this.torso.position.y = 8;
  this.torso.castShadow = true;
  this.body.add(this.torso);

  var handGeom = new THREE.CubeGeometry(3,3,3, 1);
  this.handR = new THREE.Mesh(handGeom, brownMat);
  this.handR.position.z=7;
  this.handR.position.y=8;
  this.body.add(this.handR);

  this.handL = this.handR.clone();
  this.handL.position.z = - this.handR.position.z;
  this.body.add(this.handL);

  var headGeom = new THREE.CubeGeometry(16,16,16, 1);//
  this.head = new THREE.Mesh(headGeom, blueMat);
  this.head.position.y = 21;
  this.head.castShadow = true;
  this.body.add(this.head);

  var legGeom = new THREE.CubeGeometry(8,3,5, 1);

  this.legR = new THREE.Mesh(legGeom, brownMat);
  this.legR.position.x = 0;
  this.legR.position.z = 7;
  this.legR.position.y = 0;
  this.legR.castShadow = true;
  this.body.add(this.legR);

  this.legL = this.legR.clone();
  this.legL.position.z = - this.legR.position.z;
  this.legL.castShadow = true;
  this.body.add(this.legL);

  // Ensure that every part of the body casts and receives shadows.
  this.body.traverse(function(object) {
    if (object instanceof THREE.Mesh) {
      object.castShadow = true;
      object.receiveShadow = true;
    }
  });
}
Now we need to add this character to the scene:
function createHero() {
  hero = new Hero();
  scene.add(hero.mesh);
}
This is how a simple character could be made with three.js. If you want to learn more about making characters using three.js, read my detailed tutorial on Codrops.
After building this body, we are going to progressively make all of these parts move one by one, until we reach a simple walking cycle.
The whole logic is located in a run function of the Hero object:
Hero.prototype.run = function(){

  // Increment the angle.
  this.runningCycle += .03;
  var t = this.runningCycle;

  // Ensure that the angle we will use is between 0 and 2 Pi.
  t = t % (2*PI);

  // Amplitude is used as the main radius of the legs movement.
  var amp = 4;

  // Update the position and rotation of every part of the body.
  this.legR.position.x =  Math.cos(t) * amp;
  this.legR.position.y = Math.max (0, - Math.sin(t) * amp);

  this.legL.position.x =  Math.cos(t + PI) * amp;
  this.legL.position.y = Math.max (0, - Math.sin(t + PI) * amp);

  if (t<PI){
    this.legR.rotation.z = Math.cos(t * 2 + PI/2) * PI/4;
    this.legL.rotation.z = 0;
  } else{
    this.legR.rotation.z = 0;
    this.legL.rotation.z = Math.cos(t * 2 + PI/2) *  PI/4;
  }

  this.torso.position.y = 8 - Math.cos(  t * 2 ) * amp * .2;
  this.torso.rotation.y = -Math.cos( t + PI ) * amp * .05;

  this.head.position.y = 21 - Math.cos(  t * 2 ) * amp * .3;
  this.head.rotation.x = Math.cos( t ) * amp * .02;
  this.head.rotation.y =  Math.cos( t ) * amp * .01;

  this.handR.position.x = -Math.cos( t ) * amp;
  this.handR.rotation.z = -Math.cos( t ) * PI/8;
  this.handL.position.x = -Math.cos( t + PI) * amp;
  this.handL.rotation.z = -Math.cos( t + PI) * PI/8;
}
These lines of code are the most interesting part, but you can find the full code of the walking cycle on Codepen.
To make it easier to follow, I’ve made the following demo, which breaks down the movement and which highlights the part of the body being moved and the formula used at each step.
See the Pen Walking cycle breakdown by Karim Maaloul (@Yakudoo) on CodePen.
Once you are comfortable with sines and cosines, distances and frequencies, it becomes pretty easy to make different cycles, such as running, swimming, flying, even moonwalking.
Your Turn!
I won’t let you go without playing with the bunny.
The Codepen below lets you apply a different angle offset and a different amplitude to each part of the body. You can also modify the speed of the cycle for a more frantic result.
Can you figure out a different running cycle for this guy? Have fun!
See the Pen Run bunny run by Karim Maaloul (@Yakudoo) on CodePen.
Conclusion
One might think that code-based animation leads to unnatural movement. On the contrary, I believe it offers a great opportunity to tweak movement in a very flexible way, which makes it easier to achieve a convincing behavior for your character.
Moments of Happiness is a collection of different experiments, and each had its own challenges. In this article, I’ve detailed the solution used to make a running cycle. On my Codepen page, all of these experiments are available, with the code at your disposal. Feel free to play around and make your own interactive toys.
Further Reading
- A Simple Guide To Retrieval Augmented Generation Language Models
- Creating Accessible UI Animations
- Everything I Know About UX Research I First Learned From Lt. Columbo
- What Saul Bass Can Teach Us About Web Design


