Quick Wins For Improving Performance And Security Of Your Website

Email Newsletter
Weekly tips on front-end & UX.
Trusted by 182,000+ folks.
 Celebrating 10 million developers

 Custom Web Forms for Angular, React, & Vue. Your backend.

When it comes to building and maintaining a website, one has to take a ton of things into consideration. All webmasters should strive for:
- Improving the performance of their website,
- Increasing their website’s security.
Both of these goals are vital in order to run a successful website.
So, we’ve put together a list of five technologies you should consider implementing to improve both the performance and security of your website. Here’s a quick overview of the topics we’ll cover:
- Let’s Encrypt (SSL)
A free way to obtain an SSL certificate for improved security and better performance. - HTTP/2 The successor to the HTTP 1.1 protocol, which introduces many performance enhancements.
- Brotli compression.
A compression method that outperforms Gzip, resulting in smaller file sizes. - WebP images.
An image format that renders images smaller than a typical JPEG or PNG, resulting in faster loading times. - Content delivery network.
A collection of servers spread out across the globe, with the aim of caching and delivering your website’s assets faster.
If you aren’t aware of the benefits of improving your website’s performance and security, consider the fact that Google loves speed and, since 2010, has been using website speed as a ranking factor. Furthermore, if you run an e-commerce shop or a simple blog with an opt-in form, a faster website will increase your conversions. According to a study by Mobify, for every 100-millisecond decrease in home-page loading speed, Mobify saw a 1.11% lift in session-based conversions for its customer base, amounting to an average annual revenue increase of $376,789.
The web is also quickly moving towards SSL to provide users with better security and improved overall performance. In fact, for a couple of the technologies mentioned in this article, having an SSL-enabled website is a prerequisite.
Before jumping in, note that even if you can’t (or decide not to) apply each and every one of the suggestions mentioned here, your website would still benefit from implementing any number of the methods outlined. Therefore, try to determine which aspects of your website could use improvement and apply the suggestions below accordingly.
Let’s Encrypt (SSL)
If your website is still being delivered over HTTP, it’s time to migrate now. Google already takes HTTPS into consideration as a ranking signal and according to Google’s Security blog, all non-secure web pages will eventually display a dominant “Not Secure” message within the Chrome browser.
That’s why, to start off this list, we’ll go over how you can complete the migration process with a free SSL certificate, via Let’s Encrypt. Let’s Encrypt is a free and automated way to obtain an SSL certificate. Before Let’s Encrypt, you were required to purchase a valid certificate from a certificate-issuing authority if you wanted to deliver your website over HTTPS. Due to the additional cost, many web developers opted not to purchase the certificate and, therefore, continued serving their website over HTTP.
However, since Let’s Encrypt’s public beta launched in late 2015, millions of free SSL certificates have been issued. In fact, Let’s Encrypt stated that, as of late June 2017, over 100 million certificates have been issued. Before Let’s Encrypt launched, fewer than 40% of web pages were delivered over HTTPS. A little over a year and a half after the launch of Let’s Encrypt, that number has risen to 58%.
If you haven’t already moved to HTTPS, do so as soon as possible. Here are a few reasons why moving to HTTPS is beneficial:
- increased security (because everything is encrypted),
- HTTPS is required in order for HTTP/2 and Brotli to work,
- HTTPS is a ranking signal,
- SSL-secured websites build visitor trust.
How To Obtain A Let’s Encrypt Certificate
You can obtain an SSL certificate in a few ways. Although the SSL certificates that Let’s Encrypt provides satisfy most use cases, there are certain things to be aware of:
- There is currently no option for wildcard certificates. However, this is planned to be supported in January 2018.
- Let’s Encrypt certificates are valid for a period of 90 days. You must either renew them manually before they expire or set up a process to renew them automatically.
Of course, if one or both of these points are a deal-breaker, then acquiring a custom SSL certificate from a certificate authority is your next best bet. Regardless of which provider you choose, having an HTTPS-enabled website should be your top priority.
To obtain a Let’s Encrypt certificate, you have two methods to choose from:
- With shell access: Run the installation and obtain a certificate yourself.
- Without shell access: Obtain a certificate through your hosting or CDN provider.
The second option is pretty straightforward. If your web host or CDN provider offers Let’s Encrypt support, you basically just need to enable it in order to start delivering assets over HTTPS.
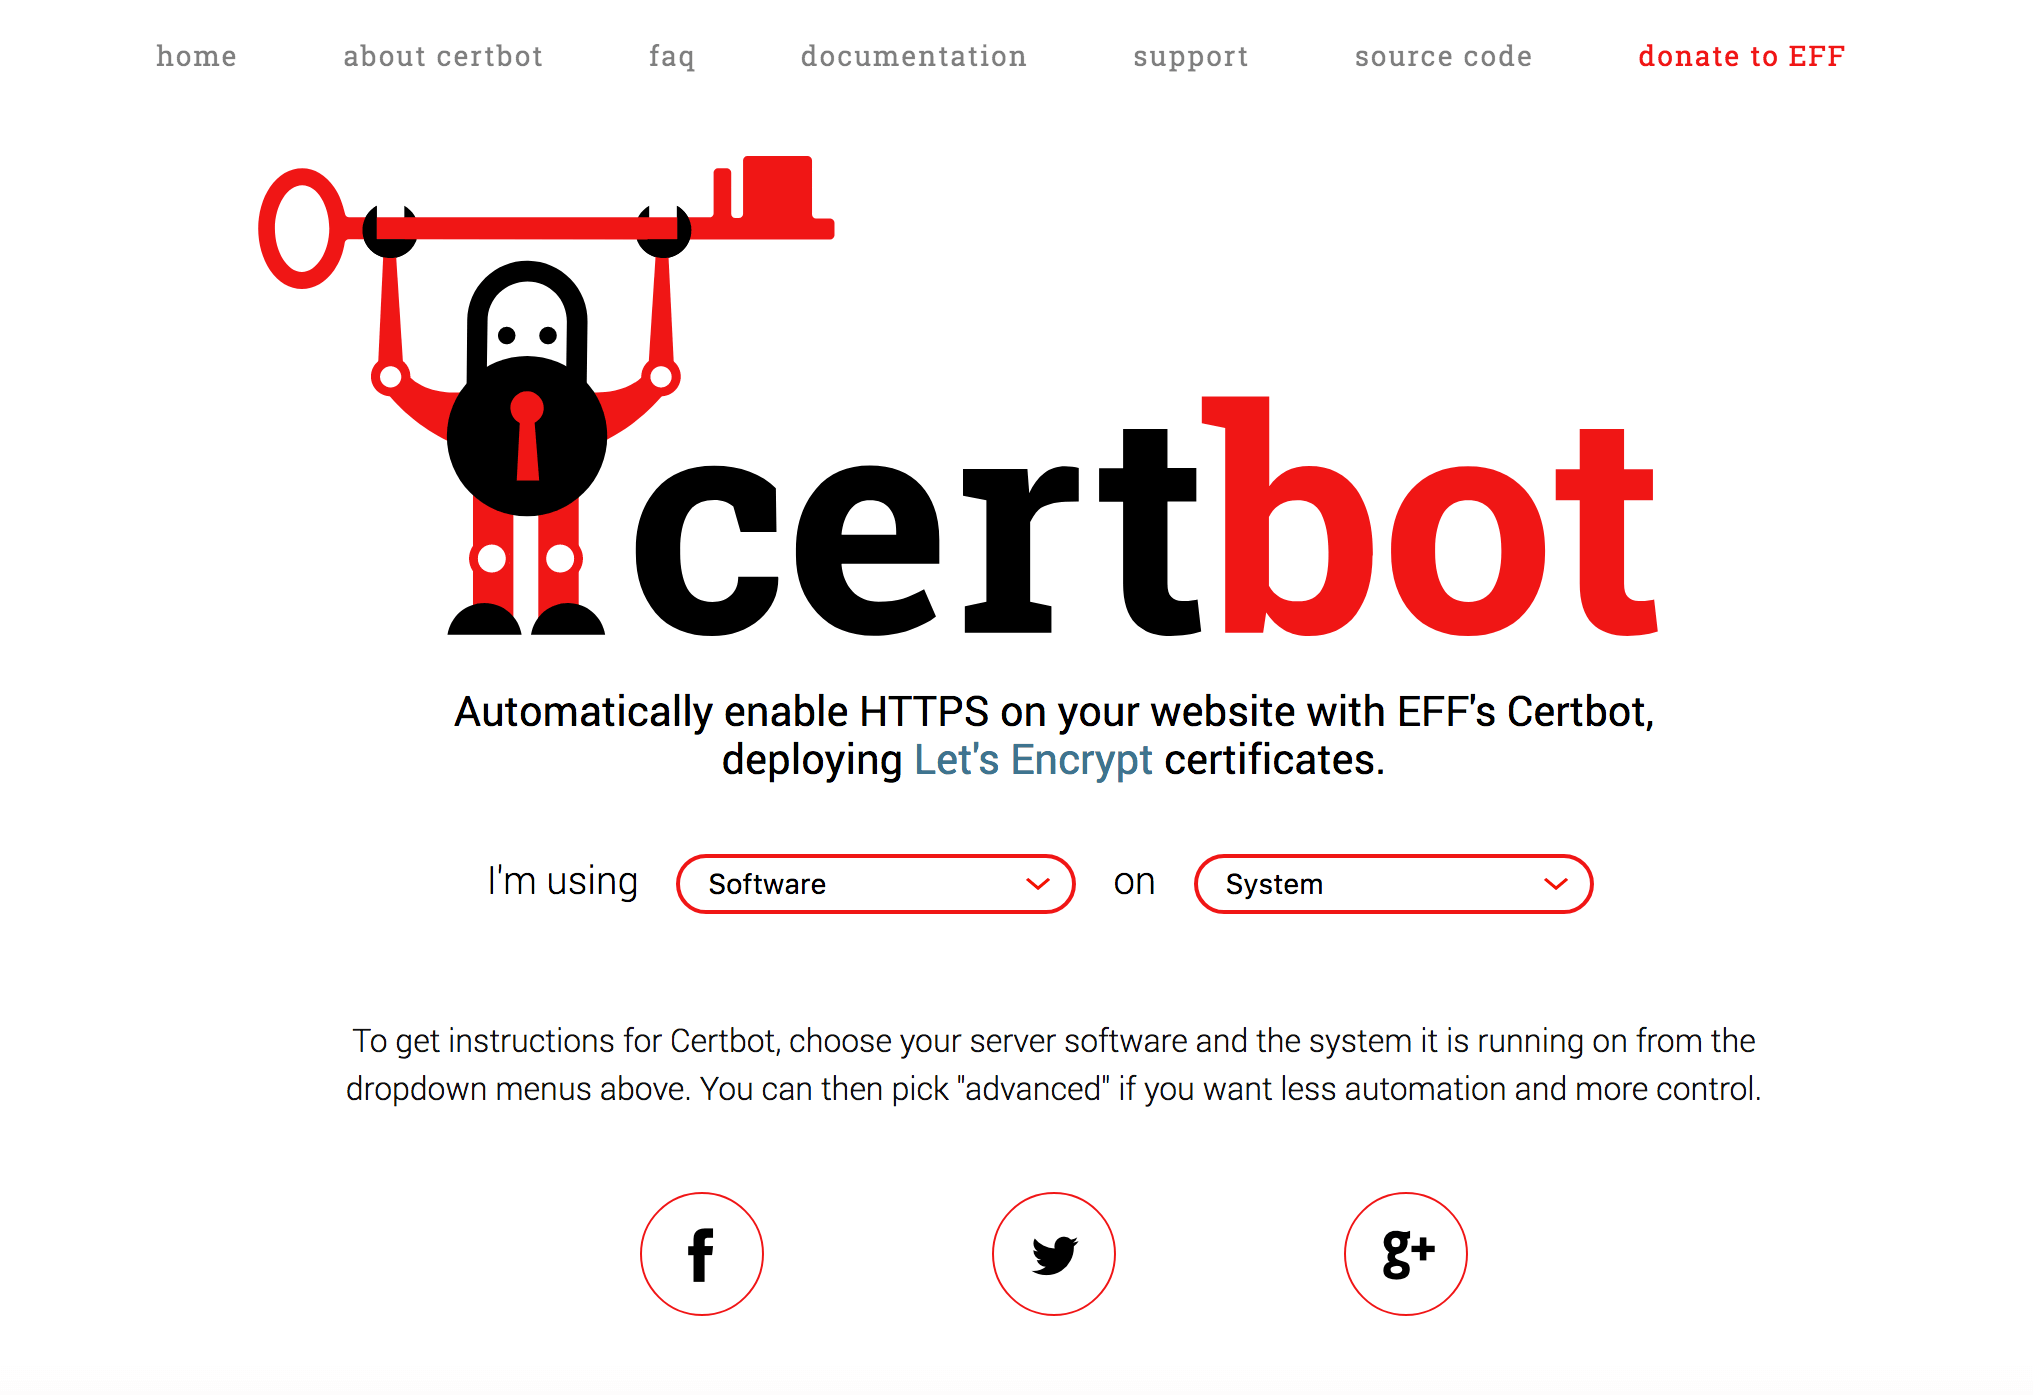
However, if you have shell access and want or need to configure Let’s Encrypt yourself, then you’ll need to determine which web server and operating system you’re using. Next, go to Certbot and select your software and system from the dropdown menus to find your specific installation instructions. Although the instructions for each combination of software and OS are different, Certbot provides simple setup instructions for a wide variety of systems.
HTTP/2
Thanks to Let’s Encrypt (or any other SSL certificate authority), your website should now be running over HTTPS. This means you can now take advantage of the next two technologies we’ll discuss, which would otherwise be incompatible if your website was delivered over HTTP. The second technology we’ll cover is HTTP/2.
HTTP 1.1 was released more than 15 years ago, and since then some major improvements have occurred. One of the most welcome improvements of HTTP/2 is that it allows browsers to parallelize multiple downloads using only one connection. With HTTP 1.1, most browsers were able to handle only six concurrent downloads on average. HTTP/2 now renders methods such as domain-sharding obsolete.
Apart from requiring only one connection per origin and allowing multiple requests at the same time (multiplexing), HTTP/2 offers other benefits:
- Server push. Pushes additional resources that it thinks the client will require in the future.
- Header compression. Reduces the size of headers by using HPACK header compression.
- Binary. Unlike in HTTP 1.1, which was textual, binary reduces the time required to translate text to binary and makes it easier for a server to parse.
- Prioritization. Priority levels are associated with requests, thereby allowing resources of higher importance to be delivered first.
Enabling HTTP/2
Regardless of how you’re delivering the majority of your content, whether from your origin server or a CDN, most providers now support HTTP/2. Determining whether a provider supports HTTP/2 should be fairly easy by going to its features page and checking around. As for CDN providers, Is TLS Fast Yet? provides a comprehensive list of CDN services and marks whether they support HTTP/2.
If you want to check for yourself whether your website currently uses HTTP/2, then you’ll need to get the latest version of cURL and run the following command:
curl --http2 https://yourwebsite.comAlternatively, if you’re not comfortable using the command line, you can open up Chrome’s Developer Tools and navigate to the “Network” tab. Under the “Protocol” column, you should see the value h2.
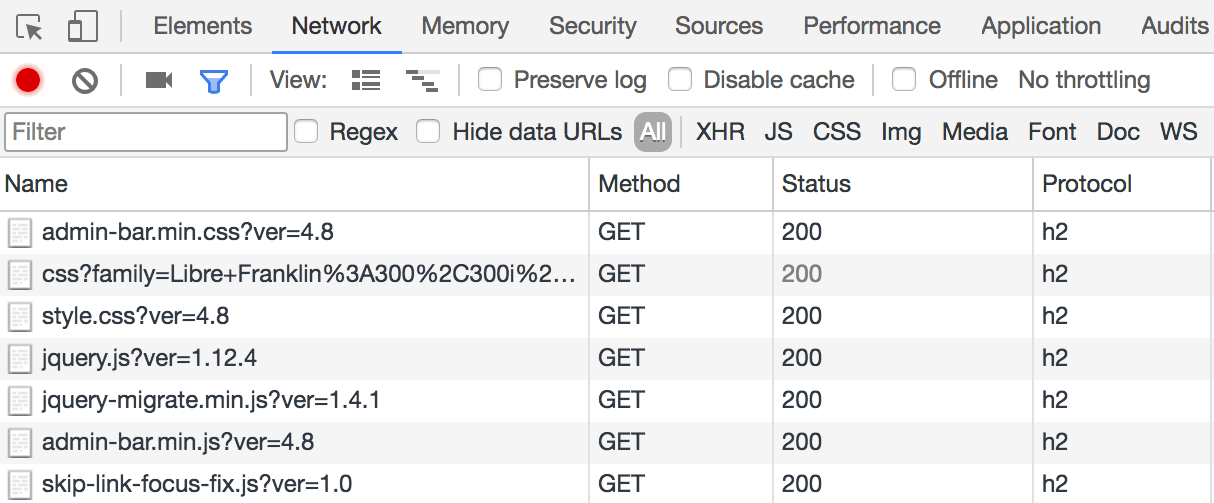
h2 (View large version)Enabling HTTP/2 On nginx
If you’re running your own server and are using an outdated software version, then you’ll need to upgrade it to a version that supports HTTP/2. For nginx users, the process is pretty straightforward. Simply ensure that you’re running nginx version 1.9.5 or higher, and add the following listen directive within the server block of your configuration file:
listen 443 ssl http2;Enabling HTTP/2 On Apache
For Apache users, the process involves a few more steps. Apache users must update their system to version 2.4.17 or higher in order to make use of HTTP/2. They’ll also need to build HTTPS with the mod_http2 Apache module, load the module, and then define the proper server configuration. An outline of how to configure HTTP/2 on an Apache server can be found in the Apache HTTP/2 guide.
No matter which web server you’re using, your website will need to be running on HTTPS in order to take advantage of the benefits of HTTP/2.
HTTP/2 Vs. HTTP 1.1: Performance Test
You can test the performance of HTTP/2 compared to HTTP 1.1 manually by running an online speed test before and after enabling HTTP/2 or by checking your browser’s development console.
Based on the structure and number of assets that your website loads, you might experience different levels of improvement. For instance, a website with a large number of resources will require multiple connections over HTTP 1.1 (thus increasing the number of round trips required), whereas on HTTP/2 it will require only one.
The results below are the findings for a default WordPress installation using the 2017 theme and loading 18 image assets. Each setup was tested three times on a 100 Mbps connection, and the average overall loading time was used as the final result. Firefox was used to examine the waterfall structure of these tests.
The first test below shows the results over HTTP 1.1. In total, the entire page took an average of 1.73 seconds to fully load, and various lengths of blocked time were incurred (as seen by the red bars).
When testing the exact same website, only this time over HTTP/2, the results were quite different. Using HTTP/2, the average loading time of the entire page took 1.40 seconds, and the amount of blocked time incurred was negligible.
Just by switching to HTTP/2, the average savings in loading time ended up being 330 milliseconds. That being said, the more resources your website loads, the more connections must be made. So, if your website loads a lot of resources, then implementing HTTP/2 is a must.
3. Brotli Compression
The third technology is Brotli, a compression algorithm developed by Google back in 2015. Brotli continues to grow in popularity, and currently all popular web browsers support it (with the exception of Internet Explorer). Compared to Gzip, Brotli still has some catching up to do in global availability (i.e. in CMS plugins, server support, CDN support, etc.).
However, Brotli has shown some impressive compression results compared to other methods. For instance, according to Google’s algorithm study, Brotli outperformed Zopfli (another modern compression method) by 20 to 26% in compression ratio.
Enabling Brotli
Depending on which web server you’re running, implementation of Brotli will be different. You’ll need to use the method appropriate to your setup. If you’re using nginx, Apache or Microsoft IIS, then the following modules are available to enable Brotli.
- ngx_brotli, nginx module
- mod_brotli, Apache module
- IIS Brotli, Microsoft IIS community-contributed extension
Once you’ve finished downloading and installing one of the modules above, you’ll need to configure the directives to your liking. When doing this, pay attention to three things:
- File type. The types of files that can be compressed with Brotli include CSS, JavaScript, XML and HTML.
- Compression quality. The quality of compression will depend on the amount of compression you want to achieve in exchange for time. The higher the compression level, the more time and resources will be required, but the greater the savings in size. Brotli’s compression value can be defined anywhere from 1 to 11.
- Static versus dynamic compression. The stage at which you would like Brotli compression to take place will determine whether to implement static or dynamic compression:
- Static compression pre-compresses assets ahead of time — before the user actually makes a request. Therefore, once the request is made, there is no need for Brotli to compress the asset — it will already have been compressed and, hence, can be served immediately. This feature comes built-in with the nginx Brotli module, whereas implementing static compression with Apache requires some configuration.
- Dynamic compression occurs on the fly. In other words, once a visitor makes a request for a Brotli-compressible asset, the asset is compressed on the spot and subsequently delivered. This is useful for dynamic content that needs to be compressed upon each request, the downside being that the user must wait for the asset to be compressed before it is delivered.
A Brotli configuration for nginx users might look similar to the snippet below. This example sets compression to occur dynamically (on the fly), defines a quality level of 5 and specifies various file types.
brotli on;
brotli_comp_level 5;
brotli_types text/plain text/css application/json application/javascript application/x-javascript text/xml application/xml application/xml+rss text/javascript;
To verify that Brotli is enabled on your server, you can open up Chrome’s Developer Tools, navigate to the “Network” tab, select an asset, and check the Content-Encoding header. This should now be br. Note that Brotli requires HTTPS, so if you’ve correctly gone through the installation and configuration process but still don’t see the br value, then you’ll need to migrate to HTTPS.
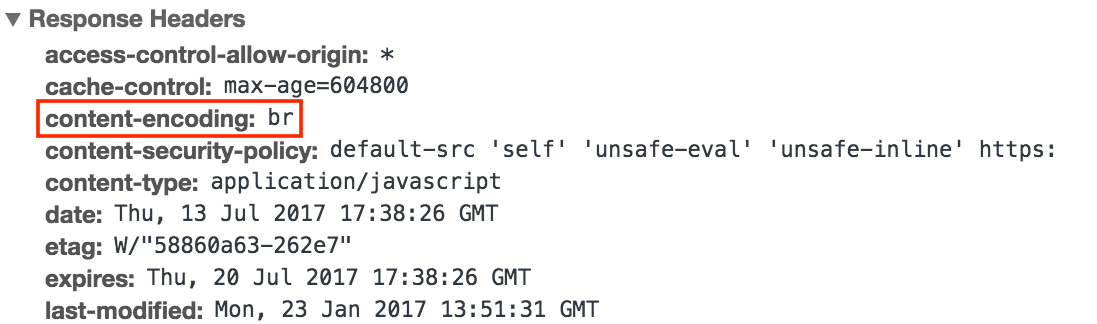
br (View large version)Otherwise, you can run a simple cURL command, such as:
curl -I https://yourwebsite.com/path/to/your/asset.jsThis will return a list of response headers, where you can also check for the Content-Encoding header value. If you're using WordPress and want to take things a step further by delivering a Brotli-compressed HTML document, check out my WordPress guide to Brotli to learn how.
Brotli Vs. Gzip: Performance Test
To compare Brotli and Gzip compression, we'll take three compressible web assets and compare them in size and loading speed. Both compression methods were defined with a level 5 compression value.
Having tested the assets three times and taking the average loading speed of each, the results were as follows:
| Asset name | Gzip size | Gzip loading time | Brotli size | Brotli loading time |
|---|---|---|---|---|
| jquery.js | 33.4 KB | 308 ms | 32.3 KB | 273 ms |
| dashicons.min.css | 28.1 KB | 148 ms | 27.9 KB | 132 ms |
| style.css | 15.7 KB | 305 ms | 14.5 KB | 271 ms |
Overall, the Gzipped assets were 77.2 KB in total size, while the Brotli assets were 74.7 KB. That's a 3.3% reduction in overall page size just from using Brotli compression on three assets. As for loading time, the Gzip assets had a combined total time of 761 milliseconds, while the Brotli assets took 676 milliseconds to load — an improvement of 12.6%.
4. WebP Images
Our fourth suggestion is to use the image format that goes by the name of WebP. Like Brotli, WebP was developed by Google for the purpose of making images smaller. Like JPEG and PNG, WebP is an image format. The primary advantage of serving WebP images is that they are much smaller in size than JPEGs and PNGs. Typically, savings of up to 80% can be achieved after converting a JPEG or PNG to WebP.
The downside of the WebP image format is that not all browsers support it. At the time of writing, only Chrome and Opera do. However, with proper configuration, you can deliver WebP images to supporting browsers, while delivering a fallback image format (such as JPEG) to non-supporting browsers.
WebP still has a way to go before becoming as widespread as JPEG and PNG. However, thanks to its impressive savings in size, it stands a good chance of continued growth. Overall, WebP reduces total page size, speeds up website loading and saves bandwidth.
How To Convert To And Deliver WebP
A few options are available to convert images to WebP format. If you use a popular CMS such as WordPress, Joomla or Magento, Plugins are available that enable you to convert images directly within the CMS’ dashboard.
On the other hand, if you want to take a manual approach, online WebP image converters are available, and certain image-processing apps even come with a WebP format option that you can export to, thereby saving you from having to convert anything at all.
Lastly, if you prefer a more integrated approach, certain image-processing services provide an API that you can use to integrate directly in your web project, enabling you to convert images automatically.
As mentioned, not all browsers currently support WebP images. Therefore, if you serve an image on your website with only a .webp extension, non-supporting browsers will return a broken image. That's why a fallback is important. Let's go over three ways to achieve this.
1. Use The picture Element
This method allows you to define the path of a WebP image, as well as the path of the original JPEG within the website's HTML. With this method, supporting browsers will display the WebP images, while all other browsers will display the default image defined in the last nested child tag within the picture block. Consider the following example:
<picture>
    <source srcset="images/my-webp-image.webp" type="image/webp">
    <img src="images/my-jpg-image.jpg" alt="My image">
</picture>
This method implements WebP functionality most widely, while ensuring that a fallback mechanism is in place. However, it might require a lot of modification to the HTML, depending on how large your application is.
2. Modify The Server’s Config File
This method uses rewrite rules defined in the server's config file to fall back to a supported image format if the browser doesn't support WebP. Use the appropriate snippet for Apache or nginx according to your web server, and adjust the path/images directory accordingly.
For Apache:
RewriteEngine On
RewriteCond %{HTTP_ACCEPT} image/webp
RewriteCond %{DOCUMENT_ROOT}/$1.webp -f
RewriteRule ^(path/images.+)\.(jpe?g|png)$ $1.webp [T=image/webp,E=accept:1]

Header append Vary Accept env=REDIRECT_accept
AddType image/webp .webp
For nginx:
# http config block
map $http_accept $webp_ext {
    default "";
    "~*webp" ".webp";
}

# server config block
location ~* ^(path/images.+)\.(png|jpg)$ {
    add_header Vary Accept;
    try_files $1$webp_ext $uri =404;
}
The downside of this method is that it is not recommended if you are going to be using WebP images in conjunction with a CDN. The reason is that the CDN will cache a WebP image if a WebP-supported browser is the first one to request the asset. Therefore, any subsequent requests will return the WebP image, whether the browser supports it or not.
3. Use A WordPress Caching Plugin
If you're a WordPress user and need a solution that will deliver WebP images to supporting browsers while falling back to JPEGs and PNGs for others, all the while being compatible with a CDN, then you can use a caching plugin such as Cache Enabler. If you define within the plugin that you want to create an additional cached version for WebP, then the plugin will deliver a WebP-cached version to supporting browsers, while falling back to HTML or HTML Gzip for other browsers.
WebP Vs. JPEG: Performance Tests
To demonstrate the difference in size between a WebP and JPEG image, we'll take three JPEG images, convert them to WebP, and compare the output to the originals. The three images are shown below and carry a size of 2.1 MB, 4.3 MB and 3.3 MB, respectively.


When converted to WebP format, each image reduced significantly in size. The table below outlines the sizes of the original images, the sizes of the WebP versions, and how much smaller the WebP images are than the JPEGs. The images were converted to WebP using lossy compression, with a quality level of 80.
| Image name | JPEG size | WebP size | Percentage smaller |
|---|---|---|---|
| test-jpg-1 | 2.1 MB | 1.1 MB | 48% |
| test-jpg-2 | 4.3 MB | 1 MB | 77% |
| test-jpg-3 | 3.3 MB | 447 KB | 85.9% |
You can compress WebP images using either a lossless (i.e. no quality loss) or lossy (i.e. some quality loss) method. The tradeoff for quality is a smaller image size. If you want to implement lossy compression for additional savings in size, doing so with WebP will render a better quality picture at a smaller size, as opposed to a lossy JPEG at the same level of quality. David Walsh has written a comprehensive post outlining the size and quality differences between WebP, JPEG and PNG.
5. Content Delivery Network
The last suggestion is to use a content delivery network (CDN). A CDN accelerates web assets globally by caching them across a cluster of servers. When a website uses a CDN, it essentially offloads the majority of its traffic to the CDN's edge servers and routes its visitors to the nearest CDN server.
CDNs store a website's resources for a predefined period of time thanks to caching. With caching, a CDN's server creates a copy of the origin server's web asset and store it on its own server. This process makes web requests much more efficient, given that visitors will be accessing your website from multiple geographic regions.
If no CDN has been configured, then all of your visitors' requests will go to the origin server's location, wherever that may be. This creates additional latency, especially for visitors who are requesting assets from a location far away from the origin server. However, with a CDN configured, visitors will be routed to the CDN provider's nearest edge server to obtain the requested resources, thus minimizing request and response times.
Setting Up A CDN
The process for setting up a CDN will vary according to the CMS or framework you're using. However, at a high level, the process is more or less the same:
- Create a CDN zone that points to your origin URL (https://yourwebsite.com).
- Create a CNAME record to point a custom CDN URL (cdn.yourwebsite.com) to the URL provided by your CDN service.
- Use your custom CDN URL to integrate the CDN with your website (make sure to follow the guide appropriate to your website's setup).
- Check your website's HTML to verify that the static assets are being called using the CDN's URL that you defined and not the origin URL.
Once this is complete, you'll be delivering your website's static assets from the CDN's edge servers instead of your own. This will not only improve website speed, but will also enhance security, reduce the load on your origin server and increase redundancy.
Before And After Using A CDN: Performance Test
Because a CDN, by nature, has multiple server locations, performance tests will vary according to where you are requesting an asset from and where the CDN's closest server is. Therefore, for the sake of simplicity, we'll choose three locations from which to perform our tests:
- Frankfurt, Germany
- New York, United States
- Toronto, Canada.
As for the assets to be tested, we chose to measure the loading times of an image, a CSS file and a JavaScript file. The results of each test, both with and without a CDN enabled, are outlined in the table below:
| Frankfurt, Germany | New York, United States | Toronto, Canada | |
|---|---|---|---|
| Image, no CDN | 222 ms | 757 ms | 764 ms |
| Image, with CDN | 32 ms | 81 ms | 236 ms |
| JavaScript file, no CDN | 90 ms | 441 ms | 560 ms |
| JavaScript file, with CDN | 30 ms | 68 ms | 171 ms |
| CSS file, no CDN | 96 ms | 481 ms | 553 ms |
| CSS file, with CDN | 31 ms | 77 ms | 148 ms |
In all cases, the loading times for assets loaded through a CDN were faster than without a CDN. Results will vary according to the location of the CDN and your visitors; however, in general, performance should be boosted.
Conclusion
If you're looking for ways to increase your website's performance and security, these five methods are all great options. Not only are they all relatively easy to implement, but they'll also modernize your overall stack.
Some of these technologies are still in the process of being globally adopted (in terms of browser support, plugin support, etc.); however, as demand increases, so will compatibility. Thankfully, there are ways to implement some of the technologies (such as Brotli and WebP images) for browsers that support them, while falling back to older methods for browsers that do not.
As a final note, if you haven't already migrated your website to HTTPS, do so as soon as possible. HTTPS is now the standard and is required in order to use certain technologies, such as HTTP/2 and Brotli. Your website will be more secure overall, will perform faster (thanks to HTTP/2) and will look better in the eyes of Google.
Further Reading
- Modern Methods For Improving Drupal’s Largest Contentful Paint Core Web Vital
- Preparing For Interaction To Next Paint, A New Web Core Vital
- The Safest Way To Hide Your API Keys When Using React
- Passkeys: A No-Frills Explainer On The Future Of Password-Less Authentication


