How To Make A Drag-and-Drop File Uploader With Vanilla JavaScript

Email Newsletter
Weekly tips on front-end & UX.
Trusted by 182,000+ folks.

 Custom Web Forms for Angular, React, & Vue. Your backend.

 Celebrating 10 million developers
It’s a known fact that file selection inputs are difficult to style the way developers want to, so many simply hide it and create a button that opens the file selection dialog instead. Nowadays, though, we have an even fancier way of handling file selection: drag and drop.
Technically, this was already possible because most (if not all) implementations of the file selection input allowed you to drag files over it to select them, but this requires you to actually show the file element. So, let’s actually use the APIs given to us by the browser to implement a drag-and-drop file selector and uploader.
In this article, we’ll be using “vanilla” ES2015+ JavaScript (no frameworks or libraries) to complete this project, and it is assumed that you have a working knowledge of JavaScript in the browser. This example — aside from the ES2015+ syntax, which can easily changed to ES5 syntax or transpiled by Babel — should be compatible with every evergreen browser plus IE 10 and 11.
Here’s a quick look at what you’ll be making:
Drag-And-Drop Events
The first thing we need to discuss is the events related to drag-and-drop because they are the driving force behind this feature. In all, there are eight events the browser fires related to drag and drop: drag, dragend, dragenter, dragexit, dragleave, dragover, dragstart, and drop. We won’t be going over all of them because drag, dragend, dragexit, and dragstart are all fired on the element that is being dragged, and in our case, we’ll be dragging files in from our file system rather than DOM elements, so these events will never pop up.
If you’re curious about them, you can read some documentation about these events on MDN.
As you might expect, you can register event handlers for these events in the same way you register event handlers for most browser events: via addEventListener.
let dropArea = document.getElementById('drop-area')

  dropArea.addEventListener('dragenter', handlerFunction, false)
  dropArea.addEventListener('dragleave', handlerFunction, false)
  dropArea.addEventListener('dragover', handlerFunction, false)
  dropArea.addEventListener('drop', handlerFunction, false)
Here’s a little table describing what these events do, using dropArea from the code sample in order to make the language clearer:
| Event | When Is It Fired? |
|---|---|
dragenter | The dragged item is dragged over dropArea, making it the target for the drop event if the user drops it there. |
dragleave | The dragged item is dragged off of dropArea and onto another element, making it the target for the drop event instead. |
dragover | Every few hundred milliseconds, while the dragged item is over dropArea and is moving. |
drop | The user releases their mouse button, dropping the dragged item onto dropArea. |
Note that the dragged item is dragged over a child of dropArea, dragleave will fire on dropArea and dragenter will fire on that child element because it is the new target. The drop event will propagate up to dropArea (unless propagation is stopped by a different event listener before it gets there), so it’ll still fire on dropArea despite it not being the target for the event.
Also note that in order to create custom drag-and-drop interactions, you’ll need to call event.preventDefault() in each of the listeners for these events. If you don’t, the browser will end up opening the file you dropped instead of sending it along to the drop event handler.
Setting Up Our Form
Before we start adding drag-and-drop functionality, we’ll need a basic form with a standard file input. Technically this isn’t necessary, but it’s a good idea to provide it as an alternative in case the user has a browser without support for the drag-and-drop API.
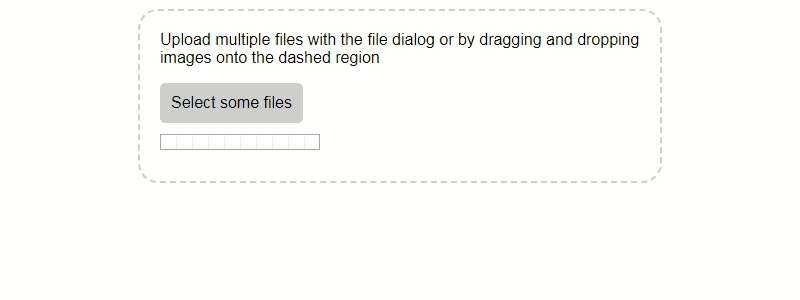
<div id="drop-area">
  <form class="my-form">
    <p>Upload multiple files with the file dialog or by dragging and dropping images onto the dashed region</p>
    <input type="file" id="fileElem" multiple accept="image/*" onchange="handleFiles(this.files)">
    <label class="button" for="fileElem">Select some files</label>
  </form>
</div>
Pretty simple structure. You may notice an onchange handler on the input. We’ll take a look at that later. It would also be a good idea to add an action to the form and a submit button to help out those people who don’t have JavaScript enabled. Then you can use JavaScript to get rid of them for a cleaner form. In any case, you will need a server-side script to accept the upload, whether it’s something developed in-house, or you’re using a service like Cloudinary to do it for you. Other than those notes, there’s nothing special here, so let’s throw some styles in:
#drop-area {
  border: 2px dashed #ccc;
  border-radius: 20px;
  width: 480px;
  font-family: sans-serif;
  margin: 100px auto;
  padding: 20px;
}
#drop-area.highlight {
  border-color: purple;
}
p {
  margin-top: 0;
}
.my-form {
  margin-bottom: 10px;
}
#gallery {
  margin-top: 10px;
}
#gallery img {
  width: 150px;
  margin-bottom: 10px;
  margin-right: 10px;
  vertical-align: middle;
}
.button {
  display: inline-block;
  padding: 10px;
  background: #ccc;
  cursor: pointer;
  border-radius: 5px;
  border: 1px solid #ccc;
}
.button:hover {
  background: #ddd;
}
#fileElem {
  display: none;
}
Many of these styles aren’t coming into play yet, but that’s OK. The highlights, for now, are that the file input is hidden, but its label is styled to look like a button, so people will realize they can click it to bring up the file selection dialog. We’re also following a convention by outlining the drop area with dashed lines.
Adding The Drag-And-Drop Functionality
Now we get to the meat of the situation: drag and drop. Let’s throw a script in at the bottom of the page, or in a separate file, however you feel like doing it. The first thing we need in the script is a reference to the drop area so we can attach some events to it:
let dropArea = document.getElementById('drop-area')
Now let’s add some events. We’ll start off with adding handlers to all the events to prevent default behaviors and stop the events from bubbling up any higher than necessary:
;['dragenter', 'dragover', 'dragleave', 'drop'].forEach(eventName => {
  dropArea.addEventListener(eventName, preventDefaults, false)
})

function preventDefaults (e) {
  e.preventDefault()
  e.stopPropagation()
}
Now let’s add an indicator to let the user know that they have indeed dragged the item over the correct area by using CSS to change the color of the border color of the drop area. The styles should already be there under the #drop-area.highlight selector, so let’s use JS to add and remove that highlight class when necessary.
;['dragenter', 'dragover'].forEach(eventName => {
  dropArea.addEventListener(eventName, highlight, false)
})

;['dragleave', 'drop'].forEach(eventName => {
  dropArea.addEventListener(eventName, unhighlight, false)
})

function highlight(e) {
  dropArea.classList.add('highlight')
}

function unhighlight(e) {
  dropArea.classList.remove('highlight')
}
We had to use both dragenter and dragover for the highlighting because of what I mentioned earlier. If you start off hovering directly over dropArea and then hover over one of its children, then dragleave will be fired and the highlight will be removed. The dragover event is fired after the dragenter and dragleave events, so the highlight will be added back onto dropArea before we see it being removed.
We also remove the highlight when the dragged item leaves the designated area or when you drop the item.
Now all we need to do is figure out what to do when some files are dropped:
dropArea.addEventListener('drop', handleDrop, false)

function handleDrop(e) {
  let dt = e.dataTransfer
  let files = dt.files

  handleFiles(files)
}
This doesn’t bring us anywhere near completion, but it does two important things:
- Demonstrates how to get the data for the files that were dropped.
- Gets us to the same place that the
fileinputwas at with itsonchangehandler: waiting forhandleFiles.
Keep in mind that files is not an array, but a FileList. So, when we implement handleFiles, we’ll need to convert it to an array in order to iterate over it more easily:
function handleFiles(files) {
  ([...files]).forEach(uploadFile)
}
That was anticlimactic. Let’s get into uploadFile for the real meaty stuff.
function uploadFile(file) {
  let url = 'YOUR URL HERE'
  let formData = new FormData()

  formData.append('file', file)

  fetch(url, {
    method: 'POST',
    body: formData
  })
  .then(() => { /* Done. Inform the user */ })
  .catch(() => { /* Error. Inform the user */ })
}
Here we use FormData, a built-in browser API for creating form data to send to the server. We then use the fetch API to actually send the image to the server. Make sure you change the URL to work with your back-end or service, and formData.append any additional form data you may need to give the server all the information it needs.
Alternatively, if you want to support Internet Explorer, you may want to use XMLHttpRequest, which means uploadFile would look like this instead:
function uploadFile(file) {
  var url = 'YOUR URL HERE'
  var xhr = new XMLHttpRequest()
  var formData = new FormData()
  xhr.open('POST', url, true)

  xhr.addEventListener('readystatechange', function(e) {
    if (xhr.readyState == 4 && xhr.status == 200) {
      // Done. Inform the user
    }
    else if (xhr.readyState == 4 && xhr.status != 200) {
      // Error. Inform the user
    }
  })

  formData.append('file', file)
  xhr.send(formData)
}
Depending on how your server is set up, you may want to check for different ranges of status numbers rather than just 200, but for our purposes, this will work.
Additional Features
That is all of the base functionality, but often we want more functionality. Specifically, in this tutorial, we’ll be adding a preview pane that displays all the chosen images to the user, then we’ll add a progress bar that lets the user see the progress of the uploads. So, let’s get started with previewing images.
Image Preview
There are a couple of ways you could do this: you could wait until after the image has been uploaded and ask the server to send the URL of the image, but that means you need to wait and images can be pretty large sometimes. The alternative — which we’ll be exploring today — is to use the FileReader API on the file data we received from the drop event. This is asynchronous, and you could alternatively use FileReaderSync, but we could be trying to read several large files in a row, so this could block the thread for quite a while and really ruin the experience. So let’s create a previewFile function and see how it works:
function previewFile(file) {
  let reader = new FileReader()
  reader.readAsDataURL(file)
  reader.onloadend = function() {
    let img = document.createElement('img')
    img.src = reader.result
    document.getElementById('gallery').appendChild(img)
  }
}
Here we create a new FileReader and call readAsDataURL on it with the File object. As mentioned, this is asynchronous, so we need to add an onloadend event handler in order to get the result of the read. We then use the base 64 data URL as the src for a new image element and add it to the gallery element. There are only two things that need to be done to make this work now: add the gallery element, and make sure previewFile is actually called.
First, add the following HTML right after the end of the form tag:
<div id="gallery"></div>
Nothing special; it’s just a div. The styles are already specified for it and the images in it, so there’s nothing left to do there. Now let’s change the handleFiles function to the following:
function handleFiles(files) {
  files = [...files]
  files.forEach(uploadFile)
  files.forEach(previewFile)
}
There are a few ways you could have done this, such as composition, or a single callback to forEach that ran uploadFile and previewFile in it, but this works too. And with that, when you drop or select some images, they should show up almost instantly below the form. The interesting thing about this is that — in certain applications — you may not actually want to upload images, but instead store the data URLs of them in localStorage or some other client-side cache to be accessed by the app later. I can’t personally think of any good use cases for this, but I’m willing to bet there are some.
Tracking Progress
If something might take a while, a progress bar can help a user realize progress is actually being made and give an indication of how long it will take to be completed. Adding a progress indicator is pretty easy thanks to the HTML5 progress tag. Let’s start by adding that to the HTML code this time.
<progress id="progress-bar" max=100 value=0></progress>
You can plop that in right after the label or between the form and gallery div, whichever you fancy more. For that matter, you can place it wherever you want within the body tags. No styles were added for this example, so it will show the browser’s default implementation, which is serviceable. Now let’s work on adding the JavaScript. We’ll first look at the implementation using fetch and then we’ll show a version for XMLHttpRequest. To start, we’ll need a couple of new variables at the top of the script :
let filesDone = 0
let filesToDo = 0
let progressBar = document.getElementById('progress-bar')
When using fetch we’re only able to determine when an upload is finished, so the only information we track is how many files are selected to upload (as filesToDo) and the number of files that have finished uploading (as filesDone). We’re also keeping a reference to the #progress-bar element so we can update it quickly. Now let’s create a couple of functions for managing the progress:
function initializeProgress(numfiles) {
  progressBar.value = 0
  filesDone = 0
  filesToDo = numfiles
}

function progressDone() {
  filesDone++
  progressBar.value = filesDone / filesToDo * 100
}
When we start uploading, initializeProgress will be called to reset the progress bar. Then, with each completed upload, we’ll call progressDone to increment the number of completed uploads and update the progress bar to show the current progress. So let’s call these functions by updating a couple of old functions:
function handleFiles(files) {
  files = [...files]
  initializeProgress(files.length) // <- Add this line
  files.forEach(uploadFile)
  files.forEach(previewFile)
}

function uploadFile(file) {
  let url = 'YOUR URL HERE'
  let formData = new FormData()

  formData.append('file', file)

  fetch(url, {
    method: 'POST',
    body: formData
  })
  .then(progressDone) // <- Add `progressDone` call here
  .catch(() => { /* Error. Inform the user */ })
}
And that’s it. Now let’s take a look at the XMLHttpRequest implementation. We could just make a quick update to uploadFile, but XMLHttpRequest actually gives us more functionality than fetch, namely we’re able to add an event listener for upload progress on each request, which will periodically give us information about how much of the request is finished. Because of this, we need to track the percentage completion of each request instead of just how many are done. So, let’s start with replacing the declarations for filesDone and filesToDo with the following:
let uploadProgress = []
Then we need to update our functions as well. We’ll rename progressDone to updateProgress and change them to be the following:
function initializeProgress(numFiles) {
  progressBar.value = 0
  uploadProgress = []

  for(let i = numFiles; i > 0; i--) {
    uploadProgress.push(0)
  }
}

function updateProgress(fileNumber, percent) {
  uploadProgress[fileNumber] = percent
  let total = uploadProgress.reduce((tot, curr) => tot + curr, 0) / uploadProgress.length
  progressBar.value = total
}
Now initializeProgress initializes an array with a length equal to numFiles that is filled with zeroes, denoting that each file is 0% complete. In updateProgress we find out which image is having their progress updated and change the value at that index to the provided percent. We then calculate the total progress percentage by taking an average of all the percentages and update the progress bar to reflect the calculated total.
We still call initializeProgress in handleFiles the same as we did in the fetch example, so now all we need to update is uploadFile to call updateProgress.
function uploadFile(file, i) { // <- Add `i` parameter
  var url = 'YOUR URL HERE'
  var xhr = new XMLHttpRequest()
  var formData = new FormData()
  xhr.open('POST', url, true)

  // Add following event listener
  xhr.upload.addEventListener("progress", function(e) {
    updateProgress(i, (e.loaded * 100.0 / e.total) || 100)
  })

  xhr.addEventListener('readystatechange', function(e) {
    if (xhr.readyState == 4 && xhr.status == 200) {
      // Done. Inform the user
    }
    else if (xhr.readyState == 4 && xhr.status != 200) {
      // Error. Inform the user
    }
  })

  formData.append('file', file)
  xhr.send(formData)
}
The first thing to note is that we added an i parameter. This is the index of the file in the list of files. We don’t need to update handleFiles to pass this parameter in because it is using forEach, which already gives the index of the element as the second parameter to callbacks. We also added the progress event listener to xhr.upload so we can call updateProgress with the progress. The event object (referred to as e in the code) has two pertinent pieces of information on it: loaded which contains the number of bytes that have been uploaded so far and total which contains the number of bytes the file is in total.
The || 100 piece is in there because sometimes if there is an error, e.loaded and e.total will be zero, which means the calculation will come out as NaN, so the 100 is used instead to report that the file is done. You could also use 0. In either case, the error will show up in the readystatechange handler so that you can inform the user about them. This is merely to prevent exceptions from being thrown for trying to do math with NaN.
Conclusion
That’s the final piece. You now have a web page where you can upload images via drag and drop, preview the images being uploaded immediately, and see the progress of the upload in a progress bar. You can see the final version (with XMLHttpRequest) in action on CodePen, but be aware that the service I upload the files to has limits, so if a lot of people test it out, it may break for a time.
Further Reading
- SolidStart: A Different Breed Of Meta-Framework
- Web Development Is Getting Too Complex, And It May Be Our Fault
- Level Up Your CSS Skills With The :has() Selector
- Useful DevTools Tips and Tricks


