Learning Framer By Creating A Mobile App Prototype

Email Newsletter
Weekly tips on front-end & UX.
Trusted by 182,000+ folks.


 Celebrating 10 million developers
 Custom Web Forms for Angular, React, & Vue. Your backend.
The time of static user interfaces is long gone. Designing interactive prototypes is the best approach to expressing your ideas and explaining them to clients and stakeholders. Or, as Jerry Cao of UXPin puts it: "Nothing brings you closer to the functionality of the final product than prototyping. It is the prototype that brings to life the experience behind user experience."
Prototyping is an important part of the modern UX design process. I have tried many tools, and I think Framer Studio (powered by Framer Library) is one of the best when it comes to making user interface prototypes. So, in the following tutorial, I would like to teach you some Framer basics.
What will you learn? If you know what Framer is and would like to learn more about how to use it, or if you don't know what Framer is but would like to learn a bit more about advanced prototyping techniques, I believe this is the tutorial for you! By the end of the tutorial, you should be able to create a mobile app prototype, and you will also learn some CoffeeScript code. I will guide you along the way and will provide you with files to help you getting started more easily.

A Note About Framer Studio, Framer Library, Platforms And Shortcuts
Before we continue, an important note: This tutorial is about Framer Studio, which is a Mac-only app. Framer Studio is powered by Framer Library, which is open-source and free. The Framer Library itself can be used on all operating systems (Mac, Windows and Linux). So far, no Windows version of Framer Studio is available; however, there is a way to make Framer Library work on Windows OS with Atom. (If you're curious about the Windows bit, read "How to Run Framer JS on Windows". Also, note that, because I am using Framer Studio on a Mac, in my tutorial I will be using the Mac notation for shortcuts.
What Is Framer?
There are two main categories of prototyping tools (more on these later), but Framer is a tool that falls into a category of its own. You can use it for simple transitions and rapid prototyping, as well as for creating microinteractions and advanced animations. It gives you — the designer — the ultimate power to create interactions without any limitations imposed by a graphic user interface and predefined tools.
Learning Some Code
In Framer, the code is your ultimate design superpower. Does it mean you have to learn to code? Yes. Should designers code? This topic is ages old, and there have been some good points for both "yes" and "no"; here, I would like to present you with a slightly different take on the question.
In a recent article, Shawn Hickman said:
"There’s a constant debate about whether or not designers should learn to code. While I’m happy to talk about that at length, I think it’s helpful to look at it from a different perspective. What are you trying to accomplish? In my case, I wanted to ship a product."
And also:
"Framer is such an amazing tool for designers to learn how to code. Being able to see the results of your code live helped to teach me what was actually happening. Framer taught me basic things like variables, for-loops and functions. Nothing fancy, but totally necessary."
This brings me to my next important point. In my opinion, Framer is one of the most designer-friendly approaches to coding out there. And while prototypes are never made with production-ready code, programmers will still benefit and be able to use some information from your code. Finally, you will also get a better understanding of how everything works under the hood and will build some foundation for further development of your skills.
What Is CoffeeScript?
The language used in Framer is CoffeeScript. Great news for beginners: It's a simplified version of JavaScript, and so the learning curve is not too steep.
According to the official website:
"CoffeeScript is a language that compiles into JavaScript. It is an attempt to expose the good parts of JavaScript in a simple way."
There is one more great advantage to using CoffeeScript: It's essentially a web technology, so everything you create in Framer runs as JavaScript later on! To follow along in this tutorial, you'll have to know just a tiny bit of programming.
Useful Resources
Because we'll be writing some CoffeeScript, if you need any help getting started, I recommend you check out the following resources first:
- "Code," Framer
Framer's programming guide. - "Framer Course," Greg Rog
My video tutorial about CoffeeScript. - "An Introduction to CoffeeScript," Jeffrey Biles, SitePoint
- "Brief Introduction to CoffeeScript," JumpstartLab
- "Intro to Framer," Meng To
A highly recommended resource for learning a few key basic things about Framer.
Note On Framer Versions
The tutorial runs (and was tested) on Framer version 111. If you haven't yet updated to 111, I strongly recommend you download it and update. As for future updates to Framer, it's likely that a future version of Framer will introduce more new features and could have an impact on the code of this tutorial.
Why Is Prototyping Important?
Compare these approaches to presenting the same idea. You could use a wireframe, like this:

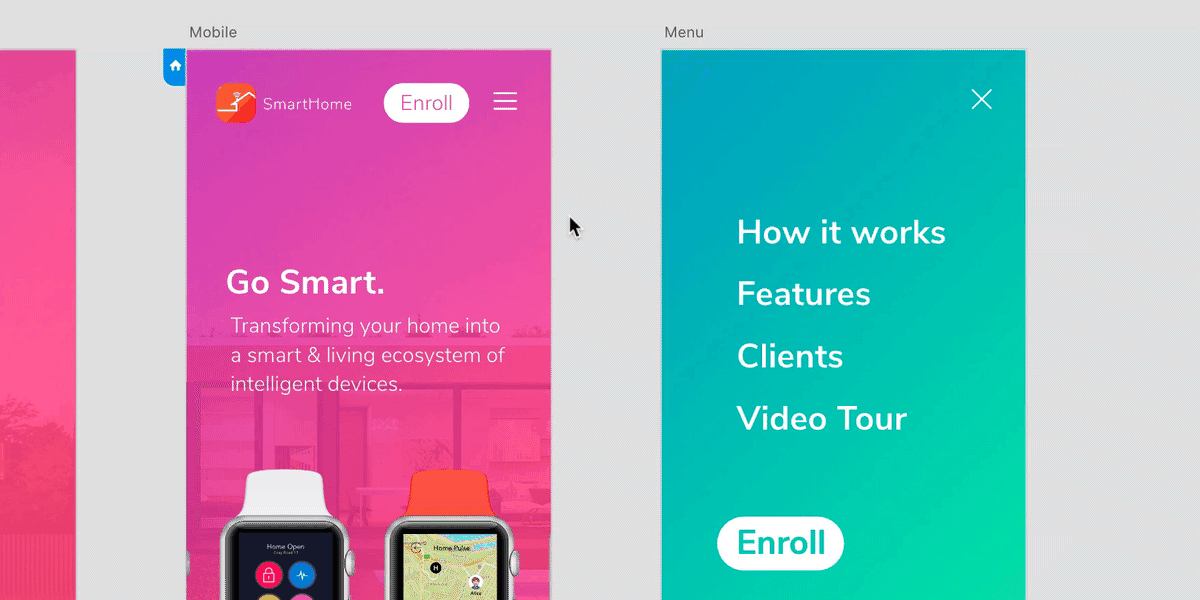
Or the same idea could be presented with a simple yet powerful prototype:

Imagine you're presenting this idea to a group of people. What do you think: Which one would perform better? Even if the wireframe contained more relevant information, it would have a lesser visual impact. And people tend not to read wireframe documentation carefully.
Explaining the idea with an interactive prototype would give them a better understanding of your vision. Sometimes, even a low-fidelity prototype speaks a thousand words. (The same idea was shared by Paul Boag: "People often have trouble imagining what better looks like. A prototype allows them to see it. It can sell the potential much better than any number of documents or presentations.")
"If a picture is worth 1000 words, a prototype is worth 1000 meetings."
— Daniel Burka, #aeadenver 2017
It happens often that you have to convince people whose knowledge of the concept being presented is limited. On the other hand, having a working prototype before the actual app is developed can bring you really meaningful insight from the user testing stage. That's why I believe prototyping is so important and appealing.
In general, you can divide prototypes into two main categories. First is rapid prototyping, where you link static screens with hotspots in order to create simple transitions. This can be accomplished with tools such as Marvel, Adobe XD and Figma.
The second category is detailed prototypes with microinteractions, such as animations focused on one task (for example, setting an alarm, picking an action, etc.). You can create this type of prototype with tools such as Principle, Flinto and Origami. Refining the prototype with animations gives you an opportunity to create a more engaging prototyping experience.

Remember I said that Framer is a tool that falls into a category of its own? This is because you can use it for both rapid prototyping, as well as for creating microinteractions and quite advanced animations. Let's see how!
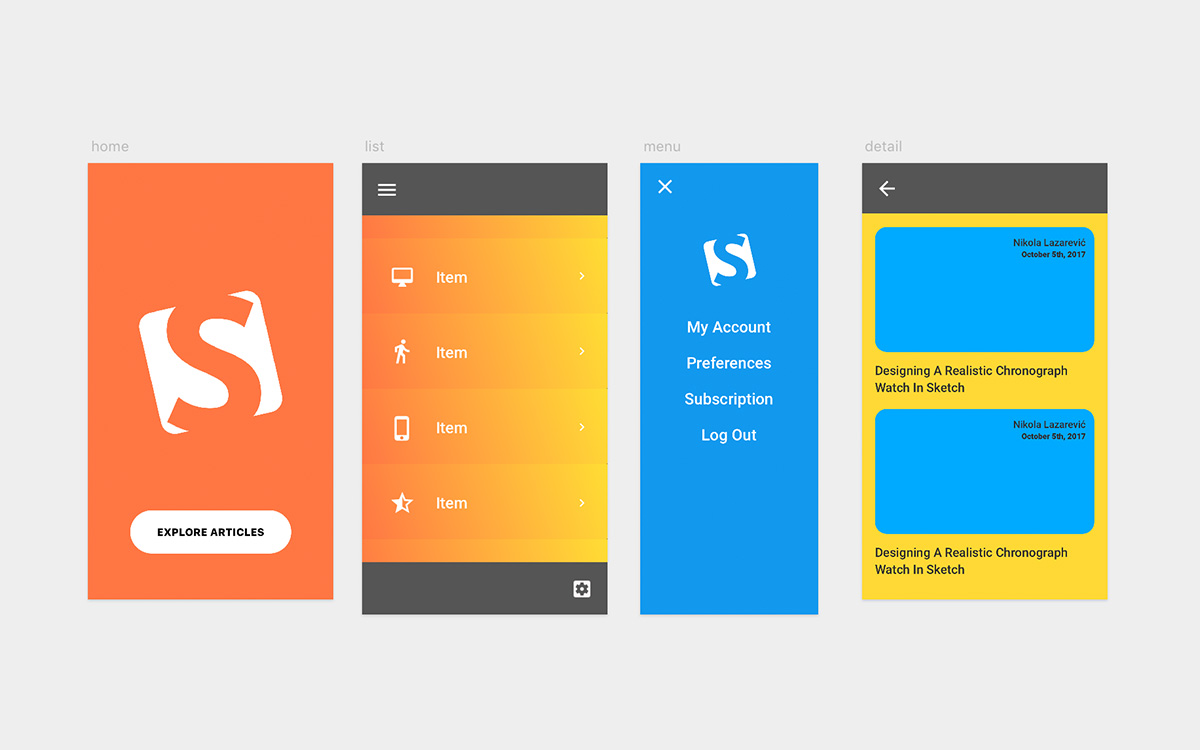
Your First Design Made With Framer
Let's start with Framer's user interface.
Framer has two well integrated views: code and design. You create your layouts and imagery in the design view, and then add all needed interactivity in the code view. In the code view, you will then be able to add animations and microinteractions. Framer is not supposed to replace the design tool of your choice (although, with the recent December update, Framer is also starting to aim at the screen design tools market, it seems; it posted an overview of the new design features), but for quick prototypes, the design view feels just fine.
Later on, with more sophisticated designs, you'll also be able to import files from Sketch or Figma. But first, let's jump right into the design view and create a simple layout using some basic design tools.
Working In Design View
When you first open Framer Studio, it will open in design view. You'll discover that most shortcuts you know from other design tools (such as Sketch) work here as well. Press A (or F) to switch to the Frame tool, and select a predefined iPhone 8 preset from the properties panel on the right.
Note: In the latest Framer update, artboards were renamed to "frames," and the whole concept has changed. What are frames exactly? Frames are smart layout containers that can be used as both screens and interface elements. Frames can also be used like slices to quickly export icons at specific sizes. If you know a bit of HTML, you could think of frames as div elements, and you can also nest frames inside of each other, to define layout elements such as navigation bars, tab bars, cards, buttons, etc. Later in the tutorial, sometimes I will refer to frames as "screens" (to give you a general idea that this is a separate screen of our app) — but, technically, screens are just frames.
You can read more about frames in the "Frames vs Shapes" help page.
A Note On Units
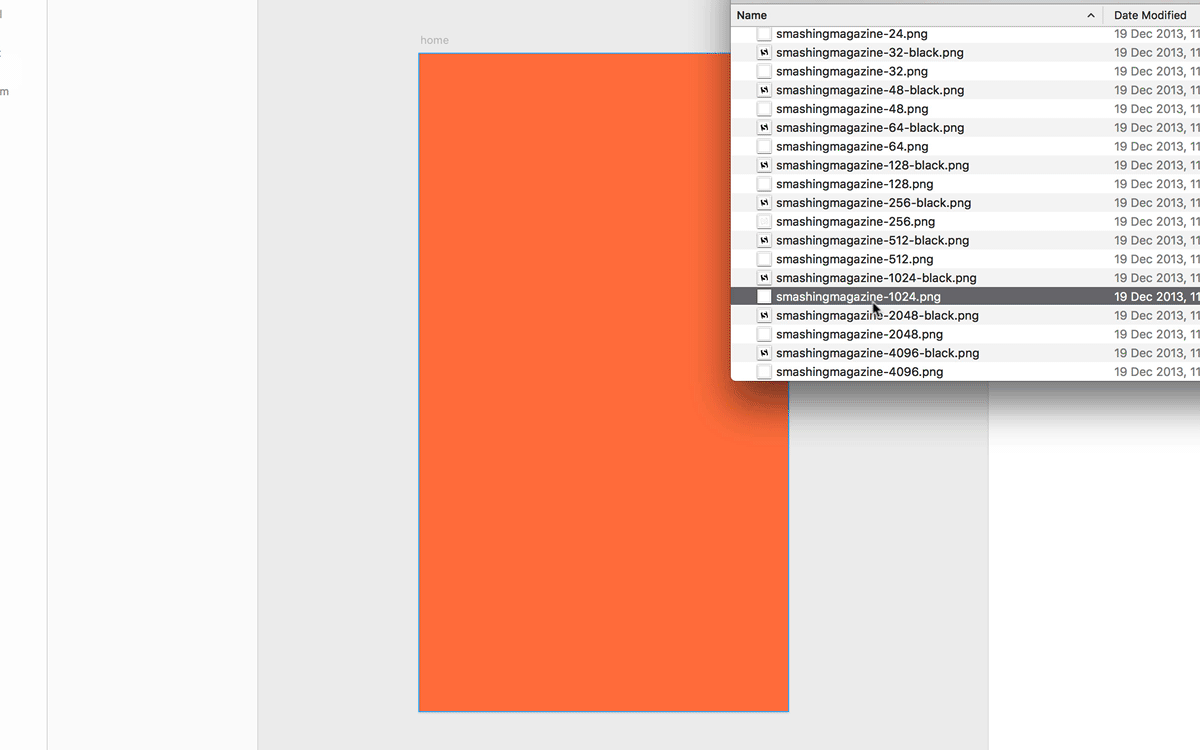
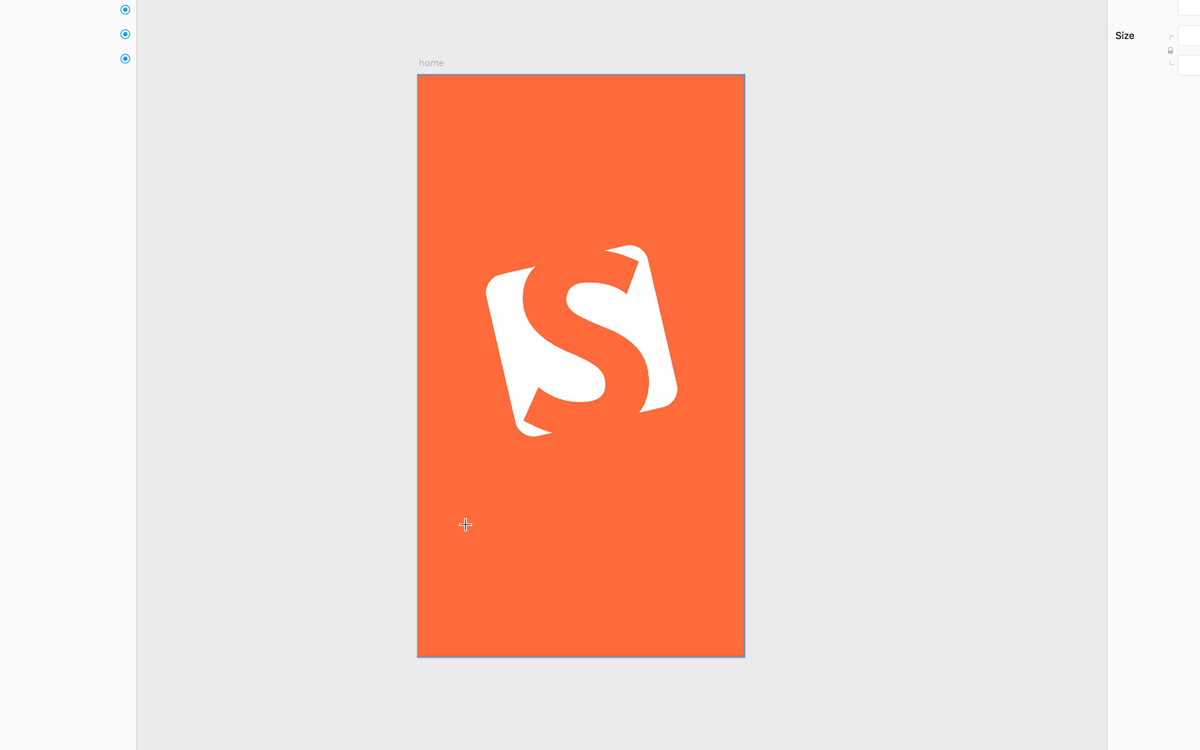
In Framer, we measure things in units called points. Each point can represent a different number of pixels, depending on the pixel density of the physical device you will be testing on. Because anything you design in Framer is created as a vector, there's little to worry about. Also, it's best to use vector SVG files, which are supported by Framer; if you have to import PNG or JPG files, make sure they are in a high enough resolution.
I've prepared the Smashing Magazine logo this way. To import it into Framer, I just drag and drop it on the canvas.
The last element in this frame is a simple button, made with the help of another nested frame (press F or A), with a text frame in it. Press T for the Text tool, and draw a text field from left to right, aligning the text to the center of the field in the properties panel, and adding some text.
Useful tip: Text is automatically applied as a sublayer to the frame object that you have created. To access it directly on the canvas, hold Command while clicking on it.
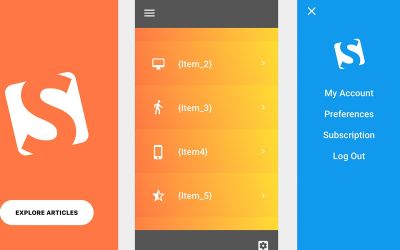
Let's design the second screen (frame). We'll be using a generic header and footer, which will be automatically applied to our prototype (this means you will skip the height of both the header and footer while working on the design).
The main element on this screen will be the list of six buttons, 115 points in height each. In total, our frames should be 6 × 115 = 690 points in height. Because it's slightly taller than the device itself, it will later scroll automatically in the preview. I used a hamburger icon from the icons panel:

I've also added some text fields, as well as gradients as a fill. Here's how it looks:
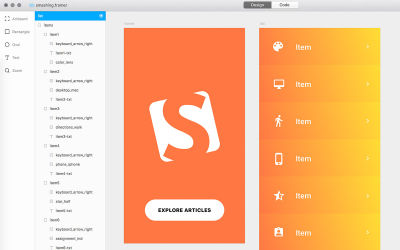
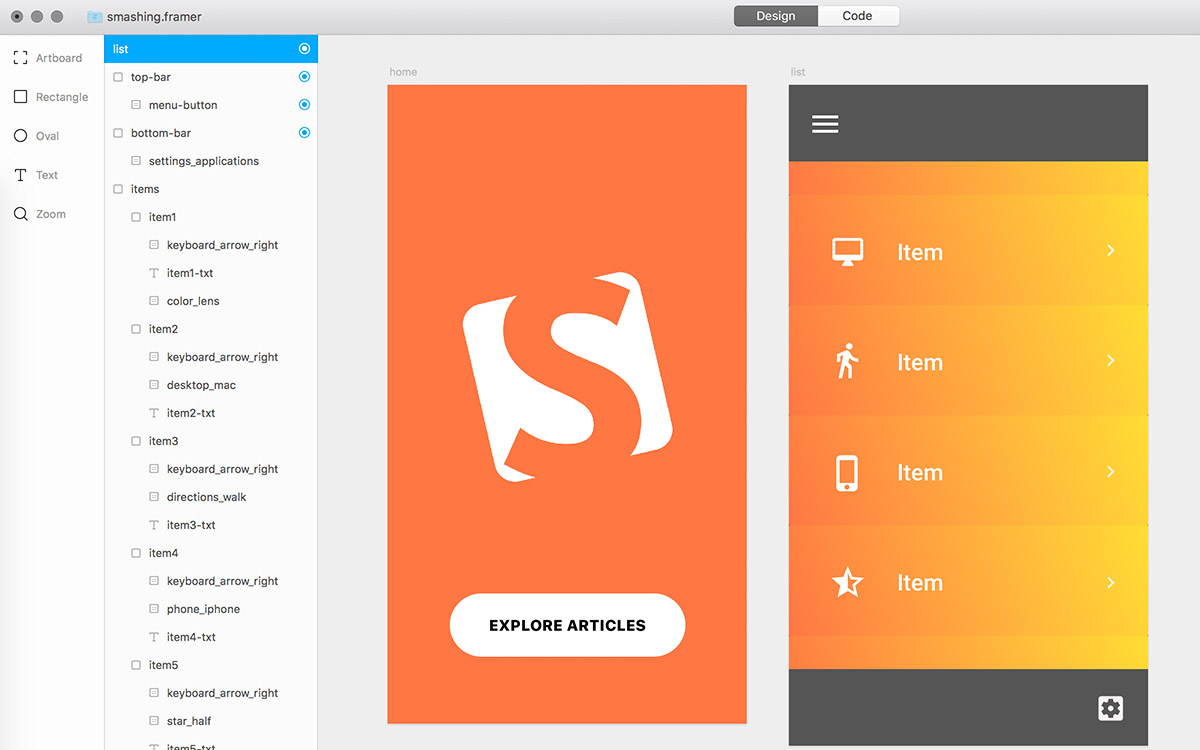
Let's select all of the buttons and press Command + Return to merge them into a new frame — a new container for these items (which I named "items"). Now, add top and bottom frames (which will be used for the header and footer), and then put them on top of the list items.
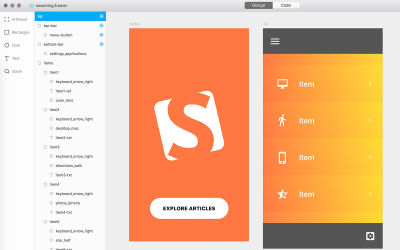
For the other frames, use similar simple shapes and tools to create the structure that you see below.
I won't go into the details of each design element because of the basic nature of the tools you'll be using. However, if you want to start with a ready-to-use Framer file, you can download one.
Before we continue, there are some things I'd like you to check out:
- The third screen with the menu has to be the same height as the tallest one (you can easily duplicate the previous frame by pressing Command + D).
- The naming convention for elements in the layers panel is critical. Please, keep it as is in my design file, or pay attention to how I bring their names.
Transition From Design To Code
To put things into motion, you'll need to access the code view. You can switch between views by pressing Command + 1 and Command + 2. Before you start coding interactions, you’ll have to enable frames from the design view to be available in the code view (they are not enabled by default). To enable a frame for working in code view, click on the target icon next to its name in the layers panel.
Now you can target this frame in the code simply by using its name.
Useful tip: Keep the naming convention for elements in the layers panel simple; try to avoid spaces and special signs; don't start a name with a digit. Using camelCase or underscores (_) is a good idea. But if you use dashes (-), you'll have to replace them with underscores (_) in the code.
First, make sure that all of the frames have been enabled for targeting them in the code view with the target icon (to see the full frames list, click anywhere on the blank canvas outside of any frame). Also, enable all of the frames inside the first frame for code view. Now, press Command + 2, and let's run some code!
Important update: As of the 20 December 2017 update of Framer (version 108), you could target in code only frames and text objects; but in a more recent update (version 109, released on 23 January 2018), the Framer team added the option to also target shapes and paths. While my tutorial uses only frames and text objects, it's also good to know that shapes and paths can now be targeted in code as well. You will also note that (as mentioned already) the Artboard tool was replaced with the Frame tool, so the tools sidebar might look slightly different than in the screenshots; this is because the bulk of the article was prepared before the 20 December 2017 update of Framer.
Adding Interactivity In Framer
It's not my intention to teach you CoffeeScript in this article, but I'll try my best to explain the code I used in this example. Hopefully, you'll be able to understand it even without prior CoffeeScript experience. That being said, if you're new to CoffeeScript or JavaScript, I strongly suggest you go through the help guide first.
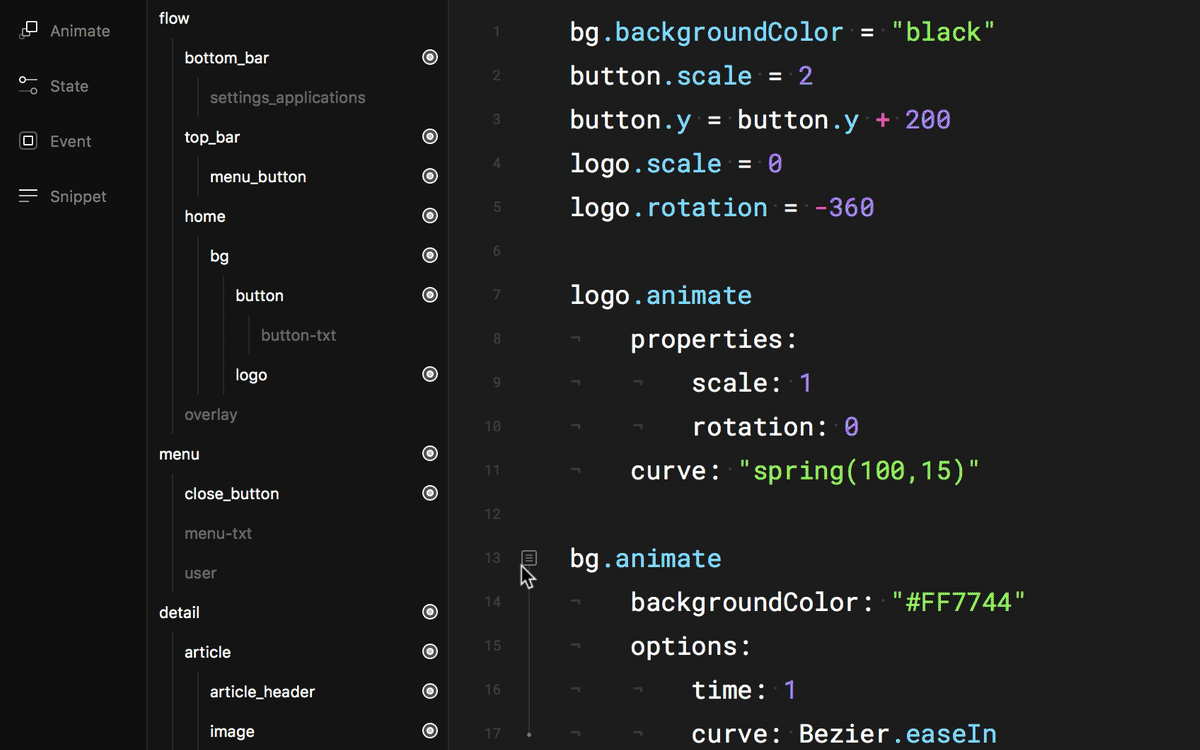
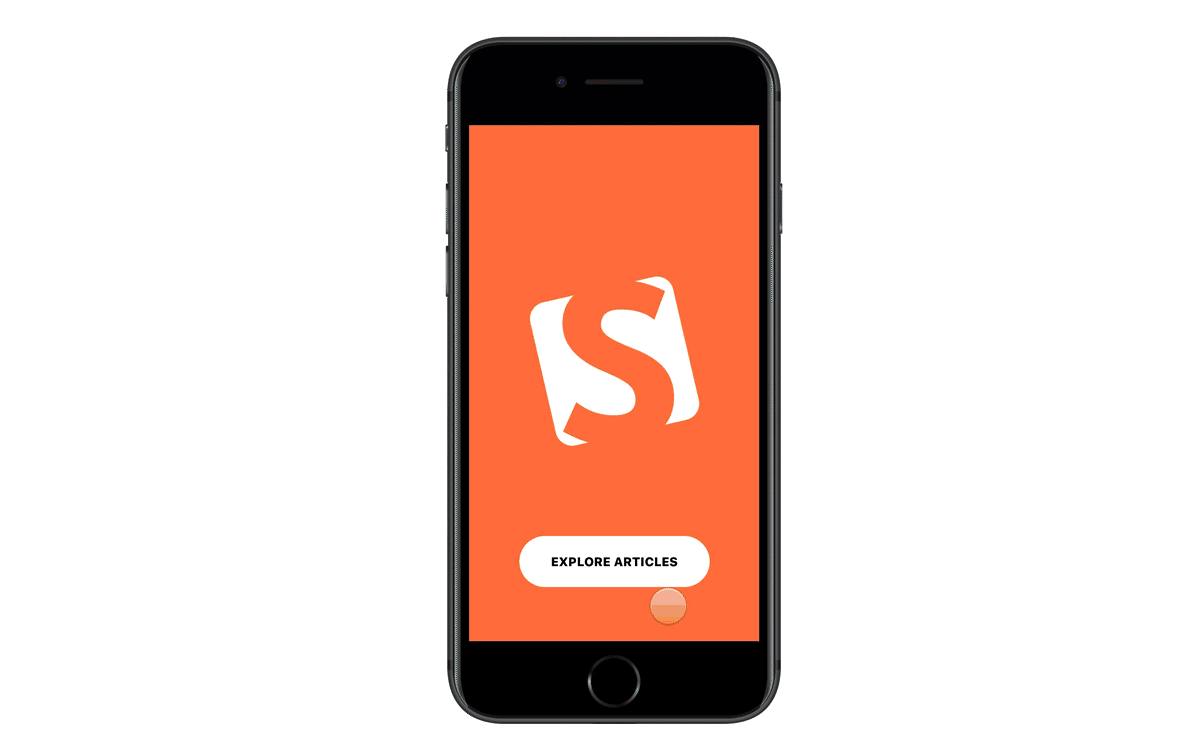
Now, let's create our first animations. We’ll explore simple transitions by creating an intro animation for the first screen. What we set up in the design view is how our app is supposed to look after elements are animated. For our first screen, we want to animate the logo's scale and rotation properties. First, we set the scale property to 0 (which will make the logo invisible), and then we set its rotation to -360:
logo.scale = 0
logo.rotation = -360
After that, we'll animate them to their original values. Here's the block of code you can use:
logo.animate
    properties:
        scale: 1
        rotation: 0
Keep in mind the indentation. Properties that animate should be indented on new lines, and we're using the animate method to set them in motion. Now, you should be able to see your first animation working! You can tweak it a bit by creating more natural motion. We'll do this thanks to easing — a concept that enables us to change motion so that it feels more life-like. Let's add one more line at the bottom:
logo.animate
    properties:
        scale: 1
        rotation: 0
    curve: "spring(100,15)"
Again, please note the indentation. Experiment with the values in the parentheses to get different results. You can read more on easing in Framer's documentation.
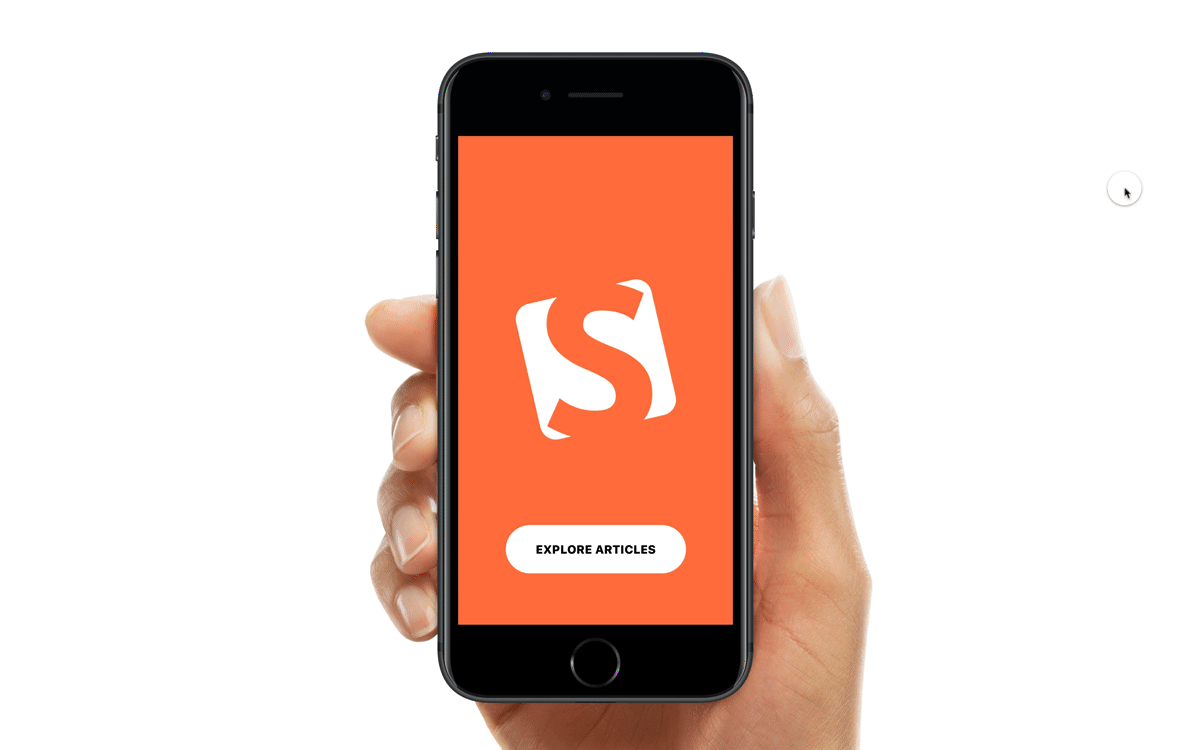
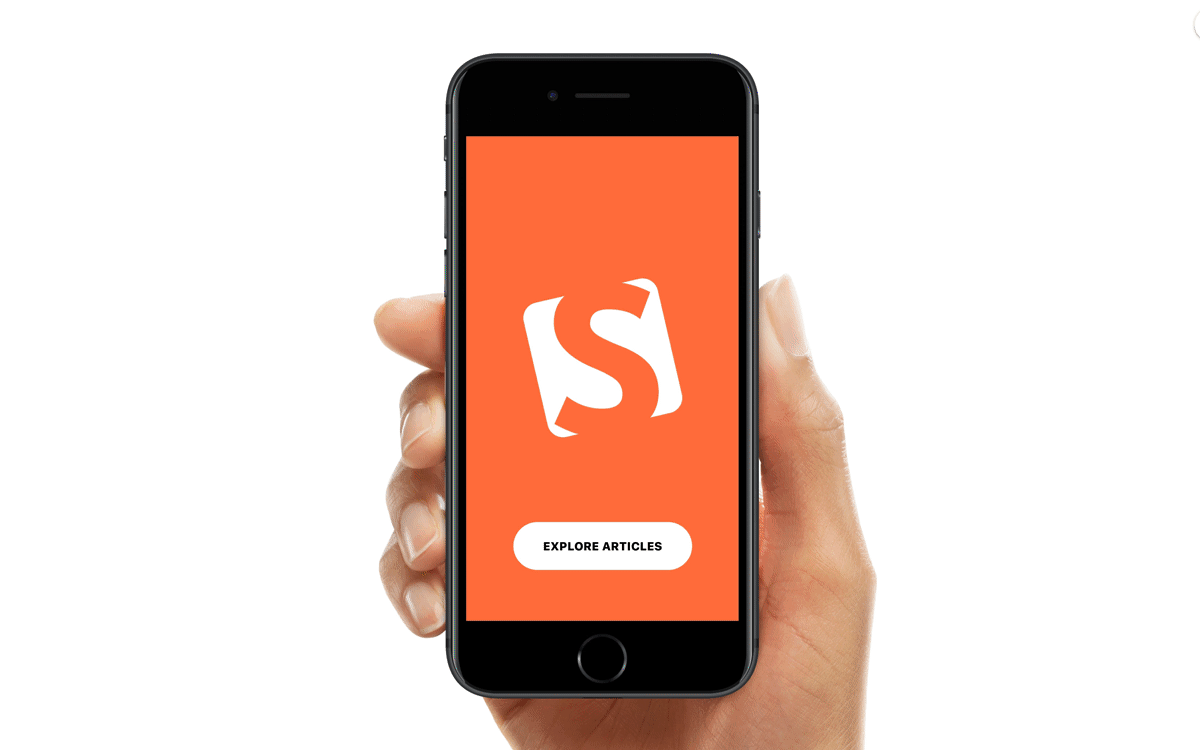
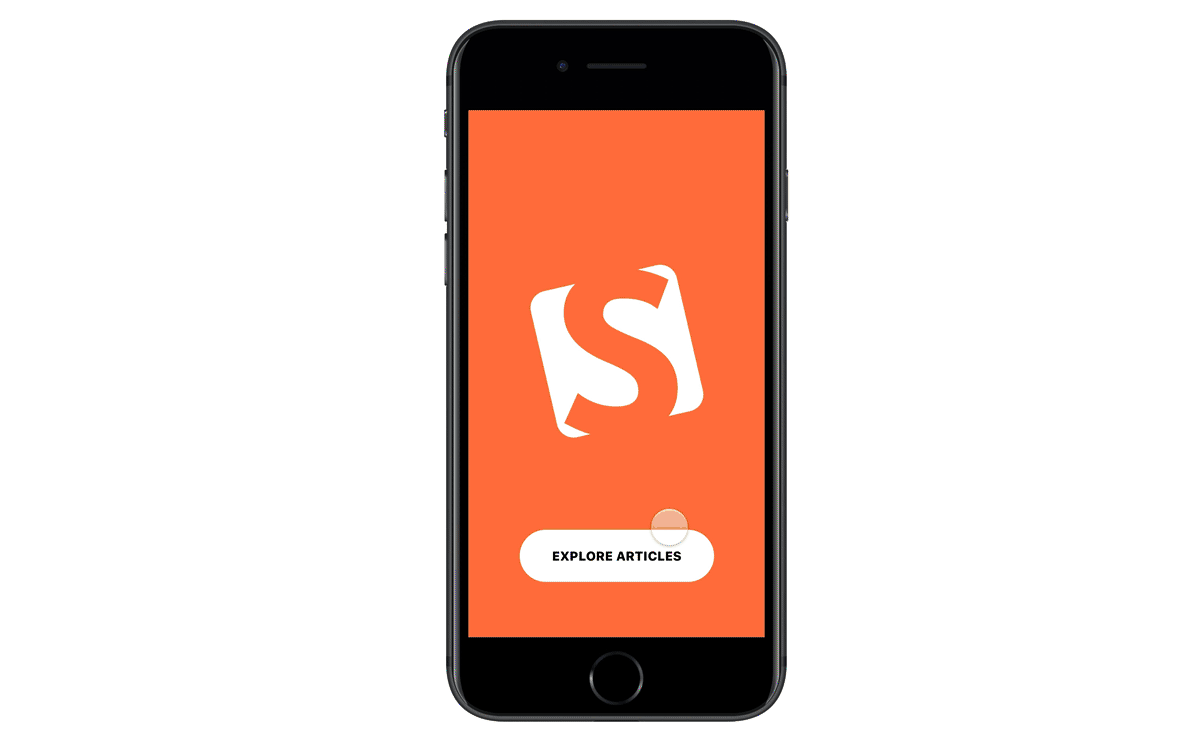
The animation should now look like this:
Let's set a few more starting properties:
bg.backgroundColor = "black"
button.scale = 2
button.y = button.y + 200
On the last line, we set the position of the button so that it is below the canvas — we first check the current position with button.y, and then add 200 more points on the vertical axis to move it down. The next step is to create some animation; let's do it for the background first:
bg.animate
    backgroundColor: "#FF7744"
And now, we want to wait until the logo animation has finished and then run the animation of the button. One approach would be to delay the animation, like this:
button.animate
    properties:
        scale: 1
        y: button.y - 200
    delay: .5
This delays it by half a second. A much nicer solution would be to wait for the logo animation to finish and then run the code. That piece of code introduces Framer events (which we'll explore a bit more later in this article). It looks like this:
logo.onAnimationEnd ->
    button.animate
        scale: 1
        y: button.y - 200
As you can see, you can even skip the properties: line when not using easing; but if you want to add some cool easing, it has to be there. Let's finish with something like this:
logo.onAnimationEnd ->
    button.animate
        properties:
            scale: 1
            y: button.y - 200
        curve: "spring"
So, this is one way to create animations in Framer; others would be to use animation objects or states. One additional tip would be to explore properties by clicking on the little icon next to the line number, where you can tweak different values.
OK, the animation now looks like this:
Scripting The Interactions
In Framer, there are plenty of ready-made components and snippets — pieces of code that you can use in your prototypes. One of them is the flow component, which enables the auto-transition of screens, as well as enables some extra features, such as defining the header and footer that will appear on each screen. Let's start by creating a flow component:
flow = new FlowComponent
flow.showNext(home)
The first line is like a declaration of a variable. But the value here actually creates a new FlowComponent object. Now, we can use this custom name, flow, to access the flow component at any time. The second line uses one of the methods built into the flow component — showNext, which, as the name suggests, displays the screen that we want to see next. In this case, it will show us the first screen of our prototype. We pass the name of the first frame as a parameter. That's all it takes to wrap it into the flow component and display the first screen.
Next, we define the header and footer. If you haven't enabled them in the design view, you’ll have to go back with Command + 1 and, in the design view, click on the target icon for the "top-bar" and "bottom-bar" frames. As you see, you can also group content together in the design view Command + Return) and, afterward, enable the new frame to be accessible in the code. Back in the code view, you can now use the following lines:
flow.header = top_bar
flow.footer = bottom_bar
You've probably noticed that when you call flow and put the dot afterward, Framer displays a list of common methods and properties that you can use. It's worth going through the list and checking out suggestions for methods and properties. And, if you want to learn more, a small icon leads to the documentation.
In object-oriented programming, this concept is very important. Take a car object as an example; the properties would be things like color, make, horsepower and so on. The methods would be ready-made functions that you can run when appropriate (for example, startTheEngine()). You can recognize the method by the parentheses, and sometimes you might want to pass some parameters to this particular function (for example, startTheEngine(gear1)). We've already used the showNext() method in this context; now we're using the header and footer properties and setting them on the appropriate layers.
Another technique you will use often in Framer is hiding and revealing layers. For example, as a design decision, we want to hide the header and footer on the first screen. You can do this with the following lines of code:
flow.header.visible = false
flow.footer.visible = false
Here, we are using the visible property in the header and footer of the flow component. CoffeeScript is meant to be as intuitive and close to plain English as possible; so, instead of false, you could even say no to hide it and yes to reveal it (instead of true).
Tip: Try selecting any lines of code and press Command + / to comment them out so that they're not executed.
It's time to use the power of the flow component to travel to the next screen of our app. First, make sure that the next frame is available in the code view as well as the button_get_started frame that we will use to get to this next screen. The following code does just this:
button_get_started.onTap ->
    flow.showNext(list)
    flow.header.visible = true
    flow.footer.visible = true
What we're doing here is another convention: We can respond to user input and interact with so-called events. There are different events to choose from, such as tapping, clicking, force tapping, hovering and much more. You can catch such events and execute some code as the user is performing the action. We're using the onTap event, and in response to that (`->`), we're executing the code that is indented below. In the flow component, we show the list frame, as well as reveal the header and footer.
Now that you know about both events and animations, you can tweak the home screen even more and experiment with the events. For example, you can add a tap animation to the button:
button.onTouchStart ->
    this.animate
        properties:
            scale: 1.1
            backgroundColor: "#f1f1f1"
        curve: "spring"
Here, I used the onTouchStart event in order to see the animation before going to the next screen, which is triggered when the user releases their finger (the onTap or onClick event).
You have already discovered some potential of the flow component, such as the automatic transition to this next screen. But the magic has just begun! As you can see, the list automatically scrolls. The problem is that we can see black (the flow component's background) when we reach the top or bottom and scroll even more. You can change the color simply by setting this (the gray color we have in the header and footer):
flow.backgroundColor = "#555555"
Now it's time to show the menu. Make sure you’ve enabled menu_button for the code, and execute these next lines of code:
menu_button.onTap ->
    flow.showOverlayLeft(menu)
We're using the showOverlayLeft() method and passing the name of the frame as a parameter. As a result, the screen animates from the left side, and the menu is hidden with another tap and is even hidden with a tap outside the menu itself. All of this with a single line of code!
Apple does not seem to encourage the use of hamburger menus in iOS apps, so I've used the menu merely as an example of what Framer can do quickly and efficiently. If you create a prototype for a real iOS app, consider following closely Apple's interface guidelines.
You can access this cool presentation mode by clicking on the full-screen icon in the preview window. It is also possible to test your prototype directly on a mobile device! You can use the live preview with the free app, available for both iOS and Android. Testing your prototypes on real devices is essential because it gives you the most accurate preview of how the design will look and feel.
If you're a beginner, you probably understand most of the tutorial so far but might not think you can do it on your own yet. So, here's a small assignment.
As you saw, I closed the menu simply by clicking in the blank area on the right side (demonstrating the magic of the flow component). Now, take a look at the flow component's documentation, and try to figure out how to accomplish the following task: We want to make the “x” button close the menu and show the previous screen. Before going any further, try to discover what is the right way to do this, and write the lines of code on your own.
If it's still not clear at this point, don't worry! By the end of the tutorial, it will have become easier to understand. The CoffeeScript we'll use here (after enabling the close_button element for the code view) is this:
close_button.onTap ->
    flow.showPrevious()
Here, showPrevious() is just a method of flow component that will let you go to the last screen. Now, try to write some code on your own again. You’ll need to link article_list and arrow_button with the code and make article_list show the appropriate screen, as well as make arrow_button go to the previous one. Also, we’ll need to hide and show the header and footer where appropriate.
Congratulations if you managed to do it! Here's the code that I used:
article_list.onTap ->
    flow.showNext(detail)
    flow.header.visible = false
    flow.footer.visible = false

arrow_button.onTap ->
    flow.showPrevious()
    flow.header.visible = true
    flow.footer.visible = true
Fetching Data For Our Prototype
Now that we have the backbone of our prototype, it's time to explore some more advanced features of Framer. This is going to be fun! We'll actually use the real data from our app. It will look so much more meaningful than generating some dummy filler content. And it might sound a bit frightening, too, but fear not — this is the next thing in your skill set. If you find this part of the article difficult, just stick with the static data. This is intended to show some more advanced users that they can deal with real data in Framer.
This approach is similar to the one used when working with variables and data sets in Adobe Photoshop. If you’re curious, read more: "Create Data-Driven Graphics in Photoshop."
In fact, first I'd like to introduce you to an easier solution, but still one that will give you control over your text from the code! Go back to the design view and put the text in the fields in braces, like this: {item_1} {item_2} ...
Make sure the text fields are enabled for the code view, and in the code view you can put all of your predefined strings in an array. (I recommend reading "Framer Cheat Sheet: Loops & Arrays" if you want to learn more about arrays.)
In short, an array acts as a variable that can contain more than one item:
categories = ["Graphic Design", "Mobile Apps", "Web Design", "User Experience", "Front-End Dev", "User Research"]
Now that we have our array, let's try to display the data. To do this, we will first use the print command, which outputs the result to the console. You can test it out right away:
print "Hello World"
The console can be refreshed by pressing Command + R. Accessing the data is as simple as this:
print categories
This line of code will display all of the data in the categories array. With arrays, you can easily access individual items that are indexed in the array by putting the number in brackets, like this:
print categories[2]
This will return the third item in the collection, because we start counting from zero. Now let's use Framer's TextLayer template functionality to update the first two strings:
item1_txt.template = categories[0]
item2_txt.template = categories[1]
You can fill in the rest of the fields! This easy example lets us manage the text fields directly from code so that we can change the text dynamically!

Where To Go From Here
Well done! At this point, you should be able to find your way around Framer and create some simple prototypes.
Note: I encourage you to try out my own video course on Framer — you can watch some lessons for free. Also, the Framer book by Tes Mat is an excellent resource for learning and understanding Framer and CoffeeScript. The book is not free, but you can read a sample chapter from it (before deciding whether you'd like to buy it).
I hope you’ve found this part of the article useful. Up to this point, we have been following simple ways to make our prototype work. But Framer is much more than that! This is why I’ve written an additional bonus section with more advanced techniques. If you're up for the challenge, then proceed to the next part: JSON!
Accessing The Data From JSON (Bonus Tutorial Section)
As a powerful alternative to the previous solution, you can use an external API and connect to it directly. While it's a bit of overkill for this particular example, more advanced users will benefit from the idea. First, comment out the code that is responsible for filling the text fields (select the code and press Command + /). The easy way is to have the file locally and load it into Framer. Preferably, this would be a JSON file, and you can get it in different ways, such as:
- use my sample JSON file,
- create it from scratch using a tool such as Dummi or JSON Editor Online,
- use some dummy data from Lists,
- get the relevant file from the developer you're working with.
But wait, what is JSON?
JSON (JavaScript Object Notation) is a lightweight data-interchange format. It is easy for humans to read and write. It is easy for machines to parse and generate. JSON is a text format that is completely language independent but uses conventions that are familiar to programmers of the C-family of languages, including C, C++, C#, Java, JavaScript, Perl, Python, and many others. These properties make JSON an ideal data-interchange language.
You can use real data for the entire design process! If you use Sketch, this can be done with InVision's Craft extension. It can load a local or remote JSON file and fetch the data for use in the layout. To learn more, check out Christian Krammer’s detailed article "Craft for Sketch Plugin: Designing With Real Data." Also, read Wojciech Dobry’s Framer tutorial, "Prototyping with Real Data."
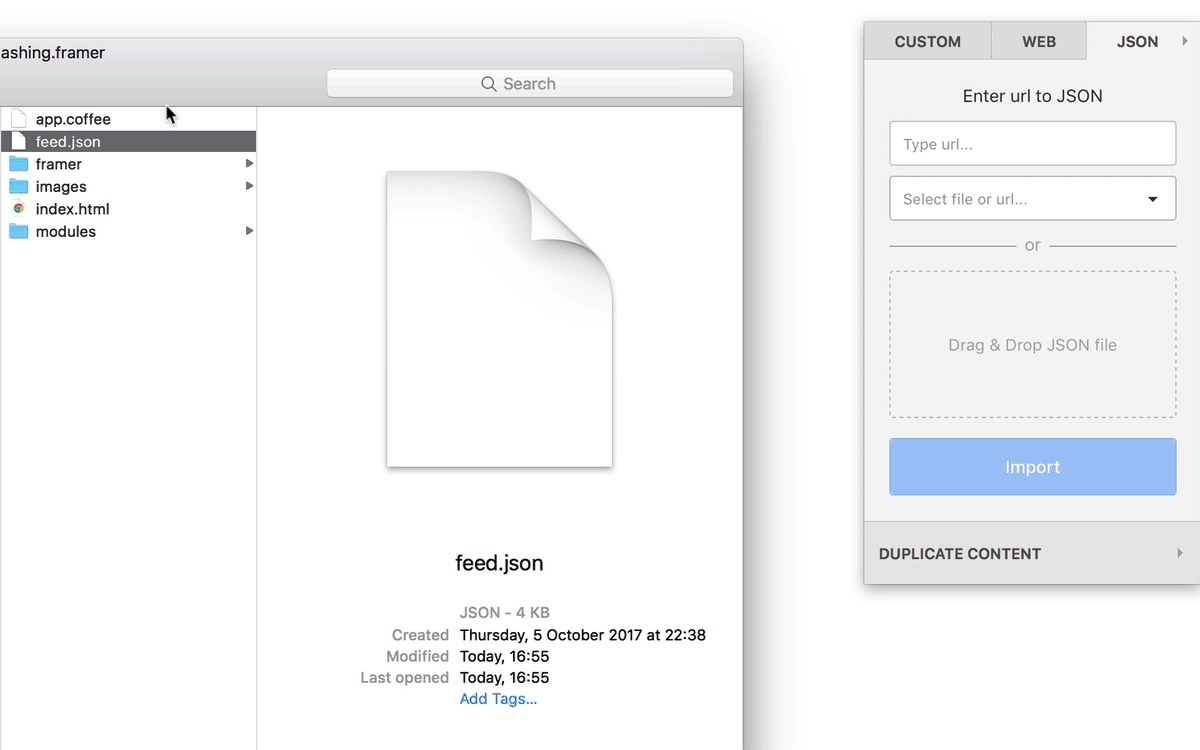
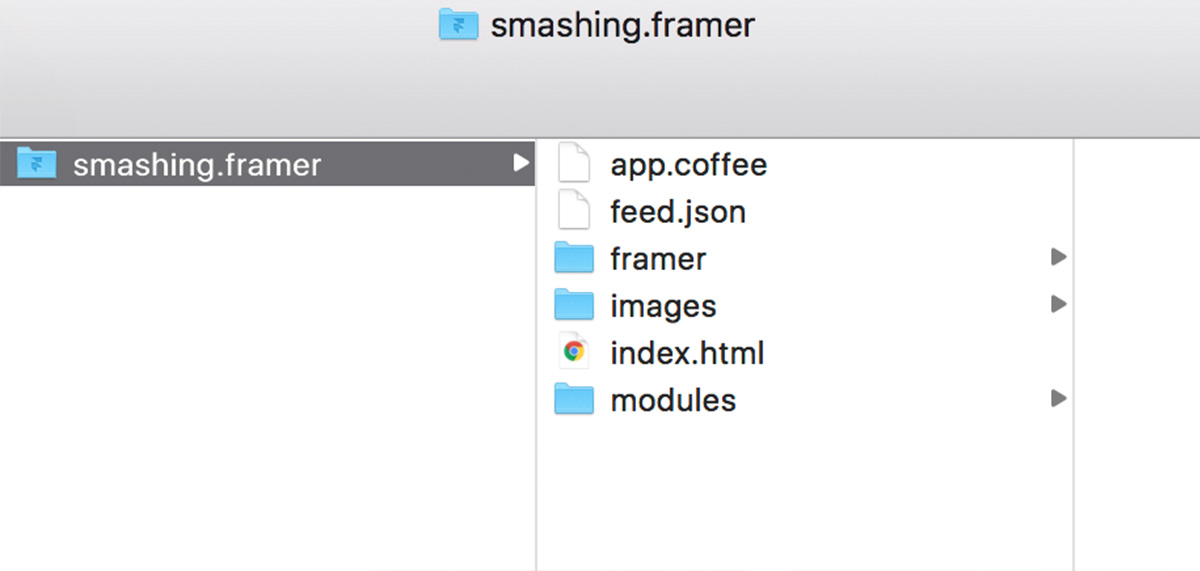
Now, let's put this file in the project’s folder. Each time you save a new Framer project, it creates a folder with the name of your project. Access it in the Finder, and put the JSON file next to the .coffee file in this structure.

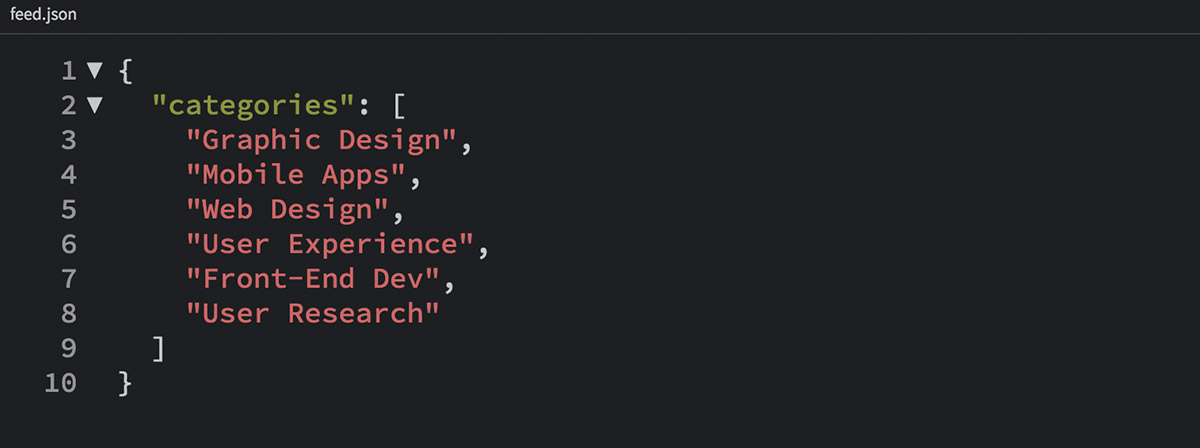
The JSON file I'm working with looks like this:
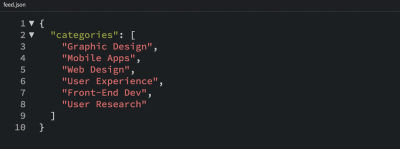
We're going to use the categories data in Framer and replace the dummy content we have in the buttons on the list screen. Just make sure you’ve given proper names to the fields (in my case, item1-txt, item2-txt, etc.) and that you’ve enabled them for the code view with the target icon.
Let's load the feed into Framer:
data = JSON.parse Utils.domLoadDataSync "feed.json"
We're using JSON.parse as well as the Utils class — a pairing that will do all of the hard work of translating JSON into a human language and putting it all in data (the name that we’ve used). To display data from the top of our .json file now, we can print it out:
print data.categories
From the data object, we can extract particular items, like in the previous example.
print data.categories[2]
Let's create an array with all of the text fields:
textfields = [item1_txt, item2_txt, item3_txt, item4_txt, item5_txt, item6_txt]
This is a simplified example, so that even if you are less experienced, you should be able to follow along. You could try to do better by running the loop if you feel more confident. Speaking of loops, we're going to use one, either way, to put the items into the text fields. It goes like this:
for i in [0...6]
    textfields[i].text = data.categories[i]
Loops enable you to run the same code many times. It starts with for, and then we define a variable, which I’ve called i. This variable will hold whatever information we pass and then will increment with each loop. In this case, we pass numbers from 0 to 5 — [0...6] is just a way of saying this. You can check out the values of i in the loop by doing the following:
print i
We need it to loop exactly six times (0,1,2,3,4,5), so that we can address each fild on one iteration. Putting i at the end of textfields will return textfields[0], textfields[1], and so on; this way, we can address all of the text fields in the array. Again, if you want to double-check, print it! Put more simply, what we've done here is just an easier way of saying this:
item1_txt.text = data.categories[0]
item1_txt.text = data.categories[1]
item1_txt.text = data.categories[2]
...
It's easier to grasp, but code-wise, this solution is not elegant at all. That is why we were using a loop here.
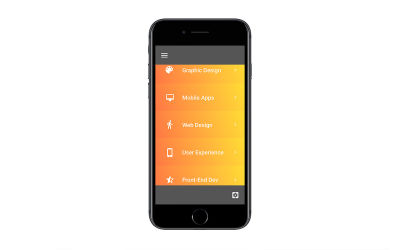
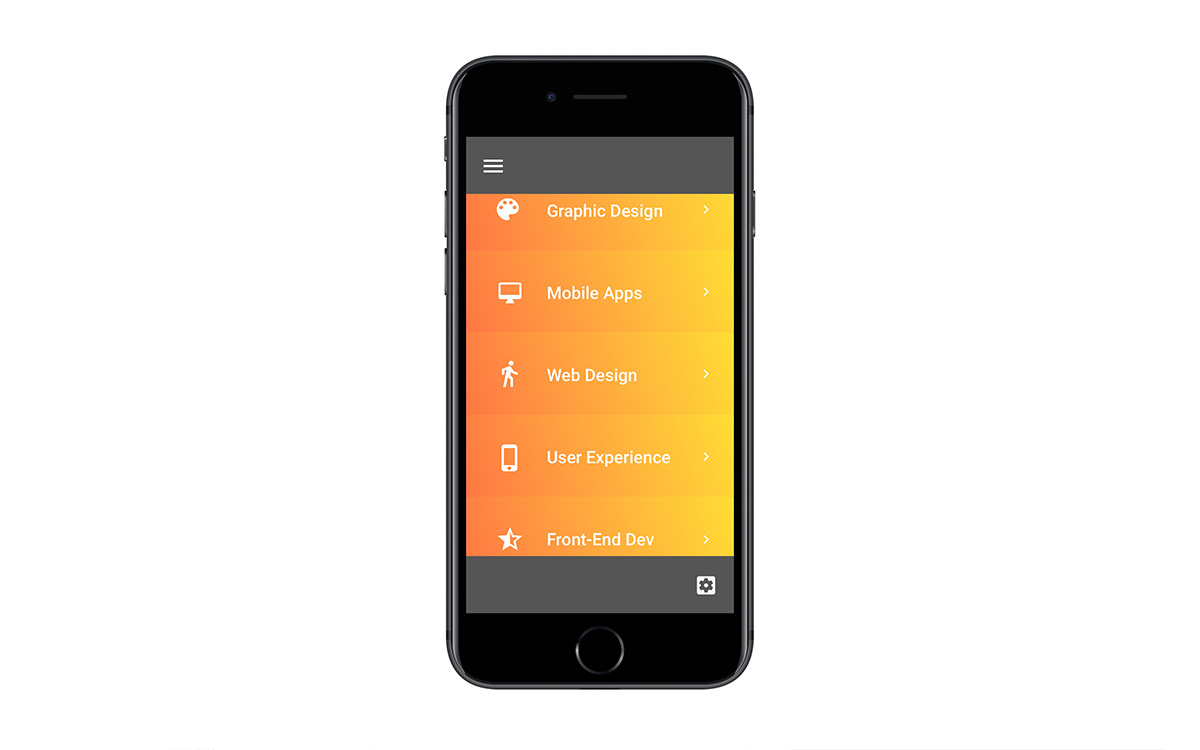
The result of our work is that all of the data is populated in the text fields:
Let's add some links to these items so that we can go to the detail screen. Doing it in the loop is a smart move because we can again add it all at once. Here is the next part of the for in loop (remember to keep the indentation).
textfields[i].onTap ->
    flow.showNext(detail)
    flow.header.visible = false
If you want to be more elegant, you can make the items tappable, not only the text. Remember, however, that you have to add them to an array first; so, just before the loop, you can put this:
items = [item1, item2, item3, item4, item5, item6]
Then, in the loop, change textfields[i] to items[i]. This whole code block will now look like this:
textfields = [item1_txt, item2_txt, item3_txt, item4_txt, item5_txt, item6_txt]

items = [item1, item2, item3, item4, item5, item6]

for i in [0...data.categories.length]
    textfields[i].text = data.categories[i]
    items[i].onTap ->
        flow.showNext(detail)
        flow.header.visible = false
If you want to take this to the next level and display different data depending on the button clicked, my hint is to use this in the event, or get the information from the event by putting (e) next to onTap. I do not recommend doing that now, though: Going crazy with the data is not necessary here. Our main goal is to create a prototype, not a real complex application. Keep that in mind. This JSON example was merely to demonstrate that it is possible to use real data in a Framer prototype.
You probably noticed that we're hiding the header here. That is because we've created a separate header for the detail view. There is a simple arrow icon that we want to link back to the previous screen. This is the block of code we'll use:
arrow_button.onTap ->
    flow.showPrevious()
    flow.header.visible = true
    flow.footer.visible = true
Again, showPrevious() is a ready-made method of the flow component, and I just looked it up in the docs!
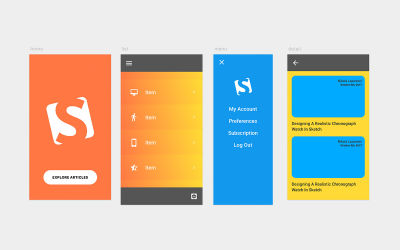
Our simple prototype is ready, and it looks like this:

You can download the complete Framer file. Surely, you can tweak it with extra animations, screens and even more data (loaded from a JSON file). I did not want to make it more complex because I wanted to keep the tutorial concise. But trust me, you have enough information to finish this prototype yourself. Just start experimenting with it and you'll see: It's so much fun. Happy coding!
Further Reading
- When Words Cannot Describe: Designing For AI Beyond Conversational Interfaces
- How Accessibility Standards Can Empower Better Chart Visual Design
- An Efficient Design-to-Code Handoff Process Using Uno Platform For Figma
- Mid-Century Modern Illustration: Creating A Cover Book With Illustrator And InDesign


