Lazy Loading JavaScript Modules With ConditionerJS

Email Newsletter
Weekly tips on front-end & UX.
Trusted by 182,000+ folks.


 Custom Web Forms for Angular, React, & Vue. Your backend.

 Celebrating 10 million developers
Linking JavaScript functionality to the DOM can be a repetitive and tedious task. You add a class to an element, find all the elements on the page, and attach the matching JavaScript functionality to the element. Conditioner is here to not only take this work of your hands but supercharge it as well!
In this article, we’ll look at the JavaScript initialization logic that is often used to link UI components to a webpage. Step-by-step we’ll improve this logic, and finally, we’ll make a 1 Kilobyte jump to replacing it with Conditioner. Then we’ll explore some practical examples and code snippets and see how Conditioner can help make our websites more flexible and user-oriented.
Conditioner And Progressive Enhancement Sitting In A Tree
Before we proceed, I need to get one thing across:
Conditioner is not a framework for building web apps.
Instead, it’s aimed at websites. The distinction between websites and web apps is useful for the continuation of this story. Let me explain how I view the overall difference between the two.
Websites are mostly created from a content viewpoint; they are there to present content to the user. The HTML is written to semantically describe the content. CSS is added to nicely present the content across multiple viewports. The last and third act is to carefully layer JavaScript on top to add that extra zing to the user experience. Think of a date picker, navigation, scroll animations, or carousels (pardon my French).
Examples of content-oriented websites are for instance: Wikipedia, Smashing Magazine, your local municipality website, newspapers, and webshops. Web apps are often found in the utility area, think of web-based email clients and online maps. While also presenting content, the focus of web apps is often more on interacting with content than presenting content. There’s a huge grey area between the two, but this contrast will help us decide when Conditioner might be effective and when we should steer clear.
As stated earlier, Conditioner is all about websites, and it’s specifically built to deal with that third act:
"Enhancing the presentation layer with JavaScript functionality to offer an improved user experience."
The Troublesome Third Act
The third act is about enhancing the user experience with that zingy JavaScript layer.
Judging from experience and what I’ve seen online, JavaScript functionality is often added to websites like this:
- A class is added to an HTML element.
- The
querySelectorAllmethod is used to get all elements assigned the class. - A for-loop traverses the
NodeListreturned in step 2. - A JavaScript function is called for each item in the list.
Let’s quickly put this workflow in code by adding autocomplete functionality to an input field. We’ll create a file called autocomplete.js and add it to the page using a <script> tag.
function createAutocomplete(element) {
  // our autocomplete logic
  // ...
}
<input type="text" class="autocomplete"/>
<script src="autocomplete.js"></script>
<script>
var inputs = document.querySelectorAll('.autocomplete');
for (var i = 0; i < inputs.length; i++) {
createAutocomplete(inputs[i]);
}
</script>That’s our starting point.
Suppose we’re now told to add another functionality to the page, say a date picker, it’s initialization will most likely follow the same pattern. Now we’ve got two for-loops. Add another functionality, and you’ve got three, and so on and so on. Not the best.
While this works and keeps you off the street, it creates a host of problems. We’ll have to add a loop to our initialization script for each functionality we add. For each loop we add, the initialization script gets linked ever tighter to the document structure of our website. Often the initialization script will be loaded on each page. Meaning all the querySelectorAll calls for all the different functionalities will be run on each and every page whether functionality is defined on the page or not.
For me, this setup never felt quite right. It always started out “okay,” but then it would slowly grow to a long list of repetitive for-loops. Depending on the project it might contain some conditional logic here and there to determine if something loads on a certain viewport or not.
if (window.innerWidth <= 480) {
  // small viewport for-loops here
}
Eventually, my initialization script would always grow out of control and turn into a giant pile of spaghetti code that I would not wish on anyone.
Something needed to be done.
Soul Searching
I am a huge proponent of carefully separating the three web dev layers HTML, CSS, and JavaScript. HTML shouldn’t have a rigid relationship with JavaScript, so no use of inline onclick attributes. The same goes for CSS, so no inline style attributes. Adding classes to HTML elements and then later searching for them in my beloved for-loops followed that philosophy nicely.
That stack of spaghetti loops though, I wanted to get rid them so badly.
I remember stumbling upon an article about using data attributes instead of classes, and how those could be used to link up JavaScript functionality (I’m not sure it was this article, but it seems to be from right timeframe). I didn’t like it, misunderstood it, and my initial thought was that this was just covering up for onclick, this mixed HTML and JavaScript, no way I was going to be lured to the dark side, I don’t want anything to do with it. Close tab.
Some weeks later I would return to this and found that linking JavaScript functionality using data attributes was still in line with having separate layers for HTML and JavaScript. As it turned out, the author of the article handed me a solution to my ever-growing initialization problem.
We’ll quickly update our script to use data attributes instead of classes.
<input type="text" data-module="autocomplete">

<script src="autocomplete.js"></script>

<script>
var inputs = document.querySelectorAll('[data-module=autocomplete]');

for (var i = 0; i < inputs.length; i++) {
  createAutocomplete(inputs[i]);
}
</script>Done!
But hang on, this is nearly the same setup; we’ve only replaced .autocomplete with [data-module=autocomplete]. How’s that any better? It’s not, you’re right. If we add an additional functionality to the page, we still have to duplicate our for-loop — blast! Don’t be sad though as this is the stepping stone to our killer for-loop.
Watch what happens when we make a couple of adjustments.
<input type="text" data-module="createAutocomplete">

<script src="autocomplete.js"></script>

<script>
var elements = document.querySelectorAll('[data-module]');

for (var i = 0; i < elements.length; i++) {
    var name = elements[i].getAttribute('data-module');
    var factory = window[name];
    factory(elements[i]);
}
</script>Now we can load any functionality with a single for-loop.
- Find all elements on the page with a
data-moduleattribute; - Loop over the node list;
- Get the
nameof the module from thedata-moduleattribute; - Store a reference to the JavaScript function in
factory; - Call the
factoryJavaScript function and pass the element.
Since we’ve now made the name of the module dynamic, we no longer have to add any additional initialization loops to our script. This is all we need to link any JavaScript functionality to an HTML element.
This basic setup has some other advantages as well:
- The init script no longer needs to know what it loads; it just needs to be very good at this one little trick.
- There’s now a convention for linking functionality to the DOM; this makes it very easy to tell which parts of the HTML will be enhanced with JavaScript.
- The init script does not search for modules that are not there, i.e. no wasted DOM searches.
- The init script is done. No more adjustments are needed. When we add functionality to the page, it will automatically be found and will simply work.
Wonderful!
So What About This Thing Called Conditioner?
We finally have our single loop, our one loop to rule all other loops, our king of loops, our hyper-loop. Ehm. Okay. We’ll just have to conclude that our is a loop of high quality and is so flexible that it can be re-used in each project (there’s not really anything project specific about it). That does not immediately make it library-worthy, it’s still quite a basic loop. However, we’ll find that our loop will require some additional trickery to really cover all our use-cases.
Let’s explore.
With the one loop, we are now loading our functionality automatically.
- We assign a
data-moduleattribute to an element. - We add a
<script>tag to the page referencing our functionality. - The loop matches the right functionality to each element.
- Boom!
Let’s take a look at what we need to add to our loop to make it a bit more flexible and re-usable. Because as it is now, while amazing, we’re going to run into trouble.
- It would be handy if we moved the global functions to isolated modules. This prevents pollution of the global scope. Makes our modules more portable to other projects. And we’ll no longer have to add our
<script>tags manually. Fewer things to add to the page, fewer things to maintain. - When using our portable modules across multiple projects (and/or pages) we’ll probably encounter a situation where we need to pass configuration options to a module. Think API keys, labels, animation speeds. That’s a bit difficult at the moment as we can’t access the for-loop.
- With the ever-growing diversity of devices out there we will eventually encounter a situation where we only want to load a module in a certain context. For instance, a menu that needs to be collapsed on small viewports. We don’t want to add if-statements to our loop. It’s beautiful as it is, we will not add if statements to our for-loop. Never.
That’s where Conditioner can help out. It encompasses all above functionality. On top of that, it exposes a plugin API so we can configure and expand Conditioner to exactly fit our project setup.
Let’s make that 1 Kilobyte jump and replace our initialization loop with Conditioner.
Switching To Conditioner
We can get the Conditioner library from the GitHub repository, npm or from unpkg. For the rest of the article, we’ll assume the Conditioner script file has been added to the page.
The fastest way is to add the unpkg version.
<script src="https://unpkg.com/conditioner-core/conditioner-core.js"></script>
With Conditioner added to the page lets take a moment of silence and say farewell to our killer for-loop.
Conditioners default behavior is exactly the same as our now departed for-loop. It’ll search for elements with the data-module attribute and link them to globally scoped JavaScript functions.
We can start this process by calling the conditioner hydrate method.
<input type="text" data-module="createAutocomplete"/>

<script src="autocomplete.js"></script>

<script>
conditioner.hydrate(document.documentElement);
</script>
Note that we pass the documentElement to the hydrate method. This tells Conditioner to search the subtree of the <html> element for elements with the data-module attribute.
It basically does this:
document.documentElement.querySelectorAll('[data-module]');
Okay, great! We’re set to take it to the next level. Let’s try to replace our globally scoped JavaScript functions with modules. Modules are reusable pieces of JavaScript that expose certain functionality for use in your scripts.
Moving From Global Functions To Modules
In this article, our modules will follow the new ES Module standard, but the examples will also work with modules based on the Universal Module Definition or UMD.
Step one is turning the createAutocomplete function into a module. Let’s create a file called autocomplete.js. We’ll add a single function to this file and make it the default export.
export default function(element) {
  // autocomplete logic
  // ...
}
It’s the same as our original function, only prepended with export default.
For the other code snippets, we’ll switch from our classic function to arrow functions.
export default element => {
  // autocomplete logic
  // ...
}
We can now import our autocomplete.js module and use the exported function like this:
import('./autocomplete.js').then(module => {
  // the autocomplete function is located in module.default
});
Note that this only works in browsers that support Dynamic import(). At the time of this writing that would be Chrome 63 and Safari 11.
Okay, so we now know how to create and import modules, our next step is to tell Conditioner to do the same.
We update the data-module attribute to ./autocomplete.js so it matches our module file name and relative path.
Remember: The import() method requires a path relative to the current module. If we don’t prepend the autocomplete.js filename with ./ the browser won’t be able to find the module.
Conditioner is still busy searching for functions on the global scope. Let’s tell it to dynamically load ES Modules instead. We can do this by overriding the moduleImport action.
We also need to tell it where to find the constructor function (module.default) on the imported module. We can point Conditioner in the right direction by overriding the moduleGetConstructor action.
<input type="text" data-module="./autocomplete.js"/>

<script>
conditioner.addPlugin({
  // fetch module with dynamic import
  moduleImport: (name) => import(name),

  // get the module constructor
  moduleGetConstructor: (module) => module.default
});

conditioner.hydrate(document.documentElement);
</script>Done!
Conditioner will now automatically lazy load ./autocomplete.js, and once received, it will call the module.default function and pass the element as a parameter.
Defining our autocomplete as ./autocomplete.js is very verbose. It’s difficult to read, and when adding multiple modules on the page, it quickly becomes tedious to write and error prone.
This can be remedied by overriding the moduleSetName action. Conditioner views the data-module value as an alias and will only use the value returned by moduleSetName as the actual module name. Let’s automatically add the js extension and relative path prefix to make our lives a bit easier.
<input type="text" data-module="autocomplete"/>
conditioner.addPlugin({
  // converts module aliases to paths
  moduleSetName: (name) => `./${ name }.js`
});
Now we can set data-module to autocomplete instead of ./autocomplete.js, much better.
That’s it! We’re done! We’ve setup Conditioner to load ES Modules. Adding modules to a page is now as easy as creating a module file and adding a data-module attribute.
The plugin architecture makes Conditioner super flexible. Because of this flexibility, it can be modified for use with a wide range of module loaders and bundlers. There’s bootstrap projects available for Webpack, Browserify and RequireJS.
Please note that Conditioner does not handle module bundling. You’ll have to configure your bundler to find the right balance between serving a bundled file containing all modules or a separate file for each module. I usually cherry pick tiny modules and core UI modules (like navigation) and serve them in a bundled file while conditionally loading all scripts further down the page.
Alright, module loading — check! It’s now time to figure out how to pass configuration options to our modules. We can’t access our loop; also we don’t really want to, so we need to figure out how to pass parameters to the constructor functions of our modules.
Passing Configuration Options To Our Modules
I might have bent the truth a little bit. Conditioner has no out-of-the-box solution for passing options to modules. There I said it. To keep Conditioner as tiny as possible I decided to strip it and make it available through the plugin API. We’ll explore some other options of passing variables to modules and then use the plugin API to set up an automatic solution.
The easiest and at the same time most banal way to create options that our modules can access is to define options on the global window scope.
window.autocompleteSource = './api/query';export default (element) => {
console.log(window.autocompleteSource);
// will log './api/query'
// autocomplete logic
// ...
}It’s better to simply add additional data attributes.
<input type="text"
       data-module="autocomplete"
       data-source="./api/query"/>
These attributes can then be accessed inside our module by accessing the element dataset which returns a DOMStringMap of all data attributes.
export default (element) => {
  console.log(element.dataset.source);
  // will log './api/query'

  // autocomplete logic
  // ...
}
This could result in a bit of repetition as we’ll be accessing element.dataset in each module. If repetition is not your thing, read on, we’ll fix it right away.
We can automate this by extracting the dataset and injecting it as an options parameter when mounting the module. Let’s override the moduleSetConstructorArguments action.
conditioner.addPlugin({

  // the name of the module and the element it's being mounted to
  moduleSetConstructorArguments: (name, element) => ([
    element,
    element.dataset
  ])

});
The moduleSetConstructorArguments action returns an array of parameters which will automatically be passed to the module constructor.
export default (element, options) => {
  console.log(options.source);
  // will log './api/query'

  // autocomplete logic
  // ...
}
We’ve only eliminated the dataset call, i.e. seven characters. Not the biggest improvement, but we’ve opened the door to take this a bit further.
Suppose we have multiple autocomplete modules on the page, and each and every single one of them requires the same API key. It would be handy if that API key was supplied automagically instead of having to add it as a data attribute on each element.
We can improve our developer lives by adding a page level configuration object.
const pageOptions = {
  // the module alias
  autocomplete: {
    key: 'abc123' // api key
  }
}

conditioner.addPlugin({

  // the name of the module and the element it's being mounted to
  moduleSetConstructorArguments: (name, element) => ([
    element,
    // merge the default page options with the options set on the element it self
    Object.assign({},
      pageOptions[element.dataset.module],
      element.dataset
    )
  ])

});As our pageOptions variable has been defined with const it’ll be block-scoped, which means it won’t pollute the global scope. Nice.
Using Object.assign we merge an empty object with both the pageOptions for this module and the dataset DOMStringMap found on the element. This will result in an options object containing both the source property and the key property. Should one of the autocomplete elements on the page have a data-key attribute, it will override the pageOptions default key for that element.
const ourOptions = Object.assign(
  {},
  { key: 'abc123' },
  { source: './api/query' }
);

console.log(ourOptions);
// output: {  key: 'abc123', source: './api/query' }
That’s some top-notch developer convenience right there.
By having added this tiny plugin, we can automatically pass options to our modules. This makes our modules more flexible and therefore re-usable over multiple projects. We can still choose to opt-out and use dataset or globally scope our configuration variables (no, don’t), whatever fits best.
Our next challenge is the conditional loading of modules. It’s actually the reason why Conditioner is named Conditioner. Welcome to the inner circle!
Conditionally Loading Modules Based On User Context
Back in 2005, desktop computers were all the rage, everyone had one, and everyone browsed the web with it. Screen resolutions ranged from big to bigger. And while users could scale down their browser windows, we looked the other way and basked in the glory of our beautiful fixed-width sites.
I’ve rendered an artist impression of the 2005 viewport:

Today, a little over ten years later, there’s more people browsing the web on mobile than on desktop, resulting in lots of different viewports.
I’ve applied this knowledge to our artist impression below.
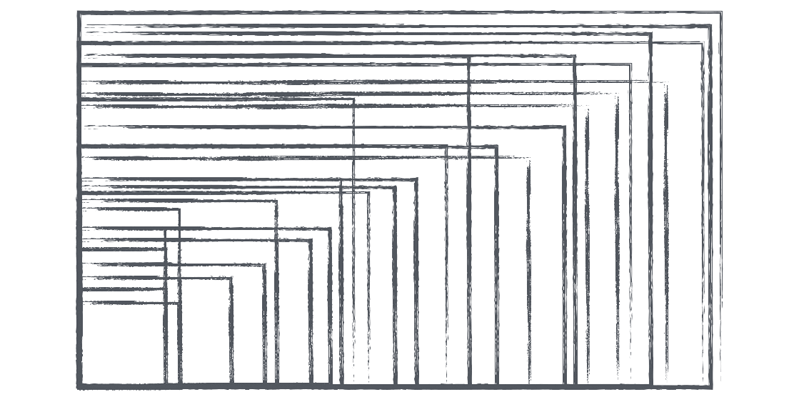
Holy smokes! That’s a lot of viewports.
Today, someone might visit your site on a small mobile device connected to a crazy fast WiFi hotspot, while another user might access your site using a desktop computer on a slow tethered connection. Yes, I switched up the connection speeds — reality is unpredictable.
And to think we were worried about users resizing their browser window. Hah!
Note that those million viewports are not set in stone. A user might load a website in portrait orientation and then rotate the device, (or, resize the browser window), all without reloading the page. Our websites should be able to handle this and load or unload functionality accordingly.
Someone on a tiny device should not receive the same JavaScript package as someone on a desktop device. That seems hardly fair; it’ll most likely result in a sub-optimal user experience on both the tiny mobile device and the good ol’ desktop device.
With Conditioner in place, let’s configure it as a gatekeeper and have it load modules based on the current user context. The user context contains information about the environment in which the user is interacting with your functionality. Some examples of environment variables influencing context are viewport size, time of day, location, and battery level. The user can also supply you with context hints, for instance, a preference for reduced motion. How a user behaves on your platform will also tell you something about the context she might be in, is this a recurring visit, how long is the current user session?
The better we’re able to measure these environment variables the better we can enhance our interface to be appropriate for the context the user is in.
We’ll need an attribute to describe our modules context requirements so Conditioner can determine the right moment for the module to load and to unload. We’ll call this attribute data-context. It’s pretty straightforward.
Let’s leave our lovely autocomplete module behind and shift focus to a new module. Our new section-toggle module will be used to hide the main navigation behind a toggle button on small viewports.
Since it should be possible for our section-toggle to be unloaded, the default function returns another function. Conditioner will call this function when it unloads the module.
export default (element) => {
  // sectionToggle logic
  // ...

  return () => {
    // sectionToggle unload logic
    // ...
  }
}
We don’t need the toggle behavior on big viewports as those have plenty of space for our menu (it’s a tiny menu). We only want to collapse our menu on viewports more narrow than 30em (this translates to 480px).
Let’s setup the HTML.
<nav>
  <h1 data-module="sectionToggle"
      data-context="@media (max-width:30em)">
      Navigation
  </h1>
  <ul>
    <li><a href="/home">home</a></li>
    <li><a href="/about">about</a></li>
    <li><a href="/contact">contact</a></li>
  </ul>
</nav>The data-context attribute will trigger Conditioner to automatically load a context monitor observing the media query (max-width:30em). When the user context matches this media query, it will load the module; when it does not, or no longer does, it will unload the module.
Monitoring happens based on events. This means that after the page has loaded, should the user resize the viewport or rotate the device, the user context is re-evaluated and the module is loaded or unloaded based on the new observations.
You can view monitoring as feature detection. Where feature detection is about an on/off situation, the browser either supports WebGL, or it doesn’t. Context monitoring is a continuous process, the initial state is observed at page load, but monitoring continues after. While the user is navigating the page, the context is monitored, and observations can influence page state in real-time.
This nonstop monitoring is important as it allows us to adapt to context changes immediately (without page reload) and optimizes our JavaScript layer to fit each new user context like a glove.
The media query monitor is the only monitor that is available by default. Adding your own custom monitors is possible using the plugin API. Let’s add a visible monitor which we’ll use to determine if an element is visible to the user (scrolled into view). To do this, we’ll use the brand new IntersectionObserver API.
conditioner.addPlugin({
  // the monitor hook expects a configuration object
  monitor: {
    // the name of our monitor with the '@'
    name: 'visible',

    // the create method will return our monitor API
    create: (context, element) => ({

      // current match state
      matches: false,

      // called by conditioner to start listening for changes
      addListener (change) {

        new IntersectionObserver(entries => {

          // update the matches state
          this.matches = entries.pop().isIntersecting == context;

          // inform Conditioner of the state change
          change();

        }).observe(element);

      }
    })
  }
});
We now have a visible monitor at our disposal.
Let’s use this monitor to only load images when they are scrolled in to view.
Our base image HTML will be a link to the image. When JavaScript fails to load the links will still work, and the contents of the link will describe the image. This is progressive enhancement at work.
<a href="cat-nom.jpg"
   data-module="lazyImage"
   data-context="@visible">
   A red cat eating a yellow bird
</a>The lazyImage module will extract the link text, create an image element, and set the link text to the alt text of the image.
export default (element) => {

  // store original link text
  const text = element.textContent;

  // replace element text with image
  const image = new Image();
  image.src = element.href;
  image.setAttribute('alt', text);
  element.replaceChild(image, element.firstChild);

  return () => {
    // restore original element state
    element.innerHTML = text
  }
}
When the anchor is scrolled into view, the link text is replaced with an img tag.
Because we’ve returned an unload function the image will be removed when the element scrolls out of view. This is most likely not what we desire.
We can remedy this behavior by adding the was operator. It will tell Conditioner to retain the first matched state.
<a href="cat-nom.jpg"
   data-module="lazyImage"
   data-context="was @visible">
   A red cat eating a yellow bird
</a>
There are three other operators at our disposal.
The not operator lets us invert a monitor result. Instead of writing @visible false we can write not @visible which makes for a more natural and relaxed reading experience.
Last but not least, we can use the or and and operators to string monitors together and form complex context requirements. Using and combined with or we can do lazy image loading on small viewports and load all images at once on big viewports.
<a href="cat-nom.jpg"
   data-module="lazyImage"
   data-context="was @visible and @media (max-width:30em) or @media (min-width:30em)">
   A red cat eating a yellow bird
</a>
We’ve looked at the @media monitor and have added our custom @visible monitor. There are lots of other contexts to measure and custom monitors to build:
- Tap into the Geolocation API and monitor the location of the user
@location (near: 51.4, 5.4)to maybe load different scripts when a user is near a certain location. - Imagine a
@timemonitor, which would make it possible to enhance a page dynamically based on the time of day@time (after 20:00). - Use the Device Light API to determine the light level
@lightlevel (max-lumen: 50)at the location of the user. Which, combined with the time, could be used to perfectly tune page colors.
By moving context monitoring outside of our modules, our modules have become even more portable. If we need to add collapsible sections to one of our pages, it’s now easy to re-use our section toggle module, because it’s not aware of the context in which it’s used. It just wants to be in charge of toggling something.
And this is what Conditioner makes possible, it extracts all distractions from the module and allows you to write a module focused on a single task.
Using Conditioner In JavaScript
Conditioner exposes a total of three methods. We’ve already encountered the hydrate and addPlugin methods. Let’s now have a look at the monitor method.
The monitor method lets us manually monitor a context and receive context updates.
const monitor = conditioner.monitor('@media (min-width:30em)');
monitor.onchange = (matches) => {
  // called when a change to the context was observed
};
monitor.start();
This method makes it possible to do context monitoring from JavaScript without requiring the DOM starting point. This makes it easier to combine Conditioner with frameworks like React, Angular or Vue to help with context monitoring.
As a quick example, I’ve built a React <ContextRouter> component that uses Conditioner to monitor user context queries and switch between views. It’s heavily inspired by React Router so might look familiar.
<ContextRouter>
    <Context query="@media (min-width:30em)"
             component={ FancyInfoGraphic }/>
    <Context>
        // fallback to use on smaller viewports
        <table/>
    </Context>
</ContextRouter>
I hope someone out there is itching to convert this to Angular. As a cat and React person I just can’t get myself to do it.
Conclusion
Replacing our initialization script with the killer for loop created a single entity in charge of loading modules. From that change, automatically followed a set of requirements. We used Conditioner to fulfill these requirements and then wrote custom plugins to extend Conditioner where it didn’t fit our needs.
Not having access to our single for loop, steered us towards writing more re-usable and flexible modules. By switching to dynamic imports we could then lazy load these modules, and later load them conditionally by combining the lazy loading with context monitoring.
With conditional loading, we can quickly determine when to send which module over the connection, and by building advanced context monitors and queries, we can target more specific contexts for enhancement.
By combining all these tiny changes, we can speed up page load time and more closely match our functionality to each different context. This will result in improved user experience and as a bonus improve our developer experience as well.
Further Reading
- Web Development Is Getting Too Complex, And It May Be Our Fault
- Gatsby Headaches: Working With Media (Part 1)
- How We Optimized Performance To Serve A Global Audience
- CSS Scroll Snapping Aligned With Global Page Layout: A Full-Width Slider Case Study


