Building Mobile Apps Using React Native And WordPress

Email Newsletter
Weekly tips on front-end & UX.
Trusted by 182,000+ folks.


 Custom Web Forms for Angular, React, & Vue. Your backend.
 Celebrating 10 million developers
As web developers, you might have thought that mobile app development calls for a fresh learning curve with another programming language. Perhaps Java and Swift need to be added to your skill set to hit the ground running with both iOS and Android, and that might bog you down.
But this article has you in for a surprise! We will look at building an e-commerce application for iOS and Android using the WooCommerce platform as our backend. This would be an ideal starting point for anyone willing to get into native cross-platform development.
A Brief History Of Cross-Platform Development
It’s 2011, and we see the beginning of hybrid mobile app development. Frameworks like Apache Cordova, PhoneGap, and Ionic Framework slowly emerge. Everything looks good, and web developers are eagerly coding away mobile apps with their existing knowledge.
However, mobile apps still looked like mobile versions of websites. No native designs like Android’s material design or iOS’s flat look. Navigation worked similar to the web and transitions were not buttery smooth. Users were not satisfied with apps built using the hybrid approach and dreamt of the native experience.
Fast forward to March 2015, and React Native appears on the scene. Developers are able to build truly native cross-platform applications using React, a favorite JavaScript library for many developers. They are now easily able to learn a small library on top of what they know with JavaScript. With this knowledge, developers are now targeting the web, iOS and Android.
Furthermore, changes done to the code during development are loaded onto the testing devices almost instantly! This used to take several minutes when we had native development through other approaches. Developers are able to enjoy the instant feedback they used to love with web development.
React developers are more than happy to be able to use existing patterns they have followed into a new platform altogether. In fact, they are targeting two more platforms with what they already know very well.
This is all good for front-end development. But what choices do we have for back-end technology? Do we still have to learn a new language or framework?
The WordPress REST API
In late 2016, WordPress released the much awaited REST API to its core, and opened the doors for solutions with decoupled backends.
So, if you already have a WordPress and WooCommerce website and wish to retain exactly the same offerings and user profiles across your website and native app, this article is for you!
Assumptions Made In This Article
I will walk you through using your WordPress skill to build a mobile app with a WooCommerce store using React Native. The article assumes:
- You are familiar with the different WordPress APIs, at least at a beginner level.
- You are familiar with the basics of React.
- You have a WordPress development server ready. I use Ubuntu with Apache.
- You have an Android or an iOS device to test with Expo.
What We Will Build In This Tutorial
The project we are going to build through this article is a fashion store app. The app will have the following functionalities:
- Shop page listing all products,
- Single product page with details of the selected item,
- ‘Add to cart’ feature,
- ‘Show items in cart’ feature,
- ‘Remove item from cart’ feature.
This article aims to inspire you to use this project as a starting point to build complex mobile apps using React Native.
Note: For the full application, you can visit my project on Github and clone it.
Getting Started With Our Project
We will begin building the app as per the official React Native documentation. Having installed Node on your development environment, open up the command prompt and type in the following command to install the Create React Native App globally.
npm install -g create-react-native-appNext, we can create our project
create-react-native-app react-native-woocommerce-storeThis will create a new React Native project which we can test with Expo.
Next, we will need to install the Expo app on our mobile device which we want to test. It is available for both iOS and Android.
On having installed the Expo app, we can run npm start on our development machine.
cd react-native-woocommerce-store

npm start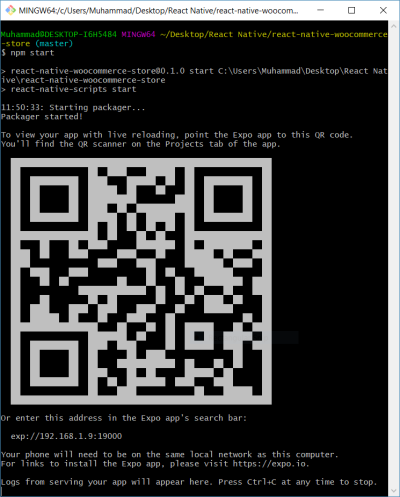
After that, you can scan the QR code through the Expo app or enter the given URL in the app’s search bar. This will run the basic ‘Hello World’ app in the mobile. We can now edit App.js to make instant changes to the app running on the phone.
Alternatively, you can run the app on an emulator. But for brevity and accuracy, we will cover running it on an actual device.
Next, let’s install all the required packages for the app using this command:
npm install -s axios react-native-htmlview react-navigation react-redux redux redux-thunkSetting Up A WordPress Site
Since this article is about creating a React Native app, we will not go into details about creating a WordPress site. Please refer to this article on how to install WordPress on Ubuntu. As WooCommerce REST API requires HTTPS, please make sure it is set up using Let’s Encrypt. Please refer to this article for a how-to guide.
We are not creating a WordPress installation on localhost since we will be running the app on a mobile device, and also since HTTPS is needed.
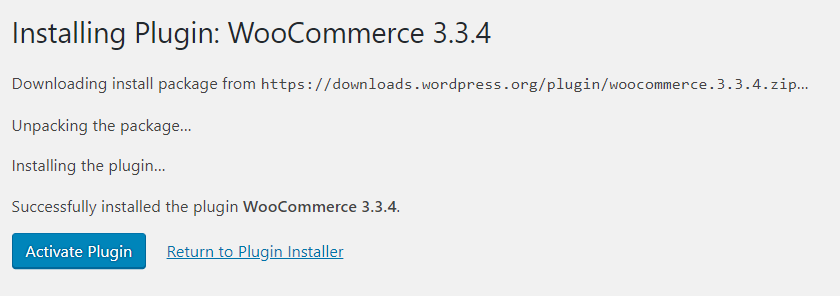
Once WordPress and HTTPS are successfully set up, we can install the WooCommerce plugin on the site.

After installing and activating the plugin, continue with the WooCommerce store setup by following the wizard. After the wizard is complete, click on ‘Return to dashboard.’
You will be greeted by another prompt.

Click on ‘Let’s go‘ to 'Add example products'. This will save us the time to create our own products to display in the app.
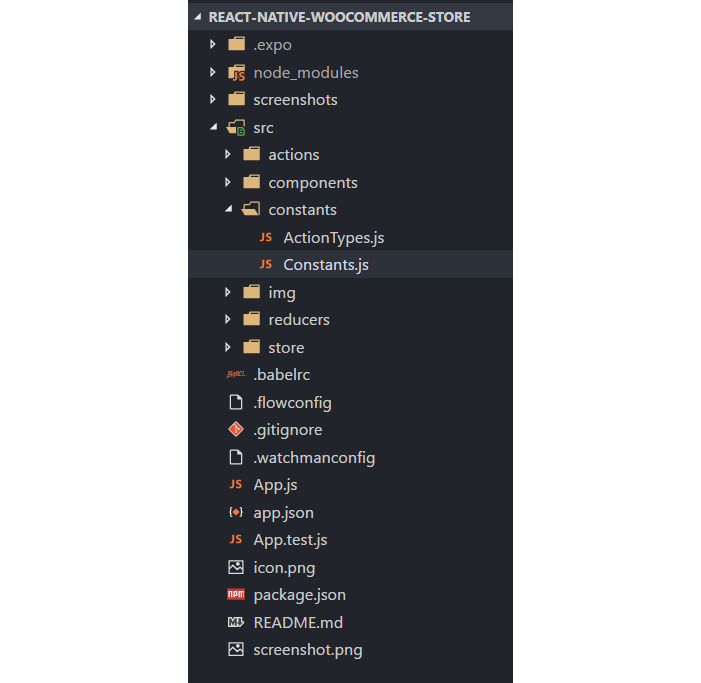
Constants File
To load our store’s products from the WooCommerce REST API, we need the relevant keys in place inside our app. For this purpose, we can have a constans.js file.
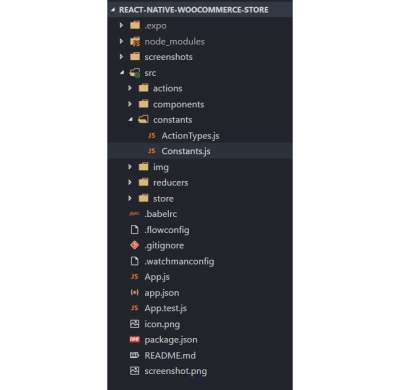
First create a folder called ‘src’ and create subfolders inside as follows:
Now, let’s generate the keys for WooCommerce. In the WordPress dashboard, navigate to WooCommerce → Settings → API → Keys/Apps and click on ‘Add Key.’
Next create a Read Only key with name React Native. Copy over the Consumer Key and Consumer Secret to the constants.js file as follows:
const Constants = {
   URL: {
wc: 'https://woocommerce-store.on-its-way.com/wp-json/wc/v2/'
   },
   Keys: {
ConsumerKey: 'CONSUMER_KEY_HERE',
ConsumerSecret: 'CONSUMER_SECRET_HERE'
   }
}
export default Constants;
Starting With React Navigation
React Navigation is a community solution to navigating between the different screens and is a standalone library. It allows developers to set up the screens of the React Native app with just a few lines of code.
There are different navigation methods within React Navigation:
- Stack,
- Switch,
- Tabs,
- Drawer,
- and more.
For our Application we will use a combination of StackNavigation and DrawerNavigation to navigate between the different screens. StackNavigation is similar to how browser history works on the web. We are using this since it provides an interface for the header and the header navigation icons. It has push and pop similar to stacks in data structures. Push means we add a new screen to the top of the Navigation Stack. Pop removes a screen from the stack.
The code shows that the StackNavigation, in fact, houses the DrawerNavigation within itself. It also takes properties for the header style and header buttons. We are placing the navigation drawer button to the left and the shopping cart button to the right. The drawer button switches the drawer on and off whereas the cart button takes the user to the shopping cart screen.
const StackNavigation = StackNavigator({
 DrawerNavigation: { screen: DrawerNavigation }
}, {
   headerMode: 'float',
   navigationOptions: ({ navigation, screenProps }) => ({
     headerStyle: { backgroundColor: '#4C3E54' },
     headerTintColor: 'white',
     headerLeft: drawerButton(navigation),
     headerRight: cartButton(navigation, screenProps)
   })
 });

const drawerButton = (navigation) => (
 <Text
   style={{ padding: 15, color: 'white' }}
   onPress={() => {
     if (navigation.state.index === 0) {
       navigation.navigate('DrawerOpen')
     } else {
       navigation.navigate('DrawerClose')
     }
   }
   }> (
 <Text style={{ padding: 15, color: 'white' }}
   onPress={() => { navigation.navigate('CartPage') }}
 >
   <EvilIcons name="cart" size={30} />
   {screenProps.cartCount}
 </Text>
);
DrawerNavigation on the other hands provides for the side drawer which will allow us to navigate between Home, Shop, and Cart. The DrawerNavigator lists the different screens that the user can visit, namely Home page, Products page, Product page, and Cart page. It also has a property which will take the Drawer container: the sliding menu which opens up when clicking the hamburger menu.
const DrawerNavigation = DrawerNavigator({
 Home: {
   screen: HomePage,
   navigationOptions: {
     title: "RN WC Store"
   }
 },
 Products: {
   screen: Products,
   navigationOptions: {
     title: "Shop"
   }
 },
 Product: {
   screen: Product,
   navigationOptions: ({ navigation }) => ({
     title: navigation.state.params.product.name
   }),
 },
 CartPage: {
   screen: CartPage,
   navigationOptions: {
     title: "Cart"
   }
 }
}, {
   contentComponent: DrawerContainer
 });
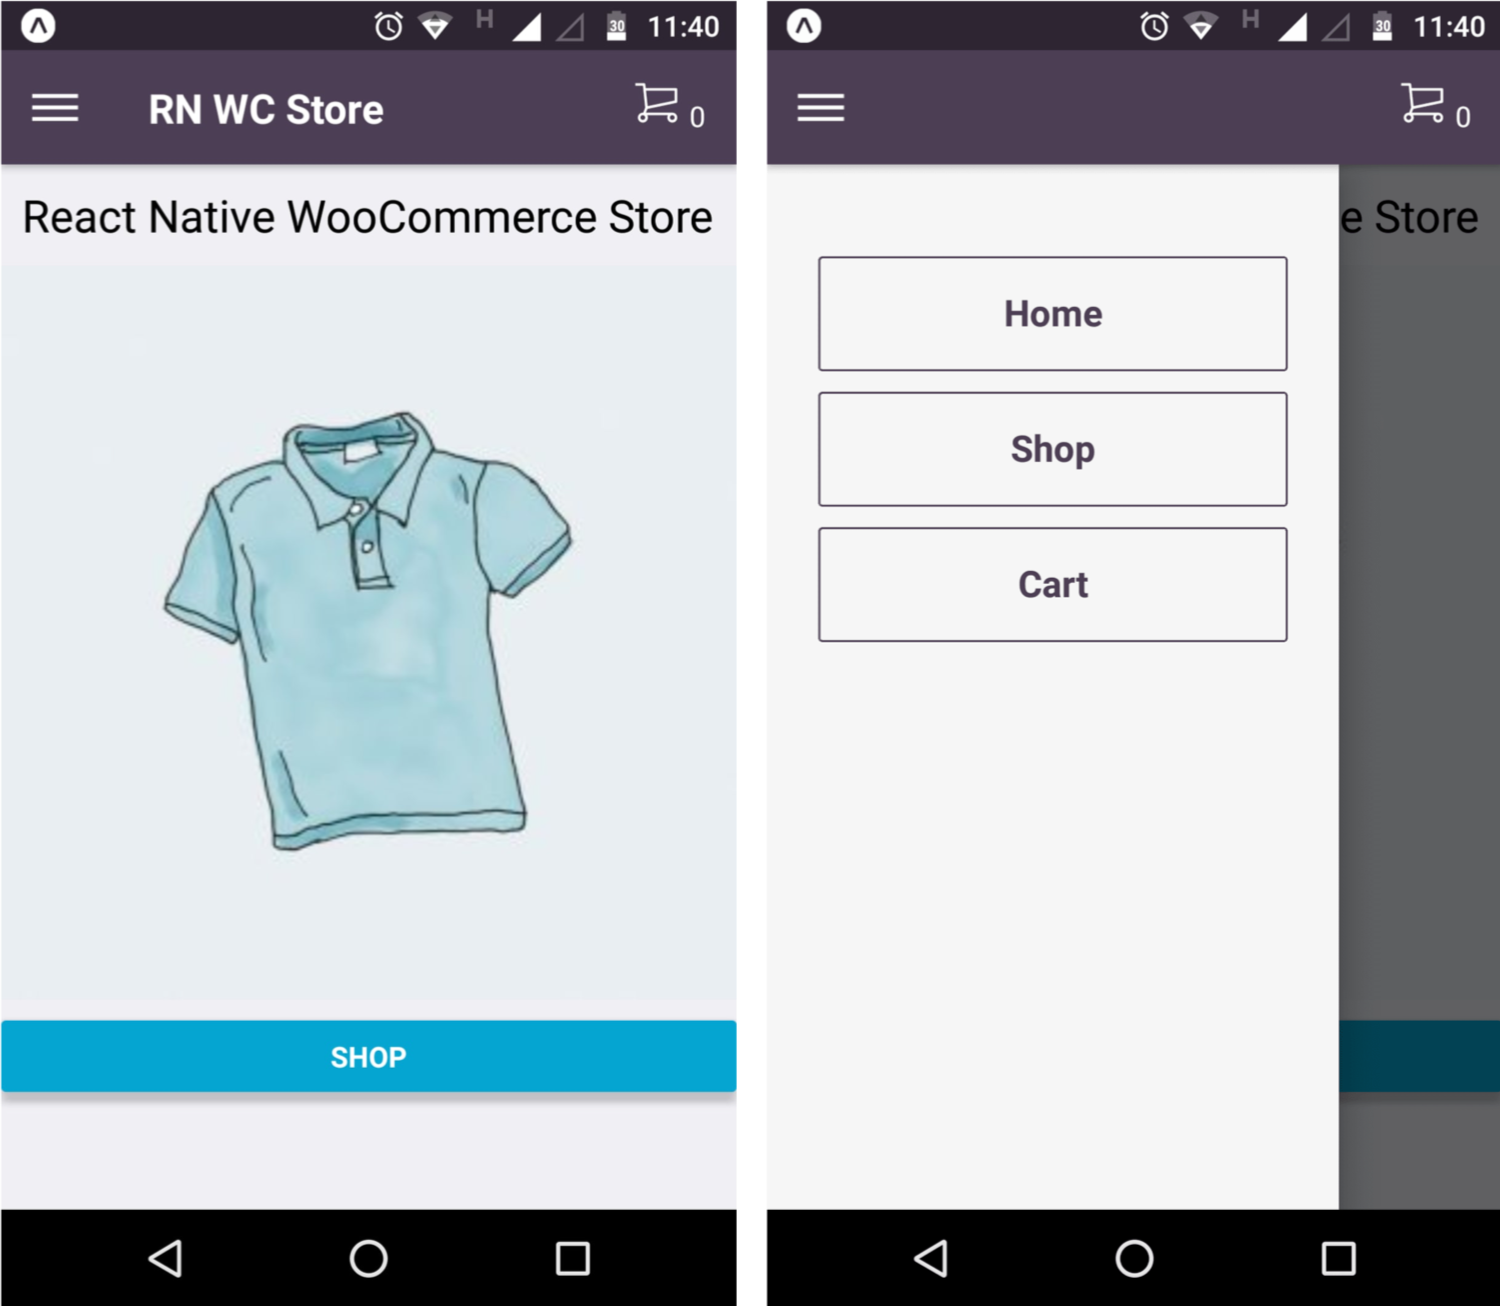
homepage.js). Right: The open drawer (DrawerContainer.js).Injecting The Redux Store To App.js
Since we are using Redux in this app, we have to inject the store into our app. We do this with the help of the Provider component.
const store = configureStore();

class App extends React.Component {
 render() {
   return (
     <Provider store={store}>
       <ConnectedApp />
     </Provider>
   )
 }
}
We will then have a ConnectedApp component so that we can have the cart count in the header.
class CA extends React.Component {
 render() {
   const cart = {
     cartCount: this.props.cart.length
   }
   return (
     <StackNavigation screenProps={cart} />
   );
 }
}

function mapStateToProps(state) {
 return {
   cart: state.cart
 };
}

const ConnectedApp = connect(mapStateToProps, null)(CA);
Redux Store, Actions, And Reducers
In Redux, we have three different parts:
- Store
Holds the whole state of your entire application. The only way to change state is to dispatch an action to it. - Actions
A plain object that represents an intention to change the state. - Reducers
A function that accepts a state and an action type and returns a new state.
These three components of Redux help us achieve a predictable state for the entire app. For simplicity, we will look at how the products are fetched and saved in the Redux store.
First of all, let’s look at the code for creating the store:
let middleware = [thunk];

export default function configureStore() {
    return createStore(
        RootReducer,
        applyMiddleware(...middleware)
    );
}
Next, the products action is responsible for fetching the products from the remote website.
export function getProducts() {
   return (dispatch) => {
       const url = `${Constants.URL.wc}products?per_page=100&consumer_key=${Constants.Keys.ConsumerKey}&consumer_secret=${Constants.Keys.ConsumerSecret}`

       return axios.get(url).then(response => {
           dispatch({
               type: types.GET_PRODUCTS_SUCCESS,
               products: response.data
           }
       )}).catch(err => {
           console.log(err.error);
       })
   };
}
The products reducer is responsible for returning the payload of data and whether it needs to be modified.
export default function (state = InitialState.products, action) {
    switch (action.type) {
        case types.GET_PRODUCTS_SUCCESS:
            return action.products;
        default:
            return state;
    }
}
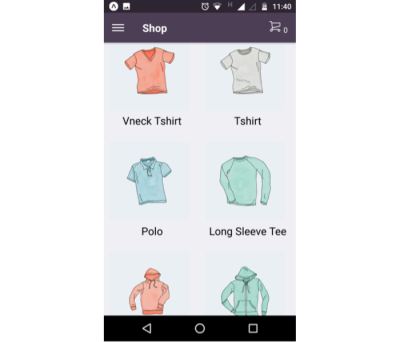
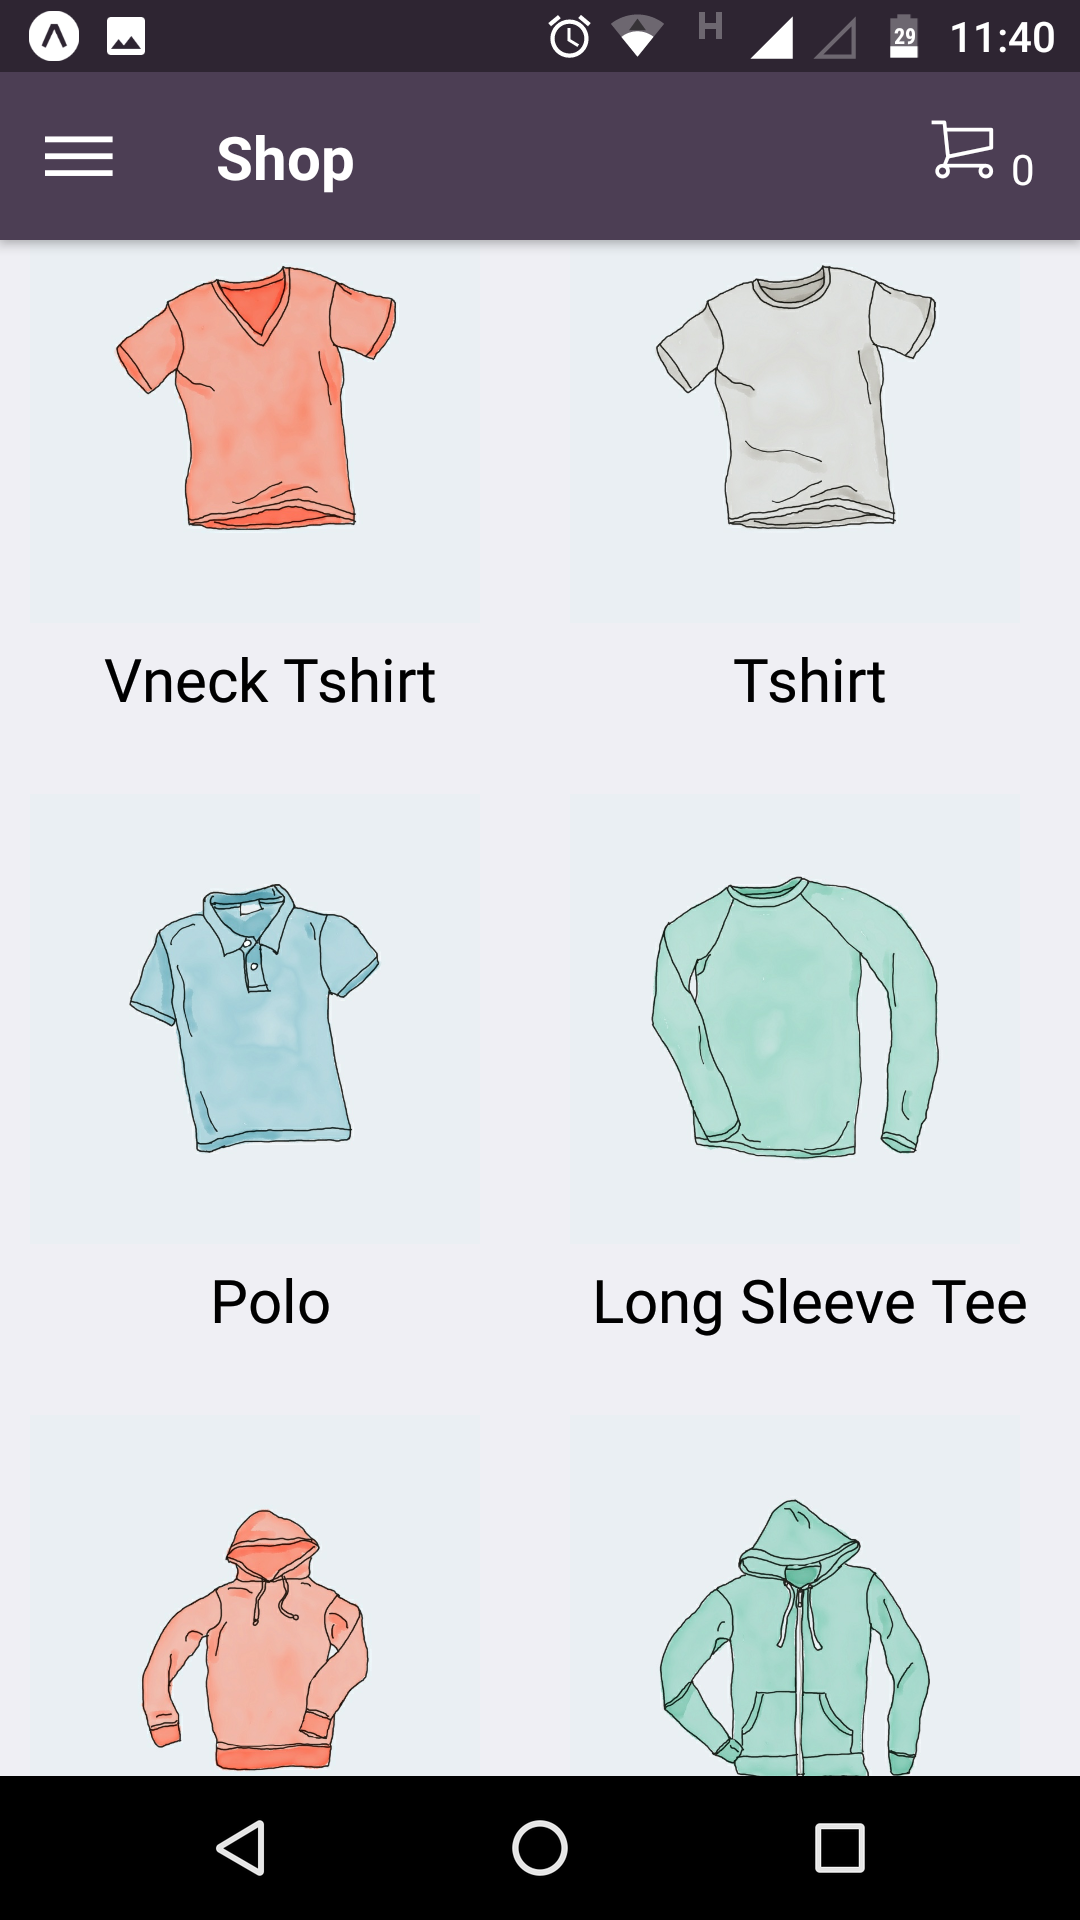
Displaying The WooCommerce Shop
The products.js file is our Shop page. It basically displays the list of products from WooCommerce.
class ProductsList extends Component {

 componentDidMount() {
   this.props.ProductAction.getProducts();
 }

 _keyExtractor = (item, index) => item.id;

 render() {
   const { navigate } = this.props.navigation;
   const Items = (
     <FlatList contentContainerStyle={styles.list} numColumns={2}
       data={this.props.products || []}
       keyExtractor={this._keyExtractor}
       renderItem={
         ({ item }) => (
           <TouchableHighlight style={{ width: '50%' }} onPress={() => navigate("Product", { product: item })} underlayColor="white">
             <View style={styles.view} >
               <Image style={styles.image} source={{ uri: item.images[0].src }} />
               <Text style={styles.text}>{item.name}</Text>
             </View>
           </TouchableHighlight>
         )
       }
     />
   );
   return (
     <ScrollView>
       {this.props.products.length ? Items :
         <View style={{ alignItems: 'center', justifyContent: 'center' }}>
           <Image style={styles.loader} source={LoadingAnimation} />
         </View>
       }
     </ScrollView>
   );
 }
}
this.props.ProductAction.getProducts() and this.props.products are possible because of mapStateToProps and mapDispatchToProps.
mapStateToProps And mapDispatchToProps
State is the Redux store and Dispatch is the actions we fire. Both of these will be exposed as props in the component.
function mapStateToProps(state) {
 return {
   products: state.products
 };
}
function mapDispatchToProps(dispatch) {
 return {
   ProductAction: bindActionCreators(ProductAction, dispatch)
 };
}
export default connect(mapStateToProps, mapDispatchToProps)(ProductsList);
Styles
In React, Native styles are generally defined on the same page. It’s similar to CSS, but we use camelCase properties instead of hyphenated properties.
const styles = StyleSheet.create({
 list: {
   flexDirection: 'column'
 },
 view: {
   padding: 10
 },
 loader: {
   width: 200,
   height: 200,
   alignItems: 'center',
   justifyContent: 'center',
 },
 image: {
   width: 150,
   height: 150
 },
 text: {
   textAlign: 'center',
   fontSize: 20,
   padding: 5
 }
});
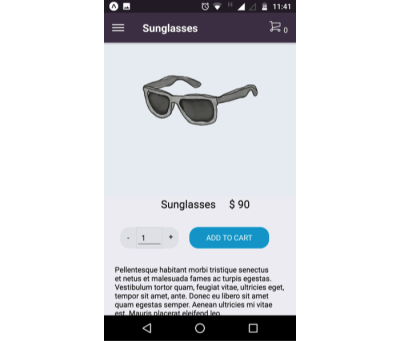
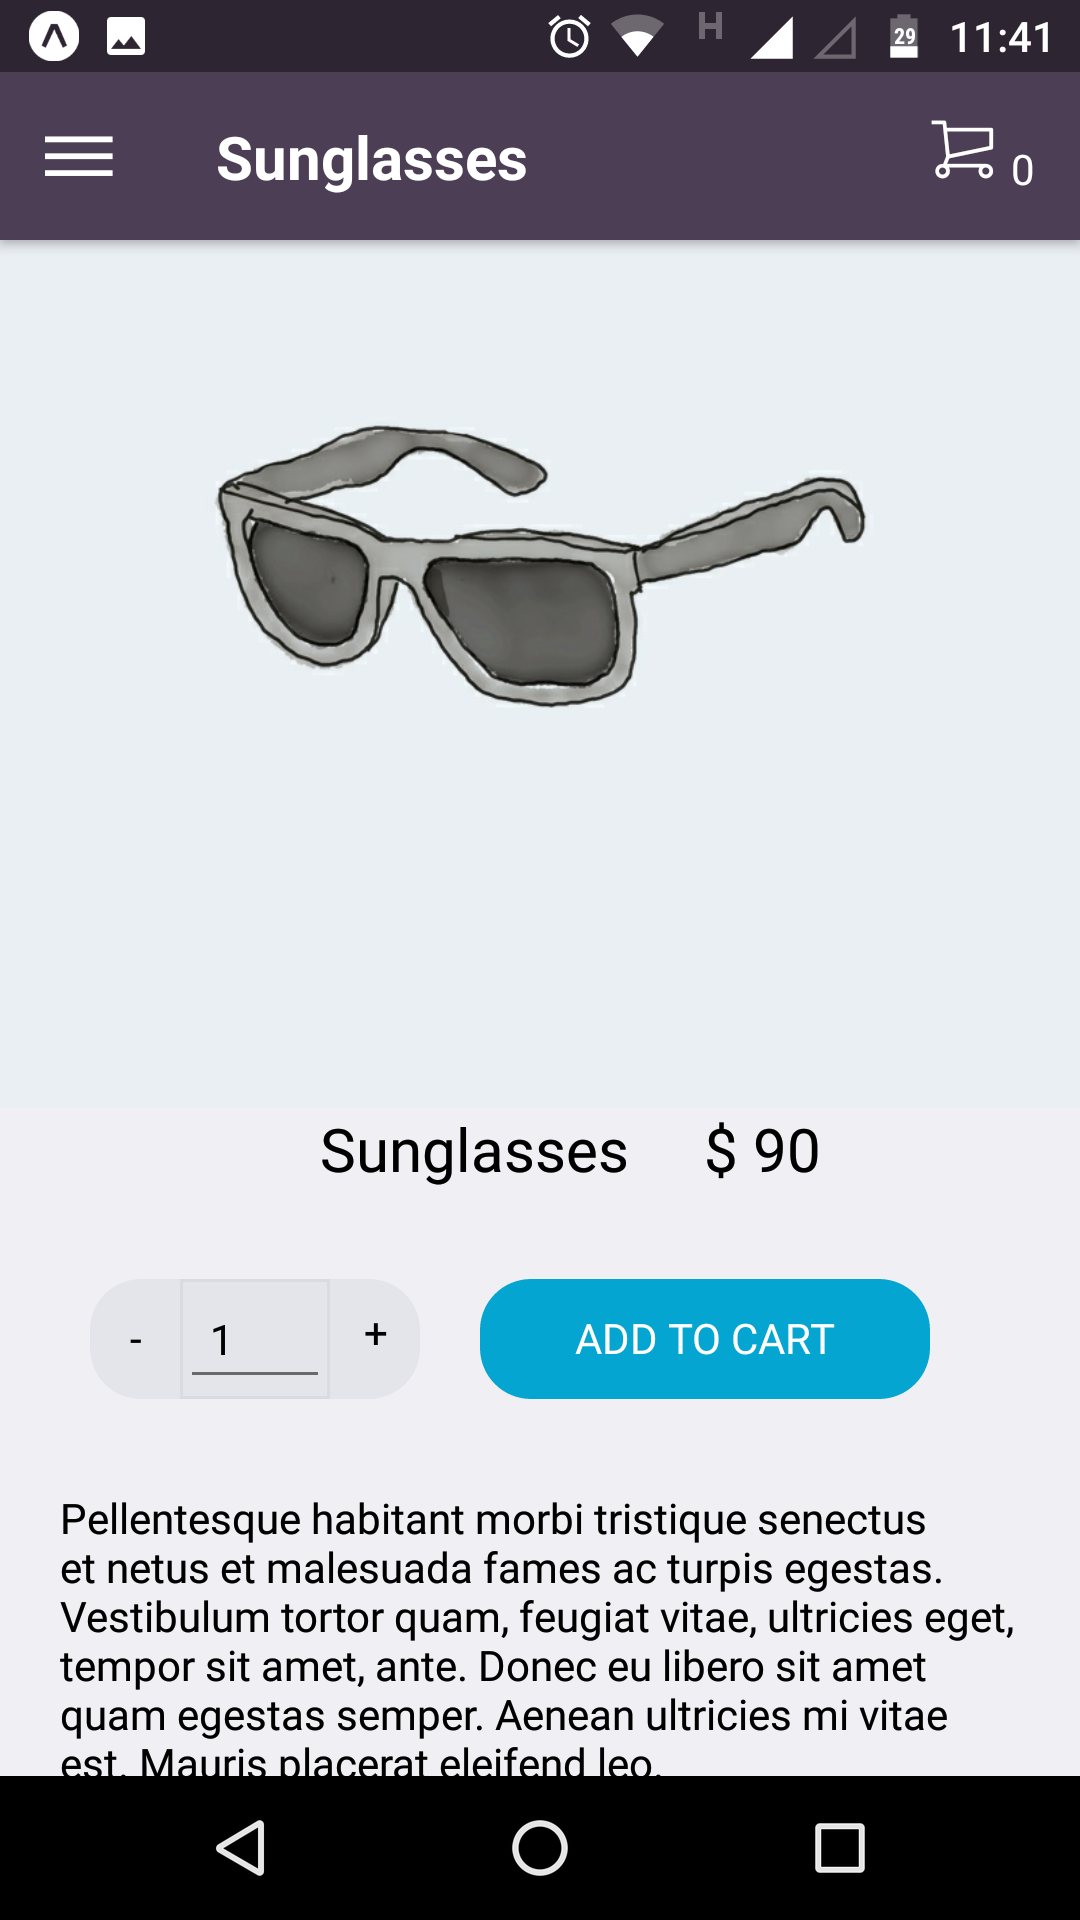
Single Product Page
This page contains details of a selected product. It shows the user the name, price, and description of the product. It also has the ‘Add to cart’ function.
Cart Page
This screen shows the list of items in the cart. The action has the functions getCart, addToCart, and removeFromCart. The reducer handles the actions likewise. Identification of actions is done through actionTypes — constants which describe the action that are stored in a separate file.
export const GET_PRODUCTS_SUCCESS = 'GET_PRODUCTS_SUCCESS'
export const GET_PRODUCTS_FAILED = 'GET_PRODUCTS_FAILED';

export const GET_CART_SUCCESS = 'GET_CART_SUCCESS';
export const ADD_TO_CART_SUCCESS = 'ADD_TO_CART_SUCCESS';
export const REMOVE_FROM_CART_SUCCESS = 'REMOVE_FROM_CART_SUCCESS';
This is the code for the CartPage component:
class CartPage extends React.Component {

 componentDidMount() {
   this.props.CartAction.getCart();
 }

 _keyExtractor = (item, index) => item.id;

 removeItem(item) {
   this.props.CartAction.removeFromCart(item);
 }

 render() {
   const { cart } = this.props;
   console.log('render cart', cart)

   if (cart && cart.length > 0) {
     const Items = <FlatList contentContainerStyle={styles.list}
       data={cart}
       keyExtractor={this._keyExtractor}
       renderItem={({ item }) =>
         <View style={styles.lineItem} >
           <Image style={styles.image} source={{ uri: item.image }} />
           <Text style={styles.text}>{item.name}</Text>
           <Text style={styles.text}>{item.quantity}</Text>
           <TouchableOpacity style={{ marginLeft: 'auto' }} onPress={() => this.removeItem(item)}><Entypo name="cross" size={30} /></TouchableOpacity>
         </View>
       }
     />;
     return (
       <View style={styles.container}>
         {Items}
       </View>
     )
   } else {
     return (
       <View style={styles.container}>
         <Text>Cart is empty!</Text>
       </View>
     )
   }
 }
}
As you can see, we are using a FlatList to iterate through the cart items. It takes in an array and creates a list of items to be displayed on the screen.
Conclusion
You can configure information about the app such as name and icon in the app.json file. The app can be published after npm installing exp.
To sum up:
- We now have a decent e-commerce application with React Native;
- Expo can be used to run the project on a smartphone;
- Existing backend technologies such as WordPress can be used;
- Redux can be used for managing the state of the entire app;
- Web developers, especially React developers can leverage this knowledge to build bigger apps.
For the full application, you can visit my project on Github and clone it. Feel free to fork it and improve it further. As an exercise, you can continue building more features into the project such as:
- Checkout page,
- Authentication,
- Storing the cart data in AsyncStorage so that closing the app does not clear the cart.
Further Reading
- WordPress Playground: From 5-Minute Install To Instant Spin-Up
- A High-Level Overview Of Large Language Model Concepts, Use Cases, And Tools
- Accessible Target Sizes Cheatsheet
- The End Of My Gatsby Journey


