Building A PWA Using Angular 6

Email Newsletter
Weekly tips on front-end & UX.
Trusted by 182,000+ folks.


 Custom Web Forms for Angular, React, & Vue. Your backend.
 Celebrating 10 million developers
In this tutorial, we’ll be using the latest Angular 6 to build a PWA by implementing the core tenets that make a PWA. We’ll start by creating a front-end web application that consumes a JSON API. For this matter, we’ll be using the Angular HttpClient module to send HTTP requests to a statically JSON API generated from the Simplified JavaScript Jargon GitHub repository. We’ll also use Material Design for building the UI via the Angular Material package.
Next, we’ll use the “Audits” panel (Lighthouse) from Chrome DevTools to analyze our web application against the core tenets of PWAs. Finally, we’ll explain and add the PWA features to our web application according to the “Progressive Web App” section in the Lighthouse report.
Before we start implementing our PWA, let’s first introduce PWAs and Lighthouse.
Recommended reading: Native And PWA: Choices, Not Challengers!
What’s A PWA?
A Progressive Web App or PWA is a web application that has a set of capabilities (similar to native apps) which provide an app-like experience to users. PWAs need to meet a set of essential requirements that we’ll see next. PWAs are similar to native apps but are deployed and accessible from web servers via URLs, so we don’t need to go through app stores.
- Progressive
Work for every user, regardless of browser choice, because they are built with progressive enhancement as a core tenet. - Responsive
Fit any form factor, desktop, mobile, tablet, or whatever is next. - Connectivity independent
Enhanced with service workers to work offline or on low-quality networks. - App-like
Use the app-shell model to provide app-style navigation and interactions. - Fresh
Always up-to-date thanks to the service worker update process. - Safe
Served via HTTPS to prevent snooping and ensure content has not been tampered with. - Discoverable
Are identifiable as “applications” thanks to W3C manifests and service worker registration scope allowing search engines to find them. - Re-engageable
Make re-engagement easy through features like push notifications. - Installable
Allow users to “keep” apps they find most useful on their home screen without the hassle of an app store. - Linkable
Easily share via URL and not require complex installation.
Introducing Lighthouse
Lighthouse is an open-source auditing tool created by Google which can be used to audit websites and applications for accessibility performance, SEO, best practices and PWA features.
You can access Lighthouse from the Audit tab in Chrome DevTools as a module in Node.js or as a CLI tool. You can use Lighthouse by providing an URL and then running the audits which will provide you with a report containing the auditing results which are basically suggestions on how you can improve your web application.
Installing Angular CLI v6 And Generating A Project
In this section, we’ll install the latest version of Angular CLI then we’ll use it to create a new Angular 6 project.
Angular CLI requires Node.js >= 8.9+ so first make sure you have the required version installed by running the following command:
$ node -v
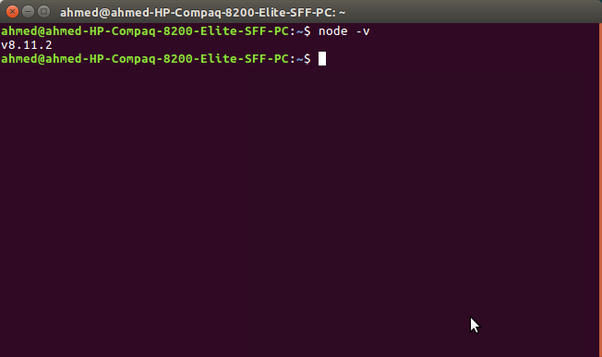
In case you don’t have Node.js installed, you can simply head on to the official Node download page and grab the Node binaries for your system.
Now, you can go ahead and install the latest version of Angular CLI by running:
$ npm install -g @angular/cli
Note: Depending on your npm configuration, you may need to add _sudo_ to install packages globally.
You can generate your Angular 6 project by running the following command in your terminal:
$ ng new pwademo
This will create a project with a structure that looks like:
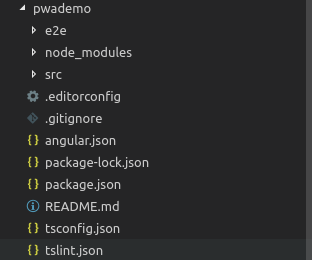
Most work that’s done will be inside the src/ folder that contains the source code of the application.
Creating The Angular Application
After generating a project, we’ll build a web application that consumes a JSON API and displays the items on the home page. We’ll use the HttpClient service for sending HTTP requests and Angular Material for building the UI.
Adding Angular Material
Thanks to Angular CLI v6 and the new ng add command, adding Angular Material to your project is only one command away. You just need to run the following command from your terminal:
$ cd pwademo
$ ng add @angular/material
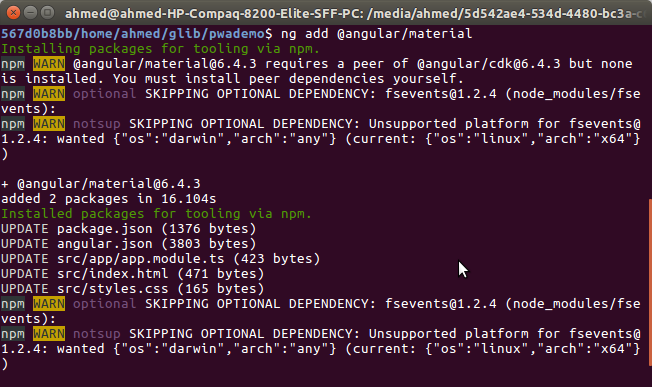
You can see from the screenshot that the command installs the required package from npm and update a bunch of files for setting up Angular Material in your project which previously needed manual updates.
Setting Up HttpClient And Consuming The JSON API
Now, let’s setup the Angular project to use HttpClient for sending HTTP requests. First, you need to import the HttpClientModule module in the main application module in the src/app/app.module.ts file:
/*...*/
import { HttpClientModule } from  '@angular/common/http';
@NgModule({
declarations: [
AppComponent
],
imports: [
/*...*/
HttpClientModule
],
providers: [],
bootstrap: [AppComponent]
})
export  class  AppModule { }
That’s it. We can now inject and use HttpClient in any component or service that belongs to the main module.
For demo purposes, we’ll consume a statically generated JSON API from the Simplified JavaScript Jargon GitHub repository. If you are consuming any other resource, make sure you have CORS enabled so the browser doesn’t disallow reading the remote resource due to the Same Origin Policy.
Let’s create a service that interfaces with the API. Inside your project folder, run:
$ ng g service api
This will create a service called ApiService in the src/app/api.service.ts file.
Now open the src/app/api.service.ts file and update it to reflect the following changes:
import { Injectable } from  '@angular/core';
import { HttpClient } from  '@angular/common/http';
import { Observable } from  'rxjs';

export  interface  Item{
name:  string;
description:  string;
url:  string;
html:  string;
markdown:  string;
}

@Injectable({
providedIn:  'root'
})

export  class  ApiService {
private  dataURL:  string  =  "https://www.techiediaries.com/api/data.json";
constructor(private  httpClient:  HttpClient) {}
fetch():  Observable<Item[]>{
return <Observable<Item[]>this.httpClient.get(this.dataURL);
}
}
We first imported the HttpClient and Observable classes then injected the HttpClient in the constructor as httpClient and added a fetch() method which calls the get() method of HttpClient (for sending an HTTP GET request to our JSON endpoint) and returns an Observable that we can subscribe to later.
We also declared an Item interface which represents a single item of the returned JSON data.
Next import this service from the application component. Open the src/app/app.component.ts file and add:
import { Component, OnInit } from  '@angular/core';
import { ApiService } from  './api.service';
import { Item } from  './api.service';

@Component({
selector:  'app-root',
templateUrl:  './app.component.html',
styleUrls: ['./app.component.css']
})
export  class  AppComponent  implements  OnInit{
title  =  'pwademo';
items:  Array<Item>;
constructor(private  apiService:  ApiService){
}
ngOnInit(){
this.fetchData();
}
fetchData(){
this.apiService.fetch().subscribe((data:  Array<Item>)=>{
console.log(data);
this.items  =  data;
}, (err)=>{
console.log(err);
});
}
}
We import the ApiService that we created before and we inject it as apiService, we also import the Item class which represents a single item of our JSON data and we declare the items variable of type Array<Item> which will hold the fetched items.
Next, we add a fetchData() method which calls our fetch() method that we defined in the ApiService which returns an Observable. We simply subscribe to this observable in order to send a GET request to our JSON endpoint and get the response data that we finally assign to the items array.
We call the fetchData() method in the ngOnInit() life-cycle event so it will be called once the AppComponent component is initialized.
Adding The Application UI
Our application UI will consist of a navigation bar and the skeleton of the page which will be created with Angular Material.
Before using an Angular Material component, you’ll need to import its module. Each Material component belongs to its own module.
Open the src/app/app.module.ts file and add the following imports:
/*...*/
import { MatToolbarModule } from  '@angular/material/toolbar';
import { MatCardModule } from  '@angular/material/card';
import { MatButtonModule } from  '@angular/material/button';

@NgModule({
declarations: [
AppComponent
],
imports: [
/*...*/
MatToolbarModule,
MatCardModule,
MatButtonModule
],
providers: [],
bootstrap: [AppComponent]
})
export  class  AppModule { }
We import modules for toolbar, card and button components and we add them to the imports array of the AppModule.
Next, open the src/app/app.component.html file, delete what’s in there and add:
<mat-toolbar  color="primary">
<mat-toolbar-row>
<span>JS-jargon</span>
</mat-toolbar-row>
</mat-toolbar>
<main>
<mat-card *ngFor="let item of items">
<mat-card-header>
<mat-card-title>{{item.name}}</mat-card-title>
</mat-card-header>
<mat-card-content>
{{item.description}}
</mat-card-content>
<mat-card-actions>
<a  mat-raised-button  href="{{item.url}}"  color="primary">More</a>
</mat-card-actions>
</mat-card>
</main>
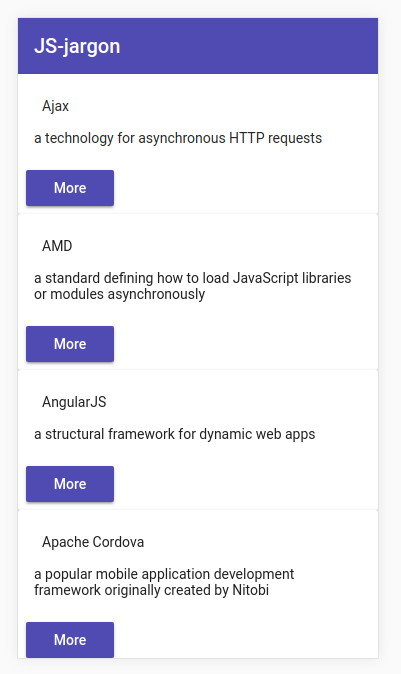
We use Material components to create the UI. The <mat-toolbar> component is used to create a Material toolbar and the <mat-card> component is used to create a Material card etc.
We iterate over the items array which gets populated by the fetchData() method when the component is initialized, and display items as Material cards. Each card contains the name, description and a link for more information (The link is styled as a Material button using the mat-raised-button directive).
This is a screenshot of the application:
Building The Application For Production
Typically, when checking your application for PWA features you should first build it for production because most PWA features are not added in development. For example, you don’t want to have service workers and caching enabled in development since you will periodically need to update the files.
Let’s build the application for production using the following command:
$ ng build --prod
The production build will be available from the dist/pwademo folder. We can use a tool like http-server to serve it.
First, install http-server using the following command:
$ npm i -g http-server
You can then run it using the following command:
$ cd dist/pwademo
$ http-server -o
The -o option will automatically open the default browser in your system and navigate to the https://127.0.0.1:8080/ address where our web application is available.
Analyzing The Application Using Lighthouse
Let’s now analyze our application using Lighthouse. First, launch Chrome and visit our application address https://127.0.0.1:8080/.
Next, open Developer Tools or press Ctrl + Shift + I and click on the Audit panel.
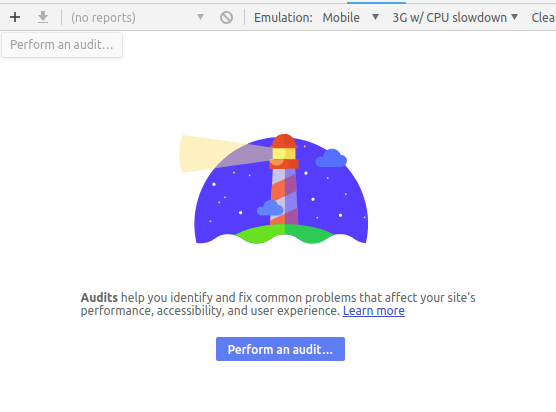
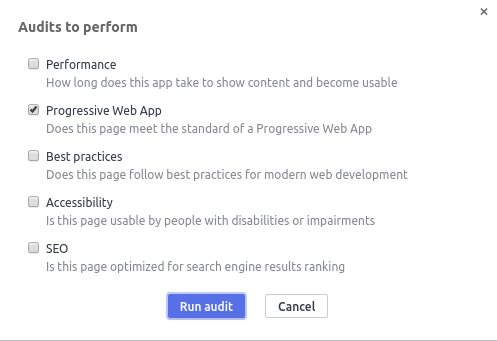
You preferably need to set the Emulation to Mobile instead of Desktop to emulate a mobile environment. Next, click on Perform an audit… blue button. You’ll have a dialog opened in which you need to choose the types of the audits you want to perform against your web application. Un-check all types but Progressive Web App and click the Run audit button.
Wait for the Lighthouse to generate the report. This is a screenshot of the result at this stage:
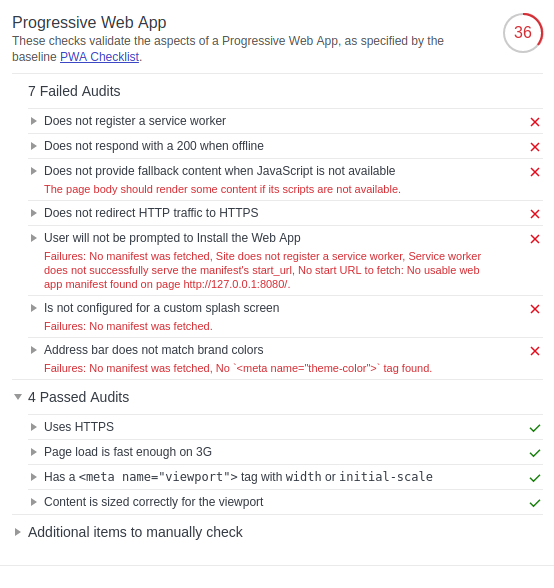
Lighthouse performs a series of checks which validate the aspects of a Progressive Web App specified by the PWA Checklist. We get an initial score of 36⁄100 that’s because we have some audits passed.
Our application has 7 failed audits mainly related to Service Workers, Progressive Enhancement, HTTPS and Web App Manifest which are the core aspects of a PWA.
Registering A Service Worker
The first two failed audits (“Does not register a service worker” and “Does not respond with a 200 when offline”) are related to Service Workers and caching. So what’s a service worker?
A service worker is a feature that’s available on modern browsers which can be used as a network proxy that lets your application intercept network requests to cache assets and data. This could be used for implementing PWA features such as offline support and Push notifications etc.
To pass these audits we simply need to register a service worker and use it to cache files locally. When offline, the SW should return the locally cached version of the file. We’ll see a bit later how to add that with one CLI command.
Recommended reading: Making A Service Worker: A Case Study
Progressive Enhancement
The third failed audit (“Does not provide fallback content when JavaScript is not available”) is related to Progressive Enhancement which is an essential aspect of a PWA and It simply refers to the capability of PWAs to run on different browsers but provide advanced features if they’re available. One simple example of PE is the use of the <noscript> HTML tag that informs users of the need to enable JavaScript to run the application in case It’s not enabled:
<noscript>
Please enable JavaScript to run this application.
</noscript>
HTTPS
The fourth failed audit (“Does not redirect HTTP traffic to HTTPS”) is related to HTTPS which is also a core aspect of PWAs (service workers can be only served from secure origins, except for localhost). The “Uses HTTPS” audit itself is considered as passed by Lighthouse since we’re auditing localhost but once you use an actual host you need a SSL certificate. You can get a free SSL certificate from different services such as Let’s Encrypt, Cloudflare, Firebase or Netlify etc.
The Web App Manifest
The three failed audits (“User will not be prompted to Install the Web App”, “Is not configured for a custom Splash Screen” and “Address bar does not match brand colors”) are related to a missing Web App Manifest which is a file in JSON format that provides the name, description, icons and other information required by a PWA. It lets users install the web app on the home screen just like native apps without going through an app store.
You need to provide a web app manifest and reference it from the index.html file using a <link> tag with rel property set to manifest. We’ll see next how we can do that automatically with one CLI command.
Implementing PWA Features
Angular CLI v6 allows you to quickly add PWA features to an existing Angular application. You can turn your application into a PWA by simply running the following command in your terminal from the root of the project:
$ ng add @angular/pwa
The command automatically adds PWA features to our Angular application, such as:
- A
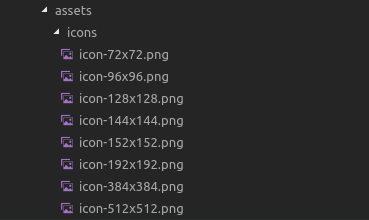
manifest.jsonfile, - Different sizes of icons in the
src/assets/iconsfolder, - The
ngsw-worker.jsservice worker.
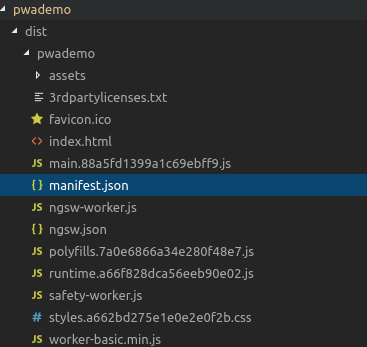
Open the dist/ folder which contains the production build. You’ll find various files but let’s concentrate on the files related to PWA features that we mentioned above:
A manifest.json file was added with the following content:
{
    "name": "pwademo",
    "short_name": "pwademo",
    "theme_color": "#1976d2",
    "background_color": "#fafafa",
    "display": "standalone",
    "scope": "/",
    "start_url": "/",
    "icons": [
        {
        "src": "assets/icons/icon-72x72.png",
        "sizes": "72x72",
        "type": "image/png"
    },
    {
        "src": "assets/icons/icon-96x96.png",
        "sizes": "96x96",
        "type": "image/png"
    },
    {
        "src": "assets/icons/icon-128x128.png",
        "sizes": "128x128",
        "type": "image/png"
    },
    {
        "src": "assets/icons/icon-144x144.png",
        "sizes": "144x144",
        "type": "image/png"
    },
    {
        "src": "assets/icons/icon-152x152.png",
        "sizes": "152x152",
        "type": "image/png"
    },
    {
        "src": "assets/icons/icon-192x192.png",
        "sizes": "192x192",
        "type": "image/png"
    },
    {
        "src": "assets/icons/icon-384x384.png",
        "sizes": "384x384",
        "type": "image/png"
    },
    {
        "src": "assets/icons/icon-512x512.png",
        "sizes": "512x512",
        "type": "image/png"
    }
    ]
}
As you can see, the added manifest.json file has all the information required by a PWA such as the name, description and start_url etc.
The manifest.json file, links to icons with different sizes, that were also added automatically in the assets/icons folder. You will, of course, need to change those icons with your own once you are ready to build the final version of your PWA.
In the index.html file, the manifest.json file is referenced using:
<link rel="manifest" href="manifest.json">
The ngsw-worker.js file, was also automatically added, which contains the service worker. The code to install this service worker is automatically inserted in the src/app/app.module.ts file:
...
import { ServiceWorkerModule } from  '@angular/service-worker';

@NgModule({
declarations: [
AppComponent
],

imports: [
...
ServiceWorkerModule.register('/ngsw-worker.js', { enabled:  environment.production })
],
The @angular/service-worker is installed by the ng add command and added as a dependency to pwademo/package.json:
"dependencies": {
...
"@angular/service-worker": "^6.1.0"
}
The service worker build support is also enabled in the CLI. In the angular.json file a "serviceWorker": true configuration option is added.
In the index.html file a meta tag for theme-color with a value of #1976d2 is added (It also corresponds to the theme_color value in the manifest.json file):
<meta name="theme-color" content="#1976d2">
The theme color tells the browser what color to tint UI elements such as the address bar.
Adding the theme color to both the index.html and manifest.json files fixes the Address Bar Matches Brand Colors audit.
The Service Worker Configuration File
Another file src/ngsw-config.json is added to the project but It’s not a required file for PWAs. It’s a configuration file which allows you to specify which files and data URLs the Angular service worker should cache and how it should update the cached files and data. You can find all details about this file from the official docs.
Note: As of this writing, with the latest 6.1.3 previous ng add @angular/pwa command will fail with this error: Path “/ngsw-config.json” already exists so for now the solution is to downgrade @angular/cli and @angular/pwa to version 6.0.8.
Simply run the following commands in your project:
$ npm i @angular/cli@6.0.8
$ ng i @angular/pwa@6.0.8
$ ng add @angular/pwa
Now let’s re-run the audits against our local PWA hosted locally. This is the new PWA score:
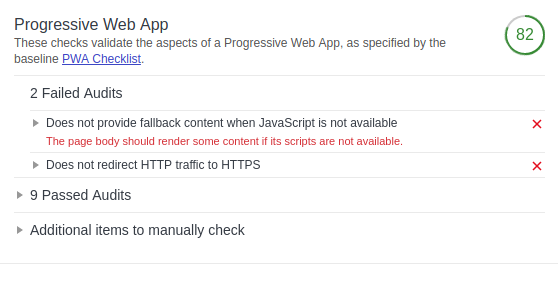
The Angular CLI doesn’t automatically add the JavaScript fallback code we mentioned in the Progressive Enhancement section so open the src/index.html file and add it:
<noscript>
Please enable JavaScript to run this application.
</noscript>
Next, rebuild your application and re-run the audits. This is the result now:
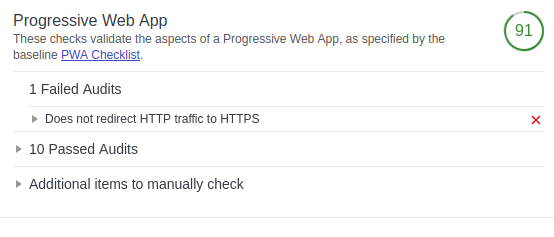
We have only one failed audit which is related to HTTPS redirect. We need to host the application and configure HTTP to HTTPS redirect.
Let’s now run the audits against a hosted and secured version of our PWA.
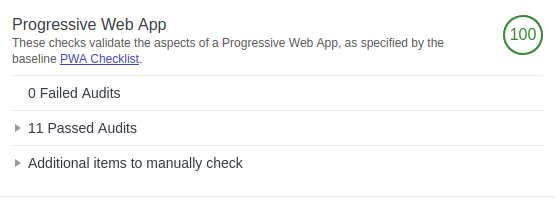
We get a score of 100⁄100 which means we’ve successfully implemented all core tenets of PWAs.
You can get the final code of this demo PWA from this GitHub repository.
Conclusion
In this tutorial, we’ve built a simple Angular application and have turned it into a PWA using Angular CLI. We used Google’s Lighthouse to audit our application for PWA features and explained various core tenets of PWAs such as Service Workers for adding offline support and push notifications. The Web Manifest file for enabling add-to-home-screen and splash screen features, Progressive Enhancement as well as HTTPS .
You may also need to manually check for other items highlighted (under the “Additional items to manually check” section) but not automatically checked by Lighthouse. These checks are required by the baseline PWA Checklist by Google. They do not affect the PWA score but it’s important that you verify them manually. For example, you need to make sure your site works cross-browser and that each page has a URL which is important for the purpose of shareability on social media.
Since PWAs are also about other aspects such as better perceived performance and accessibility, you can also use Lighthouse for auditing your PWA (or any general website) for these aspects and improve it as needed.
Further Reading
- How To Boost Your Design Workflow With Setapp
- Creating A Magento PWA: Customizing Themes vs. Coding From Scratch
- Things I Wish I Had Known About Angular When I Started
- How To Create And Deploy Angular Material Application


