Photoshop Workflows And Shortcuts For Digital Artists

Email Newsletter
Weekly tips on front-end & UX.
Trusted by 182,000+ folks.


 Custom Web Forms for Angular, React, & Vue. Your backend.

 Celebrating 10 million developers
Adobe Photoshop plays a role in almost every digital creator’s life. Photoshop is what many digital artists, photographers, graphic designers, and even some web developers have in common. The tool is so flexible that often you can achieve the same results in several different ways. What sets us all apart is our personal workflows and our preferences on how we use it to achieve the desired outcome.
I use Photoshop every day and shortcuts are a vital part of my workflow. They allow me to save time and to focus better on what I am doing: digital illustration. In this article, I am going to share the Photoshop shortcuts I use frequently — some of its features that help me be more productive, and a few key parts of my creative process.
To profit the most from this tutorial, some familiarity with Photoshop would be required but no matter if you are a complete beginner or an advanced user, you should be able to follow along because every technique will be explained in detail.
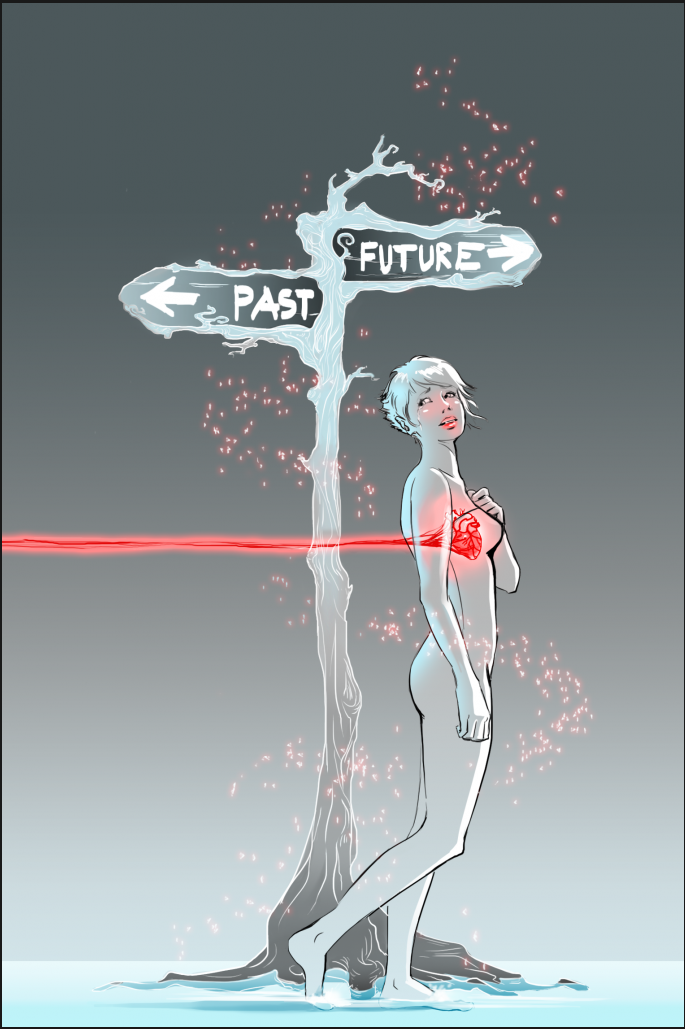
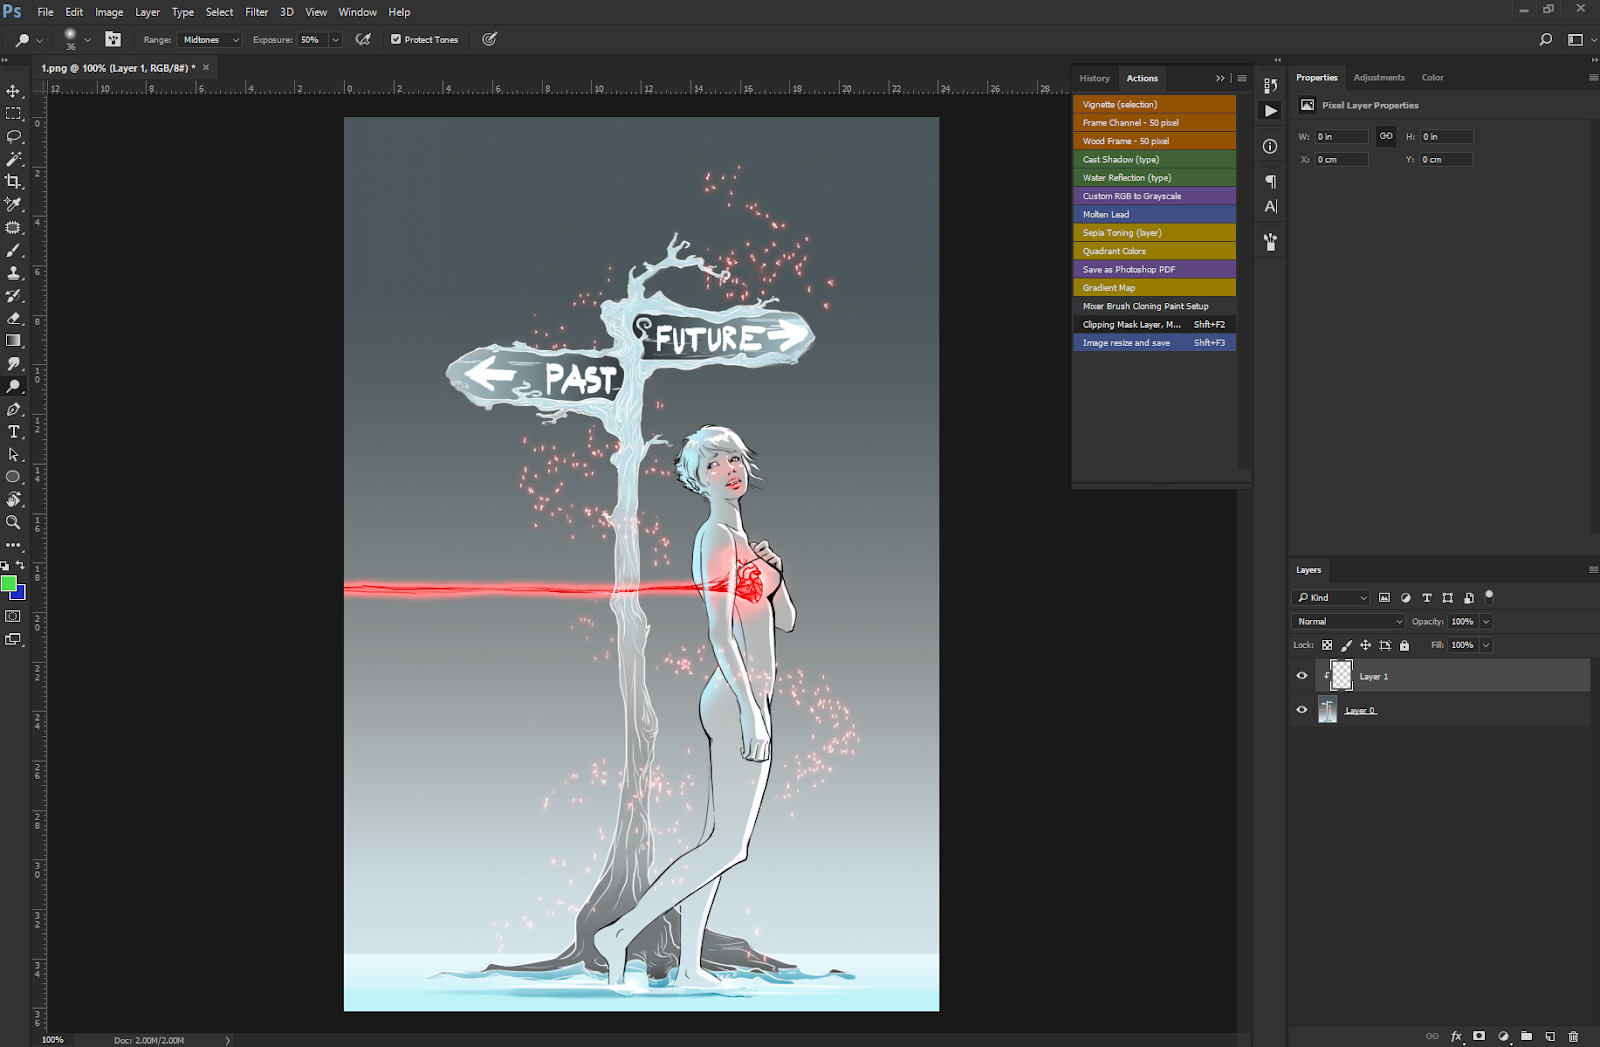
For this article, I've decided to use one of my most famous Photoshop artworks named “Regret”:

Table Of Contents
- Introduction To Shortcuts: The Path To Boosting Your Productivity
- The Keyboard Shortcuts Window
- How To Increase And Decrease The Brush Size
- How To Increase And Decrease The Brush Softness
- Quick Color Picker (HUD Color Picker)
- Working With Layers
- Working With Curves
- Actions: Recording Everything You Need For Your Project
- Conclusion
- Further Reading
1. Introduction To Shortcuts: The Path To Boosting Your Productivity
Every single designer, artist, photographer or web developer has probably once opened Photoshop and has pointed and clicked on an icon to select the Brush tool, the Move tool, and so on. We’ve all been there, but those days are long gone for most of us who use Photoshop every day. Some might still do it today, however, what I would like to talk about before getting into the details, is the importance of shortcuts.
When you think about it, you’re saving perhaps half a second by using a keyboard shortcut instead of moving your mouse (or stylus) over to the Tools bar and selecting the tool you need by clicking on the tool’s little icon. To some that may seem petty, however, do consider that every digital creator does thousands of selections per project and these half-seconds add up to become hours in the end!
Now, before we continue, please note the following:
- Shortcuts Notation
I use Photoshop on Windows but all of the shortcuts should work the same on Mac OS; the only thing worth mentioning is that the Ctrl (Control) key on Windows corresponds to the Cmd (Command) key on the Mac, so I’ll be using Ctrl/Cmd throughout this tutorial. - Photoshop CS6+
All the features and shortcuts mentioned here should work in Photoshop CS6 and later — including the latest Photoshop CC 2018.
2. The Keyboard Shortcuts Window
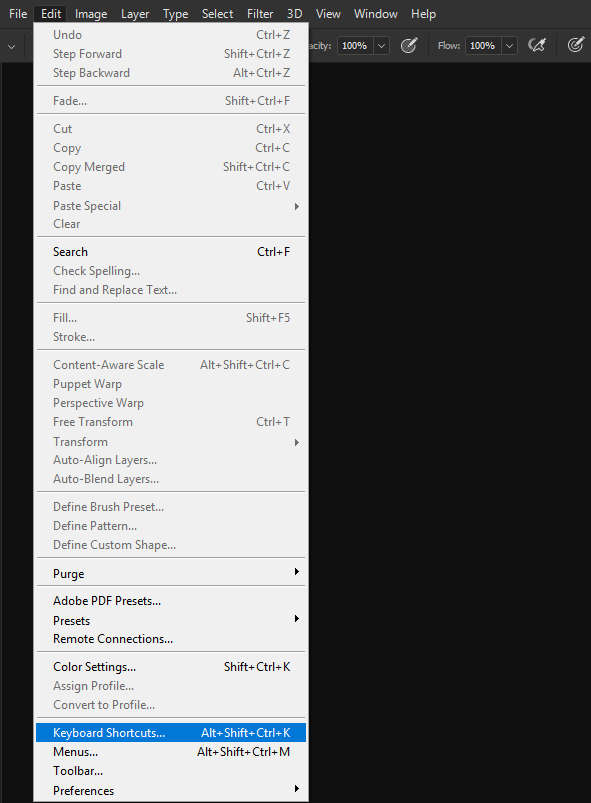
To start off, I would like to show you where you can find the Keyboard Shortcuts window where you could modify the already existing shortcuts, and learn which key is bound to which feature or tool:
Open Photoshop, go to Edit and select Keyboard Shortcuts. Alternatively, you can access the same from here: Window → Workspace → Keyboard Shortcuts & Menus.
Now you will be greeted by the Keyboard Shortcuts and Menus window (dialog box), where you can pick a category you would like to check out. There are a ton of options in there, so it could get a bit intimidating at first, but that feeling will pass soon. The main three options (accessible through the Shortcuts for:... dropdown list) are:
- Application Menus
- Panel Menus
- Tools
Typically the Application Menus will be the first thing you’ll see. These are the shortcuts for the menu options you see on the top of Photoshop’s window (File, Edit, Image, Layer, Type, and so on).
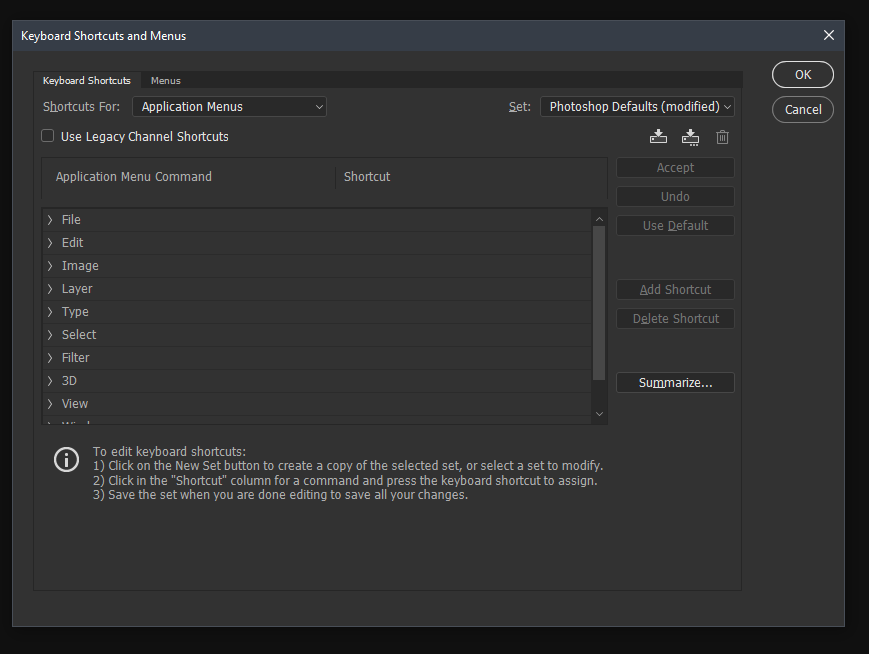
So for example if you’re using the Brightness/Contrast option often, instead of having to click on Image (in the menu), then Adjustments and finally find and click on Brightness/Contrast item, you can simply assign a key combination and Brightness/Contrast will show right up after you press the keys assigned.
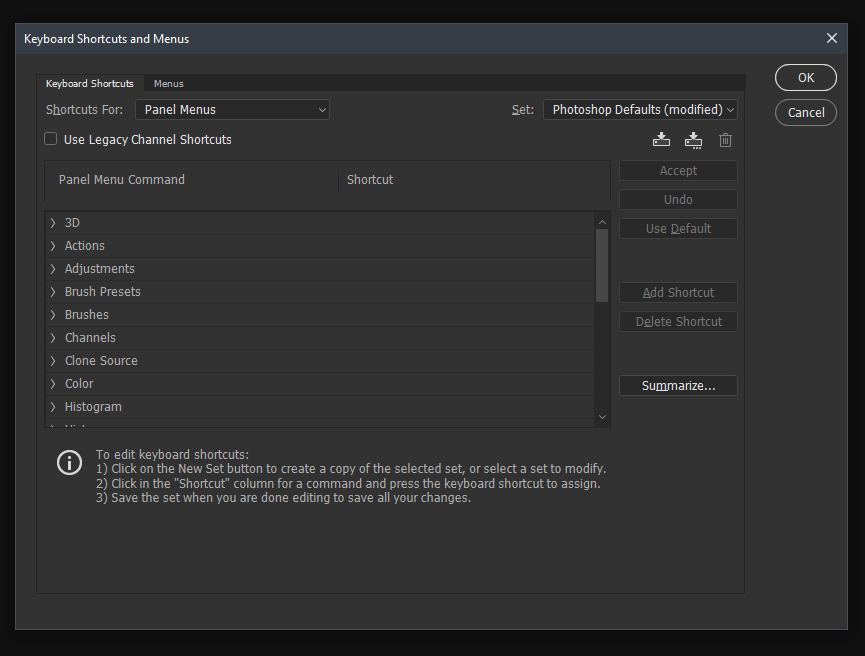
The second section, Panel Menus, is an interesting one as well, especially in its Layers portion. You get to see several options that could be of use to you depending on the type of work you need to do. That’s where the standard New Layer shortcut lies (Ctrl/Cmd + Shift + N) but also you can set up a shortcut for Delete Hidden Layers. Deleting unnecessary layers helps in lowering the size of the Photoshop file and helps improving performance because your computer will not have to cache in on those extra layers that you’re actually not using.
The third section is Tools where you can see the shortcuts assigned to all the tools found in the left panel of Photoshop.
Pro Tip: To cycle between any of the tools that have sub-tools (example: the Eraser tool has a Background Eraser and a Magic Eraser) you just need to hold your Shift key and the appropriate shortcut button. In case of the Eraser example, press Shift + E a few times until you reach the desired sub-tool.
One last thing I would like to mention before wrapping up this section is that the Keyboard Shortcuts and Menus allows you to set up different Profiles (Photoshop calls them “sets” but I think that “profiles” better suits the purpose), so that if you don’t really want to mess with the Photoshop Defaults one, you can simply create a new personalized profile. It’s worth mentioning that when you create a new Profile, you get the Default set of Photoshop Shortcuts in it until you start modifying them.

The Keyboard Shortcuts menu can take a bit of time to get around to, however, if you invest the time in the beginning (best if you do it in your own time rather than during a project), you will benefit later.
Focusing On The Shortcuts On The Left Side Of Your Keyboard
After people acknowledged the usefulness of using shortcuts, eventually they agreed that time is being wasted moving your hand from one side of the keyboard to the opposite one. Sounds a bit petty again, however, remember those half-seconds? They still add up, but this time it can even fatigue your arm if you’re constantly switching tools and have to move your arm around. So this probably led to Adobe adding a few more shortcut features focused on the left side of the keyboard.
Now let me show you the shortcuts that I most often use (and why).
3. How To Increase And Decrease The Brush Size
In order to increase or decrease the size of your brush, you need to:
- Click and hold the Alt key. (On Mac, this would be the Ctrl and Alt keys),
- Click and hold the right mouse button,
- Then drag horizontally from left to right to increase, and from right to left to decrease the size.
If you’re using anything from Photoshop CC 2017 and above, try pressing Fn + Ctrl + Alt while dragging. Looks like Adobe has changed this specific shortcut and haven’t document it just yet.
The moment I learned about this shortcut, I literally couldn’t stop using it!
If you’re a digital artist, I believe you will particularly love it as well. Sketching, painting, erasing, just about everything you need to do with a brush becomes a whole lot easier and fluent because you wouldn’t need to reach for the all too familiar [ and ] keys which are the default ones for increasing and decreasing the brush size. Going for those keys can disrupt your workflow, especially if you need to take your eyes off your project or put the stylus aside.
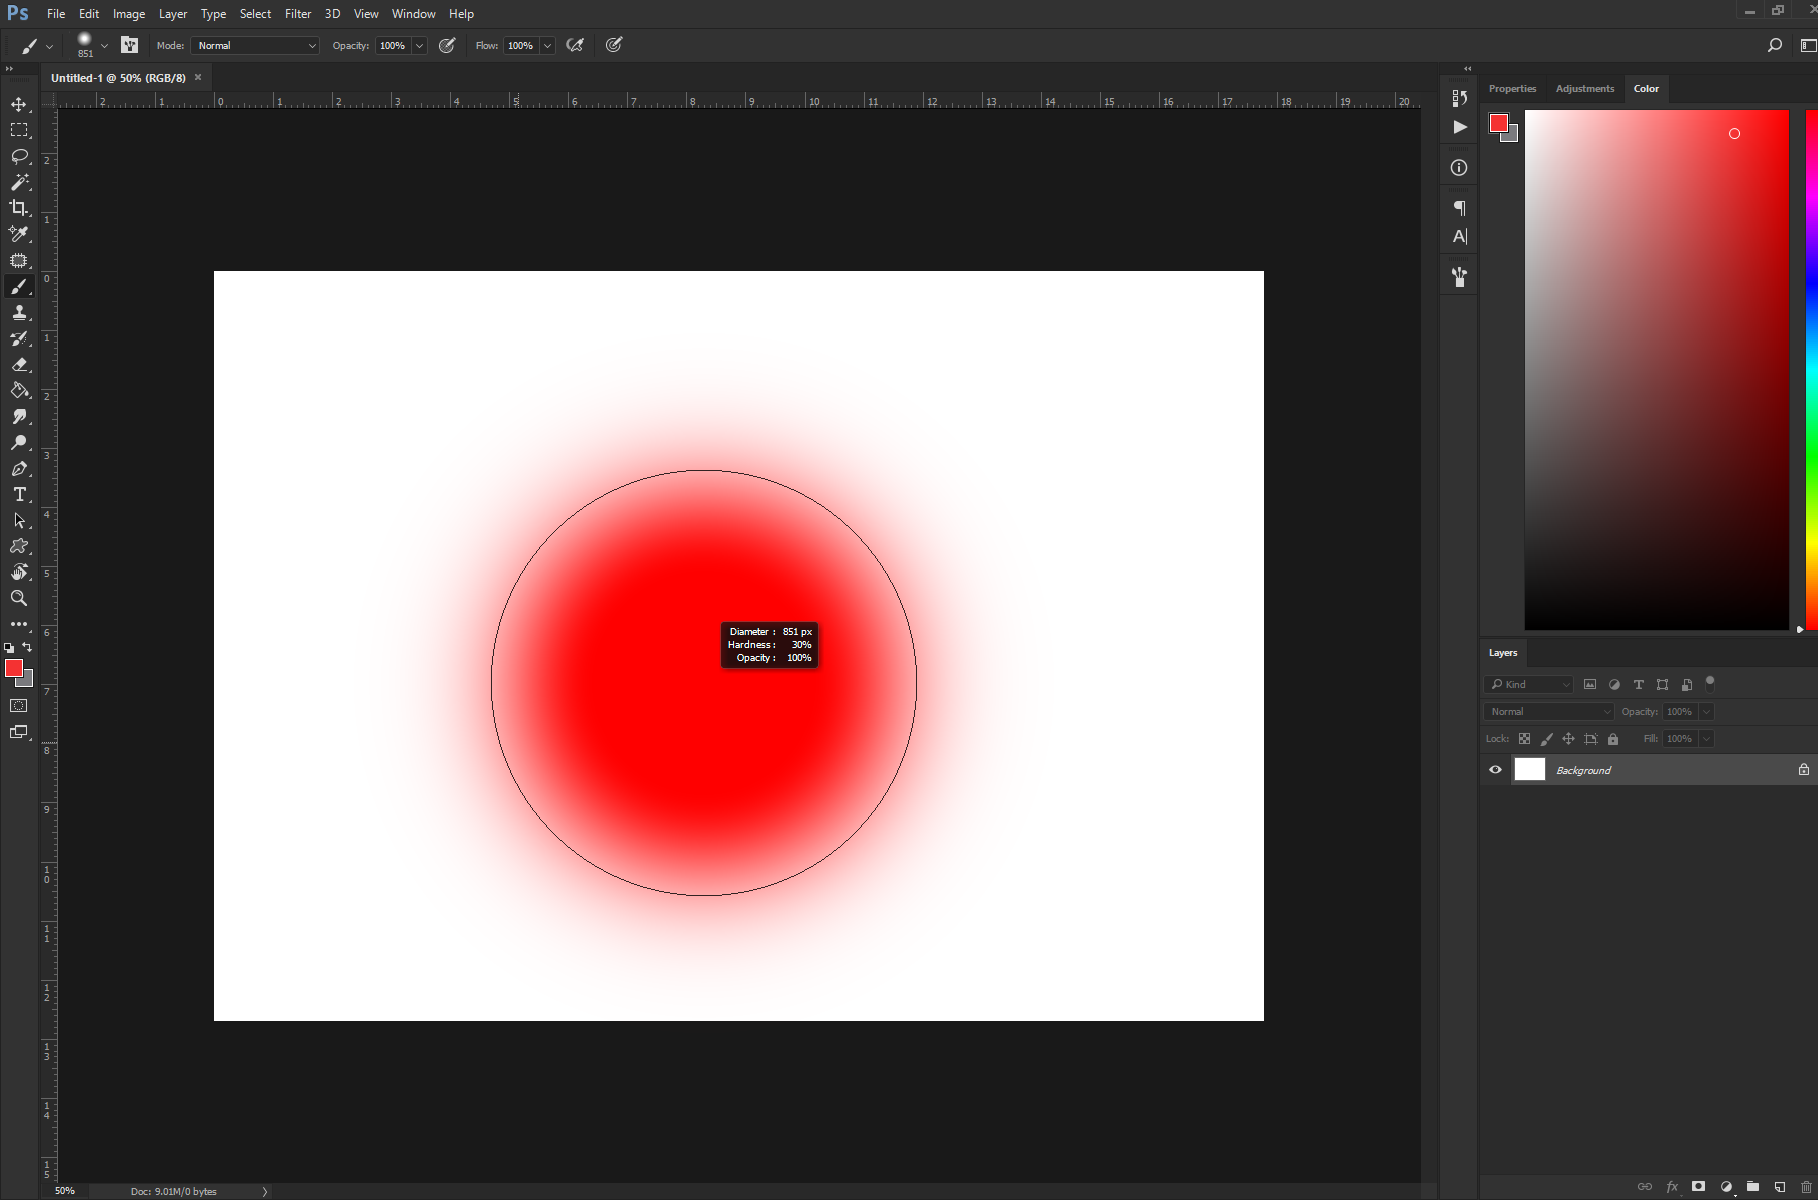
4. How To Increase And Decrease The Brush Softness
It’s actually the same key combination but with a slight twist: increasing and decreasing the softness of your Brush will work only for Photoshop’s default Round brushes. Unfortunately, if you have any custom made brushes that have a custom form, this wouldn’t work for those.
- Click and hold the Alt key. (On the Mac this would be Ctrl and Alt keys),
- Click and hold the right mouse button,
- Then drag upwards to harden the edge of your brush and drag downwards to make it softer.
Again, this shortcut doesn’t work for custom shaped brushes, although it would have been a really nice feature to have. Hopefully, we’ll be able to see that in a future update to Photoshop.
5. Quick Color Picker (HUD Color Picker)
You may or may not be aware that Photoshop offers a quick color picker (HUD Color Picker). And no, this is not the color picker that is located in the Tools section.
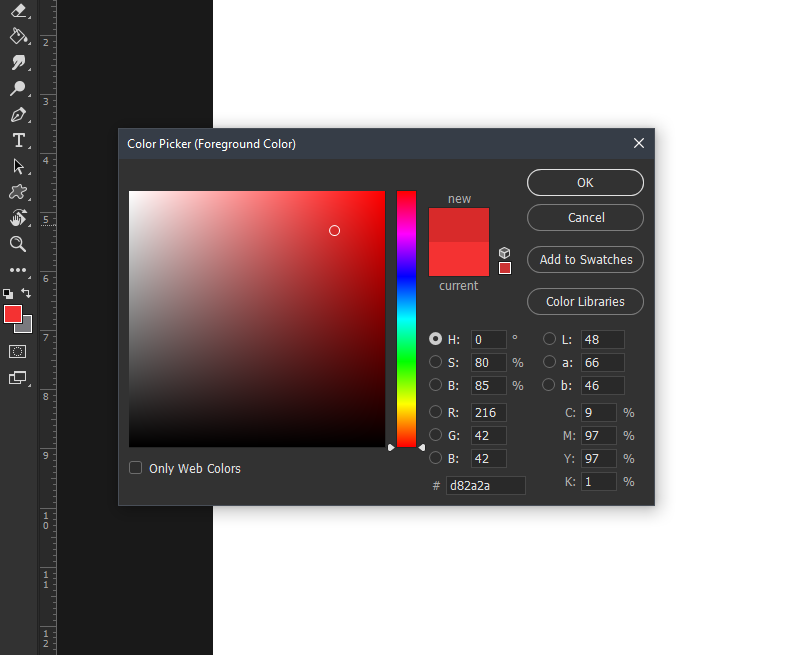
I am referring to what Adobe calls “HUD Color Picker” that pops up right where your cursor is located on the canvas.
This so-called HUD Color Picker is a built-in version and I believe it’s been around since at least Photoshop CS6 (which was released back in 2012). If you’re learning about this now, probably you’re as surprised as I was when I first came across it a few months ago. Yes, it took me a while to get used to, too! Well, to be fair, I do also have some reservations about this color picker, but I’ll get to them in a second.
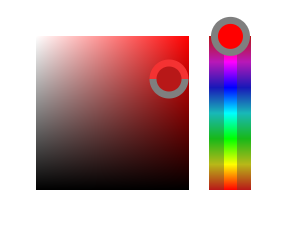
Here’s how to pull up the HUD Color Picker:
On Windows
- Click and hold Alt + Shift,
- Click and hold the right mouse button.
On Mac
- Click and hold Ctrl ⌃ + Alt ⌥ + Cmd ⌘,
- Click and hold the right mouse button.
If you’ve followed the key combinations above, you should see this colorful square. However, you’ve probably noticed that it’s a bit awkward to work with it. For example, you need to continue holding all of the keys, and while you do that, you need to hover over to the right rectangle to pick a color gamut and then hover back to the square to pick the shade. With all of the hovering that’s going on, it’s somewhat easy to miss the color that you’ve actually set your heart to pick, which could get a little annoying.
Nevertheless, I do believe that with a little practice you will be able to master the Quick Color Picker and get your desired results. If you’re not too keen on using that built-in version, there are always third-party extensions that you can strap to your Photoshop, for example, Coolorus 2 Color Wheel or Painters Wheel (works with PS CS4, CS5, CS6).
6. Working With Layers
One of the advantages of working digitally is undisputedly the ability to work with layers. They are quite versatile, and there’s a lot of things that you could do with them. You could say that one could write a book just on Layers alone. However, I’m going to do the next best thing, and that would be to share with you the options I most commonly use when working on my projects.
As you may have guessed, the Layer section is a pretty important one for any type of digital creative. In this section, I’m going to share the simpler but very useful shortcuts that could be some real lifesavers.
Clipping Mask Layer
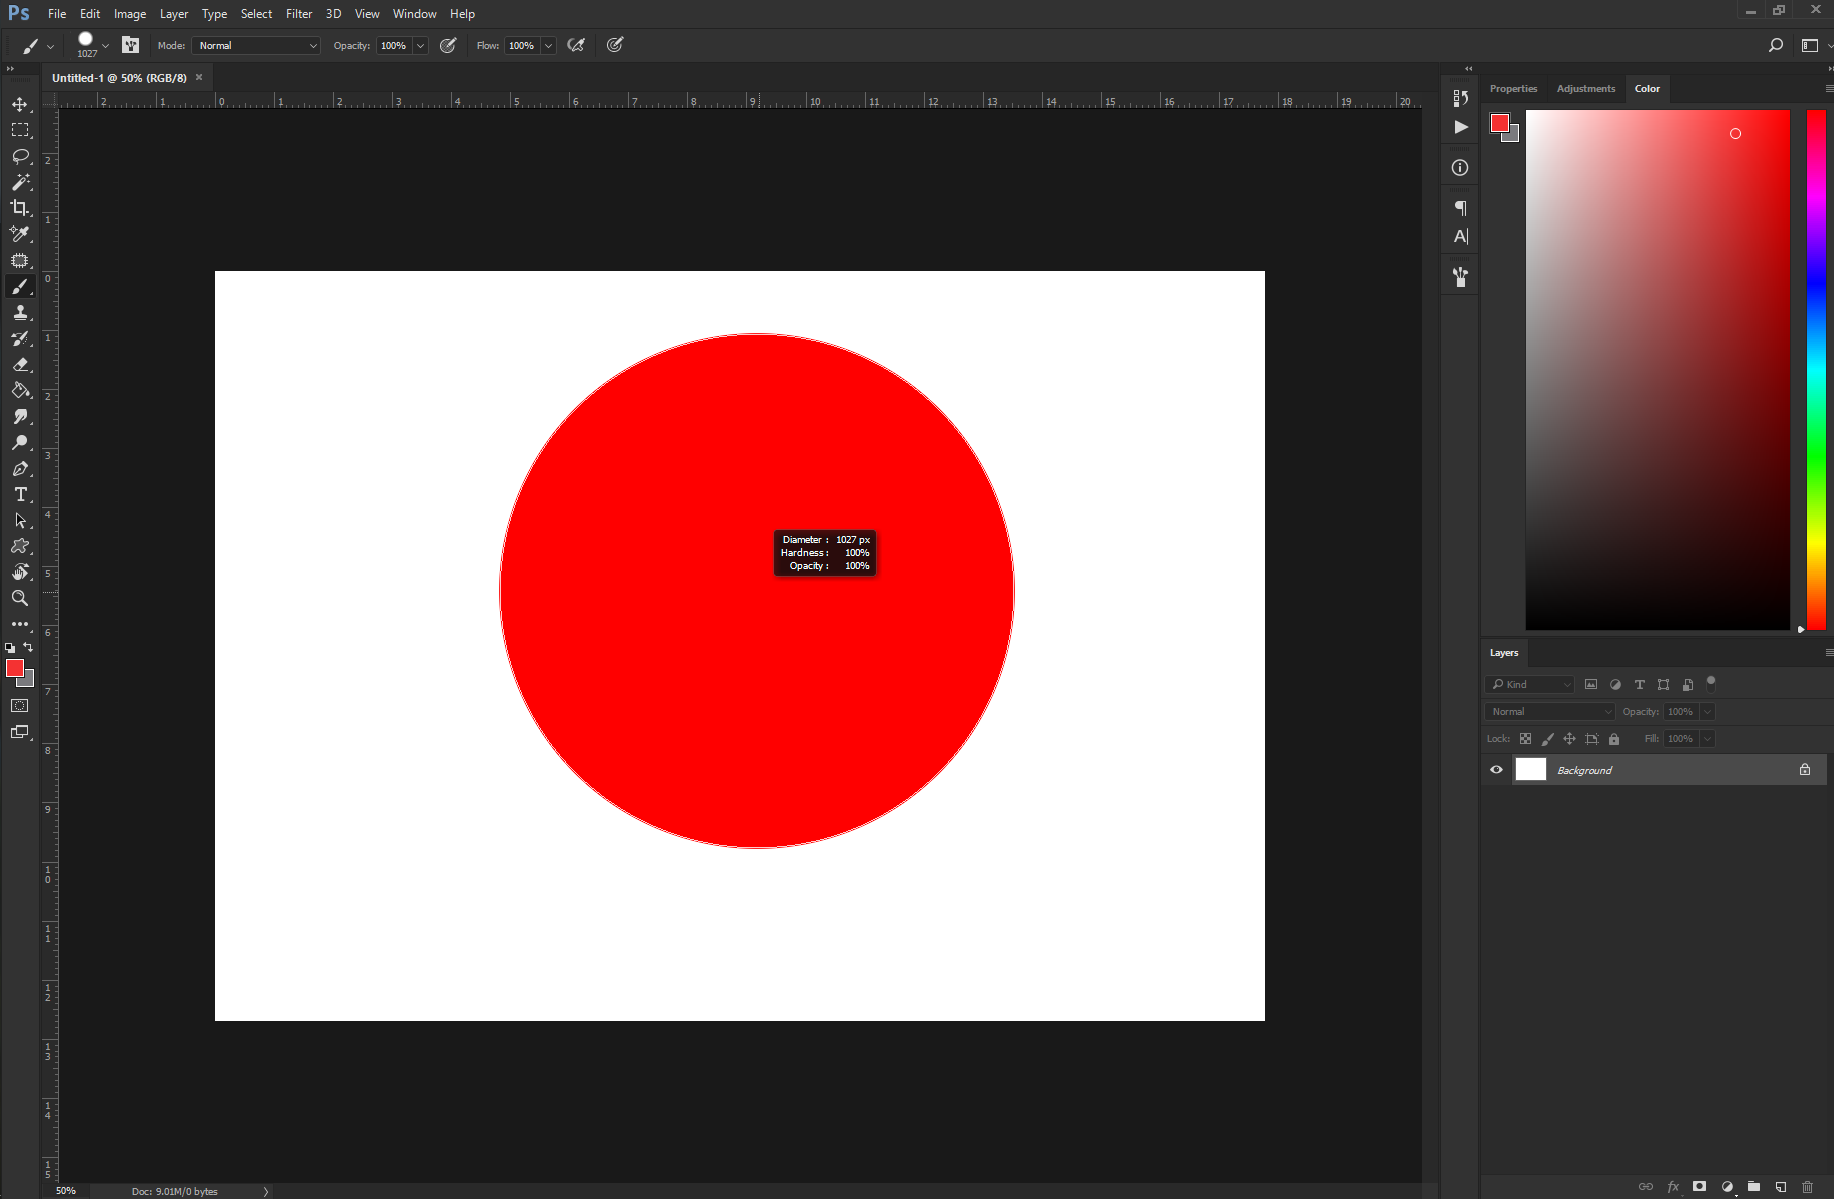
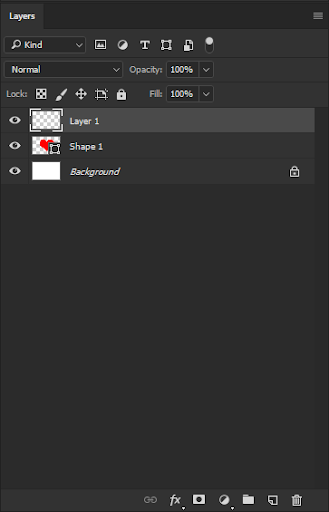
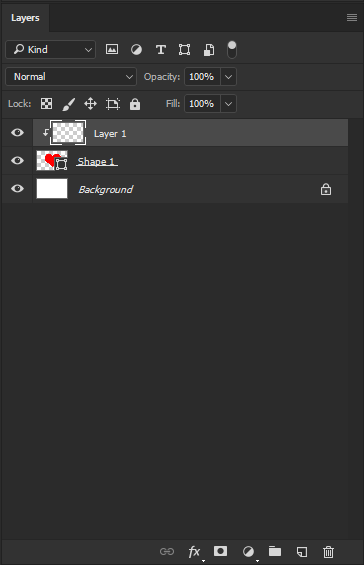
A Clipping Mask Layer is what I most often use when I’m drawing. For those of you who do not know what that is, it’s basically a layer which you clip on to the layer below. The layer below defines what’s visible on the clipped on layer.
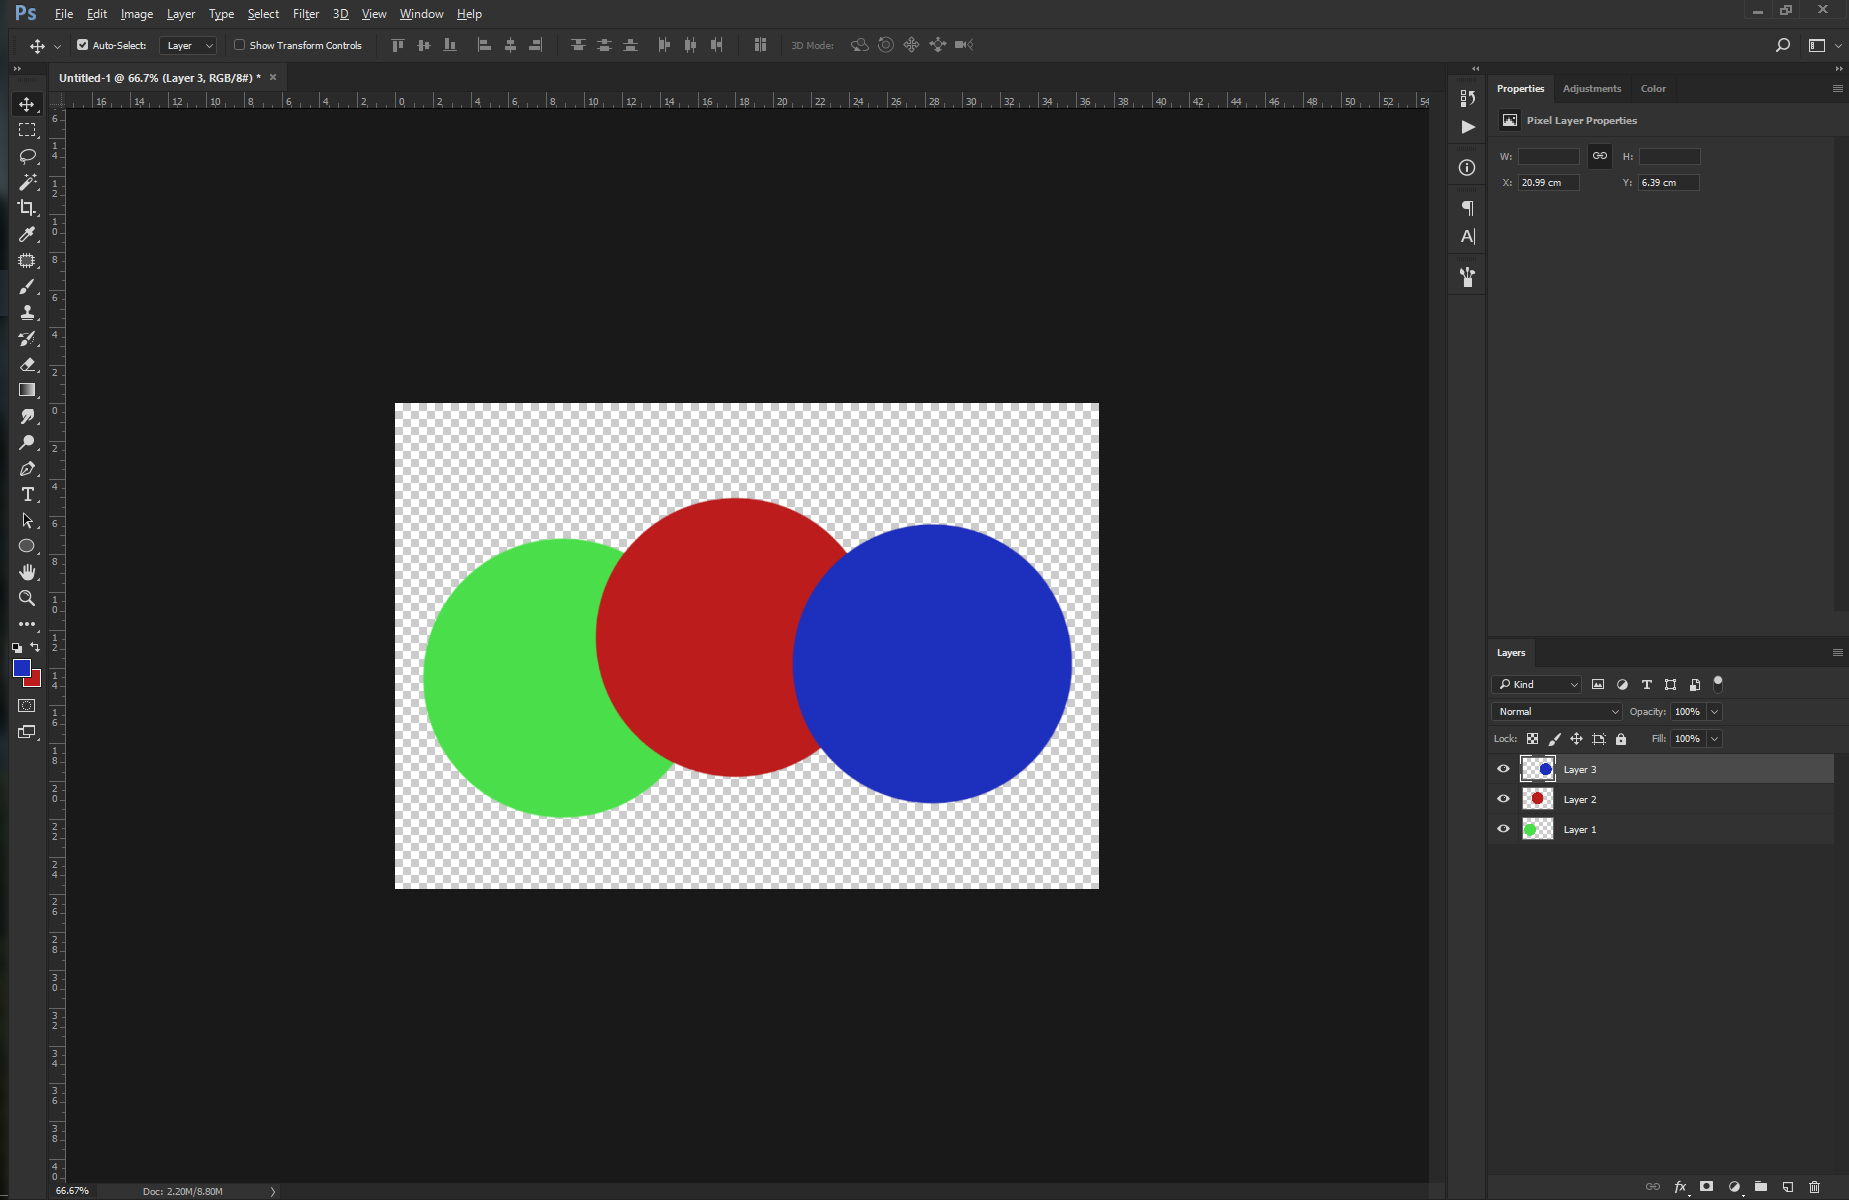
For example, let’s say that you have a circle on the base layer and then you add a Clipping Mask Layer to that circle. When you start drawing on your Clipping Mask Layer, you will be restricted only to the shapes in the Base Layer.
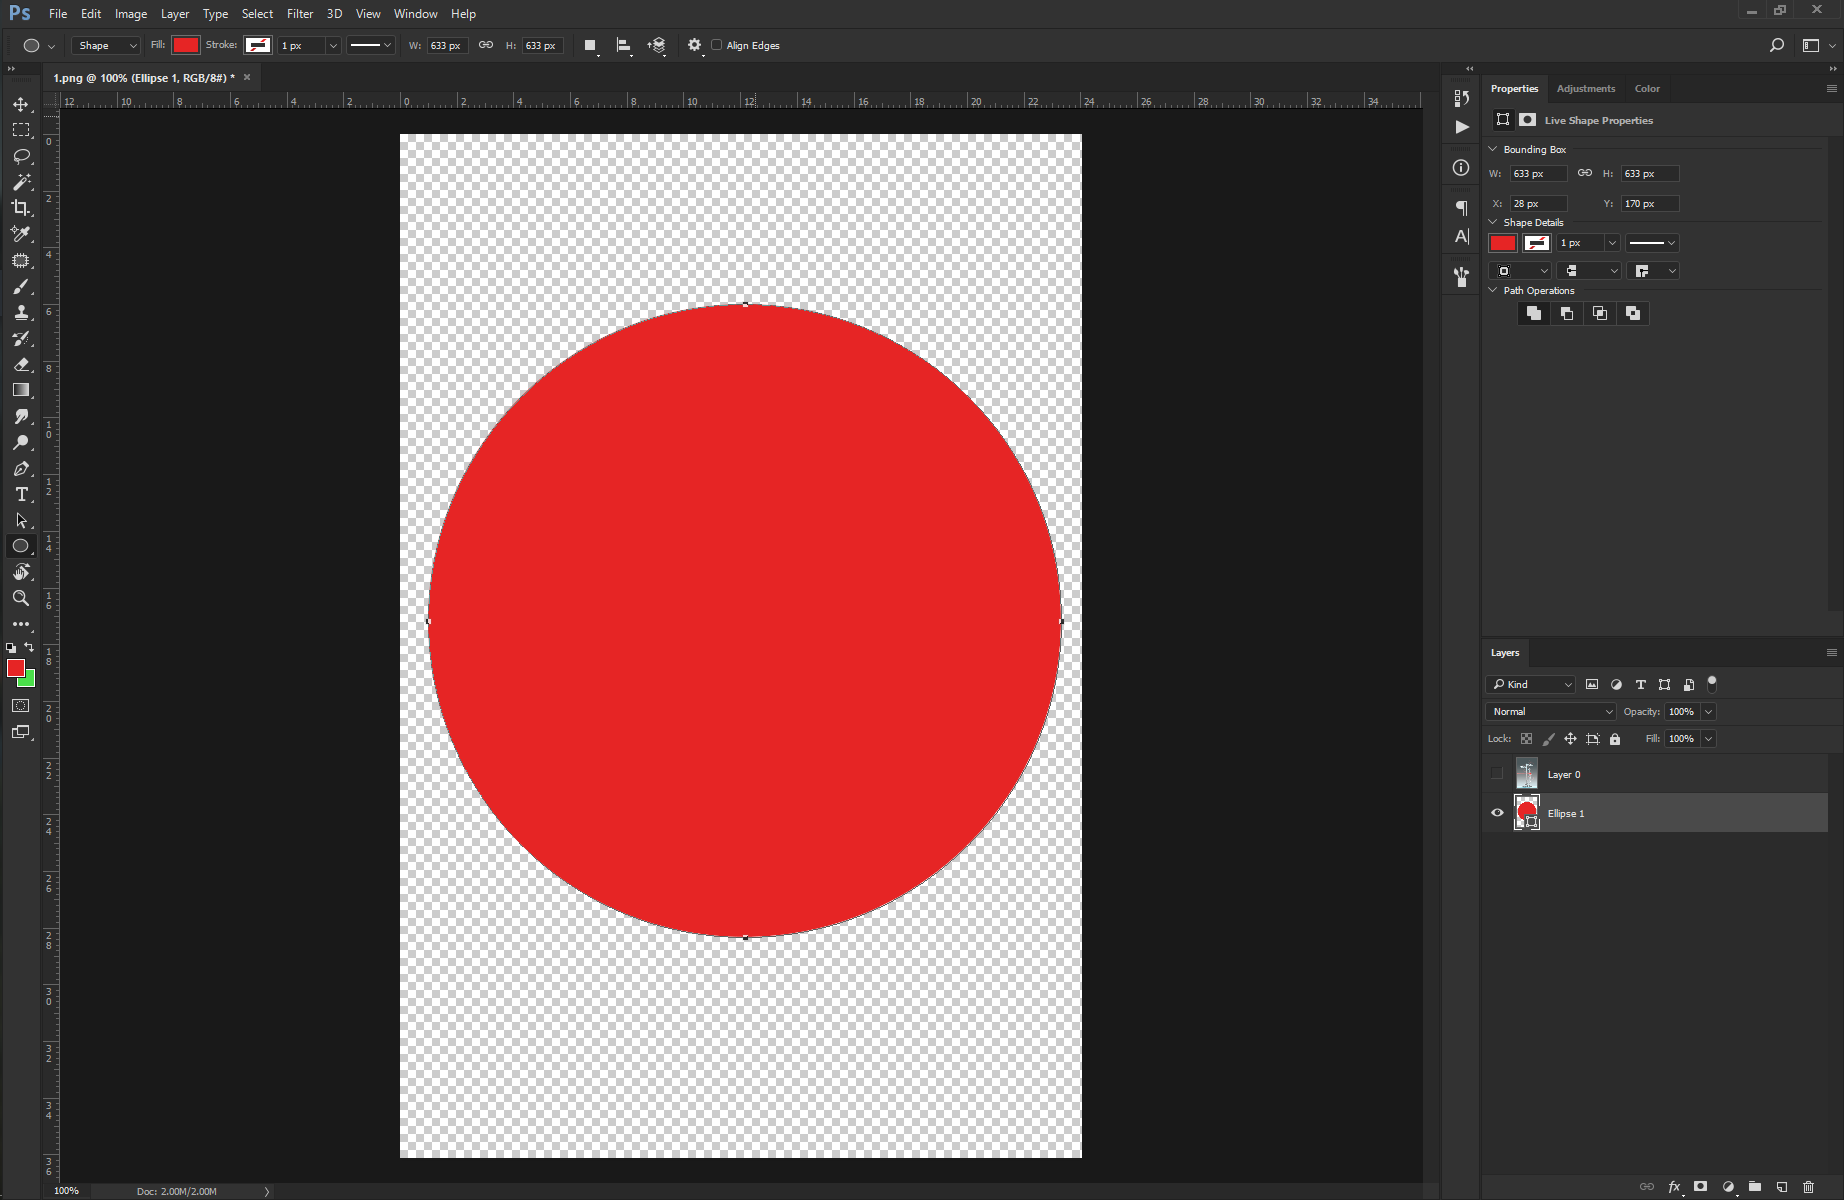

Take notice of the layers on the right side of the screen. Layer 0 is the Clipping Mask Layer of the Base Layer — Layer 1.
This option allows you to really easily create frames and the best part is that they’re non-destructive. The more shapes you add (in this case it’s Layer 1), the more visible parts of the image can be seen.

The most common use for Clipping Mask Layers in digital art/painting is to add shadows and highlights to a base color. For example, let’s say that you’ve completed your character’s line-art and you’ve added their base skin tone. You can use Clipping Mask Layers to add non-destructive shadows and highlights.
Note: I’m using the term “non-destructive” because you cannot erase away something from the base layers — they will be safe and sound.)
So, how do you create those Clipping Mask Layers? Well, each one starts off as a regular “Layer”.
To create a regular Layer, you can use this shortcut:
| Action | Keyboard Shortcut |
|---|---|
| Creates a new regular Layer | Ctrl/Cmd + Shift + N |
| Makes the newly created Layer into a Clipping Mask to the Layer below it | Ctrl/Cmd + Alt + G |
An alternative way to make a regular layer into a Clipping Mask is to press and hold the Alt key, and click between the two Layers. The upper layer will then become the Clipping Mask of the layer below.
Selecting All Layers
Every once in a while, you may want to select all of the layers, and group them together so that you can continue building on top of them or a number of other reasons. Typically, what I used to do is simply hold the Ctrl/Cmd key and then start clicking away at all of the layers. Needless to say, that was a bit time-consuming, especially if I’m working on a big project. So here’s a better way:
What you would need to do is simply press: Ctrl/Cmd + Alt + A.
Now that should’ve selected all of your layers and you will be able to do anything you want with them.
Flattening Visible Layers
Clipping Mask Layers may be totally awesome, however, they don’t always work well if you want to modify something in the general image you’re doing. Sometimes you just need everything (e.g. base color, highlights and shadows) to stop being on different layers and just be combined into one. Sometimes you just need to merge all currently visible layers into one, in a non-destructive way.
Here’s how:
Press and hold Ctrl/Cmd + Alt + Shift + E.
Et voilà! Now you should be seeing an extra layer on the top that has all other visible layers in it. The beauty of this shortcut is that you still have your other layers below — untouched and safe. If you mess up something with the newly created layer, you can still bring things back to the way they were before and start afresh.
Copying Multiple Layers
Every now and then we’re faced with the need to copy stuff from multiple layers. Typically what most people do is duplicate the two given layers they need, merge them and then start erasing away the unnecessary parts of the image.
What you need to do instead is to make a selection and then press:
Ctrl/Cmd + Shift + C
Here’s an example:
As you can see, each color dot is on a separate layer. Let’s say that we need to copy a straight rectangle through the center of the dots and copy it on a layer at the top.
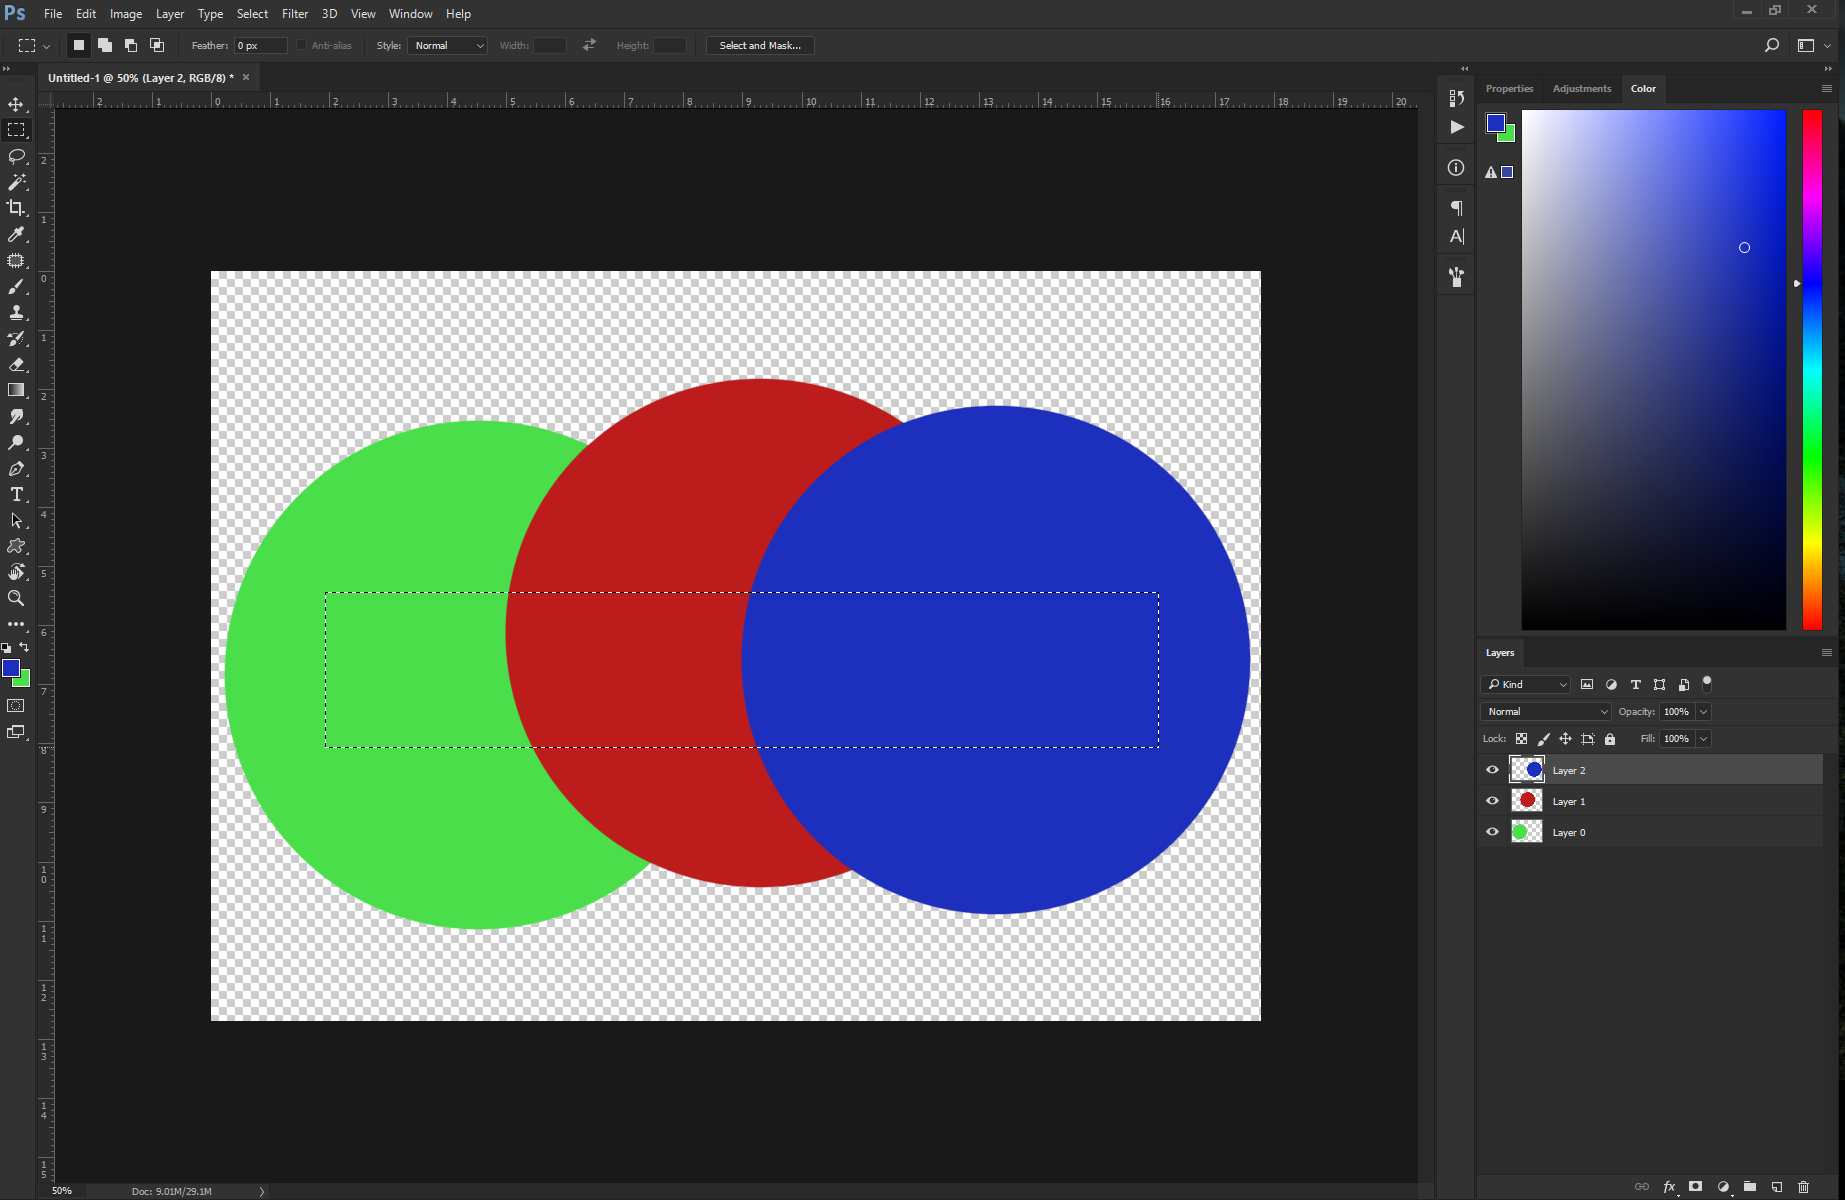
We’ve made a selection and once you press Ctrl/Cmd + Shift + C, Photoshop will copy everything you have in your selection to the clipboard. Then all you have to do is simply paste (Ctrl/Cmd + V) anywhere, and a new layer will appear on the top of the page.
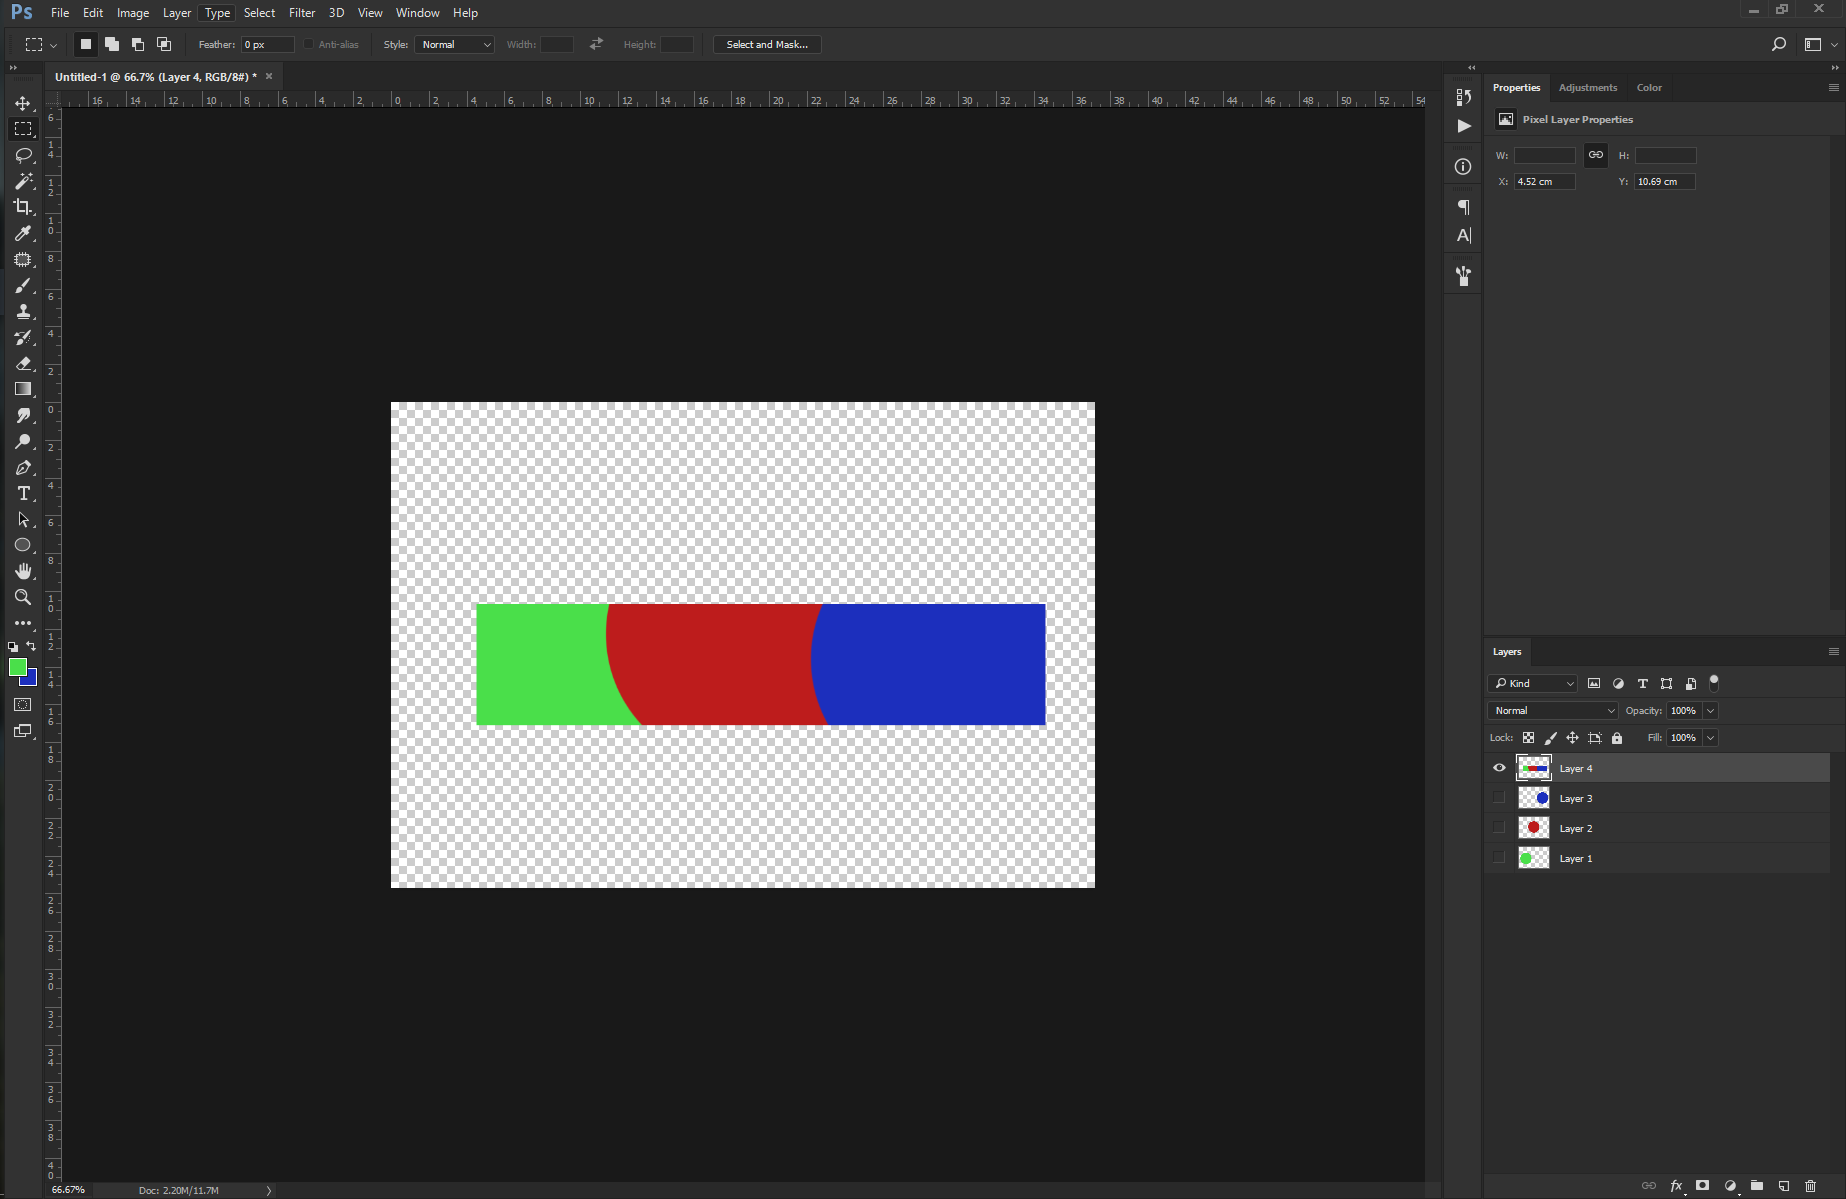
This shortcut can come really handy especially when you’re working with multiple layers, and you need just a portion of the image to be together in a single layer.
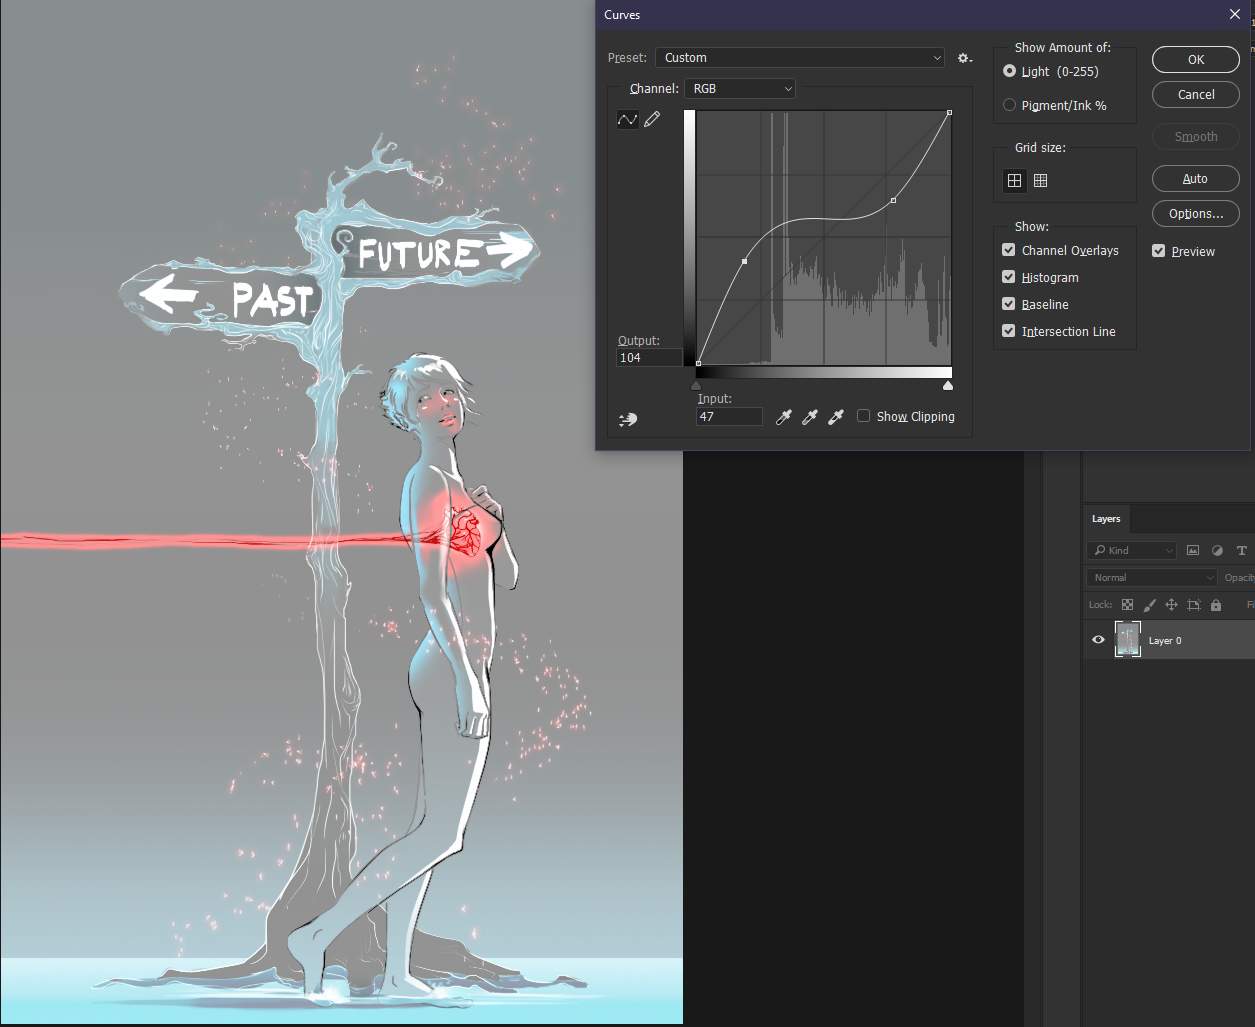
7. Working With Curves
In this section of the article, I would like to cover the importance of values as well as Curves which are generally a big topic to cover.
Starting off with the shortcut: Ctrl/Cmd + M.
Pretty simple, right? The best things in life are (almost) always simple! However, don’t let this talk about simplicity fool you, the Curves setting is one of the most powerful tools you have in Photoshop. Especially when it comes to tweaking brightness, contrast, colors, tones, and so on.
Now some of you may be feeling a bit of intimidated by the previous sentence: colors, tones, contrast,... say what now? Don’t worry, because the Curves tool is pretty simple to understand and it will do marvelous things for you. Let’s dig into the details.
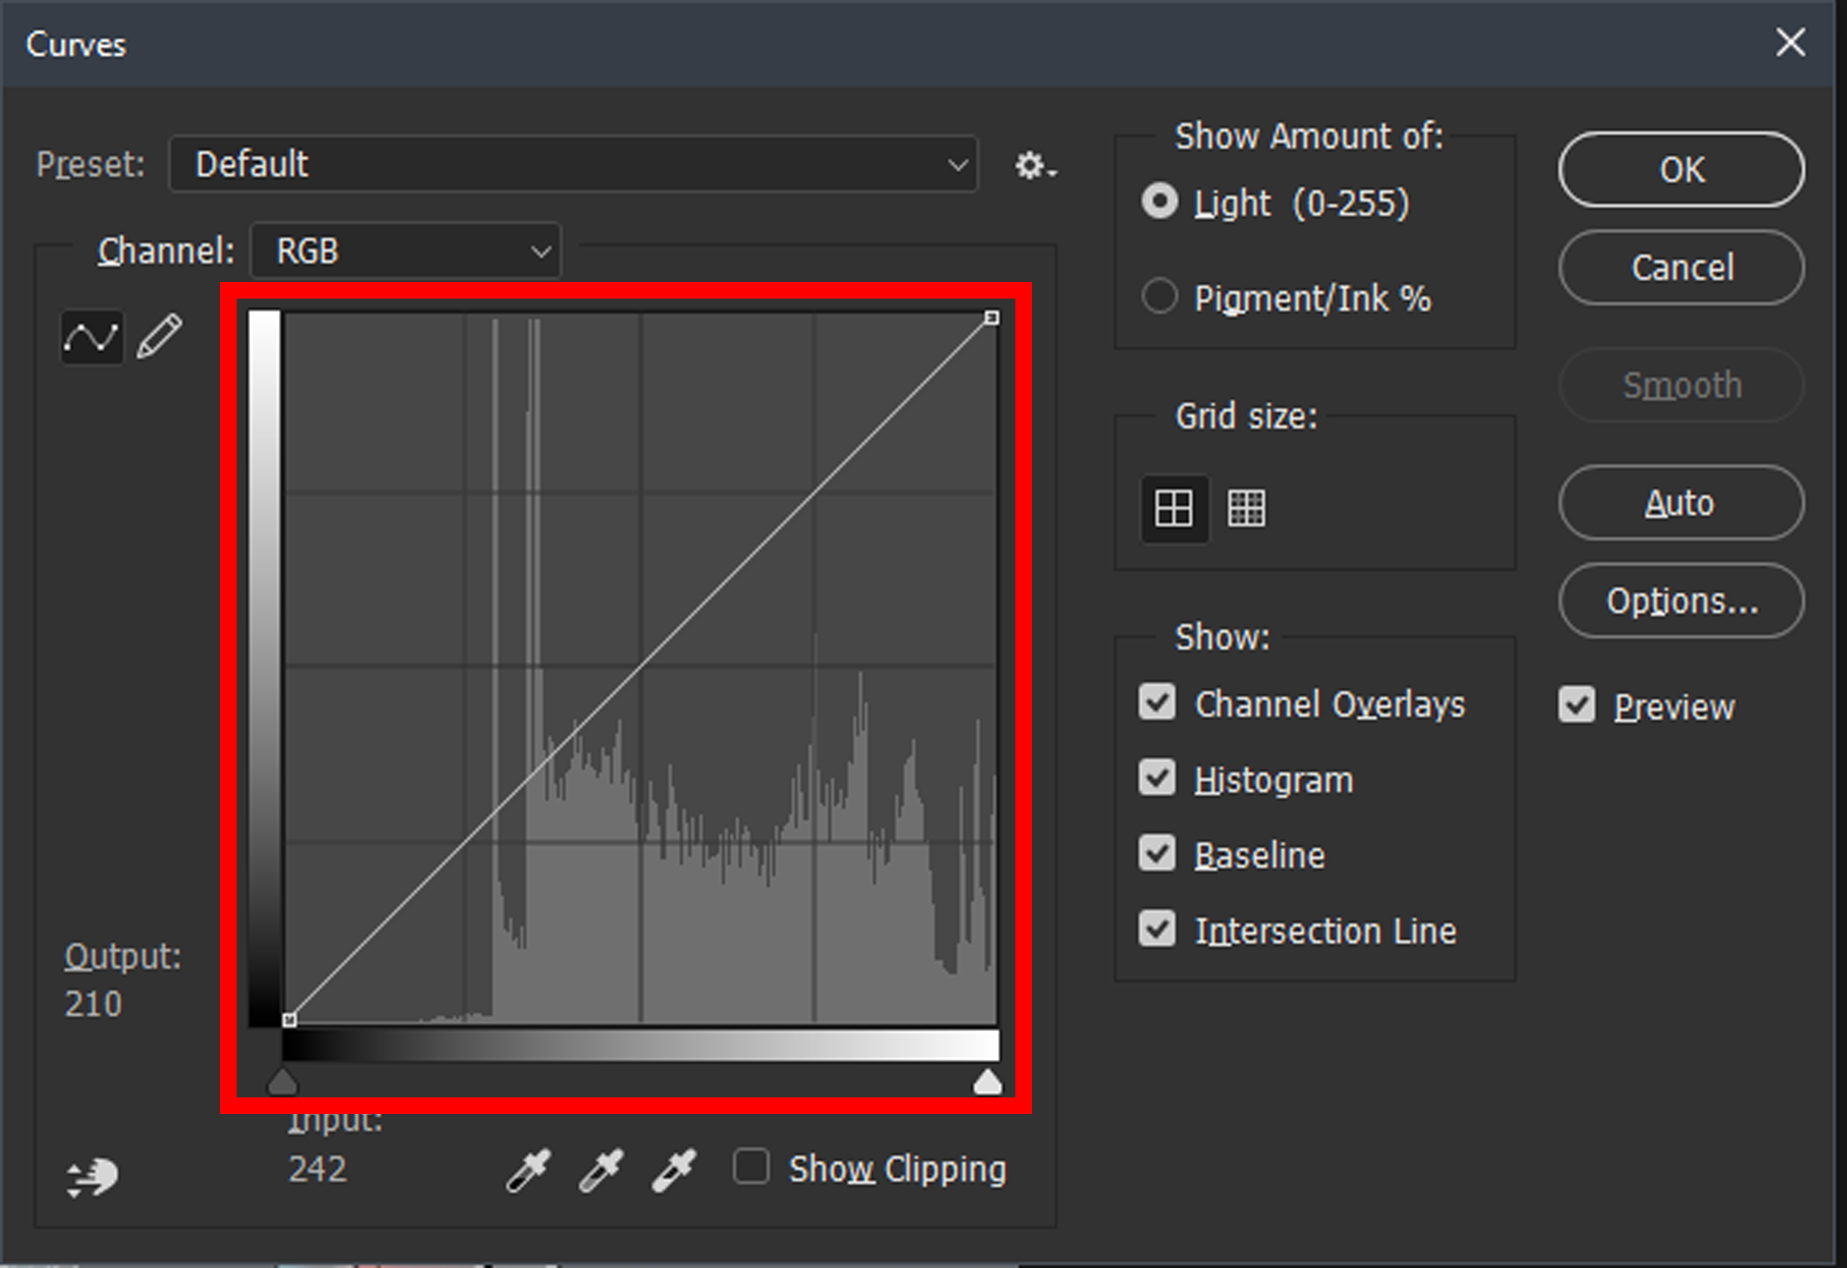
This is what the Curves tool basically looks like. As you can see, there’s a moderate amount of options available. What we’re interested in, however, is the area I’ve captured inside the red square. It is actually a simple Histogram with a diagonal line across. The Histogram’s purpose is to show the values of the given image (or painting), left being the darkest points and right being the lightest ones.
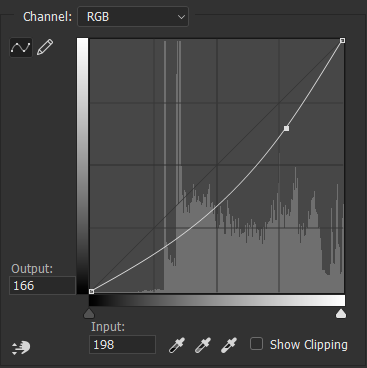
Using the mouse, we can put points on the diagonal line and drag it up and down. We typically decide what we want to darken or lighten. If, for example, we want to have the light parts of our image be just a bit darker, we need to click somewhere on the right side and drag down (just like in the first image).
Here’s an example. First, take a look at the normal image:
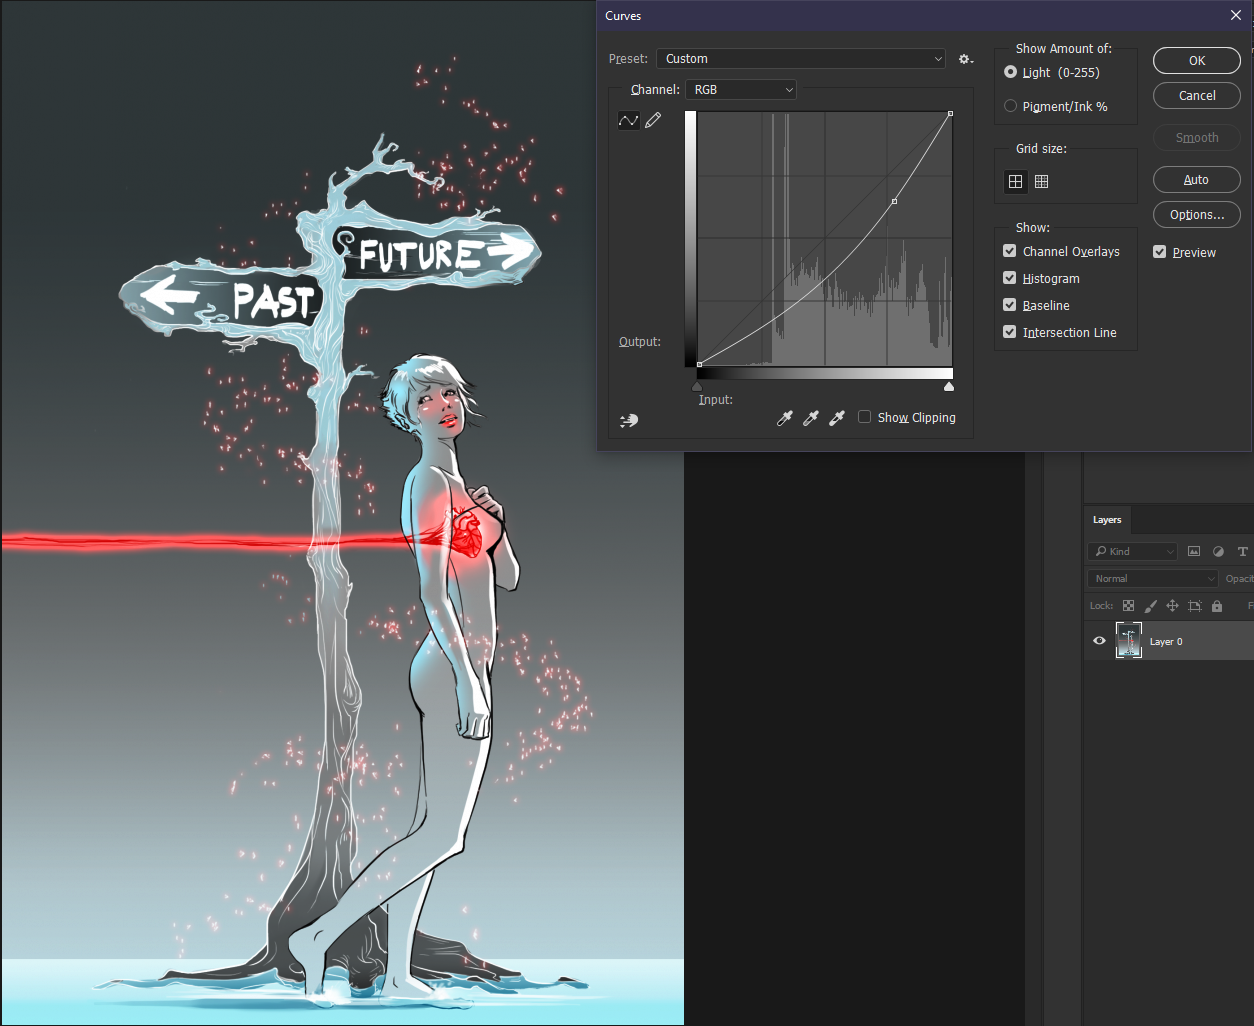
Now, using Curves with the light parts toned down:
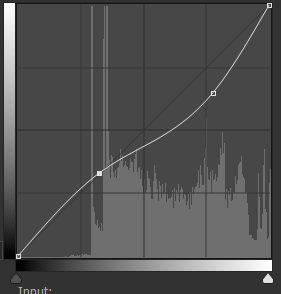
AIn addition, just for demonstration purposes, here’s what would happen if we have the lighter parts darkened and the darker parts lightened:
You see, basically the linework is the darkest part, which stayed and the other darks have been lightened to a grayish type of value.
Now let me quickly elaborate on values and why they matter: by “values,” especially in the art world, we’re referring to the amount of lightness or darkness in a drawing (painting). With values, we create depth in our painting which on its part helps with creating the illusion which element is closer to the viewer and which one is in the distance (further back).
8. Actions: Recording Everything You Need For Your Project
Every so often we all need to deal with repetitive processes which could range from adding a filter over our image to creating certain types of layers with blending modes. Does this sound familiar? If so, keep reading.
Did you know that Photoshop supports programming languages such as JavaScript, AppleScript, and VBScript to automate certain processes? I didn’t, as programming has never been my cup of tea. The good thing is that instead, I came across the Actions panel, which offers a lot of functionality and options for automating some repetitive tasks and workflows. In my opinion, this is the best automation tool that Photoshop has to offer if you don’t know how to code.
The Actions panel basically can record every process you’re doing (e.g. adding a layer, cropping the image, changing its hue, and so on); then you can assign a function key to this process and easily re-use it later at any time.
By using the Actions panel, you can capture just about anything that you do in Photoshop and then save it as a process.
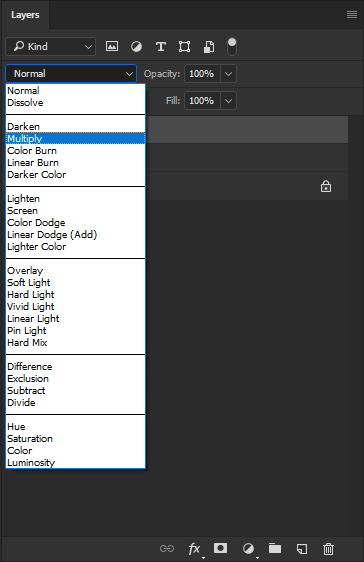
Let me give you an example. Let’s say that you want to automate the process of Create a new Layer, set it as a Clipping Mask, and then set its blending mode to Multiply (or anything else). You can record this whole process which would then be available to you for re-use by the press of a button.
Here’s how it works:
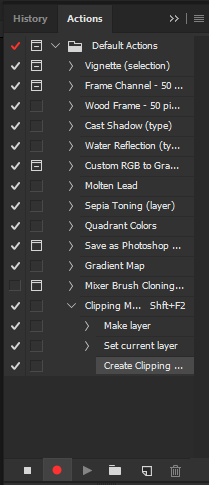
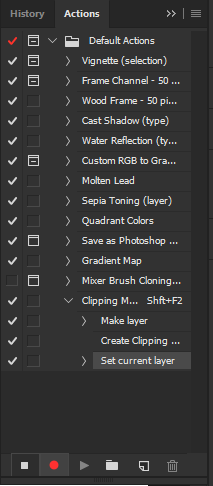
Pressing Alt + F9 will open this panel:
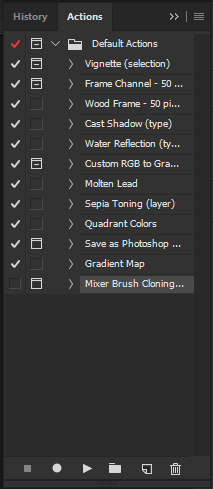
As you can probably see, there are some default (pre-recorded) processes on there. What we’re interested in, however, is creating our own action, which is done by clicking on the “Create new action” icon.
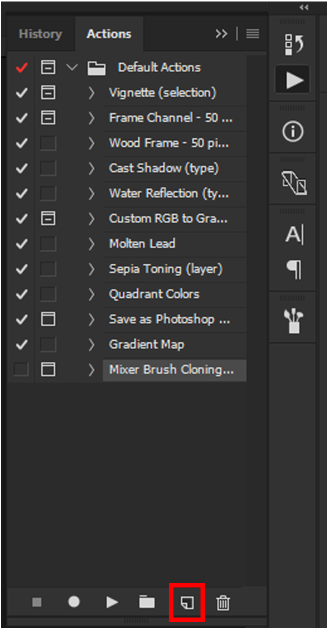
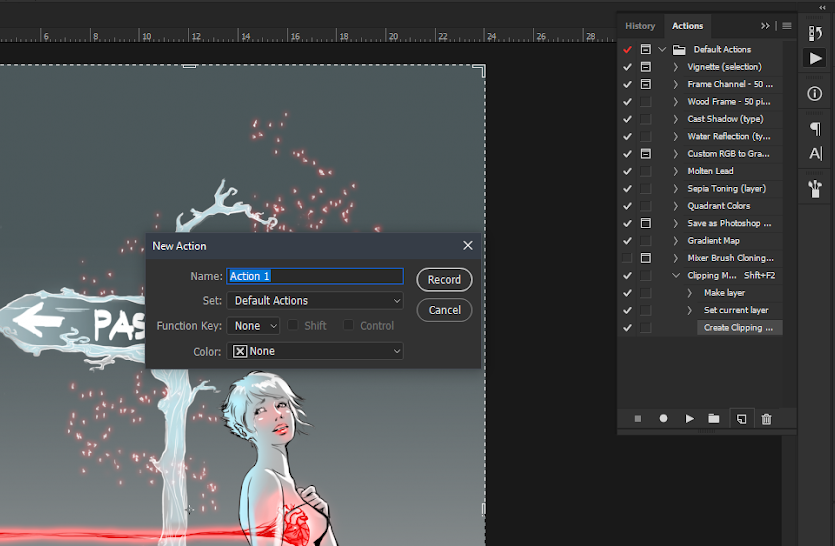
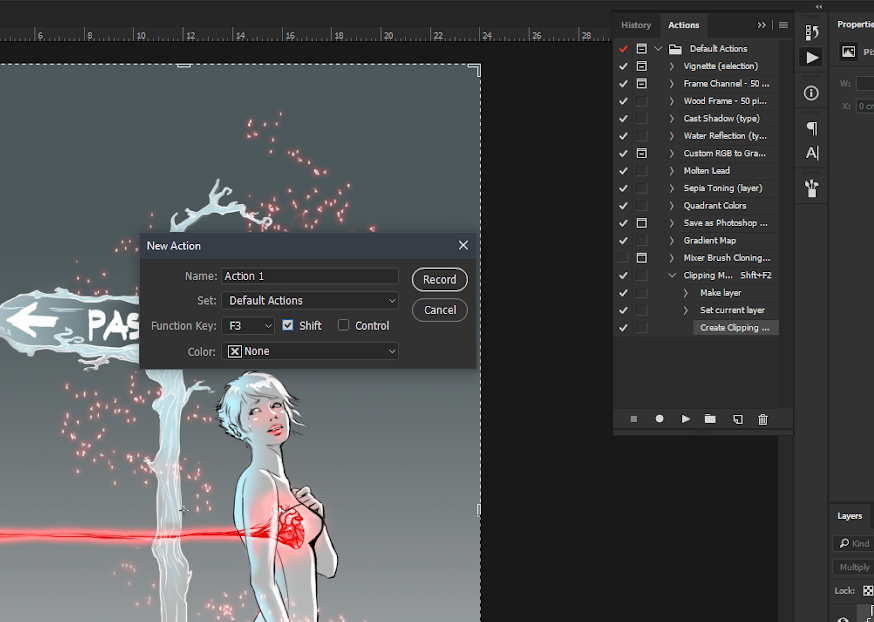
Now just like when you create a new layer in the Layers panel, once you click on the “Create new action” icon, a pop-up window opens with a few options in it.
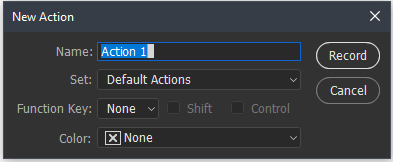
You can choose any given name for the Action you want to create and assign a Function key for it. So, for this demonstration purpose, I’ll create an action that will do the following:
- Create a new transparent Layer;
- Add it as a Clipping Mask to the Layer below;
- Set its blending mode to Multiply.
I’ll set its Function key to Shift + F2.
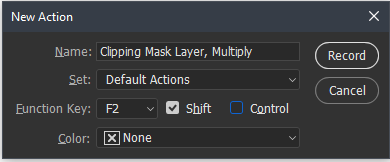
Once you’re ready with these settings, what you need to do is press the Record button. Once you’ve done that, you’ll notice that the Actions panel now has a red button to show you it’s recording.
Now you just have to go about the regular process of creating a new layer, set it as a clipping mask and change its blending mode to Multiply.

Once you’re done, you have to hit the Stop icon on the Actions panel.
Your automation process is now ready to go! When you press Shift + F2, you’ll get a new Layer set as a Clipping Mask to the layer below and its blending mode set to Multiply.
I would also like to mention that the Actions automation process is not limited to just creating layers and setting blending modes. Here are some examples of some pretty handy other uses and options for actions:
- You can set up to save images as certain types of files to certain folders on your computer;
- Using File → Automate → Batch for processing lots of images;
- The Allow Tool Recording option in the flyout Actions panel menu allows actions to include painting, and so on;
- The Insert Conditional option in the flyout Actions panel menu allows actions to change their behavior, based on the state of the document;
- File → Scripts → Script Events Manager lets actions run based on events, like when a document is opened or a new document is created.
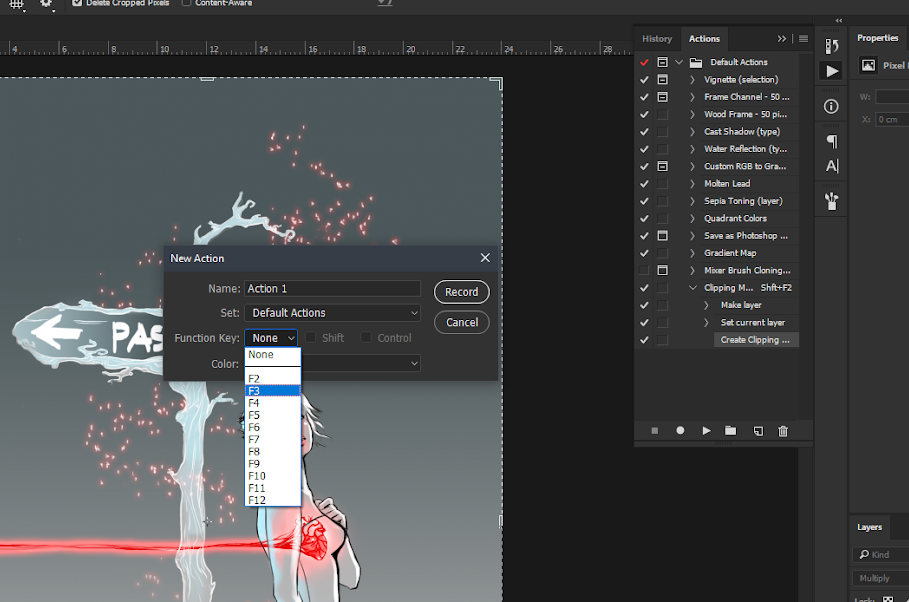
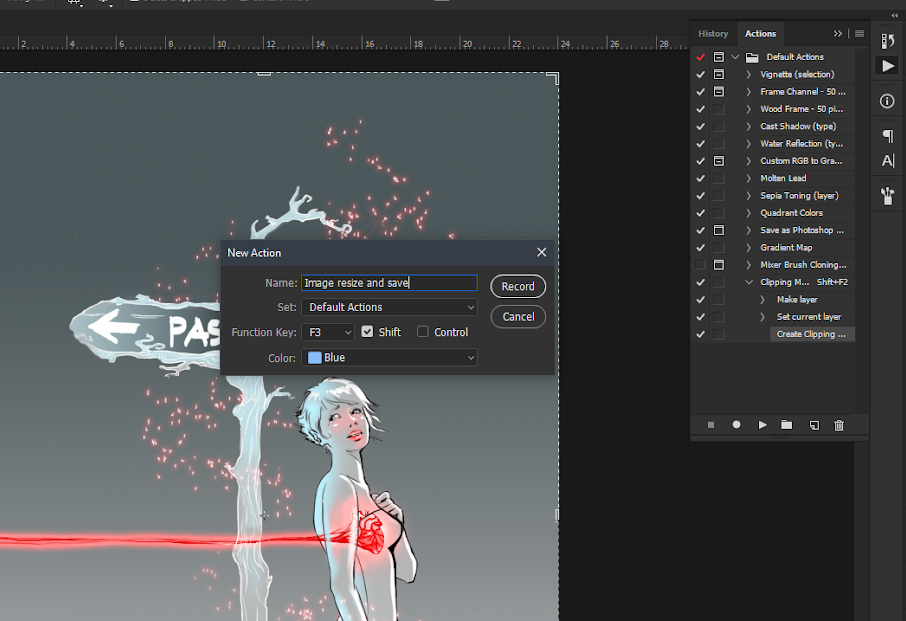
Let me give you another example, I’ll create another Action that will change the size of my image and save it as a PNG file in a certain folder on my desktop.
So after we hit the New Action button on the Actions panel, we’ll proceed with picking the shortcut that we want, set a name for it, and I’ll take it a step further and assign a color to the Action (I’ll explain why this is a helpful feature in a bit).
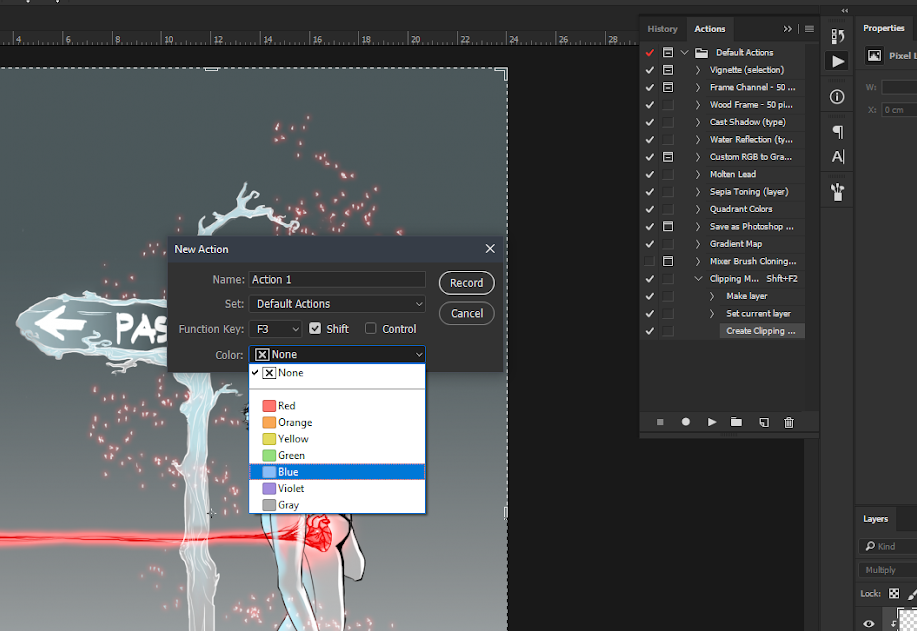
Now about that color, you may notice that when you assign a color, it doesn’t really reflect in the Actions Panel. Instead, everything stays monochrome. The reason is because when you typically open that panel, you’re in the Edit view, where you’re able to modify the Actions, record new ones, and so on. In order to see all of the available actions in a simpler interface, do this:
- On the upper-right hand corner of the panel you will see four horizontal lines. Click on those.
- You’ll get a drop-down menu, where you have different Actions options. On the top, you’ll notice a Button Mode.
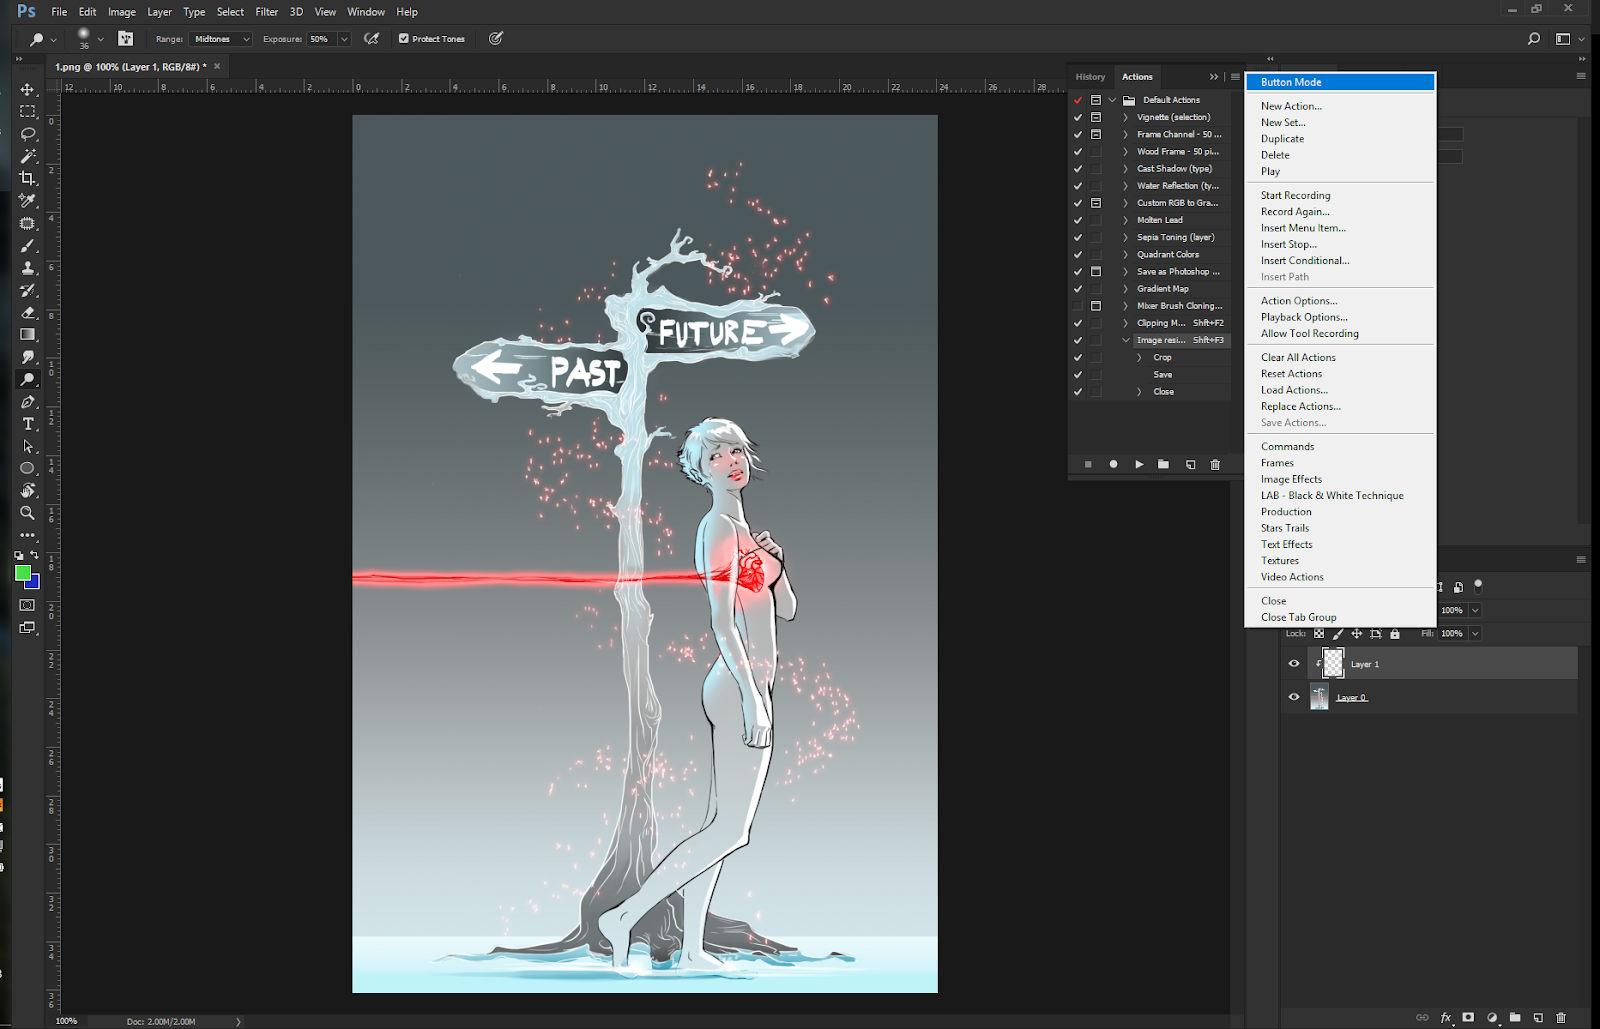
- Clicking on that will change the Actions Panel interface, where you will see your available Actions as colorful buttons.
If you haven’t guessed it already, coloring your Actions will help you distinguish them more easily at a glance. In Button mode, when you take a glance at the panel, you will be able to navigate quickly to the Action that you want to apply to your image/drawing (if you don’t really remember the shortcut you’ve assigned for it).
Okay, so what we have so far is the following:
- We’ve created a new action;
- Set the shortcut for it;
- Changed its color;
- Named it.
Let’s proceed with recording the process that we need.
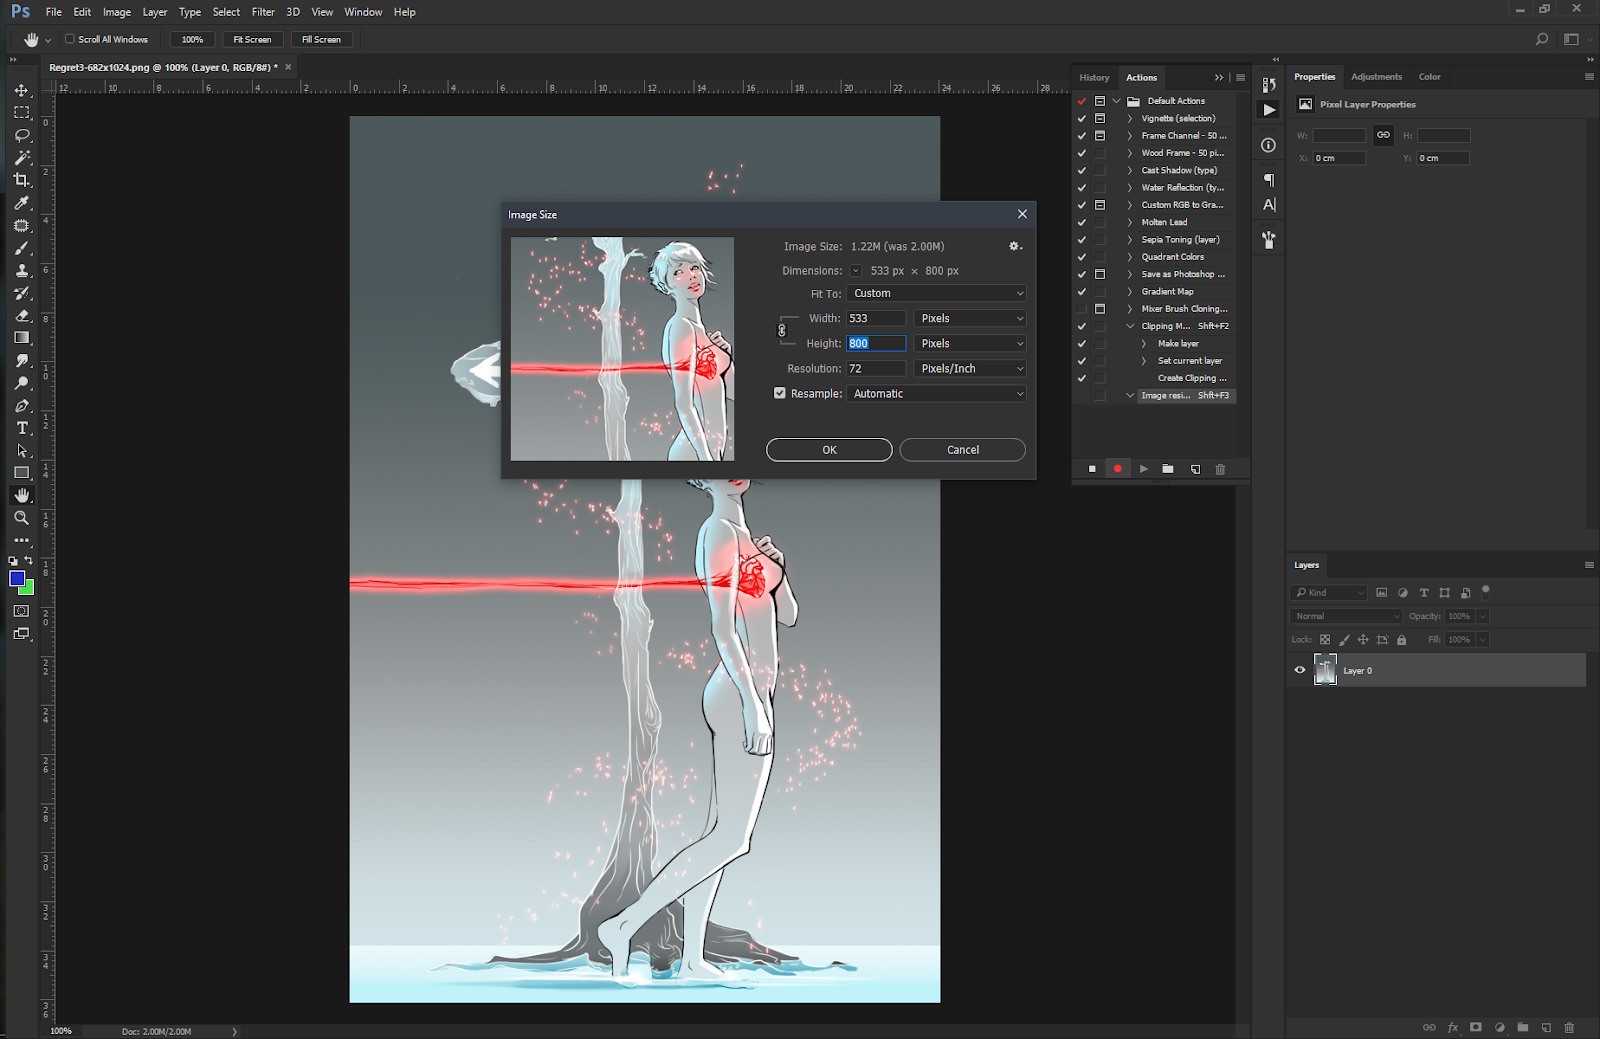
To open the Image Size menu, you can either go to Image → Image Size or simply hit Ctrl + Alt + I and you’ll get this window:

What you would want to do is set the desired size for your image and once you’re happy with that hit “OK” to apply the changes.
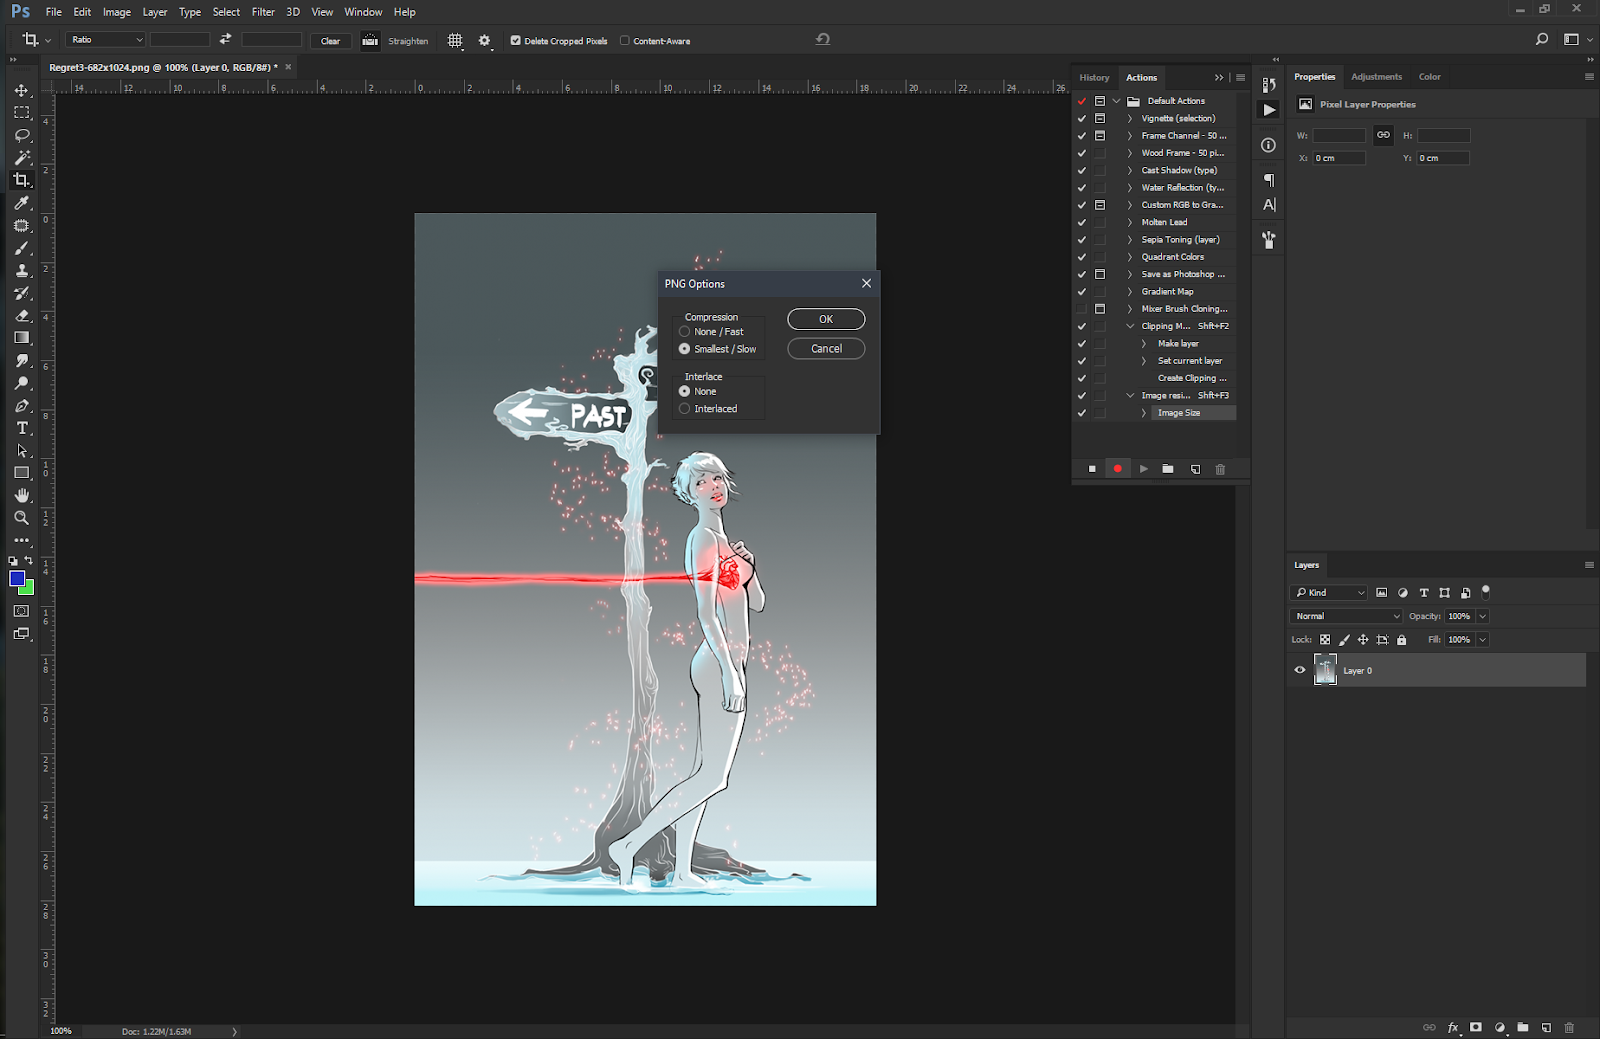
Next, what we want to do is use the Save As option in order to get the option to choose the type of file, destination folder, and so on. You can either go to File → Save As... or you could simply press Ctrl + Shift + S and you will get the following window:
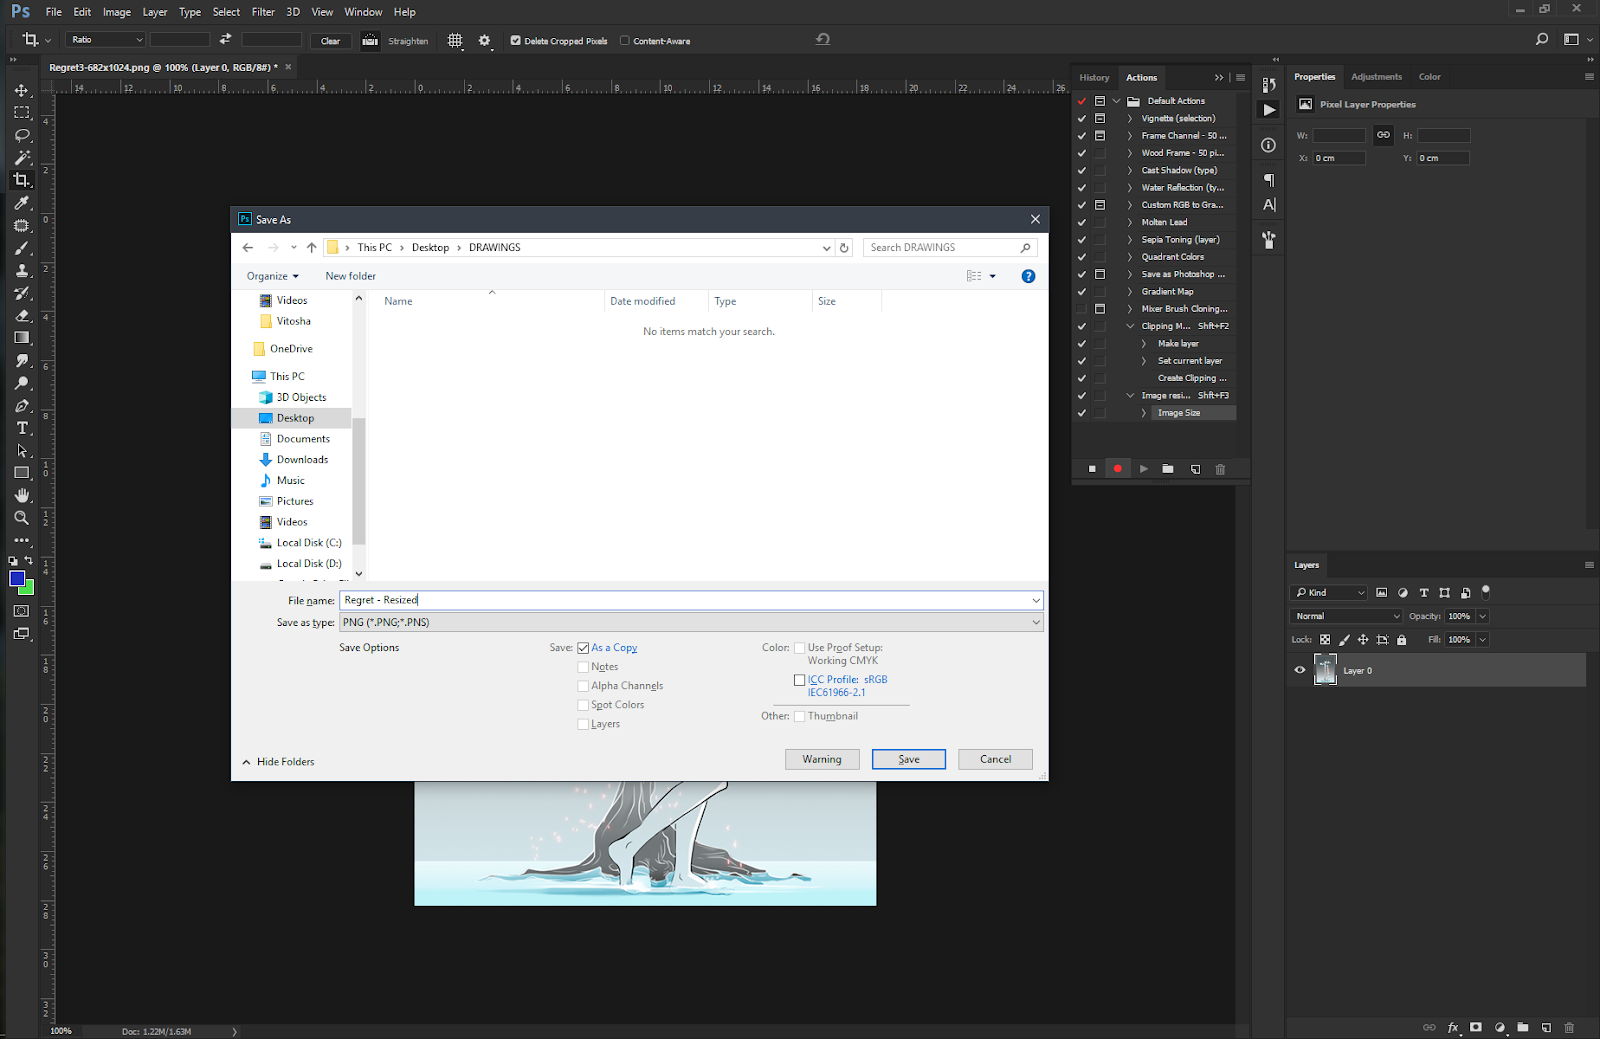
Navigate to the dedicated folder in which you want to save the current project in and actually save it there. An additional Action you can do is to close the image/project you’re working on (don’t worry, the Actions won’t stop recording unless you close down Photoshop).
Once all of that is done, you can hit the Stop icon on the Actions Panel to stop recording your movement in Photoshop.
If you need to resize a bunch of files and save them in a dedicated folder, you just have to load them up in Photoshop and continue hitting the Action shortcut that you’ve created for Resizing and Saving.
If you take the time to get accustomed to the Actions tool in Photoshop and utilize it, you can say “Goodbye” to the bothersome repetitive work that usually eats up most of your time. You will be able to fly through these tasks with such speed that even the Flash could get jealous of.
9. Conclusion
In this article, I’ve shared some of the shortcuts I mostly use. I sincerely hope that they will help you boost up your productivity and make your workflow better as well.
Special Thanks
I would like to mention that this tutorial was made possible with the help of Angel (a.k.a. ArcanumEX). You can check out his artwork on his Facebook page, on Instagram, and on his YouTube channel.
Other Resources
In addition to everything I’ve talked about so far, I’ll include more resources that I believe you might find helpful. Be sure to check out:
What are your favorite shortcuts? Feel free to share them in the comments below!
Further Reading
- How To Convert An Infographic Into A Gifographic Using Adobe Photoshop
- Mid-Century Modern Illustration: Creating A Cover Book With Illustrator And InDesign
- Iconography In Design Systems: Easy Troubleshooting And Maintenance
- How Developers Can Strengthen Their Mental Health Amidst High-Pressure Projects


