SVG Circle Decomposition To Paths

Email Newsletter
Weekly tips on front-end & UX.
Trusted by 182,000+ folks.

 Custom Web Forms for Angular, React, & Vue. Your backend.
 Celebrating 10 million developers


This article starts with a confession: I like to hand-code SVG. It’s not always the case but often enough it could seem peculiar to people who do not share my predilection. There are a good number of benefits in being able to write SVG by hand, such as optimizing SVGs in ways a tool can’t (turning a path into a simpler path or shape), or by simply understanding how libraries like D3 or Greensock work.
With that said, I’d like to look more closely at circular shapes in SVG and things we can do with them when we move past a basic circle. Why circles? Well, I love circles. They’re my favorite shape.
First off (hopefully you’ve seen a basic circle in SVG before), here’s a pen that shows one:
See the Pen circle by Bryan Rasmussen.
A lot of things can be done with a circle: it can be animated and it can have different colors applied to it. Still, there are two very nice things that you cannot have a circle do in SVG 1.1: You cannot make another graphical element move along the circle’s path (using the animateMotion element) and you cannot have shape a text along a circle’s path (this will only be allowed after SVG 2.0 is released).
Turning Our Circle Into A Path
There is a little online tool that can help you create paths out of circles (you can try it out here), but we’re going to do be creating everything from scratch so we can find out what’s really going on behind the scenes.
To make a circular path, we’re going to actually make two arcs, i.e. semicircles that complete the circle in one path. As you’ve probably noticed in the SVG above, the attributes CX, CY, and R respectively define where the circle is drawn along the X and Y axis, while R defines the radius of the circle. The CX and CY create the center of the circle, so the circle is drawn around that point.
Replicating that circle could look like this:
<path
    d="
      M (CX - R), CY
      a R,R 0 1,0 (R * 2),0
      a R,R 0 1,0 -(R * 2),0
    "
/>
Note that CX is the same as the cx attribute of the circle; the same goes for CY and the cy attribute of the circle, as well as R and the r attribute of the circle. The small a character is used to define a segment of an elliptical arc. You can use an optional Z (or z) to close the path.
The lowercase letter a denotes the beginning of an elliptical arc drawn relatively to the current position — or in our specific case:
<path
  d="
    M 25, 50
    a 25,25 0 1,1 50,0
    a 25,25 0 1,1 -50,0
  "
/>
You can see the magic happening in this pen:
See the Pen circle from path by Bryan Rasmussen.
Hidden underneath the path is a circle with a red fill. As you play around with values of the path, you’ll see that circle as long as the path totally covers the circle (the path itself is a circle of the same size), and we’ll know that we’re doing things right.
One thing you should also know is that as long as you are drawing relative arcs, you don’t need to repeat the a command for each arc you draw. When your first 7 inputs are done for your arc, the second 7 inputs will be taken for the next arc.
You can try this out with the pen above by removing the second a in the path:
a 25,25 0 1,1 50,0

25,25 0 1,1 -50,0
This may look the same, but I prefer to leave it in until I am ready to finish a drawing, and this also helps me to keep track of where I am.
How This Path Works
First, we move to an absolutely positioned X,Y coordinate in the image. It does not draw anything there — it just moves there. Remember that for a circle element CX, CY denotes the center of the circle; but as it happens in the elliptical arc, the true CX and CY of the arc will be calculated from the other properties of that arc.
In other words, if we want our CX to be at 50 and our radius is 25, then we need to move to 50 - 25 (if we are drawing from left to right, of course). This means that our first arc is drawn from 25 X, 50 Y which results to our first arc being 25,25 0 1,0 50,0.
Let’s break down what the value 25,25 0 1,0 50,0 of our arc actually means:
25: The relative X radius of the arc;25: The relative Y radius of the arc;0 1,0: I’m not going to talk about the three middle values (rotation, large-arc-flag, and the sweep-flag properties) because they are not very important in the context of the current example as long as they are the same for both arcs;50: The ending X coordinate (relative) of the arc;0: The ending Y coordinate (relative) of the arc.
The second arc is a 25,25 0 1,0 -50,0. Keep in mind that this arc will start drawing from wherever the last arc stopped drawing. Of course, the X and Y radius are the same (25), but the ending X coordinate is -50 of where the current one is.
Obviously this circle could have been drawn in many different ways. This process of turning a circle into a path is known as decomposition. In the SVG 2 spec decomposition of a circle will be done with 4 arcs, however, the method it recommends is not possible to use yet, as it currently depends on a feature named segment-completing close path which has not yet been specified.
In order to show you that we can draw the circle in a lot of ways, I have prepared a little pen with various examples:
See the Pen all circles by Bryan Rasmussen.
If you take a closer look, you’ll see our original circle along with five different examples of how to draw paths on top of that circle. Each path has a child desc element describing the use of CX, CY and R values to build the circle. The first example is the one we discussed here while three others use variations that should be comprehensible from reading the code; the last examples uses four semicircular arcs instead of two, replicating somewhat the process described in the SVG 2 spec linked above.
The circles are layered on top of each other using SVG’s natural z-indexing of placing elements that come later in the markup on top of the ones that come earlier.
If you click on the circular paths in the pen, the first click will print out how the path is structured to the console and add a class to the element so that you will see the stroke color of how the circle is drawn (you can see that the first circle is drawn with a starting wedge from the stroke). The second click will remove the circle so you have the ability to interact with the circle below.
Each circle has a different fill color; the actual circle element is yellow and will say “You clicked on the circle” to the console whenever it is clicked on. You can also, of course, simply read the code as the desc elements are quite straightforward.
Going From A Path To A Circle
I suppose you’ve noticed that while there are many different ways to draw the circle, the paths used still look pretty similar. Often — especially in SVGs output from a drawing program — circles will be represented by paths. This is probably due to optimization of the graphics program code; once you have the code to draw a path you can draw anything, so just use that. This can lead to somewhat bloated SVGs that are hard to reason about.
Recommended reading: “Tips For Creating And Exporting Better SVGs For The Web” by Sara Soueidan
Let’s take the following SVG from Wikipedia as an example. When you look at the code for that file, you will see that it has a lot of editor cruft once you’ve run it through Jake Archibald’s SVGOMG! (which you can read more about here), you’ll end up with something like the following file which has been pretty optimized but the circles in the document are still rendered as paths:
See the Pen Wikipedia Screw Head Clutch Type A by Bryan Rasmussen.
So, let’s see if we can figure out what those circles should be if they were actual circle elements given what we know about how paths work. The first path in the document is obviously not a circle while the next two are (showing just the d attribute):
M39 20a19 19 0 1 1-38 0 19 19 0 1 1 38 0z
M25 20a5 5 0 1 1-10 0 5 5 0 1 1 10 0z
So remembering that the second a can be left out, let’s rewrite these to make a little more sense. (The first path is the big circle.)
M39 20
a19 19 0 1 1-38 0
a19 19 0 1 1 38 0z
Those arcs are then obviously the following:
aR R 0 1 1 - (R * 2) 0
aR R 0 1 1 (R * 2) 0
This means that our circle radius is 19, but what are our CX and CY values? I think our M39 is actually CX + R, which means that CX is 20 and CY is 20 too.
Let’s say you add in a circle after all the paths like this:
<circle
 fill="none"
 stroke-width="1.99975"
 stroke="red"
 r="19"
 cx="20"
 cy="20"
/>
You will see that is correct, and that the red stroked circle covers exactly the large circle. The second circle path reformulated looks like this:
M25 20
a5 5 0 1 1-10 0
5 5 0 1 1 10 0z
Obviously, the radius is 5, and I bet our CX and CY values are the same as before: - 20.
Note: If CX = 20, then CX + R = 25. The circle is sitting inside the bigger one at the center, so obviously it should have the same CX and CY values.
Add the following circle at the end of the paths:
<circle
 fill="yellow"
 r="5"
 cx="20"
 cy="20"
/>
You can now see that this is correct by taking a look at the following pen:
See the Pen Wikipedia Screw Head Clutch Type A_ with example circles by Bryan Rasmussen.
Now that we know what the circles should be, we can remove those unneeded paths and actually create the circles — as you can see here:
See the Pen Wikipedia Screw Head Clutch Type A optimized by Bryan Rasmussen.
Using Our Circular Path For Wrapping Text
So now that we have our circles in paths, we can wrap text on those paths. Below is a pen with the same paths as our previous “All Circles” pen, but with text wrapped on the path. Whenever you click on a path, that path will be deleted and the text will be wrapped on the next available path, like so:
See the Pen all circles wrapped Text by Bryan Rasmussen.
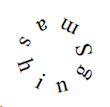
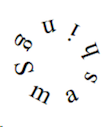
Looking at the different paths, you’ll see tiny differences between each one (more on that in a bit), but first there is a little cross-browser incompatibility to be seen — especially noticeable in the first path:
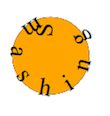 | Firefox Developer |
 | Chrome |
 | Microsoft Edge |
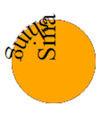
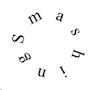
The reason why the starting “S” of “Smashing” is sitting at that funny angle in the Firefox solution is that it is where we actually started drawing our path at (due to the v-R command we used). This is more obvious in the Chrome version where you can clearly see the first pie-shaped wedge of our circle that we drew:
 | Chrome does not follow all the wedges, so this is the result when you change the text to be “Smashing Magazine”. |
The reason is that Chrome has a bug regarding inheritance of the textLength attribute declared on the parent text element. If you want them both to look the same, put the textLength attribute on the textPath element as well as the text. Why? Because it turns out that Firefox Developer has the same bug if the textLength attribute is not specified on the text element (this has been the case for some years now).
Microsoft Edge has a totally different bug; it can’t handle whitespace in between the Text and the child TextPath element. Once you have removed whitespace, and put the textLength attribute on both the text and textPath elements, they will all look relatively the same (with small variations due to differences in default fonts and so forth). So, three different bugs on three different browsers — this is why people often prefer to work with libraries!
The following pen shows how the problems can be fixed:
See the Pen all circles wrapped Text fixed TextLength by Bryan Rasmussen.
I’ve also removed the various fill colors because it makes it easier to see the text wrapping. Removing the fill colors means that my little function to allow you to cycle through the paths and see how they look won’t work unless I add a pointer-events="all" attribute, so I’ve added those as well.
Note: You can read more about the reasons for that in “Managing SVG Interaction With The Pointer Events Property” explained by Tiffany B. Brown.
We’ve already discussed the wrapping of the multiarc path, so let’s now look at the others. Since we have one path we are wrapping on, the text will always move in the same direction.
| Image | Path | Explanation |
|---|---|---|
 | M CX, CYa R, R 0 1,0 -(R * 2), 0a R, R 0 1,0 R * 2, 0and uses the translate function to move +R on the X axis. | The starting position for our textPath (since we have not specified it in any way) is determined by our first ending arc -(R * 2), given the radius that the arc itself has. |
 | M (CX + R), CYa R,R 0 1,0 -(R * 2),0a R,R 0 1,0 (R * 2),0 | Same applies as the previous path. |
 | M CX CYm -R, 0a R,R 0 1,0 (R * 2),0a R,R 0 1,0 -(R * 2),0 | Since we are ending at (R * 2 ) in our first arc, we will obviously be starting at the opposite position. In other words, this one starts where our previous two paths ended. |
 | M (CX - R), CYa R,R 0 1,1 (R * 2),0a R,R 0 1,1 -(R * 2),0 | This starts in the same position as the last one due to (R * 2), but it is running clockwise because we have set the sweep-flag property (marked in yellow) to 1. |
We‘ve seen how to wrap text on a single path in a circle. Let’s now take a look at how we can break up that path into two paths and the benefits you can get from that.
Breaking Our Paths Into Parts
There are a lot of things you can do with the text in your path, i.e. achieving stylistic effects with tspan elements, setting the offset of the text, or animating the text. Basically, whatever you do will be constrained by the path itself. But by breaking up our multiarc paths into single arc paths, we can play around with the direction of our text, the z-indexing of different parts of our text, and achieving more complex animations.
First, we are going to want to use another SVG image to show some of the effects. I will be using the diamond from the article on pointer events which I mentioned earlier. First, let’s show what it will look like with a single path circular text laid on top of it.
Let’s assume that our circle is CX 295, CY 200, R 175. Now, following the Circular path method, we now see the following:
M (CX - R), CY
a R,R 0 1,1 (R * 2),0
a R,R 0 1,1 -(R * 2),0
See the Pen SVG Amethyst by Bryan Rasmussen.
I’m not going to talk about the path or the text size, fill or stroke color. We should all understand that by now, and be able to make it be whatever we want it to be. But by looking at the text, we can see some downsides or limitations right away:
- The text all runs in one direction;
- It might be nice to have some of the text go behind the amethyst, especially where it says MAGAZINE. In order to make the ‘M’ and ‘E’ line up on the circle, the ‘A’ has to be on the side lower point of the amethyst, which feels sort of unbalanced in another way. (I feel like the ‘A’ should be precisely positioned and pointing down at that point.)
If we want to fix these issues, we need to split our single path into two. In the following pen, I have separated the path into two paths, (and placed them into the defs area of the SVG for our textPaths to reference):
See the Pen SVG Amethyst two paths by Bryan Rasmussen.
Again, assuming our CX is 295, CY 200, R 175, then the two paths are in the format of the following (for the top semicircular path):
M (CX - R), CY
a R,R 0 1,1 (R * 2),0
And the following for the bottom:
M (CX + R), CY
a R,R 0 1,1 -(R * 2),0
However, we still have circular text that moves all in the same direction. To fix that for everything but Edge, all you have to do is to add the side="right" attribute to the text element that holds the ‘MAGAZINE’ textPath.
Making The Text Go Another Direction
If we want to support as many browsers as we can, we have to alter the path and not rely on the side attribute which is not fully supported. What we can do is to copy our top semicircle path, but change the sweep from 1 to 0:
Before:
M 120, 200 a 175,175 0 1,1350,0
After:
M 120, 200 a 175,175 0 1,0350,0
But our text is now drawn on the inner circle defined by the sweep and it won’t look so nice in different browsers. This means that we’re going to have to move the position of our path to align with the ‘S’ of ‘Smashing’, make the ending X of the path greater, and set some offset to the text. As you can see, there is also a little text difference between Firefox and the others which we can improve by increasing the textLength attribute on the text element, as well as removing whitespace from the textPath (since Firefox evidently thinks whitespace is meaningful).
The solution:
See the Pen SVG Amethyst two paths fixed by Bryan Rasmussen.
Change The Z-Index Of Part Of Our Circular Text
Finally, we want to make our text goes both in front and behind the amethyst. Well, that’s easy. Remember that SVG’s z-indexing of element is based by where they are in the markup? So if we have two elements, element 1 will be drawn behind element 2. Next, all we have to do is to move a text element up in our SVG markup so it is drawn before the amethyst.
You can see the result below in which parts of the word ‘MAGAZINE’ are hidden by the lower point of the amethyst.
See the Pen SVG Amethyst two paths z-index by Bryan Rasmussen.
If you take a look at the markup, you can see that the lower semicircle of text has been moved to be before the path that draws the amethyst.
Animating The Parts Of Our Circle
So now we have the ability to make circular text by completely controlling the directionality of the parts of our text by putting the text into two semicircles. This can, of course, also be exploited to make animations of the text. Making cross-browser SVG animations is really the subject of another article (or a lot more articles). These examples will only work in Chrome and Firefox because of using the SMIL-animations syntax instead of CSS keyframes or tools like Greensock. But it gives a good indicator of the effects you can achieve by animating the decomposed circle.
Take the following pen:
See the Pen SVG Amethyst two paths animated by Bryan Rasmussen.
Please press the ‘Rerun’ button on the codepen to see the animation in action. The two parts of our circular text begin animating at the same time, but have a different duration so they end at different times. Because we are animating the textLength attribute, we have put two animate directives under each text — one for the text element (so Firefox will work) and one for the textpath element (so Chrome will work).
Conclusion
In this article, we’ve seen how to turn a circle into a path and back again, in order to better understand when we need to optimize a path and when not. We’ve seen how turning the circle into a path frees us up to placing the text on the circular path, but also how to further split the circular path into semicircles and gain fuller control over directionality and animation of the component parts of our circular text.
Further Reading
- Rethinking Responsive SVG
- Animating SVG Files With SVGator
- Styling And Animating SVGs With CSS
- Managing SVG Interaction With The Pointer Events Property


