Helping Browsers Optimize With The CSS Contain Property

Email Newsletter
Weekly tips on front-end & UX.
Trusted by 200,000+ folks.


contain property gives you a way to explain your layout to the browser, so performance optimizations can be made. However, it does come with some side effects in terms of your layout. In this article, Rachel Andrew is going to introduce a CSS Specification that has just become a W3C Recommendation. The CSS Containment Specification defines a single property, contain, and it can help you to explain to the browser which parts of your layout are independent and will not need recalculating if some other part of the layout changes.In this article, I’m going to introduce a CSS Specification that has just become a W3C Recommendation. The CSS Containment Specification defines a single property, contain, and it can help you to explain to the browser which parts of your layout are independent and will not need recalculating if some other part of the layout changes.
While this property exists for performance optimization reasons, it can also affect the layout of your page. Therefore, in this article, I’ll explain the different types of containment you can benefit from, but also the things you need to watch out for if applying contain to elements in your site.
The Problem Of Layout Recalculation
If you are building straightforward web pages that do not dynamically add or change elements after they have loaded using JavaScript, you don’t need to worry about the problem that CSS Containment solves. The browser only needs to calculate your layout once, as the page is loaded.
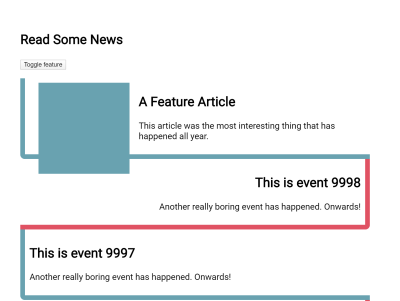
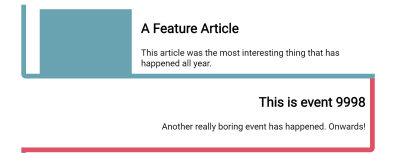
Where Containment becomes useful is when you want to add elements to your page without the user needing to reload it. In my example, I created a big list of events. If you click the button, the first event is modified, a floated element is added, and the text is changed:
When the content of our box is changed, the browser has to consider that any of the elements may have changed. Browsers are in general pretty good at dealing with this, as it’s a common thing to happen. That said, as the developer, you will know if each of the components is independent, and that a change to one doesn’t affect the others, so it would be nice if you could let the browser know this via your CSS. This is what containment and the CSS contain property gives you.
How Does Containment Help?
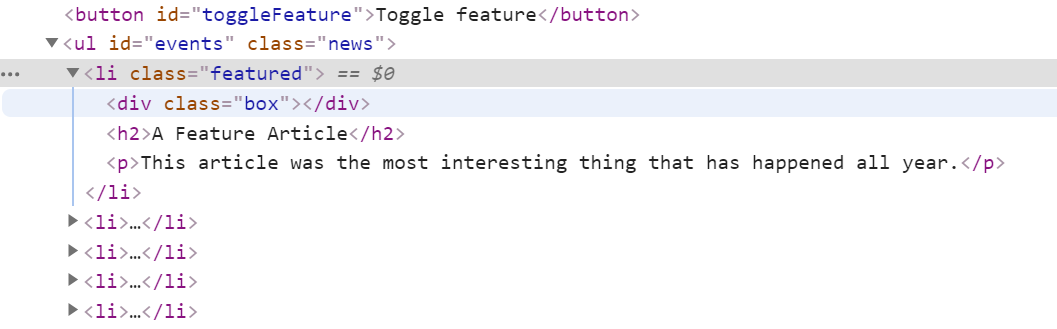
An HTML document is a tree structure which you can see when inspecting any element with DevTools. In my example above, I identify one item that I want to change by using JavaScript, and then make some changes to the internals. (This means that I’m only changing things inside the subtree for that list item.)
Applying the contain property to an element tells the browser that changes are scoped to the subtree of that element, so that the browser can do any possible optimizations — safe in the knowledge that nothing else outside of that element will change. Exactly what a particular browser might do is down to the engine. The CSS property simply gives you — as the developer and expert on this layout — the chance to let it know.
In many cases, you will be safe to go right ahead and start using the contain property, however, the different values come with some potential side effects which are worth understanding before adding the property to elements in your site.
Using Containment
The contain property can set three different types of containment:
layoutpaintsize
Note: There is a style value in the Level 2 Specification. It was removed from Level 1, so does not appear in the Recommendation, and is not implemented in Firefox.
Layout
Layout containment brings the biggest benefits. To turn on layout containment, use the following snippet:
.item {
  contain: layout;
}
With layout containment enabled, the browser knows that nothing outside the element can affect the internal layout, and nothing from inside the element can change anything about the layout of things outside it. This means that it can make any possible optimizations for this scenario.
A few additional things happen when layout containment is enabled. These are all things which ensure that this box and contents are independent of the rest of the tree.
The box establishes an independent formatting context. This ensures that the content of the box stays in the box — in particular floats will be contained and margins will not collapse through the box. This is the same behavior that we switch on when we use display: flow-root as in explained in my article “Understanding CSS Layout And The Block Formatting Context”. If a float could poke out of your box, causing following text to flow around the float, that would be a situation where the element was changing the layout of things outside it, making it a poor candidate for containment.
The containing box acts as the containing block for any absolutely or fixed position descendants. This means it will act as if you had used position: relative on the box you have applied contain: layout.
The box also creates a stacking context. Therefore z-index will work on this element, it’s children will be stacked based on this new context.
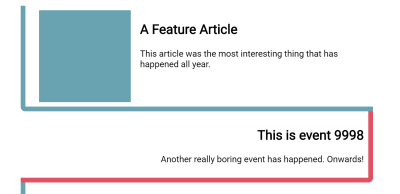
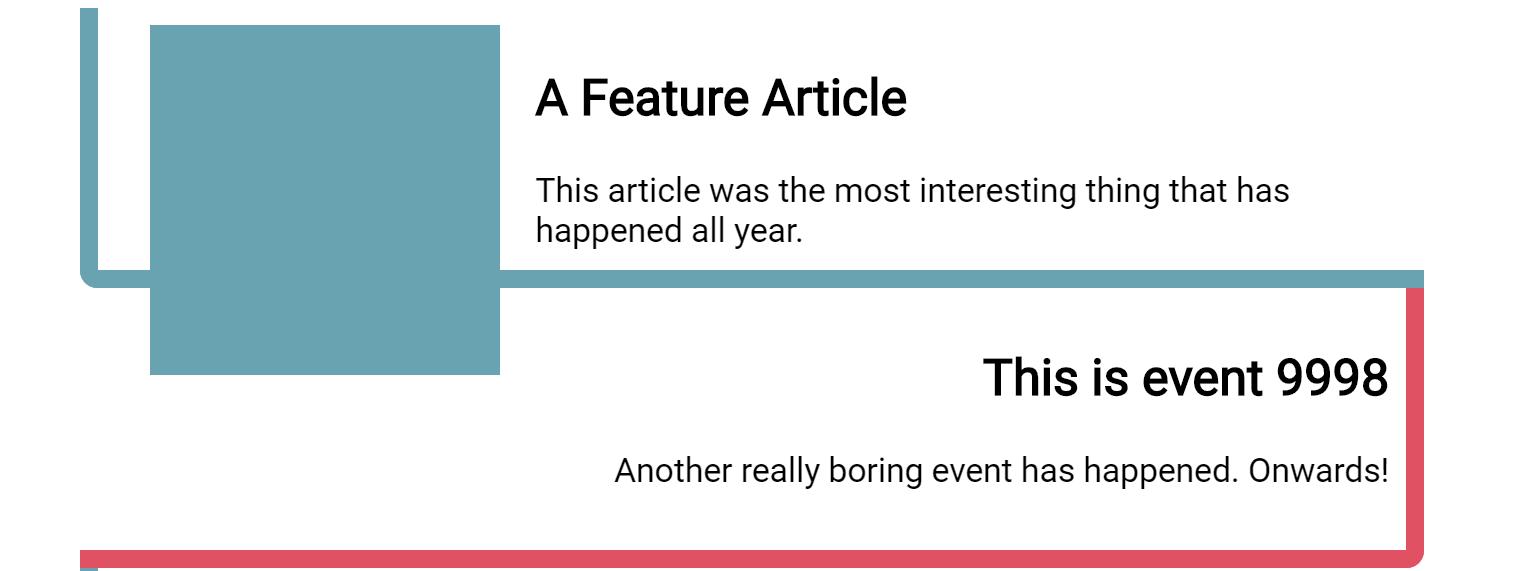
If we look at the example, this time with contain: layout, you can see that when the floated element is introduced it no longer pokes out the bottom of the box. This is our new Block Formatting Context in action, containing the float.
Paint
To turn on paint containment, use the following:
.item {
  contain: paint;
}
With paint containment enabled, the same side effects as seen with layout containment occur: The containing box becoming an independent formatting context, a containing block for positioned elements, and establishing a stacking context.
What paint containment does is indicate to the browser that elements inside the containing block will not be visible outside of the bounds of that box. The content will essentially be clipped to the box.
We can see this happen with a simple example. Even if we give our card a height, the floated item still pokes out the bottom of the box, due to the fact that the float is taken out of flow.
With paint containment turned on the floated item is now clipped to the size of the box. Nothing can be painted outside of the bounds of the element with contain: paint applied.
Size
Size containment is the value that is most likely to cause you a problem if you aren’t fully aware of how it works. To apply size containment, use:
.item {
  contain: size;
}
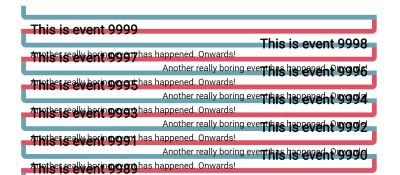
If you use size containment then you are telling the browser that you know the size of the box and it is not going to change. This does mean that if you have a box which is auto-sized in the block dimension, it will be treated as if the content has no size, therefore the box will collapse down as if it had no contents.
In the example below, I have not given the li a height; they also have contain: size applied. You can see that all of the items have collapsed as if they had no content at all, making for a very peculiar looking listing!
If you give the boxes a height then the height will be respected when contain: size is used. Alone, size containment will not create a new formatting context and therefore does not contain floats and margins as layout and paint containment will do. It’s less likely that you would use it alone; instead, it is most likely you would apply it along with other values of contain to be able to get the most possible containment.
Shorthand Values
In most cases, you can use one of two shorthand values to get the best out of containment. To turn on layout and paint containment, use contain: content;, and to turn on all possible containment (keeping in mind that items which do not have a size will then collapse), use contain: strict.
“contain: contentis reasonably "safe" to apply widely; its effects are fairly minor in practice, and most content won’t run afoul of its restrictions. However, because it doesn’t apply size containment, the element can still respond to the size of its contents, which can cause layout-invalidation to percolate further up the tree than desired. Usecontain: strictwhen possible, to gain as much containment as you can.”
Therefore, if you do not know the size of the items in advance, and understand the fact that floats and margins will be contained, use contain: content. If you do know the size of items in addition to being happy about the other side effects of containment, use contain: strict. The rest is down to the browser, you have done your bit by explaining how your layout works.
Can I Use Containment Now?
The CSS Containment specification is now a W3C Recommendation which is what we sometimes refer to as a web standard. In order for the spec to get to this stage, there needed to be two implementations of the feature which we can see in both Firefox and Chrome:
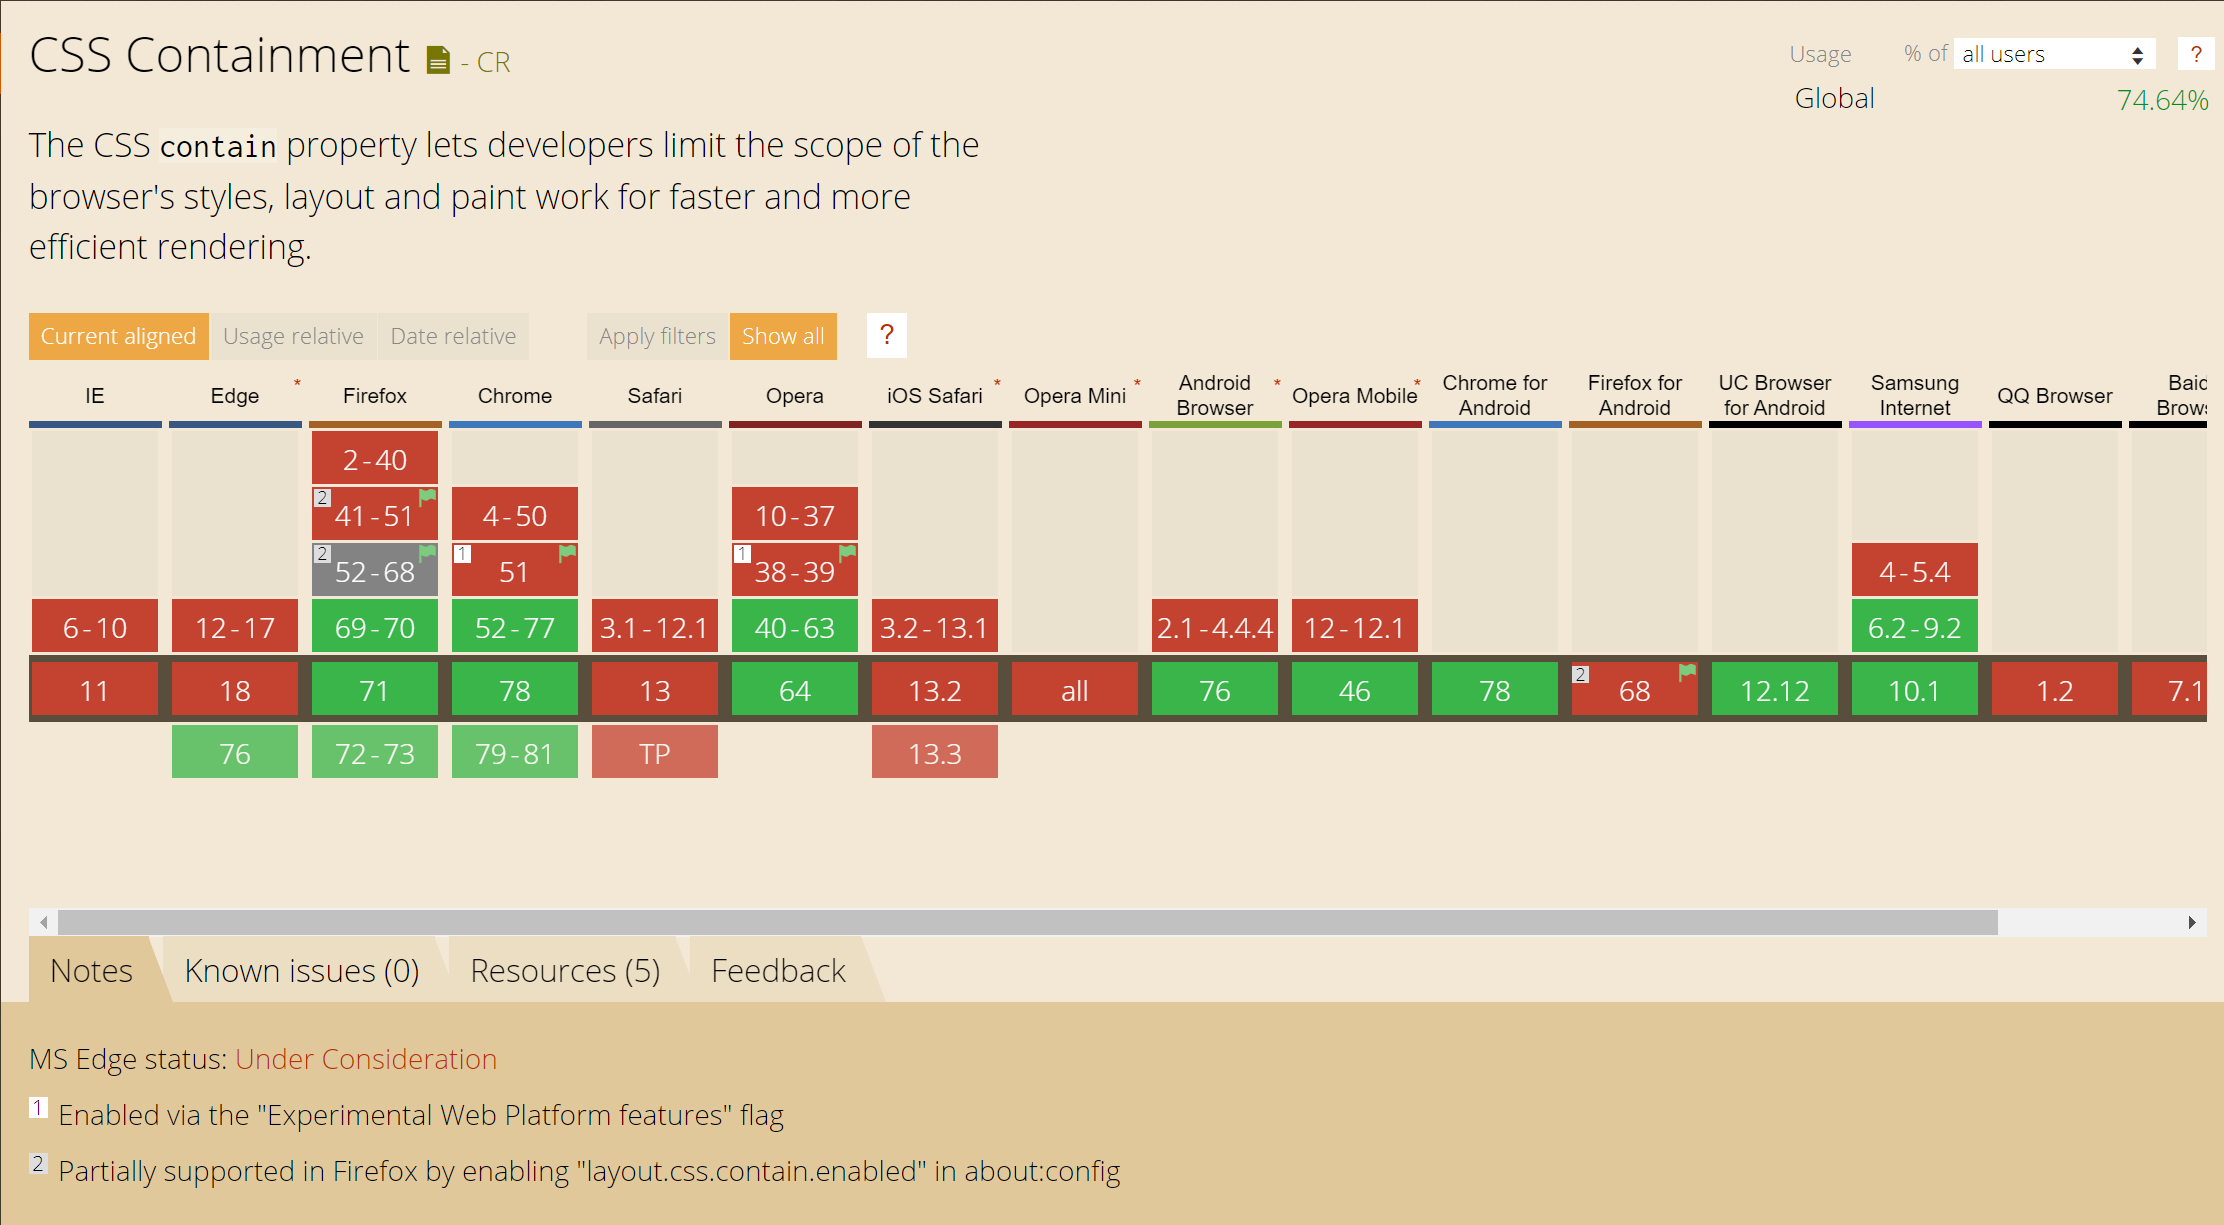
As this property is transparent to the user, it is completely safe to add to any site even if you have lots of visitors in browsers that do not support it. If the browser doesn’t support containment then the visitor gets the experience they usually get, those in supporting browsers get the enhanced performance.
I would suggest that this is a great thing to add to any components you create in a component or pattern library, if you are working in this way it is likely each component is designed to be an independent thing that does not affect other elements on the page, making contain: content a useful addition.
Therefore, if you have a page which is adding content to the DOM after load, I would recommend giving it a try — if you get any interesting results let me know in the comments!
Related Resources
The following resources will give you some more detail about the implementation of containment and potential performance benefits:
- “The
containCSS Property,” MDN web docs - “CSS Containment In Chrome 52,” Google Developers
- “CSS Containment Module Level 1,” W3C Recommendation
- “An Introduction To CSS Containment,” Manuel Rego Casasnovas
Further Reading
- Modern CSS Layouts: You Might Not Need A Framework For That
- Sliding 3D Image Frames In CSS
- Performance Game Changer: Browser Back/Forward Cache
- CTA Modal: How To Build A Web Component


