How Indigo.Design Usability Testing Takes The Guesswork Out Of Web Design

Email Newsletter
Weekly tips on front-end & UX.
Trusted by 182,000+ folks.
This article has been kindly supported by our dear friends at Infragistics who are known to provide solutions to accelerate design, development and collaboration. Thank you!

Usability is critical for a website’s success, but it can be difficult to nail down in early design and development stages without a little help.
It’s not as though the research and preparation you do for a new site won’t give you insights on how to build something that’s both beautiful and functional. And having a rock-solid design system and designer-developer handoff will certainly help you bring quality control and consistency to your site.
However, it’s not always enough.
While you can make research-backed assumptions about how visitors will respond to your website or app, it’s all theory until you get it into the hands of real users.
Today, I want to look at the process of usability testing: what it is, when you should use it and how to generate data-backed insights while developing your website using Indigo.Design.
What Is Usability Testing?
Usability testing is a method used to evaluate how easy it is to get around a website or app and to complete specific tasks.
It puts the focus on what people do rather than collect opinions on how they like the design. In other words, usability testing allows you to gather behavioral feedback to make sure the site actually does what it’s supposed to do.
To conduct a usability test, you need to put your site or app in the hands of target users. The data collected from these tests will then help you reshape the site into something that’s streamlined and better tailored to your users’ preferred journey.
Moderated Vs Unmoderated Usability Testing
There are a couple of ways to approach this:
| Moderated | Unmoderated | |
|---|---|---|
| Type of test | One-on-one | Self-guided |
| The process | Moderator engages the users as they walk through the session | Users follow instructions and the analytics tool maps their session |
| Test group size | Small | Small to large |
| Use cases | Highly specialized domains (e.g. doctors, accountants) | Geographically dispersed audience |
| Web development stage | Prototyping and onward | Prototyping and onward |
It’s okay if it’s not possible or feasible to run moderated tests on your website or app. With Indigo.Design, you can conduct either kind of test to painlessly gather accurate, quantifiable data from your users and take the guesswork out of design.
“
Usability Testing With Indigo.Design
You can start conducting usability tests as early as the prototyping stage. And, really, minimum viable products are the best kinds of websites and apps to test as it’s cheaper to iterate while you’re still in development. Plus, user feedback at this early stage will keep you from wasting time building out features or content that users don’t want or need.
To be clear, we’re not talking about soliciting opinions from stakeholders. What we need to know is whether or not real users can use your website or app successfully.
Just keep in mind that you need to bring a workable prototype to the table. That means:
- A prototype that’s rich enough to support the usability tasks you’re going to test.
- A medium-fidelity solution that strikes the right balance between empty-shell-of-a-website and ready-for-launch. It might not be pretty, but it has to be interactive.
Once you’ve gotten your product to this point, you can start usability testing:
1. Add Your Prototype To Indigo.Design
Adding prototypes to Indigo.Design is easy. You have two options:
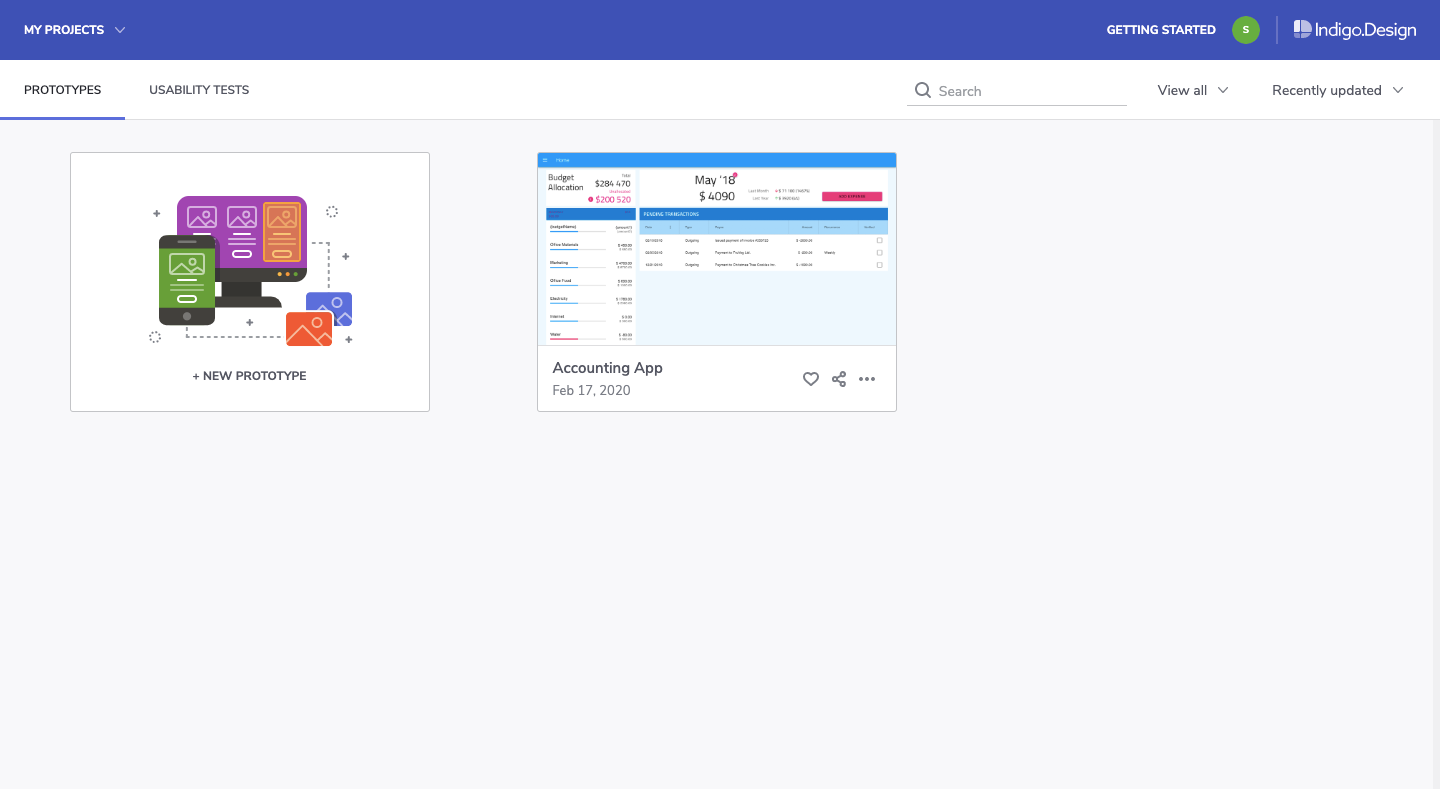
The first option is to upload a prototype from your computer. The following file formats are accepted:
- PNG,
- JPG,
- GIF,
- Sketch.
The second option is to add the Indigo.Design plugin to Sketch and sync your prototypes to the cloud. If you’re going to use this tool to simplify handoff, this plugin is going to be a huge time saver.
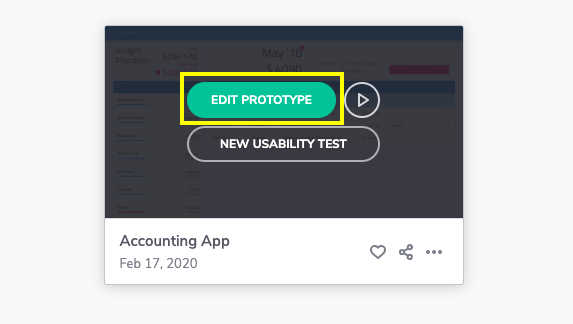
Once your prototype is loaded, hover over it and click “Edit Prototype”.
If you haven’t yet confirmed that all interactions are properly set up inside Sketch, you can do that from within the Indigo.Design cloud and edit your interactions there:
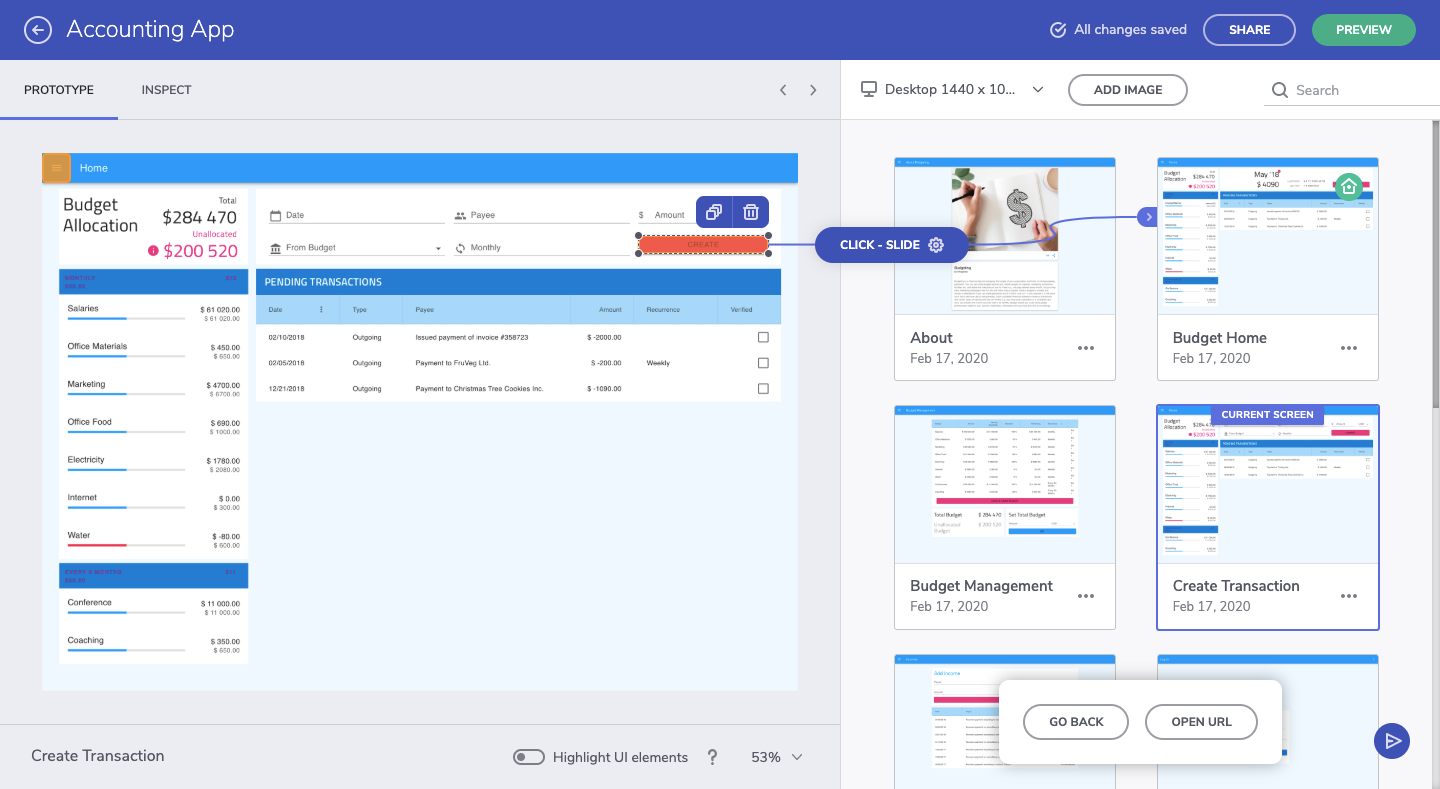
If the interactions aren’t properly set up, take care of that now. Create the hotspot on the interface on the left and then drag it to the corresponding card on the right to create an interaction.
2. Create A New Usability Test
From the same dashboard where prototypes are uploaded, you’ll begin your first usability test. You can do this from one of two places.
You can hover over the prototype you want to test and create a new one:
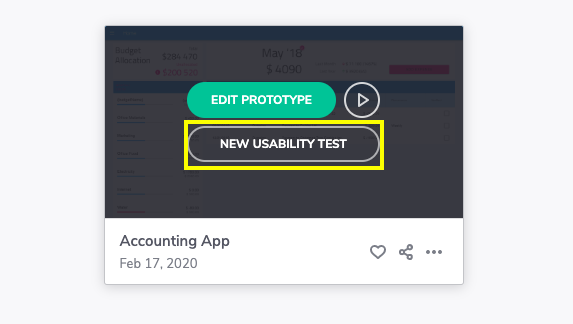
The other option is to go to the Usability Tests tab and begin the test there:
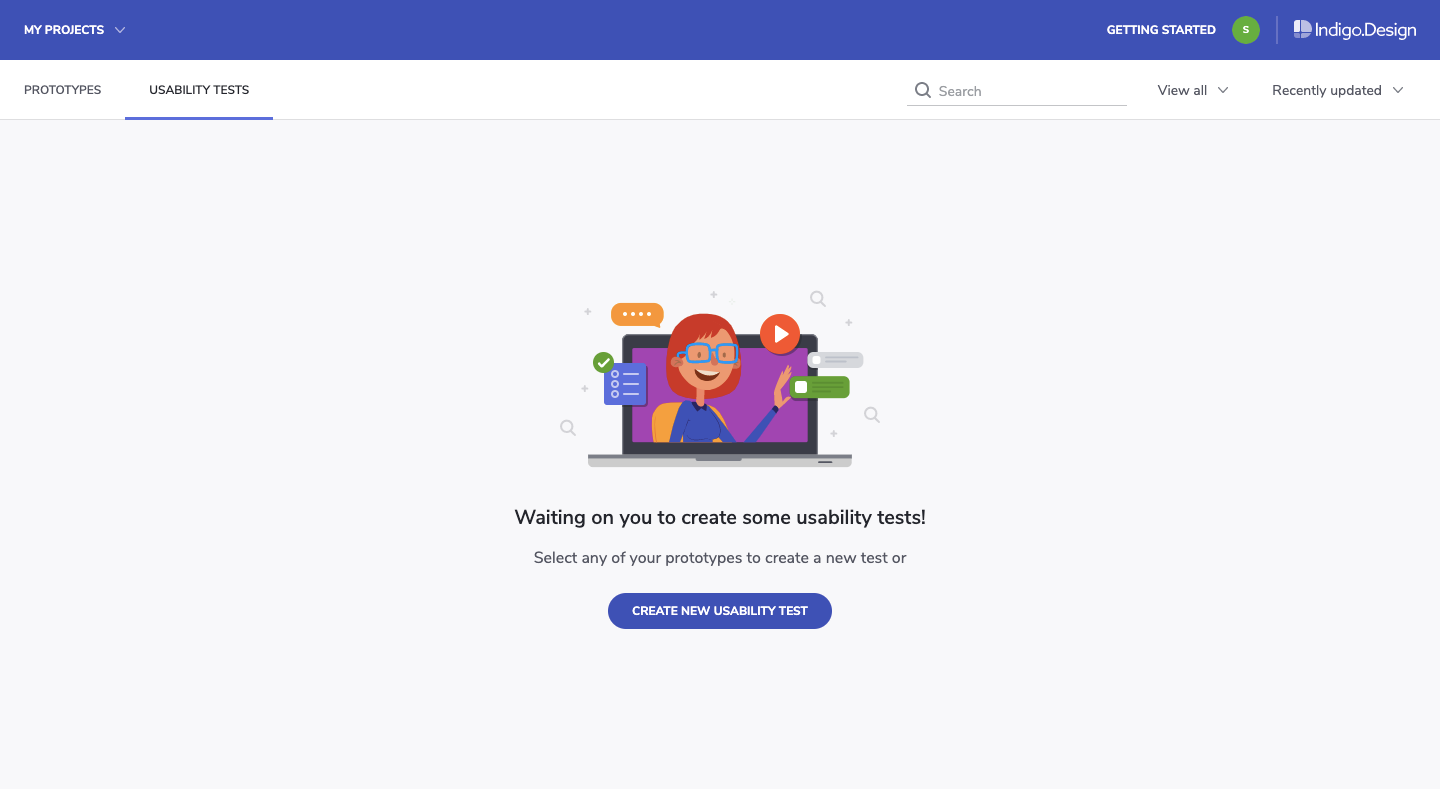
This is where you will eventually go to manage your usability tests and to review your test results, too.
With your new usability test initiated, this is what you’ll first see:

Essentially, what you need to do with this tool is:
Determine which “tasks” you want to test. These should be important steps that get your users to complete desired goals (theirs and yours).
For example, with this being a finance management app, I expect users to primarily use this to create new budgets for themselves. So, that’s the first task I want to test:
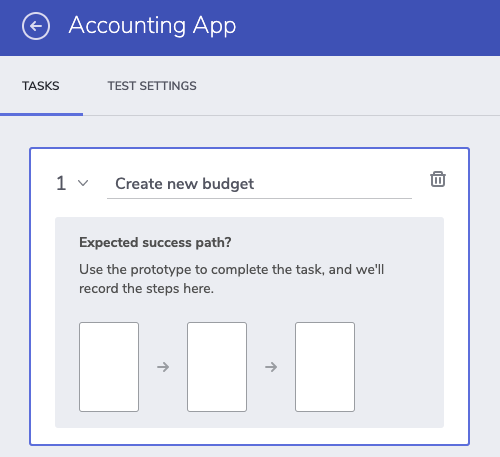
To create the “expected success path”, you must interact with your prototype exactly as you’d expect and want your users to on the live product.
Here’s an example of what the “create new budget” path might look like and how to build it out:
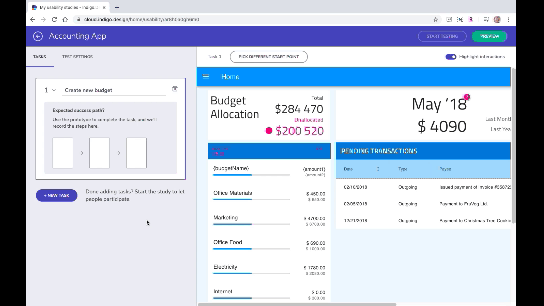
Walk through your website or app on the right part of the screen.
When you’re done, confirm your work on the left before moving on to create other tasks you’ll be including in the test.
3. Put The Finishing Touches On Your Test
Creating tasks alone won’t be enough to gather the kind of data you want from your users.
For instance, if this is an MVP, you might want to explain that the experience may feel a little rough or to provide background on the solution itself (why you’ve built it, what you’re looking to do with it) so they’re not distracted by the design.
Don’t worry about your users misplacing these details in their email invitation. There’s a place to include these notes within the context of your usability test.
Go to the “Test Settings” tab:

Under “Messaging to show participants”, this gives you the opportunity to include a welcome message with your test. This can be a blanket welcome statement or you can provide more context on the tasks if you feel it’s needed.
The thank-you statement is also useful as it provides an end-cap to the test. You can either thank them for their time or you can provide them with the next steps or information on what to expect about the product (maybe there are more usability tests to come).
Before I move on, I want to quickly call your attention to the “Success Criteria” toggle at the top of this section:
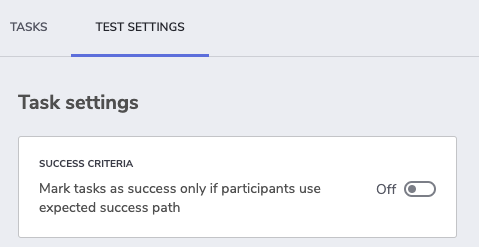
When enabled, this setting only allows for two results:
- Pass
- Fail
I’d say that you should leave this toggle set to “Off” if you want this tool to help you detect alternative paths. I’ll show you what that means in just a little bit.
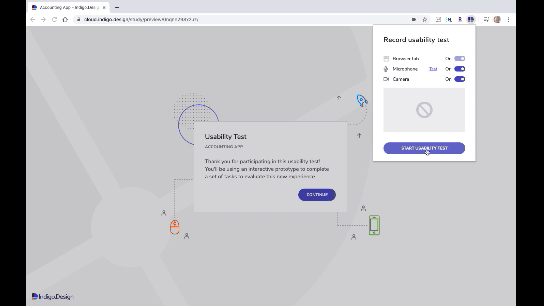
For now, it’s time to grab your usability test link and start sharing it with your participants. When you click the “Start Testing” button in the top-right corner of your screen, you’ll see this:

Copy this link and start sharing it with your participants.
If they’re Chrome users, they’ll be asked to install a browser extension that records their screen, microphone, and camera. They can enable or disable any of these.
The user will then step inside the test:
Once you’ve collected all the data you need, click the “Stop Testing” button in the top-right corner of the screen and start reviewing the results.
4. Review Your Usability Test Results
Your test results can always be found under your Usability Tests dashboard in Indigo.Design.
If you’re logging into the platform, you’ll find an overview of all your test results, past and present.
You can get a more in-depth look at your results by opening the test:
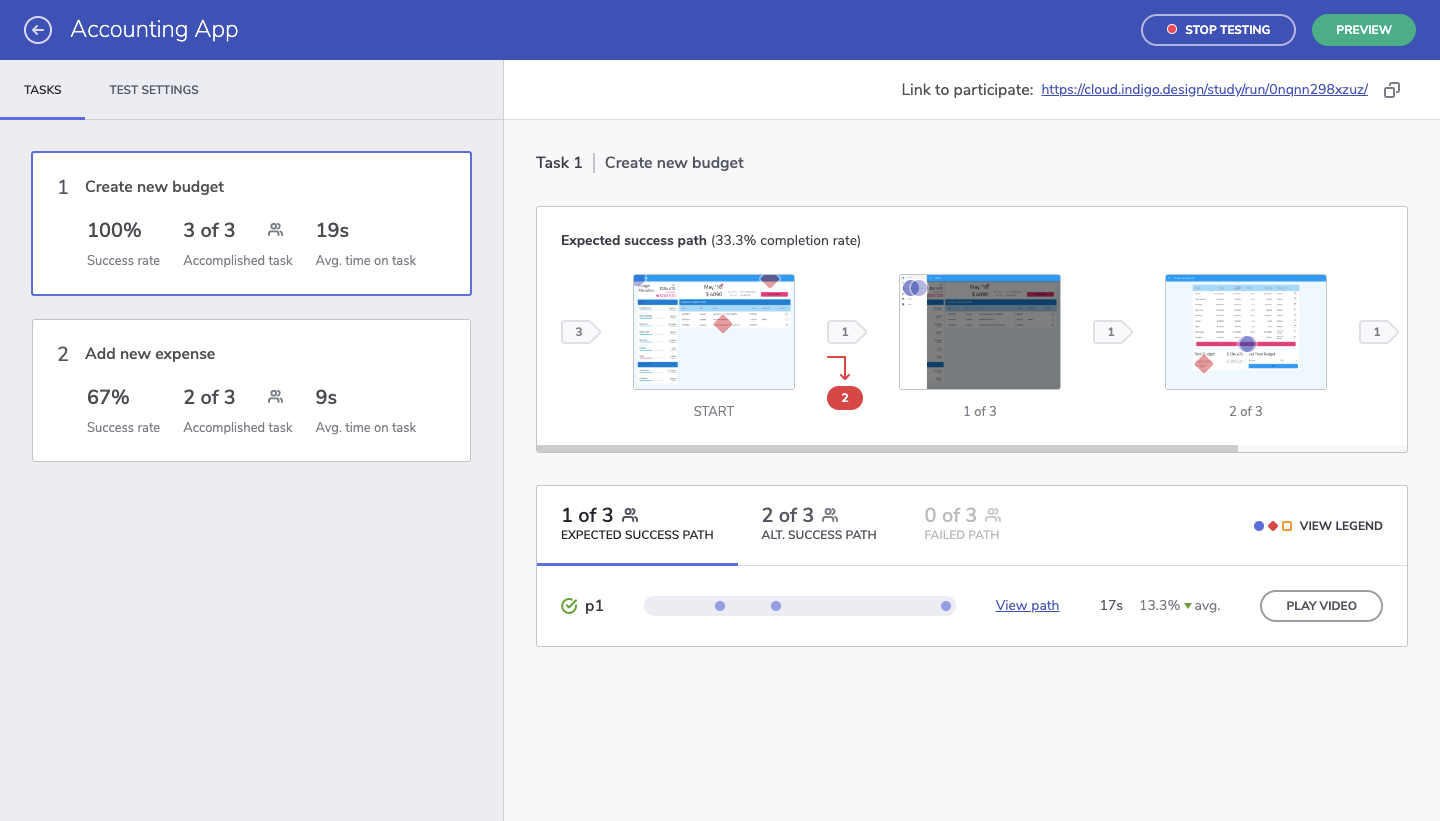
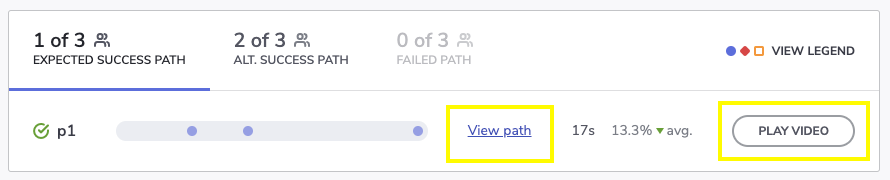
On the left, you’ll see your test results by task. They’re broken up into:
- Success rate: The percentage of users that took the exact steps you defined for the task.
- Accomplished task: The number of users that completed the task. If you didn’t enable “Success Criteria”, this result will show all users who took the expected success path as well as alternative success paths.
- Avg. time on task: The amount of time it took users to get through the task.
From this alone, you can tell quite a bit about the path you’ve laid before your users and how well-tuned it is to their mindsets and needs.
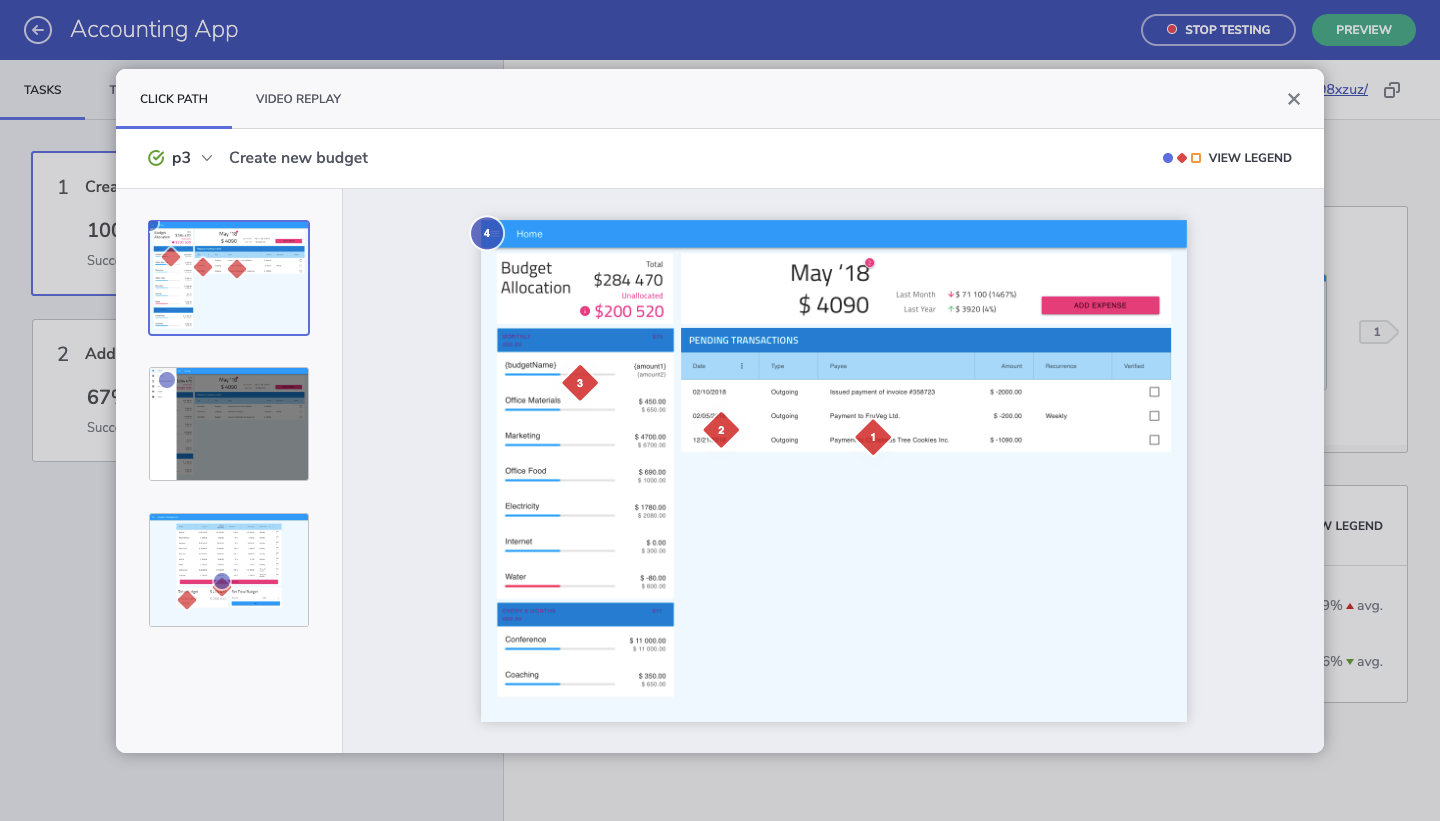
However, the right side of the screen gives us a better look at where things may have gone awry and why:
The top part of the screen shows us the original steps we laid down. Anywhere there’s a red mark and a number in red is where our test subjects deviated from that path.
This is much more effective than heatmap testing which only really gives us a general idea of where the users’ focus is. This clearly shows us that there’s something either wrong with the layout of the page or perhaps the content itself is poorly labeled and confusing.
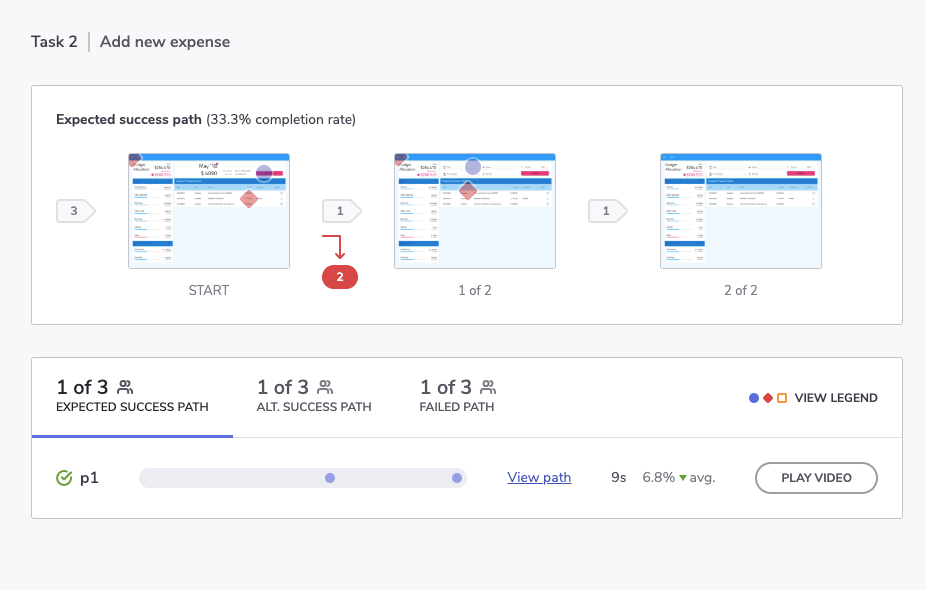
Let’s look a bit closer at the bottom of the screen and the path data we have to play with:
- Blue circles signify expected interactions,
- Red diamonds signify unexpected interactions,
- Orange squares signify that the participant requested help.
This shows us what the expected success path looked like and how long it took to complete on average.
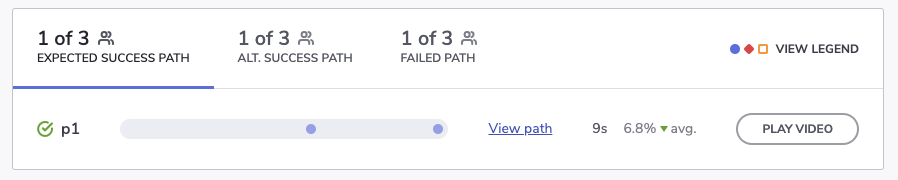
You can click on the stats for “Alt. Success Path” and “Failed Path” to view how things went for your other participants:

When we allow leeway in terms of success criteria, we get a chance to see the alternative success paths.
This is useful for a couple of reasons. First, if there are enough users who took the same route and there were more of them than those on the success path, it might be worth reshaping the pathway entirely. If the alternative route is more logical and efficient, it would make sense to get rid of the path less traveled.

Secondly, the alternative success path along with the failed path shows us where friction occurs along the way. This enables us to see where our users’ breaking points really are. Not that we ever want to push our users to the edge, but it’s good to have a sense of what kinds of interactions just don’t work.
For instance, let’s say one of the buttons requires a right-click instead of a regular click. I know this is something I’ve encountered in some tools and it drives me nuts because it’s almost always unexpected and counterintuitive. I wouldn’t abandon the experience over it, but your users might.
So, by comparing the alternative success path with the failed path, you can figure out what these kinds of deal-breakers are much more easily.
Look A Little Deeper
I know the numbers and pathway steps are really important to look at but don’t forget to study the other information left behind by your participants.
For instance, if your users enabled browser recording, you can “Play Video” and watch them actually go through it.
If not, you can still use the “View path” link to watch the actual steps they took (if they weren’t the expected blue-circle steps).
This is what you’ll see for each of your test subjects:
This particular view might be more useful to you than video since you can track the actual clicks on each static page. Not only do you see every part of the website where they clicked, but you also see in which order they made those clicks.
And like I said before, if you can identify trends where these alternative success paths or failed paths took your users, you can more quickly stamp out issues in your web design. It’s only when those clicks are all over the place or users give up on completing any of the tasks that you have a real problem.
Wrapping Up
Using a design system does not automatically imply good usability. You need to be able to design more than just consistently beautiful UIs.
That’s what’s so nice about the solution we’ve just looked at. With usability testing built into Indigo.Design, the focus isn’t just on shipping pixel-perfect websites. Whether you plan on doing moderated or unmoderated usability testing, you now have a tool that can accurately map your users’ journeys and the difficulties they would otherwise face.
Further Reading
- Getting To The Bottom Of Minimum WCAG-Conformant Interactive Element Size
- So Your Website Or App Is Live… Now What?
- Useful Email Newsletters For Designers
- Event Calendars For Web Made Easy With These Commercial Options