A Complete Guide To Mechanical Keyboards

Email Newsletter
Weekly tips on front-end & UX.
Trusted by 182,000+ folks.


 Custom Web Forms for Angular, React, & Vue. Your backend.
 Celebrating 10 million developers
About six years ago, a colleague I’ll call Tom, because that’s his name, forwarded me a link to the ‘WASD CODE’; a keyboard focused on the needs of programmers, designed with the help of Stack Overflow’s Jeff Atwood.
I had no idea at the time that there were people actually dedicating themselves to creating keyboards beyond the stock fare shipping with computers. As I read and re-read the blurb, I was smitten.
So it came to be that shortly after, I spent $220 on my first mechanical keyboard. I imagine that many of you reading this, who have never had a mechanical keyboard, will wonder if I was of sound mind. For those that have, they likely understand entirely.
For some, mechanical keyboards elicit the same nuanced fanaticism as typography. Let me qualify that analogy.
For those who get drawn into typography, it can become an obsession. The need to choose just the right font for a heading. The ability to spend hours pouring over the descenders of various ‘g’ glyphs. The endless marveling at the merits of Helvetica.
Others, meanwhile, would be happy to just use Lobster and move on.
Just as someone versed in typography can explain to you why a font makes you feel a certain way or has a particular effect on the reader, a mechanical keyboard proponent can extol the virtues of their keyboard, their choice of switches, their particular layout and materials chosen. Take a look at the breadth of variety on offer.
I can’t tell you what’s so bad about using Lobster, but I’m going to take a shot at explaining why you might want to try a mechanical keyboard and feel a greater physical connection to the primary tool of your trade.
Our Primary Input Mechanism
For decades, keyboards have been the primary mechanisms by which we interact with our computers.
If you spend 8 hours a day working, and maybe half of that typing, for a 5-day week and 48-week working year, that’s 960 hours of typing on your keyboard every year! Despite that sobering figure, most of us just use whatever keyboard is shipped with the computer.
Look down at the grubby, unloved implement beneath your fingers. When was the last time you actually sharpened that sword? How often do you use each of the keys you press? Are the most used keys within easy reach? What about the tactility? How do the keys themselves feel? Is the travel of the keys helpful? Do you wish the travel was greater? Do you wish it was less? What about the sound? Does it annoy you? Does it annoy those around you? Do you have helpful shortcuts to adjust your volume? Skip a music track? Perform an oft-used set of keystrokes? Or what about an easy way to toggle between typing on your computer and typing into your phone?
Mechanical keyboards exist to answer as many of these questions as possible.
What Is A Mechanical Keyboard?
Generally speaking, it’s possible to define a keyboard as mechanical if it uses mechanical switches for each key.
Firstly, let’s consider the everyday alternative to mechanical switches. Typical, inexpensive, everyday computer keyboards often employ rubber dome switches. As the name implies, these are constructed with a sheet of rubber domes above electrical switches. You press down on a key and the dome collapses causing the key to be switched. You lift up your finger a little and the rubber dome plops back into shape and the key is no longer pressed. Rubber dome switches are popular because they are so cheap compared to manufacture. However, they are certainly not the best way of solving the problem of registering a keypress.
Mechanical switches offer a range of tactility unavailable with rubber dome keyboards.
Mechanical keyboards are enjoying a renaissance, which although has been going on for a number of years, is really starting to gain more widespread adoption since being embraced by the gaming community.
Now, before we get much further into this, I feel it’s my duty to be quite candid. I often read people justifying mechanical keyboards due to the fact that they ‘last longer’. Whilst this is possibly true, I don’t ever remember wearing a keyboard out. And you could probably buy a lifetime of budget keyboards and still have change left compared to the costs of a mechanical keyboard.
Buying a mechanical keyboard is not an exercise in sound economics. It’s about finding the best possible version, for you, of a tool you use almost every day. A keyboard that has just the right layout, feel, and aesthetics. Once you have your keyboard, I like to think you will rise every morning chanting the mechanical keyboard owners Creed:
“This is my keyboard. There are many like it, but this one is mine.
My keyboard is my best friend. It is my life. I must master it as I must master my life.
Without me, my keyboard is useless. Without my keyboard, I am useless. I must type my keyboard true. I must type faster than my colleague who is trying to better me. I must program things before he does. I will...”
The sheer wealth of permutations when it comes to mechanical keyboards can be mind-boggling. In this article, we will concentrate on the broadest strokes. The considerations we feel are most important to understand if you entertain purchasing a mechanical keyboard.
We will cover:
The Plethora Of Key Switch Types
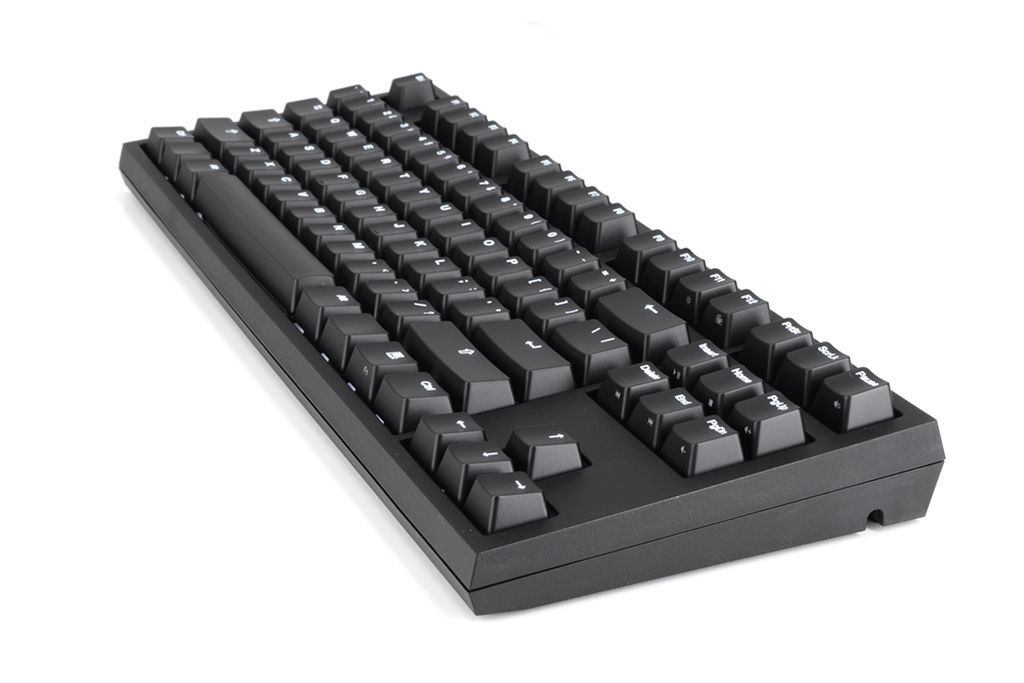
Arguably the single most obvious distinguishing feature of a mechanical keyboard compared to a ‘normal’ keyboard is the switches.
There are a plethora of different mechanical switches for keyboards. They can be most easily categorized by the physical shape and stem mounting. The latter is the protruding mount that the keycaps attach to. The switch ‘type’ is the defining characteristic of the switch itself — typically categorized as ‘linear’, ‘clicky’ or ‘tactile’.
Physical Switch Differences
Far and away, the most common physical type of switch is ‘Cherry MX’ as well as the now numerous Cherry MX clones.
Historically, due to patents, the manufacturer, Cherry was the only brand able to make switches with their mount system. Now their patent has expired, there are a number of other manufacturers offering comparable and compatible switches for less.
Nowadays, it isn’t necessary to get hung up on getting a board with genuine Cherry brand switches. I’d argue that there are brands being far more progressive and innovative in switch development these days. Kailh is a Chinese brand that not just makes comparable switches for MX mounts with color designations (such as ‘Blue’, ‘Green’, ‘Red’, and so on) to approximate the equivalent Cherry switch (we’ll cover color designations for switches in a moment), but they also produce ‘box’ switches which are IP56 dust and water-resistant, as well as ‘speed’ switches aimed at gamers. These have shorter travel resulting in quicker switch actuation. Hence, the ‘Speed’ moniker.
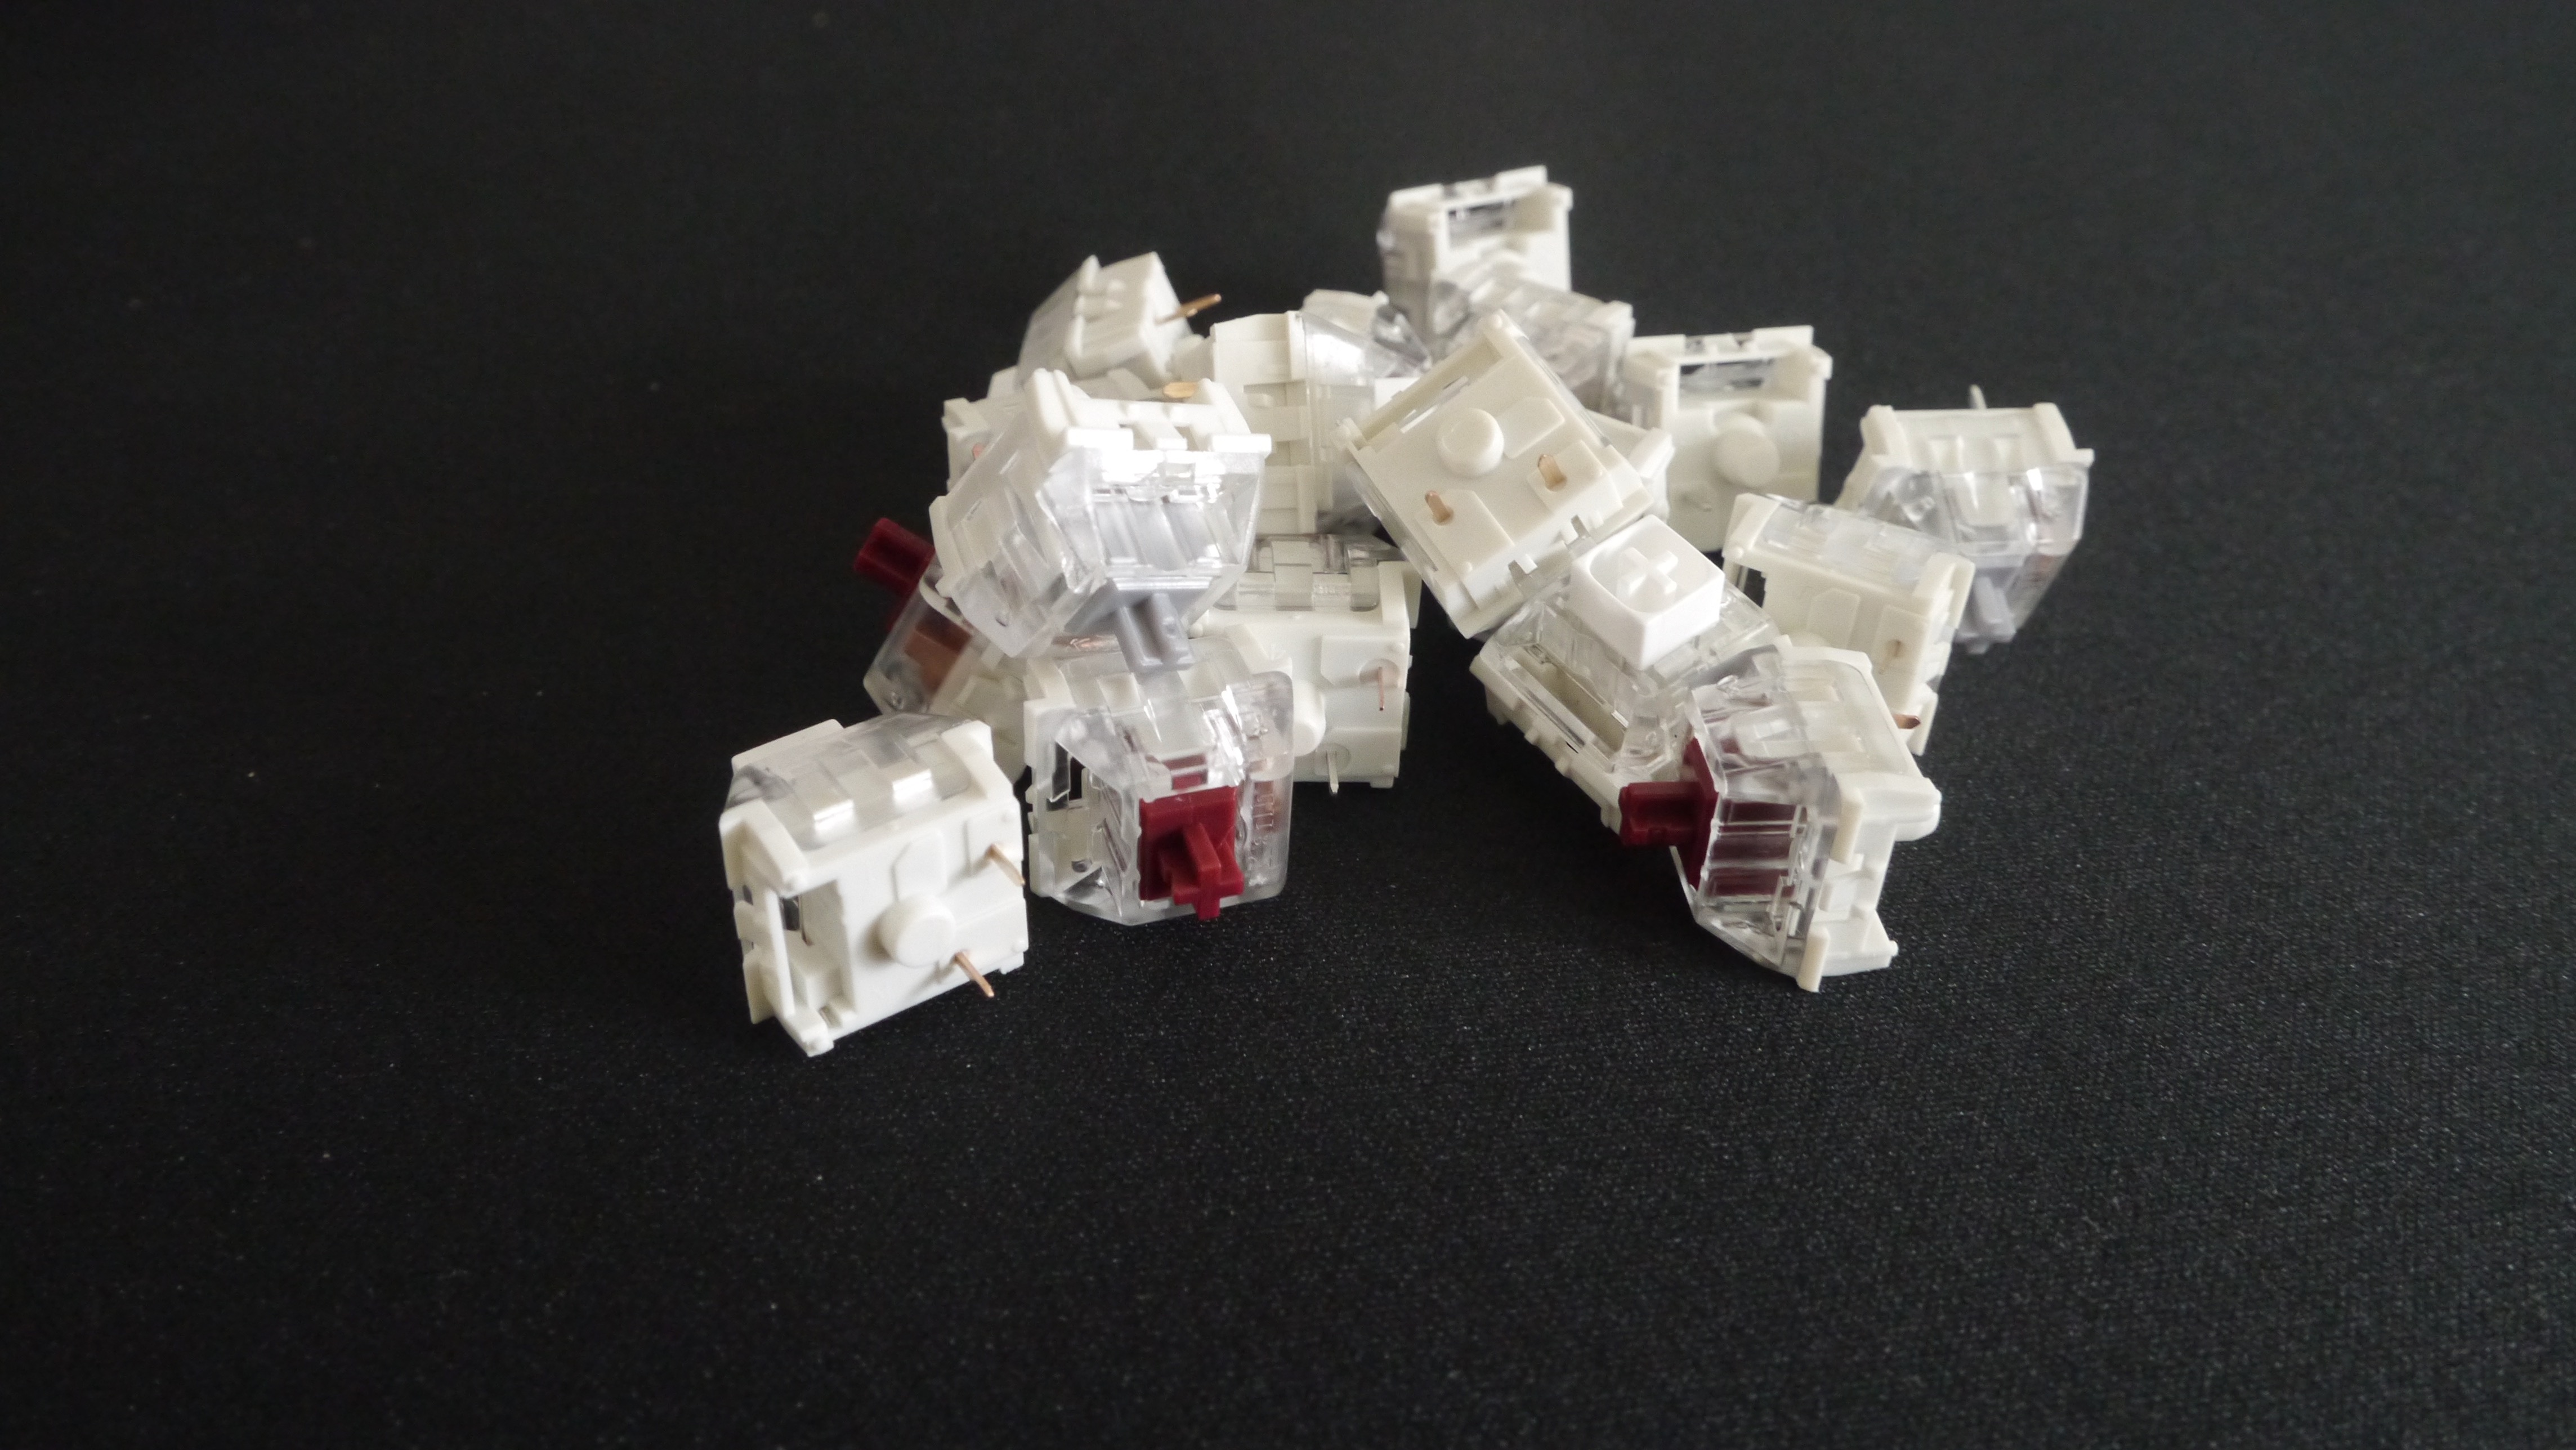
There are also many other fine key switch types that bear no relation to Cherry — Topre being a personal favorite. Topre switches are designed and built in Japan and give a marvelous tactile feel that some swear by. However, they are expensive and subsequently less common.
If you want a decent idea of the most popular options, take a look at the list available on the Keyswitch guide at the Mechanical Keyboards store.
Key switches — especially Cherry MX and variants — are typically labeled by color; for example, ‘Blue’ or ‘Brown’. Different colors are attributed to different switch types; most typically, a switch that is either linear, tactile, or clicky.
Whilst trying to describe the way a key switch feels in words might seem like an exercise in futility, I’m going to attempt just that regardless.
- A linear switch is just like a linear animation, there are no curves, you press down and the resistance feels constant all the way down until the switch ‘bottoms out’.
- A tactile switch is more like an easeInQuart animation curve; there is a sort of bump at the top you have to get over and then it moves down like a linear switch until bottoming out. This little bit of tactile resistance at the top of the keypress is what earns them the label of ‘tactile’.
- A clicky switch is a bit more simple to communicate. It has a similar kind of bump at the top like a tactile switch but makes an audible click on actuation (or both directions in the case of Kailh Box Whites, for example).
For each switch type, there are differing key switch ‘weights’; that is, how much force is required to make the switch do its thing. Key switch actuation force is often measured in cN units (centinewton). Again, colors are arbitrarily assigned. So, for instance, a Kailh Box Red is a soft linear switch whilst a Kailh Box Black is also a linear but heavier. There’s no real sense to the color designations, simply that Cherry made them originally and now others follow suit.
Now, in a geeky topic, the subject of key switches can take on proportions of geekiness even I get uncomfortable with.
So, in the interests of trying to keep you with me, the TL;DR of keyboard switch types is this: If you are looking for a mechanical keyboard (perhaps your first one), opt for a board with Cherry MX, or Cherry MX compatible switches such as those made by Kailh. Choose a switch type which, at least on paper, sounds appealing. Buy it, and see how you get on.
To offer just a little more broad guidance:
- Like the idea of linear switches? Go for Cherry MX or compatible red switches.
- If a tactile switch seems like it would be your bag, opt for MX brown or compatible switches. If you can find a good offer on a Topre-based board a Happy Hacking or Realforce, that would be a solid choice, too.
- Does a clicky switch appeal? MX Blue or compatible switches for you.
I’m making such broad recommendations because ultimately it’s all preference anyway. However, if you do go for switches with an MX mounting stem, then you give yourself the greatest number of options when it comes to keycaps.
Despite telling you it is all preference, we thought it might be useful to try and describe the differences in the mechanical keyboards switches from first-hand experience.
Subjective Switch Feel
We tried a number of different Kailh switches in a 87-Key TKL keyboard for comparison. We also tried a WASD CODE v2 with MX Blue switches, and a WASD CODE v3 board with Zealio switches. In addition, we also tried the Happy Hacking Professional Hybrid with Topre switches.
Kailh Box Whites have a little click as the key travels down and again on the way back up, a Cherry Blue MX switch just clicks on the way down. Both are pleasant and give satisfying feedback. It’s easy to get addicted to the thick-thock-thick-thock rhythm as you type with clicky switches! However, a loud clicky keyboard is perhaps not the best choice if you work in a shared office space. Unless, that is, you want to exact ‘death by a thousand clicks’ revenge on Bob in accounts for his ridiculous booming voice!
In terms of tactile switches, the Kailh Speed Copper feels like they have a little more resistance than a standard Kailh Brown. The Kailh Speed Coppers felt very similar to the Zealio switches in the WASD CODE board. It would take a real enthusiast to be able to discern any difference in a blind test. If you were to ask me today which switch to opt for as the best ‘all rounder’ I would suggest the Kaihl Brown or Speed Copper, or the Zealio switches. All felt great for typing/coding with the tactile feel providing a nice compromise between feel and volume.
The Kailh Speed Silver switches have similar weight/resistance to the Kailh browns but as they are linear, the resistance is felt all the way down the keypress. The sound is slightly higher-pitched in the Silver than the Browns, and the Copper Kaihls are a deeper sound still.
The Topre switches are different again. They provide a tactile feel that is simply impossible to replicate in a Cherry style keyboard. There is a consistency and solidity to the keys which every keyboard enthusiast should try at some point.
I must emphasize once again that these are very fine margins. Any of these switches are going to provide a level of feedback far exceeding that of a standard ‘off the shelf’ keyboard.
Keyboard Layouts And Sizes
With the touchy-feely issue of switches dealt with, let’s move on to the next wall of acronyms and abbreviations. These deal with the keyboard layout.
Keyboard Sizes
A keyboard layout is most typically defined first and foremost by its size. Going smallest to largest:
- “40%” diminutive layout where many keys are doubled up, requiring an additional key to be pressed alongside the desired one. Unless you have a specific reason to have one, I couldn’t recommend this layout for practical purposes;
- “60%” typically a normal key layout minus a dedicated arrow key cluster, home/end/page up and page down or function keys;
- “65%” compact like a 60% but usually incorporating at least an arrow cluster;
- “75%” usually brings in a distinct function row;
- “TKL” the ‘Ten Key-Less’ is a more conventional layout, think of a ‘normal’ keyboard minus the number pad section;
- Full size; the typical keyboard layout complete with function keys, number pad, and arrow cluster.
For a good feel of the many layout variations, take a look at this guide on Drop.
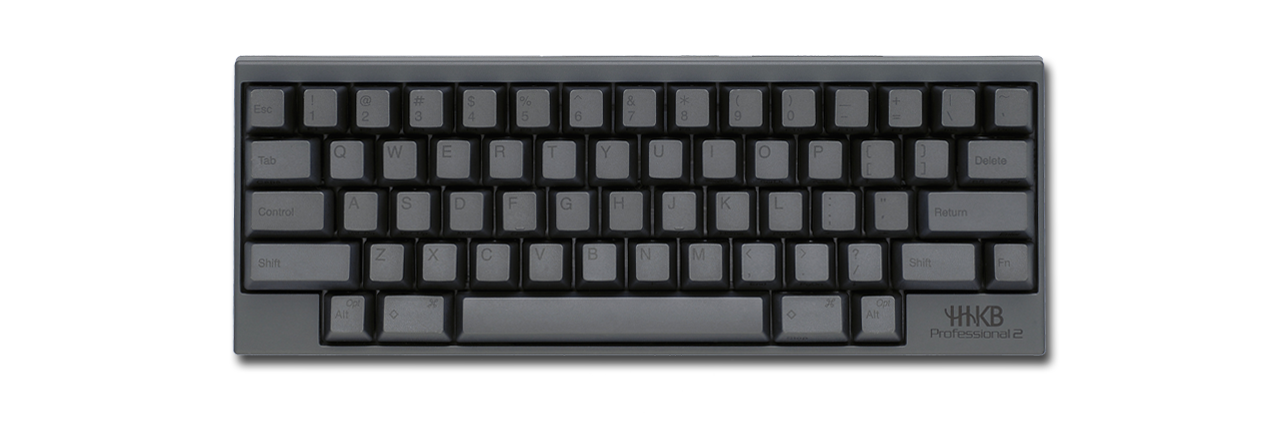
Note: There are popular layouts that are sub-distinctions of these sizes. For example, the Happy Hacking Keyboard layout, or ‘HHKB’ as it is often referred to, is a layout over 20 years old and originally designed for UNIX users. It remains incredibly popular because it was designed around the philosophy of keeping hands around the home row, something that perpetuates for Vim users today.
Ergonomic Keyboards
Some people stumble into mechanical keyboards in the search for a more ergonomic keyboard. One area where mechanical keyboards can honestly claim some bragging rights is in the variety of ergonomic boards and layouts on offer.
For example, consider the Ergodox EZ. This keyboard is completely split (albeit apart from a wire connecting the two halves) and enjoys the increasingly popular feature of a ‘hotswap’ printed circuit board. This means that you can easily swap out one lot of mechanical switches for another depending upon your preference. That’s certainly a good thing.
It’s common to start with mechanical keyboards favoring one switch type and then as time goes on you grow to prefer another. This way, you don’t have to buy a whole new keyboard; just replace the switches. The Ergodox EZ is also entirely programmable meaning you can adjust any key to do whatever you like. The layout choices are genuinely almost infinite.
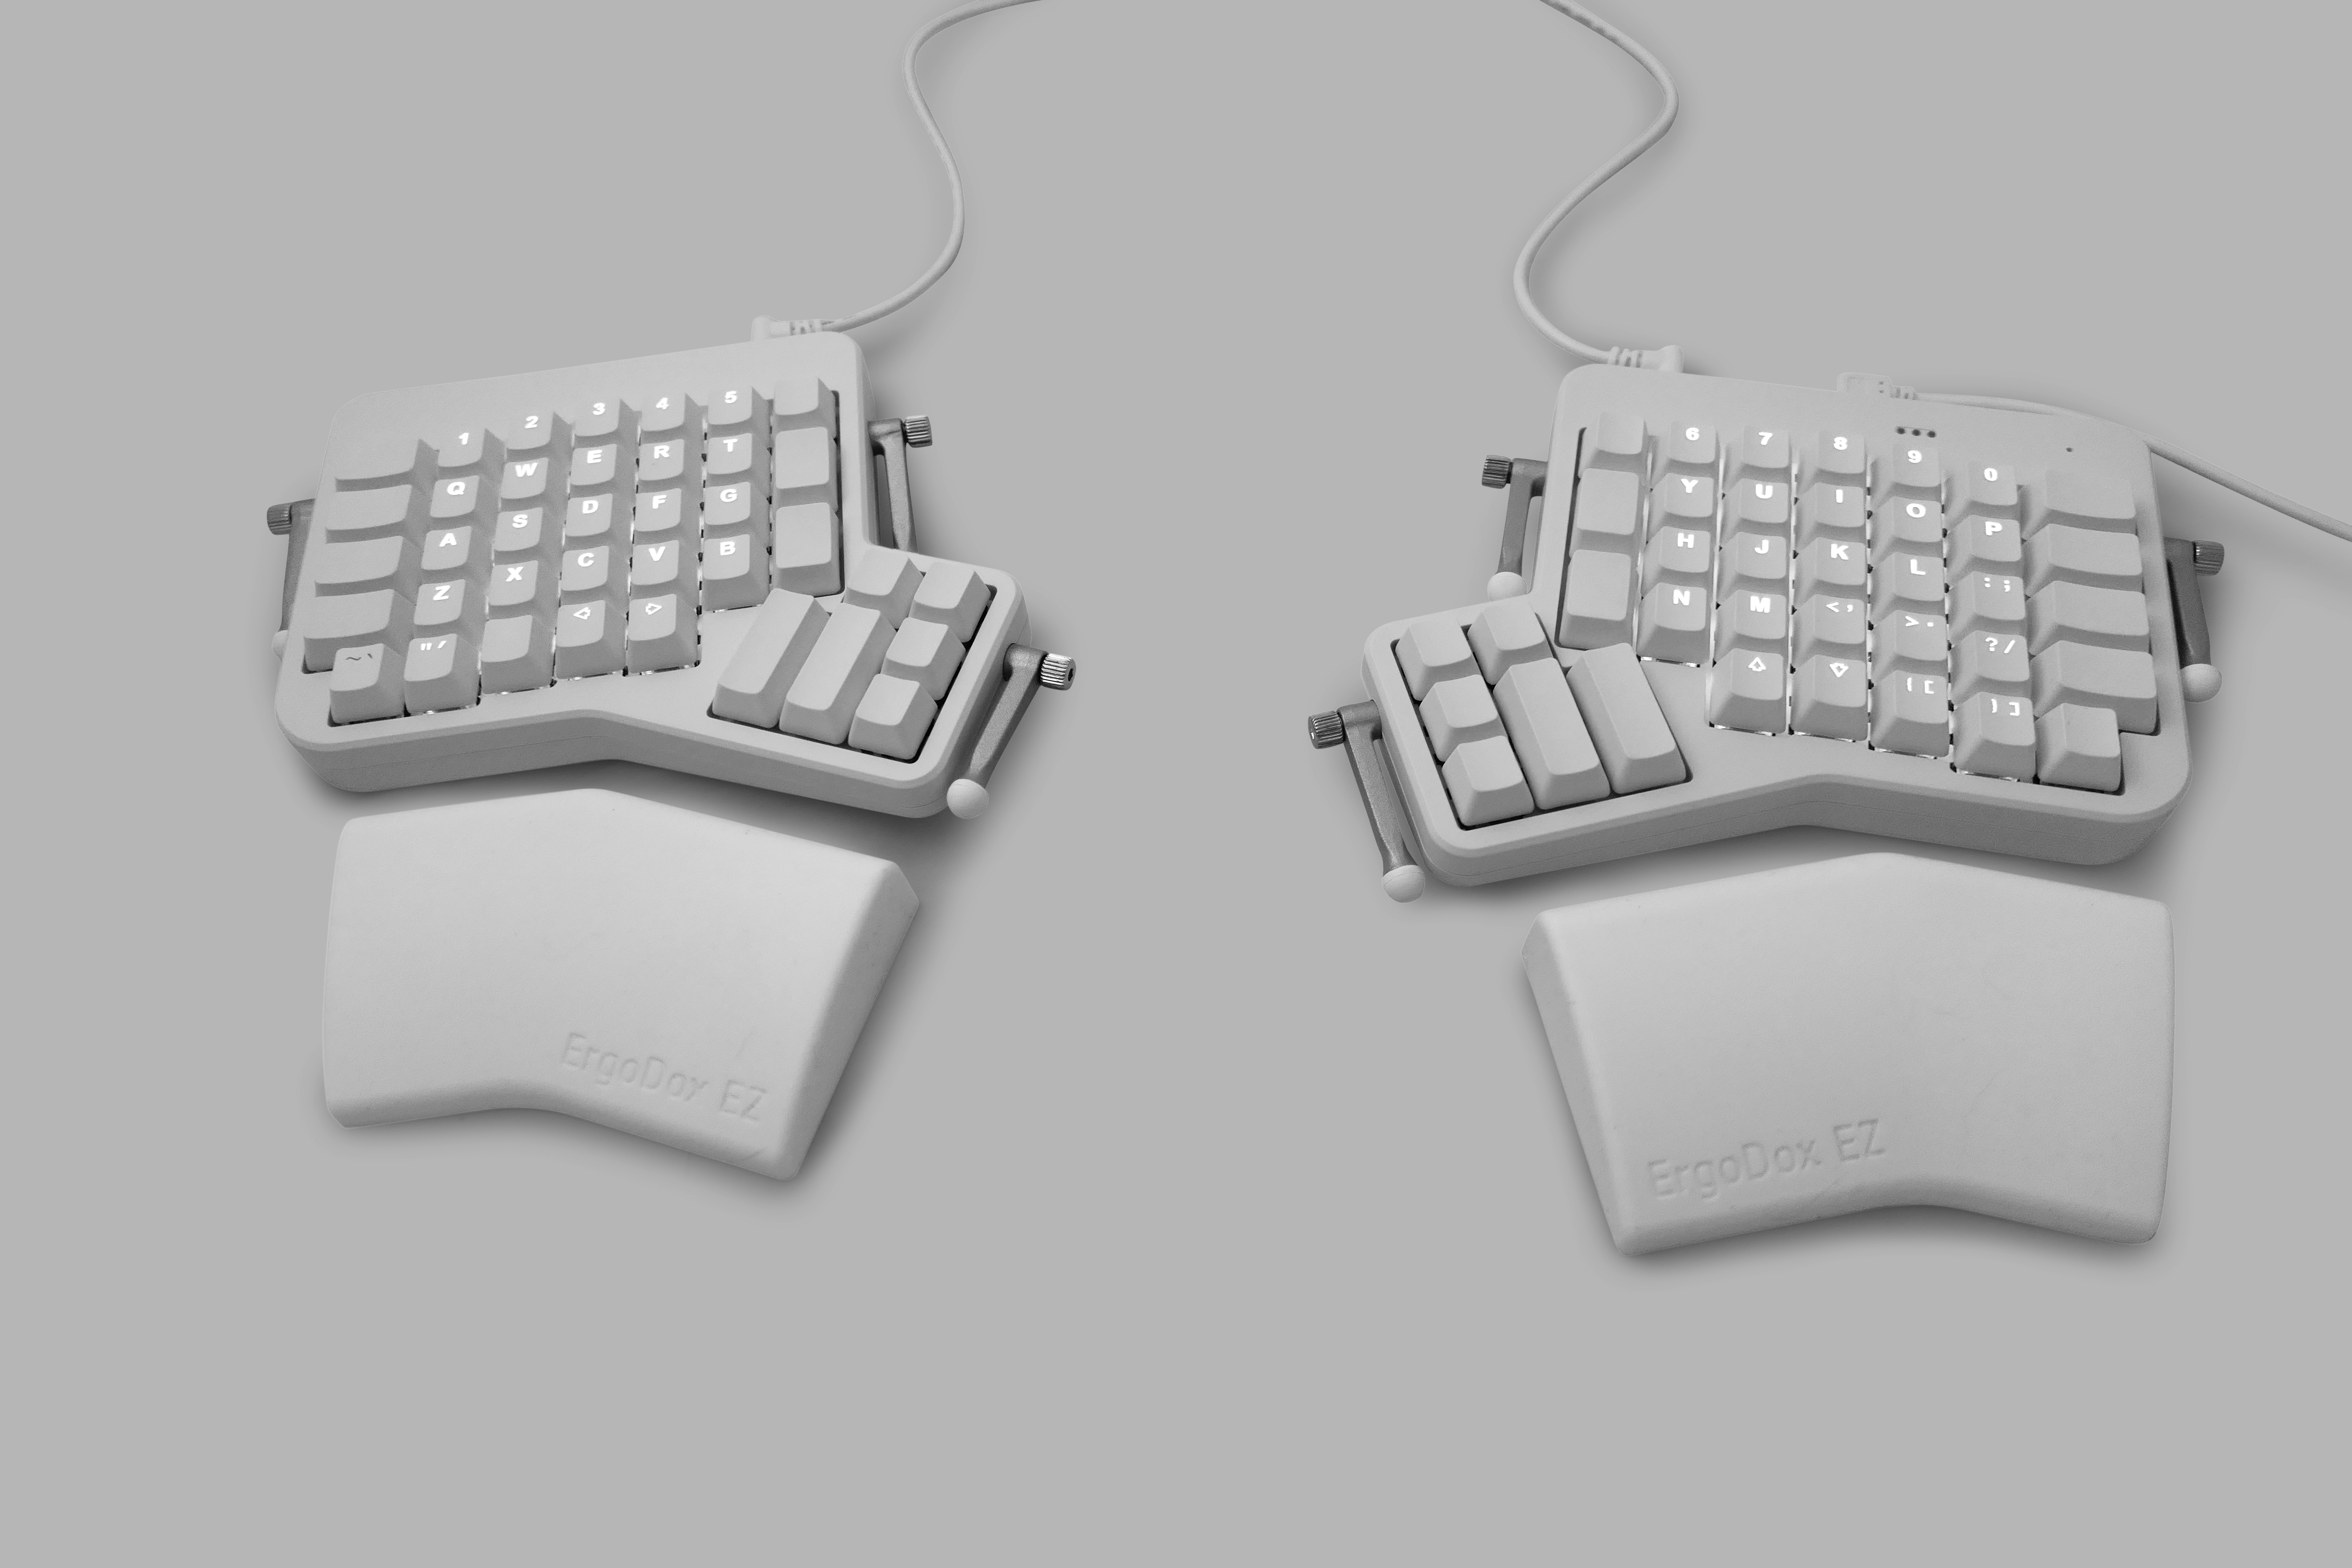
The ErgoDox EZ’s initial layout is itself, certainly unconventional. There’s not just the split to get accustomed to, the Ergodox EZ also has ‘ortholinear’ key layout, casting aside the staggered key layout which we have become accustomed to (a throwback to typewriters where staggering the keys was a mechanical necessity). Thankfully, the Ergodox EZ also enjoys supporting software that teaches and tests your accuracy and ultimately improves your typing speed.
Regardless of how you feel about the aesthetics, if you’re someone who suffers from a condition such as RSI, such factors are likely to pale into insignificance. As long as you are prepared to invest some time re-learning your typing, it might be the best $350 you can invest in your personal hardware, and perhaps even personal well-being.
Hotswap and programmable keyboards are getting more and more common but they remain largely a feature of ‘build your own’ keyboards. Building your own keyboard is a whole other related topic beyond the remit of this article. But be sure to let us know if that is a topic you’d like us to cover.
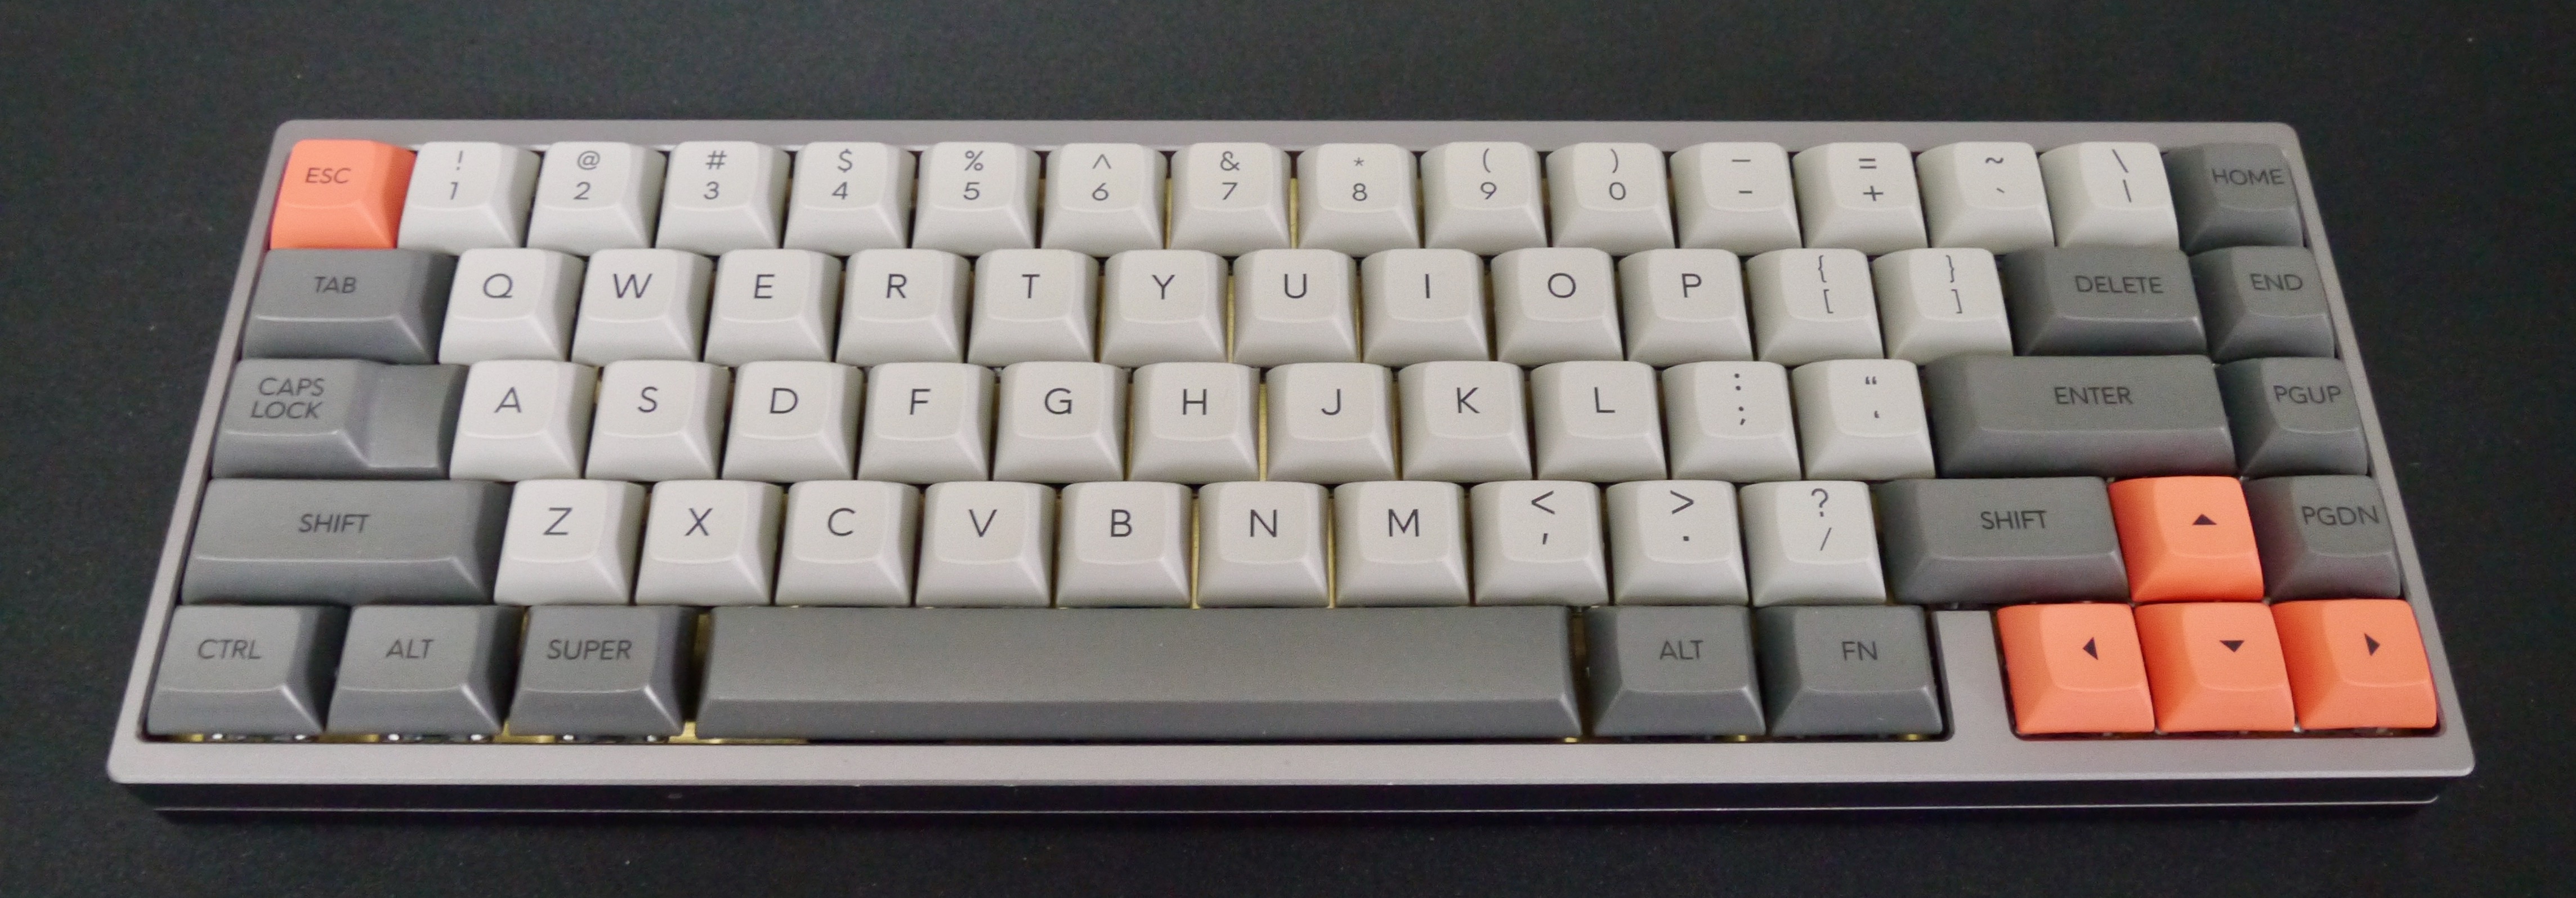
ANSI Or ISO
There is also the consideration of regional peculiarities; for users in the Western world this boils down to ANSI (American National Standards Institute), with the straight enter key one row high, or ISO (International Organization for Standardization), typified with the angular enter key taking up two rows of height.

Whilst these might be the most distinct visual differences, they are not the only ones.
However, for simplicity, unless you have a reason not to, it makes the most sense to stick with the ANSI/ISO layout you use currently. Although, it is worth pointing out there are considerably more choices for keycaps and board layouts when it comes to ANSI. More than you would ever want to know about ANSI and ISO layouts can be found on Wikipedia.
Analysing Your Key Presses
At first glance, some of the smaller layout sizes such as 60% and 65% might seem completely impractical. However, you might be surprised to know just how little you use certain keys.
Rather than guessing, you can answer that question with cold hard data by logging your keystrokes for a few weeks. There are a number of programs to do this. I used Loggerman.
Loggerman runs in the background and counts up all your key presses. It then lets you run a report to show a heatmap of where your keypresses actually are. Here’s my own heat map for a three-week period.

Despite the image showing a Macbook, I wasn’t actually typing on one; I was typing on a WASD Code v3 TKL. Therefore, if you do this kind of analysis, it’s necessary to think about where the keys you press a lot are on your own keyboard. What interested me looking at that was that whilst a lot of general key presses were around the centre, there are big concentrations on the escape key at the top left, the delete key, nearly top right and the arrow cluster bottom right.
I’m usually writing in Vim these days, so if you’re wondering why the escape key is used so much, it’s to exit ‘insert’ mode. Any developer wouldn’t be surprised to see delete and the arrow keys featuring heavily in my usage though — although Vim purists would berate me for not using h,j,k and l more!
So, what to take from this? If I was in the market for another keyboard, and the honest truth is, I probably always will be, I might think about looking for a layout where the physical distance between my most used keys is less. For example, something like a 65% where the escape key is on the first row and the arrow cluster is nearer to my right hand. In addition, perhaps ideally, have the backspace key (confusingly often labelled as ‘delete’ on Mac hardware, despite the fact that delete should remove characters going forward) a row further down so it’s easier to reach. Or something like the ErgoDox EZ where I can put the keys anywhere I like!
A counter situation to this might be someone who deals with numbers a lot. In that situation, a dedicated number pad would likely make a lot of sense and steer the layout decision that way.
The take away is there are lots of variations on layouts. The likelihood is that there is a keyboard layout that probably better suits your needs than the layout you use currently.
Case Construction And Connectivity
The majority of mechanical keyboards are wired. Whether that is USB-C, or Mini-USB, there is a wire going from board to computer.
However, if you switch devices frequently, or travel a lot, messing around with cables is something you don’t have to put up with. Many of the well-known mechanical keyboard brands such as Filco, Matias, Corsair, Ducky, Atom and HHKB all have wireless variants.
When it comes to case construction, the two common materials are aluminium or plastic. Like most choices, there isn’t a right or wrong, just a preference. Although wireless boards tend to be plastic to save weight and improve signal from the Bluetooth controllers.
Things that are genuinely useful to consider though are boards that make some accommodation for cable location. For example, if your nearest USB port is on the left of your computer, it might be a pain if the keyboard’s port is on it’s right side. Some keyboards have multiple ports. Some, such as the WASD mentioned at the outset have channels built into the case so you can route the cable however you like. That’s a feature I don’t see often enough from other brands but I certainly miss it when it isn’t there.
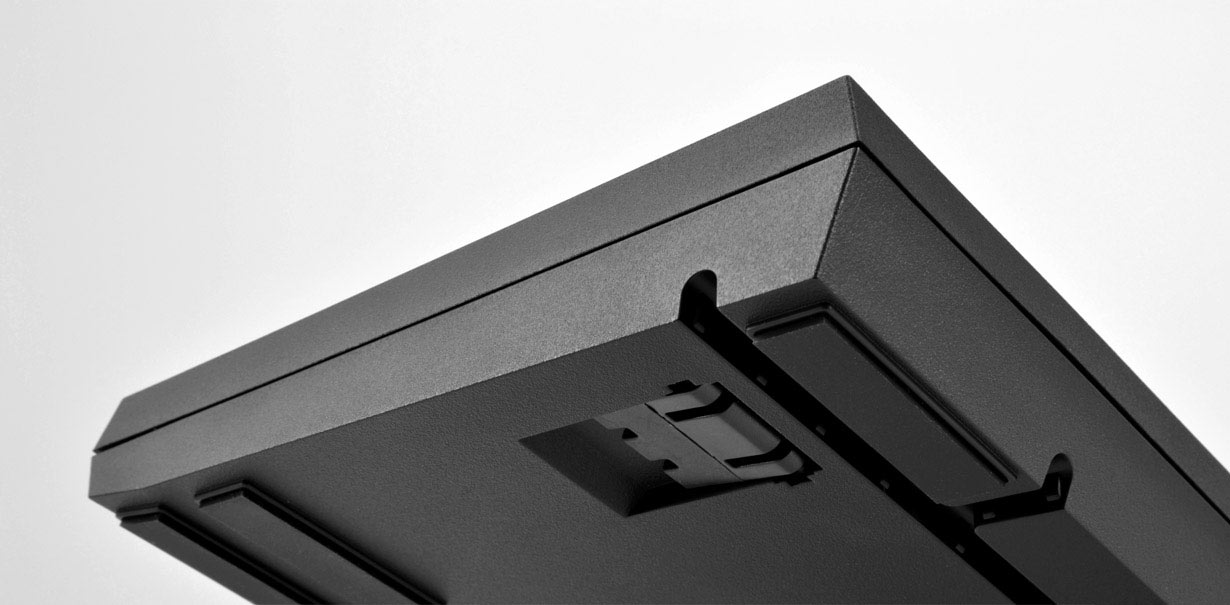
Aesthetically, there is a wider choice of case colors in aluminium with even cerakoting and electrophoretical coating an option. But as you might imagine, with great beauty comes great expense.
Feast your eyes on the RAMA Koyu. It’s made from a single piece of solid brass, hand polished to a mirror finish! No eating crisps at your desk with this keyboard!
If they hadn’t already sold out, it could have been yours for $1000, although keycaps and switches are extra!
Keycaps
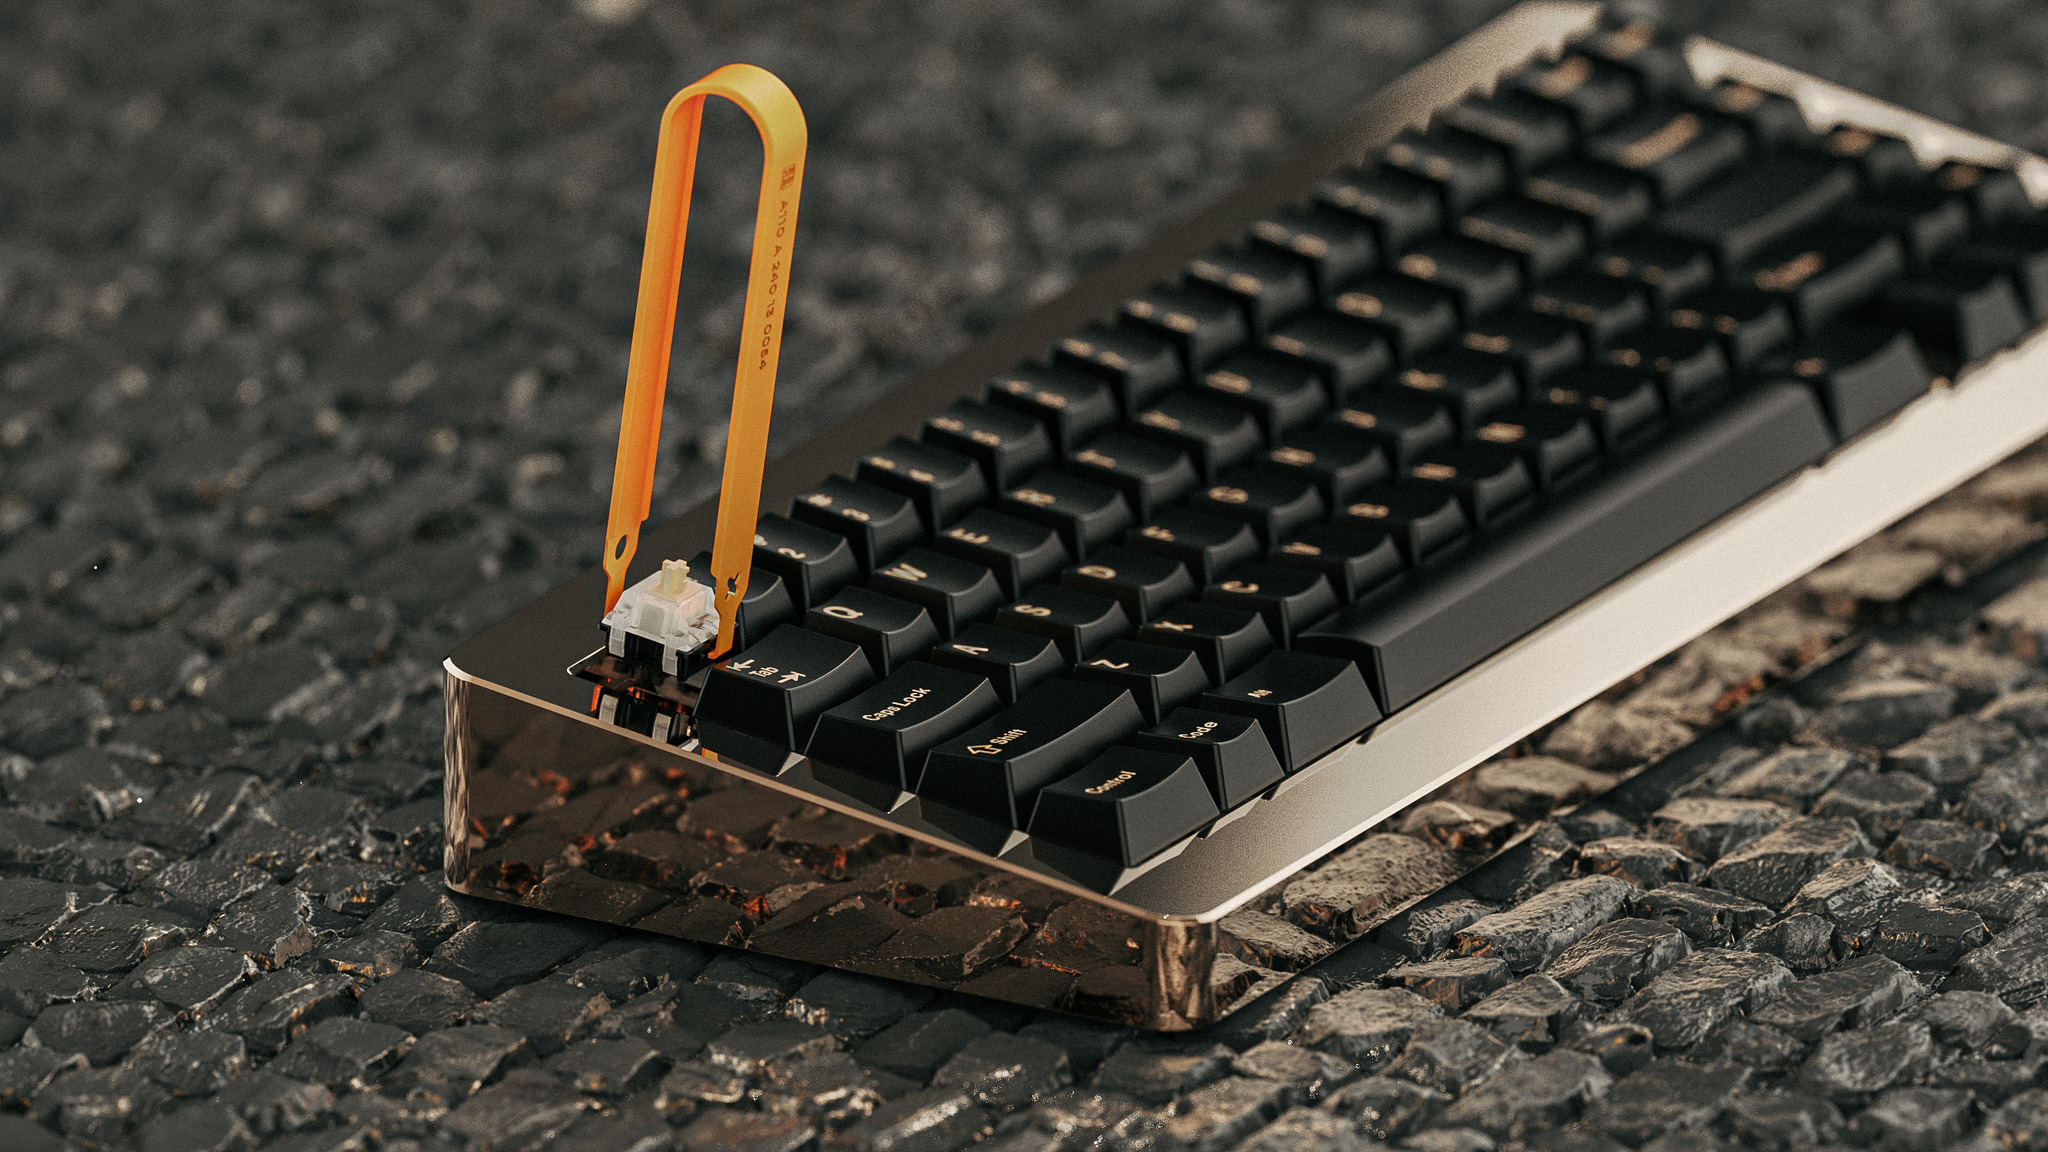
One of the biggest draws of a mechanical keyboard is that you can easily swap out the keycaps for a different set. As we discussed in the section on key switch types, the most popular switch type, when it comes to keycaps, is ‘Cherry MX’ compatible. Therefore, by far the most ubiquitous keycap mount is Cherry MX style.
However, within the realms of the MX mount connection type there are a great many options. There are choices in terms of materials used, key profiles, and legend marking method. Let’s look at each of those.
Here are some images of popular key profile types:
SA
These are quite high keys and enjoy a sculpted shape down the rows (if you were looking at the keys side on).
DSA
DSA are a lower key and although they have a slightly curved top to each key like the SA, they do not have a sculpted shape down the rows.
If you are just starting with a mechanical keyboard, I’m not sure it’s useful to worry too much about the key profile. However, it might be interesting to consider the kind of options available.
Signature Plastics, one of the largest and most popular producers of custom keycaps has a page dedicated to the different profiles they offer with PDF specifications to boot:
You might also see row numbers mentioned; this has most relevance if you are looking at a sculpted set of keys.
“Row refers to the location of the keys on the keyboard and is most important when ordering a sculptured keycap family. On a standard QWERTY board, the “number” row is row 1; the “Q” row is row 2; the “A” row is row 3; the “Z” row and the space bar row are row 4; the upper “function key” row can be either row 5 style or row 1 style.”

It is also important, if ordering an after-market set of keycaps, to consider how many of each size of key you are getting. Most keycaps are single unit, referred to as ‘1u’. Wider keys are designated in full and quarter increments. For example, the Alt, Cmd and Ctrl keys on the WASD keyboard I’m typing on as I write this are each 1.25u wide, the Tab key is 1.5u, and so on. Larger keys such as Shift and Space often have more than one mount underneath and these connect onto the board with a stabilizer (or ‘stab’, as they are referred to in mechanical keyboard circles).
Legend Marking
The three most common means of marking the legend onto each key (e.g. the E on the key for E) are double-shot, dye-sublimation and laser-etching.
Double-shot involves taking two different colors of plastic and putting one within the other; the contrasting colors creating the legend.
Dye-Sublimation, or ‘Dye-Sub’, as it is more commonly termed is a process where the markings are dyed into the plastic. Think of it like a tattoo for keycaps!
Purists will argue that double-shot creates slightly crisper legends but with high quality dye-sublimation, from a reputable brand like Signature Plastics, I think the difference is academic.
Laser etching is just as it sounds, a laser etches the legend into the keycap. However, compared to dye-sublimation or double-shot, laser etched tends to wear away far sooner and are therefore far less popular.
Keycap Materials
The overwhelming majority of keycaps are made of some sort of plastic. We won’t cover more exotic materials for keycaps here.
ABS is the plastic typically used with ‘double-shot’ key-caps. It’s a softer plastic, hence more pliable. You tend to get the widest variety of color options with double-shot but the downside is that the ABS plastic can go shiny over time. This manifests with keyboards with the most used keys visibly shiny compared to the others.
PBT plastic doesn’t tend to get shiny over time as ABS does but dye-sublimation doesn’t make as many color options possible. However, it does typically enjoy a slightly textured surface which some prefer.
As ever, it’s a preference thing.
I’ve been spending the last month switching between a keyboard with SA Lime which is a double-shot ABS plastic SA profile keycap set, and a keyboard with DSA Ferrous, a DSA profile PBT set. My personal preference is the PBT set as I enjoy the slight friction from the PBT but the ABS set is certainly no hardship!
Summary
Let me try and distill everything we’ve been through here.
Firstly, mechanical keyboards offer a level of tactility in keyboards that is simply not achievable elsewhere. Furthermore, with many boards offering programmability, it means your keyboard no longer needs to adhere to the standard layout you are used to. Each key can do whatever you want it to!
You can get a layout that suits the way you use your keyboard; compact 60%, all-rounder TKL or full size with number pad plus everything in-between.
If you are someone who suffers from RSI or, simply feel your comfort might improve with a more ergonomic keyboard, mechanical keyboards like the ErgoDox EZ should be top of your list of hardware to investigate.
There is a gamut of keyboard switches available. Audible clicky switches, smoother tactile switches and fast linears are all available. If you can’t find any to try first, consider buying a board with a hot-swappable PCB. This means you can try out other switch types at your convenience without needing to replace an entire keyboard. You don’t need to go with genuine Cherry switches, manufacturers like Kaihl offer great alternatives.
Needing a portable keyboard does not mean sacrificing on quality! Keyboards like the Happy Hacking Professional Hybrid offer a premium switch feel with Bluetooth connectivity.
You can get keycaps of every conceivable colorway and profile. Take a look at Signature Plastics website for an idea of the breadth of choice available.
If you want a ‘one-stop shop’ take a look at WASD Keyboards. Not only do they offer ANSI and ISO layouts, you can also pick the color of the case, every single key color and the type of legend on the keycaps!
Manufacturers And Suppliers
Here’s a reference and reminder of all the suppliers and manufacturers mentioned through this piece.
- Happy Hacking Keyboards using the revered Topre switches and the oft-imitated HHKB 60% layout.
- WASD
Makers of the CODE keyboard. Offer unsurpassed choice when it comes to ordering a bespoke mechanical keyboard. - ErgoDox EZ
Ergonomic mechanical keyboards with incredible choice of switches, colors. Also feature hot-swappable PCBs and programmable layout. - Pimp My Keyboard/Signature Plastics
US manufacturer of high-quality after-market keycap sets. - RAMA WORKS
Exclusive limited edition keyboards - Kailh makers of high-quality MX compatible keyboard switches.
Further Reading And Online Communities
Sites dedicated to mechanical keyboards:
The Rabbit Hole
"After this, there is no turning back. You take the blue pill—the story ends, you wake up in your bed and believe whatever you want to believe. You take the red pill—you stay in Wonderland, and I show you how deep the rabbit hole goes."
Pre-manufactured mechanical keyboards might not be the end of your journey. It’s possible they might just be the beginning.
For the truly obsessed you can opt to build your own mechanical keyboard. It’s not as wacky a proposition as it might sound. Think of it like a Lego kit for keyboards. Choose the exact material, switch type, case style, color and flash it with whatever set of instructions you like.
In the meantime, have a think about that device you interact with day in and day out. Perhaps every key press could be that much more enjoyable, easier and satisfying if you took the time to consider that there may be something better just waiting for your attention.
Further Reading
- UX Improvements For Keyboard Accessibility
- Avoid Keyboard Event-Related Bugs In Browser-Based Transliteration
- UX Optimizations For Keyboard-Only And Assistive Technology Users
- I Used The Web For A Day With Just A Keyboard


