Building Reusable React Components Using Tailwind

Email Newsletter
Weekly tips on front-end & UX.
Trusted by 182,000+ folks.

 Celebrating 10 million developers
 Custom Web Forms for Angular, React, & Vue. Your backend.

In this post, we’ll look at several different ways you can build reusable React components that leverage Tailwind under the hood while exposing a nice interface to other components. This will improve your code by moving from long lists of class names to semantic props that are easier to read and maintain.
You will need to have worked with React in order to get a good understanding of this post.
Tailwind is a very popular CSS framework that provides low-level utility classes to help developers build custom designs. It’s grown in popularity over the last few years because it solves two problems really well:
- Tailwind makes it easy to make iterative changes to HTML without digging through stylesheets to find matching CSS selectors.
- Tailwind has sane conventions and defaults. This makes it easy for people to get started without writing CSS from scratch.
Add the comprehensive documentation and it’s no surprise why Tailwind is so popular.
These methods will help you transform code that looks like this:
<button className="bg-blue-500 hover:bg-blue-700 text-white font-bold py-2 px-4 rounded">
  Enable
</button>
To code that looks like this:
<Button size="sm" textColor="white" bgColor="blue-500">
  Enable
</Button>
The difference between both snippets is that in the first we made use of a standard HTML button tag, while the second used a <Button> component. The <Button> component had been built for reusability and is easier to read since it has better semantics. Instead of a long list of class names, it uses properties to set various attributes such as size, textColor, and bgColor.
Let’s get started.
Method 1: Controlling Classes With The Classnames Module
A simple way to adapt Tailwind into a React application is to embrace the class names and toggle them programmatically.
The classnames npm module makes it easy to toggle classes in React. To demonstrate how you may use this, let’s take a use case where you have <Button> components in your React application.
// This could be hard to read.
<button className="bg-blue-500 hover:bg-blue-700 text-white font-bold py-2 px-4 rounded">Enable</button>

// This is more conventional React.
<Button size="sm" textColor="white" bgColor="blue-500">Enable</Button>
Let’s see how to separate Tailwind classes so people using this <Button> component can use React props such as size, textColor, and bgColor.
- Pass props such as
bgColorandtextColordirectly into the class name string template. - Use objects to programmatically switch class names (as we have done with the
sizeprop)
In the example code below, we’ll take a look at both approaches.
// Button.jsx
import classnames from 'classnames';

function Button ({size, bgColor, textColor, children}) {
    return (
        <button className={classnames("bg-${bgColor} text-${textColor} font-bold py-2 px-4 rounded", {
    "text-xs": size === 'sm'
    "text-xl": size === 'lg',
    })}>
        {children}
    </button>
    )
};

export default Button;
In the code above, we define a Button component that takes the following props:
size
Defines the size of the button and applies the Tailwind classestext-xsortext-xlbgColor
Defines the background color of the button and applies the Tailwindbg-*classes.textColor
Defines the text color of the button and applies the Tailwindtext-* classes.children
Any subcomponents will be passed through here. It will usually contain the text within the<Button>.
By defining Button.jsx, we can now import it in and use React props instead of class names. This makes our code easier to read and reuse.
import Button from './Button';
<Button size="sm" textColor="white" bgColor="blue-500">Enable</Button>
Using Class Names For Interactive Components
A Button is a very simple use-case. What about something more complicated? Well, you can take this further to make interactive components.
For example, let’s look at a dropdown that is made using Tailwind.
An interactive dropdown built using Tailwind and class name toggling.
For this example, we create the HTML component using Tailwind CSS classnames but we expose a React component that looks like this:
<Dropdown
  options={\["Edit", "Duplicate", "Archive", "Move", "Delete"\]}
  onOptionSelect={(option) => {
    console.log("Selected Option", option)}
  }
/>
Looking at the code above, you’ll notice that we don’t have any Tailwind classes. They are all hidden inside the implementation code of <Dropdown/>. The user of this Dropdown component just has to provide a list of options and a click handler, onOptionSelect when an option is clicked.
Let’s see how this component can be built using Tailwind.
Removing some of the unrelated code, here’s the crux of the logic. You can view this Codepen for a complete example.
import classNames from 'classnames';

function Dropdown({ options, onOptionSelect }) {

  // Keep track of whether the dropdown is open or not.
  const [isActive, setActive] = useState(false);

  const buttonClasses = `inline-flex justify-center w-full rounded-md border border-gray-300 px-4 py-2 bg-white text-sm leading-5 font-medium text-gray-700 hover:text-gray-500 focus:outline-none focus:border-blue-300 focus:shadow-outline-blue active:bg-blue-500 active:text-gray-200 transition ease-in-out duration-150`;

  return (
    // Toggle the dropdown if the button is clicked
    <button onClick={() => setActive(!isActive)} className={buttonClasses}>
      Options
    </button>
    // Use the classnames module to toggle the Tailwind .block and .hidden classes
    <div class={classNames("origin-top-right absolute right-0 mt-2 w-56 rounded-md shadow-lg", {
      block: isActive,
      hidden: !isActive
    })}>
    // List items are rendered here.
    {options.map((option) => <div key={option} onClick={(e) => onOptionSelect(option)}>{option}</div>)}
   </div>
  )
}

export default Dropdown;
The dropdown is made interactive by selectively showing or hiding it using the .hidden and .block classes. Whenever the <button> is pressed, we fire the onClick handler that toggles the isActive state. If the button is active (isActive === true), we set the block class. Otherwise, we set the hidden class. These are both Tailwind classes for toggling display behavior.
In summary, the classnames module is a simple and effective way to programmatically control class names for Tailwind. It makes it easier to separate logic into React props, which makes your components easier to reuse. It works for simple and interactive components.
Method 2: Using Constants To Define A Design System
Another way of using Tailwind and React together is by using constants and mapping props to a specific constant. This is effective for building design systems. Let’s demonstrate with an example.
Start with a theme.js file where you list out your design system.
// theme.js (you can call it whatever you want)
export const ButtonType = {
    primary: "bg-blue-500 hover:bg-blue-700 text-white font-bold rounded",
    secondary: "bg-blue-500 hover:bg-blue-700 text-white font-bold rounded",
    basic: "bg-white hover:bg-gray-700 text-gray-700 font-bold rounded",
  delete: "bg-red-300 hover:bg-red-500 text-white font-bold rounded"
};

export const ButtonSize = {
  sm: "py-2 px-4 text-xs",
  lg: "py-3 px-6 text-lg"
}
In this case, we have two sets of constants:
ButtonTypedefines how buttons are styled in our app.ButtonSizesdefines the sizes of buttons in our app.
Now, let’s write our <Button> component:
import {ButtonType, ButtonSize} from './theme';

function Button({size, type, children}) {

  // This can be improved. I’m keeping it simple here by joining two strings.
  const classNames = ButtonType[type] + " " + ButtonSize[size];

  return (
    <button className={classNames}>{children}</button>
  )
}
export default Button;
We use the ButtonType and ButtonSize constants to create a list of class names. This makes the interface of our <Button> much nicer. It lets us use size and type props instead of putting everything in a class name string.
// Cleaner and well defined props.
<Button size="xs" type="primary">Enable</Button>
Versus the prior approach:
// Exposing class names
<button className="py-2 px-4 text-xs bg-blue-500 hover:bg-blue-700 text-white font-bold rounded">Enable</button>
If you need to redefine how buttons look in your application, just edit the theme.js file and all buttons in your app will automatically update. This can be easier than searching for class names in various components.
Method 3: Composing Utilities With @apply
A third way to improve the legibility of your React components is using CSS and the @apply pattern available in PostCSS to extract repeated classes. This pattern involves using stylesheets and post-processors.
Let’s demonstrate how this works through an example. Suppose you have a Button group that has a Primary and a Secondary Button.
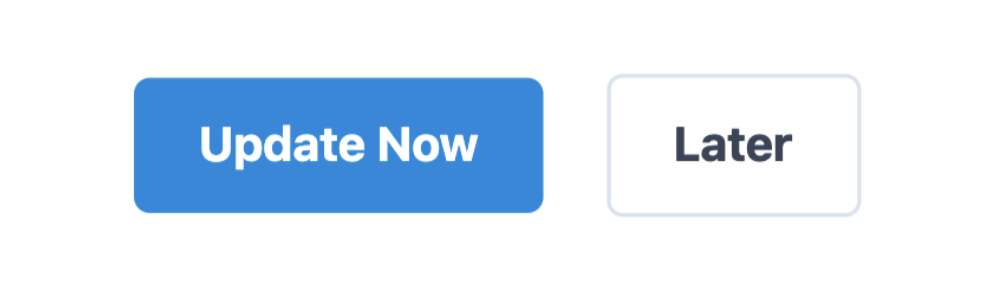
<button className="py-2 px-4 mr-4 text-xs bg-blue-500 hover:bg-blue-700 text-white font-bold rounded">Update Now</button>

<button className="py-2 px-4 text-xs mr-4 hover:bg-gray-100 text-gray-700 border-gray-300 border font-bold rounded">Later</button>
Using the @apply pattern, you can write this HTML as:
<button className="btn btn-primary btn-xs">Update Now</button>
<button className="btn btn-secondary btn-xs">Later</button>
Which can then be adopted to React to become:
import classnames from "classnames";

function Button ({size, type, children}) {
  const bSize = "btn-" + size;
  const bType = "btn-" + type;
  return (
    <button className={classnames("btn", bSize, bType)}>{children}</button>
  )
}

Button.propTypes = {
  size: PropTypes.oneOf(['xs, xl']),
  type: PropTypes.oneOf(['primary', 'secondary'])
};


// Using the Button component.
<Button type="primary" size="xs">Update Now</Button>
<Button type="secondary" size="xs">Later</Button>
Here’s how you would create these BEM-style classnames such as .btn, .btn-primary, and others. Start by creating a button.css file:
/\* button.css \*/
@tailwind base;
@tailwind components;

.btn {
  @apply py-2 px-4 mr-4 font-bold rounded;
}
.btn-primary {
  @apply bg-blue-500 hover:bg-blue-700 text-white;
}
.btn-secondary {
  @apply hover:bg-gray-700 text-gray-700 border-gray-300 border;
}
.btn-xs {
  @apply text-xs;
}
.btn-xl {
  @apply text-xl;
}

@tailwind utilities;
The code above isn’t real CSS but it will get compiled by PostCSS. There’s a GitHub repository available here which shows how to setup PostCSS and Tailwind for a JavaScript project.
There’s also a short video that demonstrates how to set it up here.
Disadvantages Of Using @apply
The concept of extracting Tailwind utility classes into higher-level CSS classes seems like it makes sense, but it has some disadvantages which you should be aware of. Let’s highlight these with another example.
First, by extracting these class names out, we lose some information. For example, we need to be aware that .btn-primary has to be added to a component that already has .btn applied to it. Also, .btn-primary and .btn-secondary can’t be applied together. This information is not evident by just looking at the classes.
If this component was something more complicated, you would also need to understand the parent-child relationship between the classes. In a way, this is the problem that Tailwind was designed to solve, and by using @apply, we are bringing the problems back, in a different way.
Here’s a video where Adam Wathan — the creator of Tailwind — dives into the pros and cons of using @apply.
Summary
In this article, we looked at three ways that you can integrate Tailwind into a React application to build reusable components. These methods help you to build React components that have a cleaner interface using props.
- Use the classnames module to programmatically toggle classes.
- Define a constants file where you define a list of classes per component state.
- Use
@applyto extract higher-level CSS classes.
If you have any questions, send me a message on Twitter at @tilomitra.
Further Reading
- Setting Up Tailwind CSS In A React Project
- Creating Sortable Tables With React
- A Guide To New And Experimental CSS DevTools In Firefox
- Make Your Own Expanding And Contracting Content Panels


