Setting TypeScript For Modern React Projects Using Webpack

Email Newsletter
Weekly tips on front-end & UX.
Trusted by 182,000+ folks.


 Celebrating 10 million developers
 Custom Web Forms for Angular, React, & Vue. Your backend.
In this era of software development, JavaScript can be used to develop almost any type of app. However, the fact that JavaScript is dynamically typed could be a concern for most large enterprise companies, because of its loose type-checking feature.
Fortunately, we don’t have to wait until the Ecma Technical Committee 39 introduces a static type system into JavaScript. We can use TypeScript instead.
JavaScript, being dynamically typed, is not aware of the data type of a variable until that variable is instantiated at runtime. Developers who write large software programs might have a tendency to reassign a variable, declared earlier, to a value of a different type, with no warning or issue whatsoever, resulting in bugs often overlooked.
In this tutorial, we will learn what TypeScript is and how to work with it in a React project. By the end, we’ll have built a project consisting of an episode-picker app for the TV show Money Heist, using TypeScript and current React-like hooks (useState, useEffect, useReducer, useContext). With this knowledge, you can go on to experiment with TypeScript in your own projects.
This article isn’t an introduction to TypeScript. Hence, we won’t go through the basic syntax of TypeScript and JavaScript. However, you don’t have to be an expert in any of these languages to follow along, because we’ll try to follow the KISS principle (keep it simple, stupid).
What Is TypeScript?
In 2019, TypeScript was ranked the seventh most-used language and the fifth fastest-growing language on GitHub. But what exactly is TypeScript?
According to the official documentation, TypeScript is a typed superset of JavaScript that compiles to plain JavaScript. It is developed and maintained by Microsoft and the open-source community.
“Superset” in this context means that the language contains all of the features and functionality of JavaScript and then some. TypeScript is a typed scripting language.
It offers developers more control over their code base via its type annotation, classes, and interface, sparing developers from having to manually fix annoying bugs in the console.
TypeScript wasn’t created to alter JavaScript. Instead, it expands on JavaScript with valuable new features. Any program written in plain JavaScript will also run as expected in TypeScript, including cross-platform mobile apps and back ends in Node.js.
This means you can also write React apps in TypeScript, as we will do in this tutorial.
Why TypeScript?
Perhaps, you aren’t convinced of embracing the goodness of TypeScript. Let’s consider a few of its advantages.
Fewer Bugs
We cannot eliminate all bugs in our code, but we can reduce them. TypeScript checks for types at compile-time and throws errors if the variable type changes.
Being able to find these obvious yet frequent errors this early on makes it a lot easier to manage your code with types.
Refactoring Is Easier
You probably often want to refactor quite a lot of things, but because they touch so much other code and many other files, you’re wary of modifying them.
In TypeScript, such things can often be refactored with just a click of the “Rename symbol” command in your integrated development environment (IDE).

In a dynamically typed language such as JavaScript, the only way to refactor multiple files at the same time is with the traditional “search and replace” function using regular expressions (RegExp).
In a statically typed language such as TypeScript, “search and replace” isn’t needed anymore. With IDE commands such as “Find all occurrences” and “Rename symbol”, you can see all occurrences in the app of the given function, class, or property of an object interface.
TypeScript will help you find all instances of the refactored bit, rename it, and alert you with a compile error in case your code has any type mismatches after the refactoring.
TypeScript has even more advantages than what we’ve covered here.
Disadvantages Of TypeScript
TypeScript is surely not without its disadvantages, even given the promising features highlighted above.
A False Sense Of Security
TypeScript’s type-checking feature often creates a false sense of security among developers. The type checking indeed warns us when something is wrong with our code. However, static types don’t reduce overall bug density.
Therefore, the strength of your program will depend on your usage of TypeScript, because types are written by the developer and not checked at runtime.
If you’re looking to TypeScript to reduce your bugs, please consider test-driven development instead.
Complicated Typing System
The typing system, while a great tool in many regards, can sometimes be a little complicated. This downside stems from it being fully interoperable with JavaScript, which leaves even more room for complication.
However, TypeScript is still JavaScript, so understanding JavaScript is important.
When To Use TypeScript?
I would advise you to use TypeScript in the following cases:
- If you’re looking to building an application that will be maintained over a long period, then I would strongly recommend starting with TypeScript, because it fosters self-documenting code, thus helping other developers to understand your code easily when they join your code base.
- If you need to create a library, consider writing it in TypeScript. It will help code editors to suggest the appropriate types to developers who are using your library.
In the last few sections, we have balanced the pros and cons of TypeScript. Let’s move on to the business of the day: setting up TypeScript in a modern React project.
Getting Started
There are several ways to set up TypeScript in a React Project. In this tutorial, we’ll be covering just two.
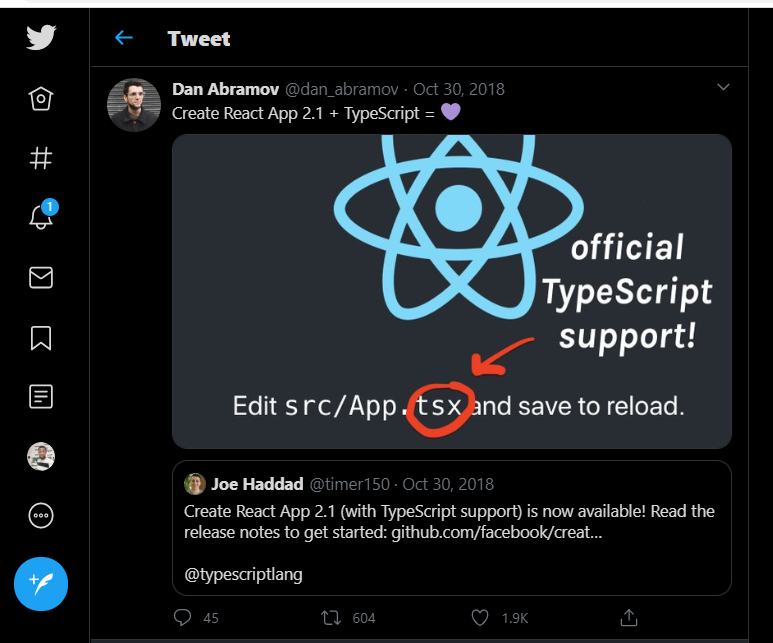
Method 1: Create React App + TypeScript
About two years ago, the React team released Create React App 2.1, with TypeScript support. So, you might never have to do any heavy lifting to get TypeScript into your project.
To start a new Create React App project, you can run this…
npx create-react-app my-app --folder-name
… or this:
yarn create react-app my-app --folder-name
To add TypeScript to a Create React App project, first install it and its respective @types:
npm install --save typescript @types/node @types/react @types/react-dom @types/jest
… or:
yarn add typescript @types/node @types/react @types/react-dom @types/jest
Next, rename the files (for example, index.js to index.tsx), and restart your development server!
That was quick, wasn’t it?
Method 2: Set Up TypeScript With Webpack
Webpack is a static module bundler for JavaScript applications. It takes all of the code from your application and makes it usable in a web browser. Modules are reusable chunks of code built from your app’s JavaScript, node_modules, images, and CSS styles, which are packaged to be easily used on your website.
Create A New Project
Let’s start by creating a new directory for our project:
mkdir react-webpack
cd react-webpack
We’ll use npm to initialize our project:
npm init -y
The command above will generate a package.json file with some default values. Let’s also add some dependencies for webpack, TypeScript, and some React-specific modules.
Installing Packages
Lastly, we’d need to install the necessary packages. Open your command-line interface (CLI) and run this:
#Installing devDependencies

npm install --save-dev @types/react @types/react-dom awesome-typescript-loader css-loader html-webpack-plugin mini-css-extract-plugin source-map-loader typescript webpack webpack-cli webpack-dev-server

#installing Dependencies
npm install react react-dom
Let’s also manually add a few different files and folders under our react-webpack folder:
- Add
webpack.config.jsto add webpack-related configurations. - Add
tsconfig.jsonfor all of our TypeScript configurations. - Add a new directory,
src. - Create a new directory,
components, in thesrcfolder. - Finally, add
index.html,App.tsx, andindex.tsxin thecomponentsfolder.
Project Structure
Thus, our folder structure will look something like this:
├── package.json
├── package-lock.json
├── tsconfig.json
├── webpack.config.js
├── .gitignore
└── src
    └──components
        ├── App.tsx
        ├── index.tsx
        ├── index.html
Start Adding Some Code
We’ll start with index.html:
<!DOCTYPE html>
<html lang="en">
<head>
  <meta charset="UTF-8">
  <meta name="viewport" content="width=device-width, initial-scale=1.0">
  <title>React-Webpack Setup</title>
</head>
<body>
  <div id="output"></div>
</body>
</html>
This will create the HTML, with an empty div with an ID of output.
Let’s add the code to our React component App.tsx:
import * as React from "react";
export interface HelloWorldProps {
userName: string;
lang: string;
}
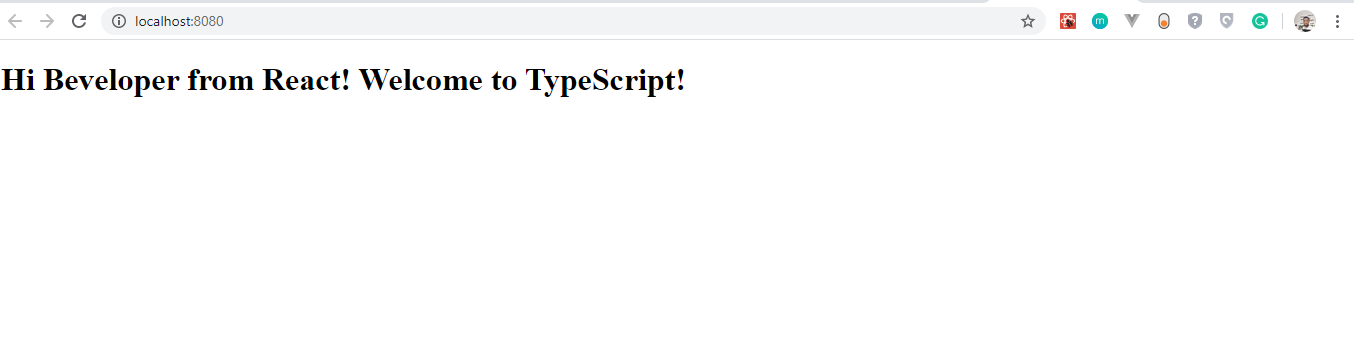
export const App = (props: HelloWorldProps) => (
<h1>
Hi {props.userName} from React! Welcome to {props.lang}!
</h1>
);
We’ve created an interface object and named it HelloWorldProps, with userName and lang having a string type.
We passed props to our App component and exported it.
Now, let’s update the code in index.tsx:
import * as React from "react";
import * as ReactDOM from "react-dom";
import { App } from "./App";
ReactDOM.render(
  <App userName="Beveloper" lang="TypeScript" />,
  document.getElementById("output")
);
We just imported the App component into index.tsx. When webpack sees any file with the extension .ts or .tsx, it will transpile that file using the awesome-typescript-loader library.
TypeScript Configuration
We’ll then add some configuration to tsconfig.json:
{
  "compilerOptions": {
    "jsx": "react",
    "module": "commonjs",
    "noImplicitAny": true,
    "outDir": "./build/",
    "preserveConstEnums": true,
    "removeComments": true,
    "sourceMap": true,
    "target": "es5"
  },
  "include": [
    "src/components/index.tsx"
  ]
}
Let’s also look at the different options we added to tsconfig.json:
compilerOptionsRepresents the different compiler options.jsx:reactAdds support for JSX in.tsxfiles.libAdds a list of library files to the compilation (for example, usinges2015allows us to use ECMAScript 6 syntax).moduleGenerates module code.noImplicitAnyRaises errors for declarations with an impliedanytype.outDirRepresents the output directory.sourceMapGenerates a.mapfile, which can be very useful for debugging the app.targetRepresents the target ECMAScript version to transpile our code down to (we can add a version based on our specific browser requirements).includeUsed to specify the file list to be included.
Webpack Configuration
Let’s add some webpack configuration to webpack.config.js.
const path = require("path");
const HtmlWebpackPlugin = require("html-webpack-plugin");
const MiniCssExtractPlugin = require("mini-css-extract-plugin");
module.exports = {
  entry: "./src/components/index.tsx",
  target: "web",
  mode: "development",
  output: {
    path: path.resolve(\__dirname, "build"),
    filename: "bundle.js",
  },
  resolve: {
    extensions: [".js", ".jsx", ".json", ".ts", ".tsx"],
  },
  module: {
    rules: [
      {
        test: /\.(ts|tsx)$/,
        loader: "awesome-typescript-loader",
      },
      {
        enforce: "pre",
        test: /\.js$/,
        loader: "source-map-loader",
      },
      {
        test: /\.css$/,
        loader: "css-loader",
      },
    ],
  },
  plugins: [
    new HtmlWebpackPlugin({
      template: path.resolve(\__dirname, "src", "components", "index.html"),
    }),
    new MiniCssExtractPlugin({
      filename: "./src/yourfile.css",
    }),
  ],
};
Let’s look at the different options we’ve added to webpack.config.js:
entryThis specifies the entry point for our app. It may be a single file or an array of files that we want to include in our build.outputThis contains the output configuration. The app looks at this when trying to output bundled code from our project to the disk. The path represents the output directory for code to be outputted to, and the file name represents the file name for the same. It is generally namedbundle.js.resolveWebpack looks at this attribute to decide whether to bundle or skip the file. Thus, in our project, webpack will consider files with the extensions.js,.jsx,.json,.ts, and.tsxfor bundling.moduleWe can enable webpack to load a particular file when requested by the app, using loaders. It takes a rules object that specifies that:- any file that ends with the extension
.tsxor.tsshould useawesome-typescript-loaderto be loaded; - files that end with the
.jsextension should be loaded withsource-map-loader; - files that end with the
.cssextension should be loaded withcss-loader.
- any file that ends with the extension
pluginsWebpack has its own limitations, and it provides plugins to overcome them and extend its capabilities. For example,html-webpack-plugincreates a template file that is rendered to the browser from theindex.htmlfile in the./src/component/index.htmldirectory.
MiniCssExtractPlugin renders the parent CSS file of the app.
Adding Scripts To package.json
We can add different scripts to build React apps in our package.json file:
"scripts": {
"start": "webpack-dev-server --open",
"build": "webpack"
},
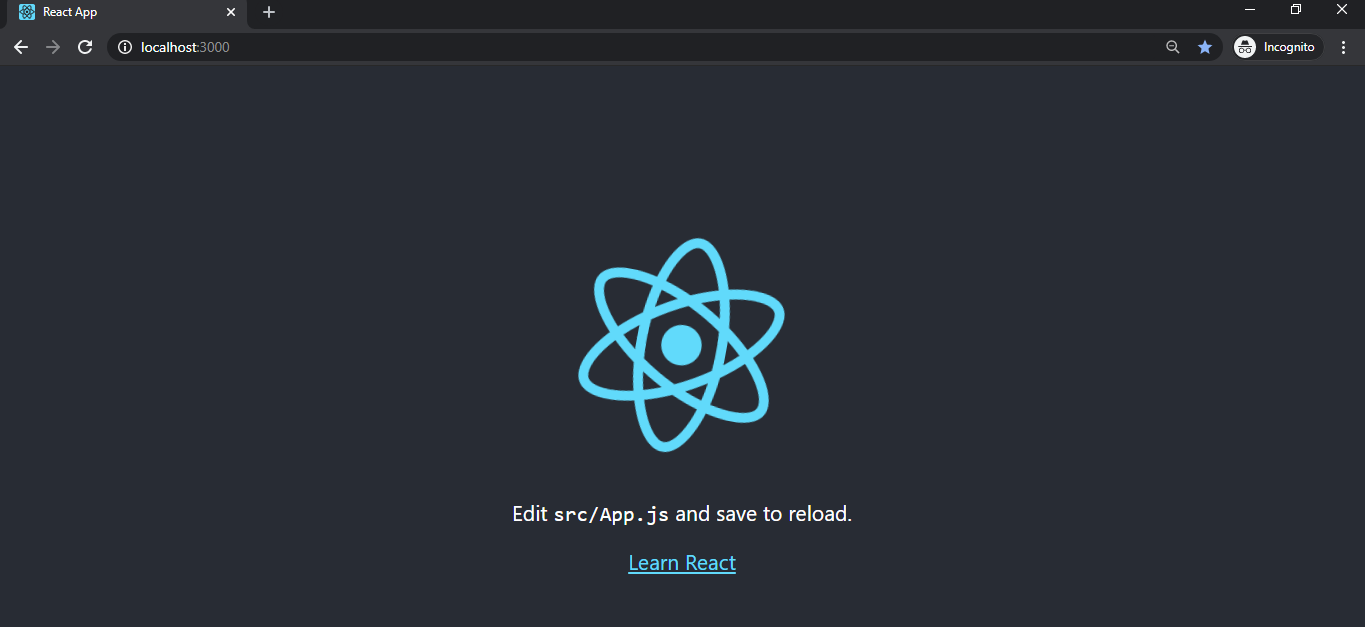
Now, run npm start in your CLI. If it all went well, you should see this:
If you have a knack for webpack, clone the repository for this setup, and use it across your projects.
Creating Files
Create a src folder and an index.tsx file. This will be the base file that renders React.
Now, if we run npm start, it will run our server and open a new tab. Running npm run build will build webpack for production and will create a build folder for us.
We have seen how to set up TypeScript from scratch using the Create React App and webpack configuration method.
One of the quickest ways to get a full grasp of TypeScript is by converting one of your existing vanilla React projects to TypeScript. Unfortunately, incrementally adopting TypeScript in an existing vanilla React project is stressful because it entails having to eject or rename all of the files, which would result in conflicts and a giant pull request if the project belonged to a large team.
Next, we’ll look at how to easily migrate a React project to TypeScript.
Migrate An Existing Create React App To TypeScript
To make this process more manageable, we’ll break it down into steps, which will enable us to migrate in individual chunks. Here are the steps we’ll take to migrate our project:
- Add TypeScript and types.
- Add
tsconfig.json. - Start small.
- Rename files extension to
.tsx.
1. Add TypeScript to the Project
First, we’ll need to add TypeScript to our project. Assuming that your React project was bootstrapped with Create React App, we can run the following:
# Using npm
npm install --save typescript @types/node @types/react @types/react-dom @types/jest

# Using Yarn
yarn add typescript @types/node @types/react @types/react-dom @types/jest
Notice that we haven’t changed anything to TypeScript yet. If we run the command to start the project locally (npm start or yarn start), nothing changes. If that’s the case, then great! We’re ready for the next step.
2. Add the tsconfig.json File
Before taking advantage of TypeScript, we need to configure it via the tsconfig.json file. The simplest way to get started is to scaffold one using this command:
npx tsc --init
This gets us some basics, with a lot of commented code. Now, replace all of the code in tsconfig.json with this:
{
    "compilerOptions": {
      "jsx": "react",
      "module": "commonjs",
      "noImplicitAny": true,
      "outDir": "./build/",
      "preserveConstEnums": true,
      "removeComments": true,
      "sourceMap": true,
      "target": "es5"
    },
    "include": [
      "./src/**/**/\*"
    ]
  }
TypeScript Configuration
Let’s also look at the different options we added to tsconfig.json:
compilerOptionsRepresents the different compiler options.targetTranslates newer JavaScript constructs down to an older version, like ECMAScript 5.libAdds a list of library files to the compilation (for example, using es2015 allows us to use ECMAScript 6 syntax).jsx:reactAdds support for JSX in.tsxfiles.libAdds a list of library files to the compilation (for example, using es2015 allows us to use ECMAScript 6 syntax).moduleGenerates module code.noImplicitAnyUsed to raise errors for declarations with an impliedanytype.outDirRepresents the output directory.sourceMapGenerates a.mapfile, which can be very useful for debugging our app.includeUsed to specify the file list to be included.
Configurations options will vary, according to a project’s demand. You might need to check the TypeScript options spreadsheet to figure out what would fit your project.
We have only taken the required actions to get things ready. Our next step is to migrate a file to TypeScript.
3. Start With a Simple Component
Take advantage of TypeScript’s ability to be gradually adopted. Go one file at a time at your own pace. Do what makes sense for you and your team. Don’t try to tackle it all at once.
To properly convert this, we need to do two things:
- Change the file extension to
.tsx. - Add the type annotation (which would require some TypeScript knowledge).
4.Rename File Extensions to .tsx
In a large code base, it might seem tiring to rename files individually.
Rename multiples files on macOS
Renaming multiple files can be a time-waster. Here is how you can do it on a Mac. Right-click (or Ctrl + click, or click with two fingers simultaneously on the trackpad if you are using a MacBook) on the folder that contains the files you want to rename. Then, click “Reveal in Finder”. In the Finder, select all of the files you want to rename. Right-click the selected files, and choose “Rename X items…” Then, you will see something like this:
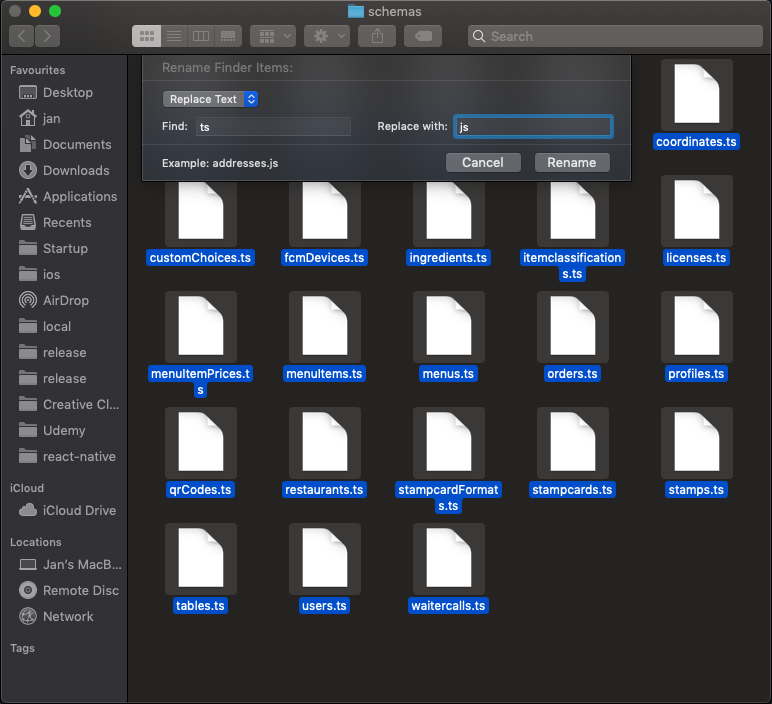
Insert the string you want to find, and the string with which you want to replace that found string, and hit “Rename”. Done.
Rename multiples files on Windows
Renaming multiple files on Windows is beyond the scope of this tutorial, but a complete guide is available. You would usually get errors after renaming the files; you just need to add the type annotations. You can brush up on this in the documentation.
We have covered how to set up TypeScript in a React app. Now, let’s build an episode-picker app for Money Heist using TypeScript.
We won’t cover the basic types of TypeScript. Going through the documentation before continuing in this tutorial is required.
Time to Build
To make this process feel less daunting, we’ll break this down into steps, which will enable us to build the app in individual chunks. Here are all of the steps we’ll take to build the Money Heist episode-picker:
- Scaffold a Create React App.
- Fetch episodes.
- Create the appropriate types and interfaces for our episodes in
interface.ts. - Set up store for fetching episodes in
store.tsx. - Create the action for fetching episodes in
action.ts. - Create an
EpisodeList.tsxcomponent that holds the episodes fetched. - Import the
EpisodesListcomponent to our home page usingReact Lazy and Suspense.
- Create the appropriate types and interfaces for our episodes in
- Add episodes.
- Set up store to add episodes in
store.tsx. - Create the action for adding episodes in
action.ts.
- Set up store to add episodes in
- Remove episodes.
- Set up store for deleting episodes in
store.tsx. - Create the action for deleting episodes in
action.ts.
- Set up store for deleting episodes in
- Favorite episode.
- Import
EpisodesListcomponent in favorite episode. - Render
EpisodesListinside favorite episode.
- Import
- Using Reach Router for navigation.
Set Up React
The easiest way to set up React is to use Create React App. Create React App is an officially supported way to create single-page React applications. It offers a modern build setup with no configuration.
We’ll make use of it to bootstrap the application we’ll be building. From your CLI, run the command below:
npx create-react-app react-ts-app && cd react-ts-app
Once the installation is successful, start the React server by running npm start.
Understanding Interfaces And Types In Typescript
Interfaces in TypeScript are used when we need to give types to objects properties. Hence, we would be using interfaces to define our types.
interface Employee {
  name: string,
  role: string
  salary: number
}
const bestEmployee: Employee= {
  name: 'John Doe',
  role: 'IOS Developer',
  salary: '$8500'    //notice we are using a string
}
When compiling the code above, we would see this error: “Types of property salary are incompatible. Type string is not assignable to type number.”
Such errors happen in TypeScript when a property or variable is assigned a type other than the defined type. Specifically, the snippet above means that the salary property was assigned a string type instead of a number type.
Let’s create an interface.ts file in our src folder. Copy and paste this code into it:
/**
|--------------------------------------------------
| All the interfaces!
|--------------------------------------------------
*/
export interface IEpisode {
  airdate: string
  airstamp: string
  airtime: string
  id: number
  image: { medium: string; original: string }
  name: string
  number: number
  runtime: number
  season: number
  summary: string
  url: string
}
export interface IState {
  episodes: Array<IEpisode>
  favourites: Array<IEpisode>
}
export interface IAction {
  type: string
  payload: Array<IEpisode> | any
}
export type Dispatch = React.Dispatch<IAction>
export type FavAction = (
  state: IState,
  dispatch: Dispatch,
  episode: IEpisode
) => IAction

export interface IEpisodeProps {
  episodes: Array<IEpisode>
  store: { state: IState; dispatch: Dispatch }
  toggleFavAction: FavAction
  favourites: Array<IEpisode>
}
export interface IProps {
  episodes: Array<IEpisode>
  store: { state: IState; dispatch: Dispatch }
  toggleFavAction: FavAction
  favourites: Array<IEpisode>
}
It’s a good practice to add an “I” to the name of the interface. It makes the code readable. However, you may decide to exclude it.
IEpisode Interface
Our API returns a set of properties such as airdate, airstamp, airtime, id, image, name, number, runtime, season, summary, and url. Hence, we defined an IEpisode interface and set the appropriate data types to the object properties.
IState Interface
Our IState interface has episodes and favorites properties, respectively, and an Array<IEpisode> interface.
IAction
The IAction interface properties are payload and type. The type property has a string type, while the payload has a type of Array | any.
Note that Array | any means an array of the episode interface or any type.
The Dispatch type is set to React.Dispatch and a <IAction> interface. Note that React.Dispatch is the standard type for the dispatch function, according to the @types/react code base, while <IAction> is an array of the Interface action.
Also, Visual Studio Code has a TypeScript checker. So, by merely highlighting or hovering over code, it’s smart enough to suggest the appropriate type.
In other words, for us to make use of our interface across our apps, we need to export it. So far, we have our store and our interfaces that hold the type of our object. Let’s now create our store. Note that the other interfaces follow the same conventions as the ones explained.
Fetch Episodes
Creating a Store
To fetch our episodes, we need a store that holds the initial state of the data and that defines our reducer function.
We’ll make use of useReducer hook to set that up. Create a store.tsx file in your src folder. Copy and paste the following code into it.
import React, { useReducer, createContext } from 'react'
import { IState, IAction } from './types/interfaces'
const initialState: IState = {
  episodes: [],
  favourites: []
}
export const Store = createContext(initialState)
const reducer = (state: IState, action: IAction): IState => {
  switch (action.type) {
    case 'FETCH_DATA':
      return { ...state, episodes: action.payload }
    default:
      return state
  }
}
export const StoreProvider = ({ children }: JSX.ElementChildrenAttribute): JSX.Element => {
  const [state, dispatch] = useReducer(reducer, initialState)
  return {children}
}
The following are the steps we’ve taken to create the store:
- In defining our store, we need the
useReducerhook and thecreateContextAPI from React, which is why we imported it. - We imported
IStateandIActionfrom./types/interfaces. - We declared an
initialStateobject with a type ofIState, and properties of episodes and favorites, which are both set to an empty array, respectively. - Next, we created a
Storevariable that holds thecreateContextmethod and that is passed theinitialState.
The createContext method type is <IState | any>, which means it could be a type of <IState> or any. We will see the any type used often in this article.
- Next, we declared a
reducerfunction and passed instateandactionas parameters. Thereducerfunction has a switch statement that checks the value ofaction.type. If the value isFETCH_DATA, then it returns an object that has a copy of our state(...state)and of the episode state that holds our action payload. - In the switch statement, we return a state of
default.
Note that the state and action parameters in the reducer function have IState and IAction types, respectively. Also, the reducer function has a type of IState.
- Lastly, we declared a
StoreProviderfunction. This will give all components in our app access to the store. - This function takes
childrenas a prop, and inside theStorePrivderfunction, we declared theuseReducerhook. - We destructured
stateanddispatch. - In order to make our store accessible to all components, we passed in an object value containing
stateanddispatch.
The state that contains our episodes and favorites state will be made accessible by other components, while the dispatch is a function that changes the state.
- We will export
StoreandStoreProvider, so that it can be used across our application.
Create Action.ts
We’ll need to make requests to the API to fetch the episodes that will be shown the user. This will be done in an action file. Create an Action.ts file, and then paste the following code:
import { Dispatch } from './interface/interfaces'
export const fetchDataAction = async (dispatch: Dispatch) => {
  const URL =
    'https://api.tvmaze.com/singlesearch/shows?q=la-casa-de-papel&embed=episodes'

  const data = await fetch(URL)
  const dataJSON = await data.json()
  return dispatch({
    type: 'FETCH_DATA',
    payload: dataJSON.\_embedded.episodes
  })
}
First, we need to import our interfaces so that they can be used in this file. The following steps were taken to create the action:
- The
fetchDataActionfunction takesdispatchprops as a parameter. - Because our function is asynchronous, we would be using
asyncandawait. - We create a variable(
URL) that holds our API endpoint. - We have another variable named
datathat holds the response from the API. - Then, we store the JSON response in
dataJSON, after we have gotten the response in JSON format by callingdata.json(). - Lastly, we return a dispatch function that has a property of
typeand a string ofFETCH_DATA. It also has apayload()._embedded.episodesis the array of the episodes object from ourendpoint.
Note that the fetchDataAction function fetches our endpoint, converts it to JSON objects, and returns the dispatch function, which updates the state declared earlier in the Store.
The exported dispatch type is set to React.Dispatch. Note that React.Dispatch is the standard type for the dispatch function according to the @types/react code base, while <IAction> is an array of the Interface Action.
EpisodesList Component
In order to maintain the reusability of our app, we will keep all fetched episodes in a separate file, and then import the file in our homePage component.
In the components folder, create an EpisodesList.tsx file, and copy and paste the following code to it:
import React from 'react'
import { IEpisode, IProps } from '../types/interfaces'
const EpisodesList = (props: IProps): Array<JSX.Element> => {
  const { episodes } = props
  return episodes.map((episode: IEpisode) => {
    return (
      <section key={episode.id} className='episode-box'>
        <img src={!!episode.image ? episode.image.medium : ''} alt={`Money Heist ${episode.name}`} />
        <div>{episode.name}</div>
        <section style={{ display: 'flex', justifyContent: 'space-between' }}>
          <div>
            Season: {episode.season} Number: {episode.number}
          </div>
          <button
            type='button'
          >
            Fav
          </button>
        </section>
      </section>
    )
  })
}
export default EpisodesList
- We import
IEpisodeandIPropsfrominterfaces.tsx. - Next, we create an
EpisodesListfunction that takes props. The props will have a type ofIProps, while the function has a type ofArray<JSX.Element>.
Visual Studio Code suggests that our function type be written as JSX.Element[].
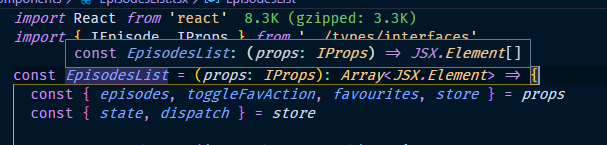
While Array<JSX.Element> is equal to JSX.Element[], Array<JSX.Element> is called the generic identity. Hence, the generic pattern will be used often in this article.
- Inside the function, we destructure the
episodesfromprops, which has theIEpisodeas a type.
Read about the generic identity, This knowledge will be needed as we proceed.
- We returned the
episodesprops and mapped through it to return a few HTML tags. - The first section holds the
key, which isepisode.id, and aclassNameofepisode-box, which will be created later. We know that our episodes have images; hence, the image tag. - The image has a ternary operator that checks if there’s either an
episode.imageor anepisode.image.medium. Else, we display an empty string if no image is found. Also, we included theepisode.namein a div.
In section, we show the season that an episode belongs to and its number. We have a button with the text Fav. We’e exported the EpisodesList component so that we can use it across our app.
Home Page Component
We want the home page to trigger the API call and display the episodes using the EpisodesList component we created. Inside the components folder, create the HomePage component, and copy and paste the following code to it:
import React, { useContext, useEffect, lazy, Suspense } from 'react'
import App from '../App'
import { Store } from '../Store'
import { IEpisodeProps } from '../types/interfaces'
import { fetchDataAction } from '../Actions'
const EpisodesList = lazy<any>(() => import('./EpisodesList'))
  const HomePage = (): JSX.Element => {
  const { state, dispatch } = useContext(Store)
  useEffect(() => {
    state.episodes.length === 0 && fetchDataAction(dispatch)
  })
  const props: IEpisodeProps = {
    episodes: state.episodes,
    store: { state, dispatch }
  }
  return (
    <App>
      <Suspense fallback={<div>loading...</div>}>
        <section className='episode-layout'>
          <EpisodesList {...props} />
        </section>
      </Suspense>
    </App>
  )
  }
export default HomePage
- We import
useContext,useEffect,lazy, andSuspensefrom React. The imported app component is the bedrock upon which all other components must receive the value of the store. - We also import
Store,IEpisodeProps, andFetchDataActionfrom their respective files. - We import the
EpisodesListcomponent using theReact.lazyfeature available in React 16.6.
React lazy loading supports the code-splitting convention. Thus, our EpisodesList component is loaded dynamically, instead of being loaded at once, thereby improving the performance of our app.
- We destructure the
stateanddispatchas props from theStore. - The ampersand (&&) in the
useEffecthook checks if our episodes state isempty(or equal to 0). Else, we return thefetchDataActionfunction. - Lastly, we return the
Appcomponent. Inside it, we use theSuspensewrapper, and setfallbackto a div with theloadingtext. This will be displayed to the user while we await the response from the API. - The
EpisodesListcomponent will mount when the data is available, and the data that will contain theepisodesis what we spread into it.
Set Up Index.txs
The Homepage component needs to be a child of the StoreProvider. We’ll have to do that in the index file. Rename index.js to index.tsx and paste the following code:
import React from 'react'
import ReactDOM from 'react-dom'
import './index.css'
import { StoreProvider } from './Store'
import HomePage from './components/HomePage'
ReactDOM.render(
  <StoreProvider>
      <HomePage />
  </StoreProvider>,
  document.getElementById('root')
)
We import StoreProvider, HomePage, and index.css from their respective files.
We wrap the HomePage component in our StoreProvider. This makes it possible for the Homepage component to access the store, as we saw in the previous section.
We have come a long way. Let’s check what the app looks like, without any CSS.

Create Index.css
Delete the code in the index.css file and replace it with this:
html {
  font-size: 14px;
}
body {
  margin: 0;
  padding: 0;
  font-size: 10px;
  font-family: -apple-system, BlinkMacSystemFont, "Segoe UI", "Roboto", "Oxygen",
    "Ubuntu", "Cantarell", "Fira Sans", "Droid Sans", "Helvetica Neue",
    sans-serif;
  -webkit-font-smoothing: antialiased;
  -moz-osx-font-smoothing: grayscale;
}
.episode-layout {
  display: flex;
  flex-wrap: wrap;
  min-width: 100vh;
}
.episode-box {
  padding: .5rem;
}
.header {
  display: flex;
  justify-content: space-between;
  background: white;
  border-bottom: 1px solid black;
  padding: .5rem;
  position: sticky;
  top: 0;
}
Our app now has a look and feel. Here’s how it looks with CSS.

Now we see that our episodes can finally be fetched and displayed, because we’ve adopted TypeScript all the way. Great, isn’t it?
Add Favorite Episodes Feature
Let’s add functionality that adds favorite episodes and that links it to a separate page. Let’s go back to our Store component and add a few lines of code:
Note that the highlighted code is newly added:
import React, { useReducer, createContext } from 'react' import { IState, IAction } from './types/interfaces' const initialState: IState = { episodes: [], favourites: [] } export const Store = createContext<IState | any>(initialState) const reducer = (state: IState, action: IAction): IState => { switch (action.type) { case 'FETCH_DATA': return { ...state, episodes: action.payload }case 'ADD_FAV': return { ...state, favourites: [...state.favourites, action.payload] }default: return state } } export const StoreProvider = ({ children }: JSX.ElementChildrenAttribute): JSX.Element => { const [state, dispatch] = useReducer(reducer, initialState) return <Store.Provider value={{ state, dispatch }}>{children}</Store.Provider> }
To implement the “Add favorite” feature to our app, the ADD_FAV case is added. It returns an object that holds a copy of our previous state, as well as an array with a copy of the favorite state, with the payload.
We need an action that will be called each time a user clicks on the FAV button. Let’s add the highlighted code to index.tx:
import {IAction, IEpisode, Dispatch } from './types/interfaces'export const fetchDataAction = async (dispatch: Dispatch) => { const URL = 'https://api.tvmaze.com/singlesearch/shows?q=la-casa-de-papel&embed=episodes' const data = await fetch(URL) const dataJSON = await data.json() return dispatch({ type: 'FETCH_DATA', payload: dataJSON._embedded.episodes }) }export const toggleFavAction = (dispatch: any, episode: IEpisode | any): IAction => { let dispatchObj = { type: 'ADD_FAV', payload: episode } return dispatch(dispatchObj) }
We create a toggleFavAction function that takes dispatch and episodes as parameters, and any and IEpisode|any as their respective types, with IAction as our function type. We have an object whose type is ADD_FAV and that has episode as its payload. Lastly, we just return and dispatch the object.
We will add some more snippets to EpisodeList.tsx. Copy and paste the highlighted code:
import React from 'react' import { IEpisode, IProps } from '../types/interfaces' const EpisodesList = (props: IProps): Array<JSX.Element> => {const { episodes, toggleFavAction, favourites, store } = props const { state, dispatch } = storereturn episodes.map((episode: IEpisode) => { return ( <section key={episode.id} className='episode-box'> <img src={!!episode.image ? episode.image.medium : ''} alt={`Money Heist - ${episode.name}`} /> <div>{episode.name}</div> <section style={{ display: 'flex', justifyContent: 'space-between' }}> <div> Seasion: {episode.season} Number: {episode.number} </div> <button type='button'onClick={() => toggleFavAction(state, dispatch, episode)} > {favourites.find((fav: IEpisode) => fav.id === episode.id) ? 'Unfav' : 'Fav'}</button> </section> </section> ) }) } export default EpisodesList
We include togglefavaction, favorites, and store as props, and we destructure state, a dispatch from the store. In order to select our favorite episode, we include the toggleFavAction method in an onClick event, and pass the state, dispatch and episode props as arguments to the function.
Lastly, we loop through the favorite state to check if fav.id(favorite ID) matches the episode.id. If it does, we toggle between the Unfav and Fav text. This helps the user know if they have favorited that episode or not.
We are getting close to the end. But we still need a page where favorite episodes can be linked to when the user chooses among the episodes on the home page.
If you’ve gotten this far, give yourself a pat on the back.
Favpage Component
In the components folder, create a FavPage.tsx file. Copy and paste the following code to it:
import React, { lazy, Suspense } from 'react'
import App from '../App'
import { Store } from '../Store'
import { IEpisodeProps } from '../types/interfaces'
import { toggleFavAction } from '../Actions'
const EpisodesList = lazy<any>(() => import('./EpisodesList'))
export default function FavPage(): JSX.Element {
  const { state, dispatch } = React.useContext(Store)
  const props: IEpisodeProps = {
    episodes: state.favourites,
    store: { state, dispatch },
    toggleFavAction,
    favourites: state.favourites
  }
  return (
    <App>
      <Suspense fallback={<div>loading...</div>}>
        <div className='episode-layout'>
          <EpisodesList {...props} />
        </div>
      </Suspense>
    </App>
  )
}
To create the logic behind choosing favorite episodes, we’ve written a little code. We import lazy and Suspense from React. We also import Store, IEpisodeProps, and toggleFavAction from their respective files.
We import our EpisodesList component using the React.lazy feature. Lastly, we return the App component. Inside it, we use the Suspense wrapper, and set a fallback to a div with the loading text.
This works similar to the Homepage component. This component will access the store to obtain the episodes the user has favorited. Then, the list of episodes gets passed to the EpisodesList component.
Let’s add a few more snippets to the HomePage.tsx file.
Include the toggleFavAction from ../Actions. Also include the toggleFavAction method as props.
import React, { useContext, useEffect, lazy, Suspense } from 'react' import App from '../App' import { Store } from '../Store' import { IEpisodeProps } from '../types/interfaces'import { fetchDataAction, toggleFavAction } from '../Actions'const EpisodesList = lazy<any>(() => import('./EpisodesList')) const HomePage = (): JSX.Element => { const { state, dispatch } = useContext(Store) useEffect(() => { state.episodes.length === 0 && fetchDataAction(dispatch) }) const props: IEpisodeProps = { episodes: state.episodes, store: { state, dispatch },toggleFavAction, favourites: state.favourites} return ( <App> <Suspense fallback={<div>loading...</div>}> <section className='episode-layout'> <EpisodesList {...props} /> </section> </Suspense> </App> ) } export default HomePage
Our FavPage needs to be linked, so we need a link in our header in App.tsx. To achieve this, we use Reach Router, a library similar to React Router. William Le explains the differences between Reach Router and React Router.
In your CLI, run npm install @reach/router @types/reach__router. We are installing both the Reach Router library and reach-router types.
Upon successful installation, import Link from @reach/router.
import React, { useContext, Fragment } from 'react' import { Store } from './tsx'import { Link } from '@reach/router'const App = ({ children }: { children: JSX.Element }): JSX.Element => {const { state } = useContext(Store)return ( <Fragment> <header className='header'> <div> <h1>Money Heist</h1> <p>Pick your favourite episode</p> </div><div> <Link to='/'>Home</Link> <Link to='/faves'>Favourite(s): {state.favourites.length}</Link> </div></header> {children} </Fragment> ) } export default App
We destructure the store from useContext. Lastly, our home will have a Link and a path to /, while our favorite has a path to /faves.
{state.favourites.length} checks for the number of episodes in the favorites states and displays it.
Finally, in our index.tsx file, we import the FavPage and HomePage components, respectively, and wrap them in the Router.
Copy the highlighted code to the existing code:
import React from 'react' import ReactDOM from 'react-dom' import './index.css' import { StoreProvider } from './Store'import { Router, RouteComponentProps } from '@reach/router' import HomePage from './components/HomePage' import FavPage from './components/FavPage' const RouterPage = ( props: { pageComponent: JSX.Element } & RouteComponentProps ) => props.pageComponentReactDOM.render( <StoreProvider><Router> <RouterPage pageComponent={<HomePage />} path='/' /> <RouterPage pageComponent={<FavPage />} path='/faves' /> </Router></StoreProvider>, document.getElementById('root') )
Now, let’s see how the implemented ADD_FAV works.

Remove Favorite Functionality
Finally, we will add the “Remove episode feature”, so that when the button is clicked, we toggle between adding or removing a favorite episode. We will display the number of episodes added or removed in the header.
STORE
To create the “Remove favorite episode” functionality, we will add another case in our store. So, go over to Store.tsx and add the highlighted code:
import React, { useReducer, createContext } from 'react' import { IState, IAction } from './types/interfaces' const initialState: IState = { episodes: [], favourites: [] } export const Store = createContext<IState | any>(initialState) const reducer = (state: IState, action: IAction): IState => { switch (action.type) { case 'FETCH_DATA': return { ...state, episodes: action.payload } case 'ADD_FAV': return { ...state, favourites: [...state.favourites, action.payload] }case 'REMOVE_FAV': return { ...state, favourites: action.payload }default: return state } } export const StoreProvider = ({ children }: JSX.ElementChildrenAttribute): JSX.Element => { const [state, dispatch] = useReducer(reducer, initialState) return{children} }
We add yet another case named REMOVE_FAV and return an object containing the copy of our initialState. Also, the favorites state contains the action payload.
ACTION
Copy the following highlighted code and paste it in action.ts:
import{ IAction, IEpisode, IState, Dispatch } from './types/interfaces'export const fetchDataAction = async (dispatch: Dispatch) => { const URL = 'https://api.tvmaze.com/singlesearch/shows?q=la-casa-de-papel&embed=episodes' const data = await fetch(URL) const dataJSON = await data.json() return dispatch({ type: 'FETCH_DATA', payload: dataJSON.\_embedded.episodes }) } //Add IState withits typeexport const toggleFavAction = (state: IState, dispatch: any, episode: IEpisode | any): IAction => { const episodeInFav = state.favourites.includes(episode)let dispatchObj = { type: 'ADD_FAV', payload: episode }if (episodeInFav) { const favWithoutEpisode = state.favourites.filter( (fav: IEpisode) => fav.id !== episode.id ) dispatchObj = { type: 'REMOVE_FAV', payload: favWithoutEpisode }} return dispatch(dispatchObj) }
We import the IState interface from ./types/interfaces, because we’ll need to pass it as the type to the state props in the toggleFavAction function.
An episodeInFav variable is created to check if there’s an episode that exists in the favorites state.
We filter through the favorites state to check if a favorite ID doesn’t equal an episode ID. Thus, the dispatchObj is reassigned a type of REMOVE_FAV and a payload of favWithoutEpisode.
Let’s preview the result of our app.
Conclusion
In this article, we’ve seen how to set up TypeScript in a React project, and how to migrate a project from vanilla React to TypeScript.
We’ve also built an app with TypeScript and React to see how TypeScript is used in React projects. I trust you were able to learn a few things.
Please do share your feedback and experiences with TypeScript in the comments section below. I’d love to see what you come up with!
The supporting repository for this article is available on GitHub.
References
- “How To Migrate A React App To TypeScript,” Joe Previte
- “Why And How To Use TypeScript In Your React App?,” Mahesh Haldar
Further Reading
- A Guide To Redux Toolkit With TypeScript
- The Key To Good Component Design Is Selfishness
- Statoscope: A Course Of Intensive Therapy For Your Bundle
- New CSS Viewport Units Do Not Solve The Classic Scrollbar Problem


