How To Build A Blog With Next And MDX

Email Newsletter
Weekly tips on front-end & UX.
Trusted by 182,000+ folks.


 Custom Web Forms for Angular, React, & Vue. Your backend.
 Celebrating 10 million developers
Next.js is a React framework that enables you to build static and dynamic apps quickly. It is production-ready and supports server-side rendering and static site generation out of the box, making Next.js apps fast and SEO-friendly.
In this tutorial, I will first explain what exactly Next.js is and why you’d use it instead of Create React App or Gatsby. Then, I’ll show you how to build a blog on which you can write and render posts using Next.js and MDX.
To get started, you’ll need some experience with React. Knowledge of Next.js would come handy but is not compulsory. This tutorial would benefit those who want to create a blog (personal or organizational) using Next.js or are still searching for what to use.
Let’s dive in.
What Is Next.js?
Next.js is a React framework created and maintained by Vercel. It’s built with React, Node.js, Babel, and Webpack. It is production-ready because it comes with a lot of great features that would usually be set up in a “vanilla” React app.
The Next.js framework can render apps on the server or export them statically. It doesn’t wait for the browser to load the JavaScript in order to show content, which makes Next.js apps SEO-friendly and blazing fast.
Why Use Next.js Over Create React App?
Create React App is a handy tool that offers a modern build setup with no configuration and without the hassle of having to set up Webpack, Babel, and so on or having to maintain their dependencies. It’s the recommended way to create React apps nowadays. It has a template for TypeScript and also comes with the React Testing Library.
However, if you want to build a multi-page app, then you’ll need to install an extra library, as if you were rendering a React app on the server. The extra setup could be a problem, and any packages installed could increase the final bundle size of your app.
This is exactly the problem that Next.js is intended to solve. It offers the best developer experience, with all of the things you need for production. It comes with several cool features:
- Static exporting (pre-rendering)
Next.js allows you to export your Next.js app at build time to static HTML that runs without a server. It is the recommended way to generate your website because it’s done at build time and not at each request. - Server-side rendering (pre-rendering)
It pre-renders pages to HTML on the server upon every request. - Automatic code splitting
Unlike React, Next.js splits code automatically and only loads the JavaScript needed, which makes the app fast. - File-system-based routing
Next.js uses the file system to enable routing in the app, meaning that every file under thepagesdirectory will be treated automatically as a route. - Hot reloading of code
Next.js relies on React Fast Refresh to hot reload your code, offering a great developer experience. - Styling options
The Next.js framework has built-in support for Styled JSX, CSS modules, Sass, LESS, and more.
Next.js Versus Gatsby
Gatsby is a static site generator built on top of React and GraphQL. It is popular and has a huge ecosystem that provides themes, plugins, recipes, and so on.
Gatsby and Next.js websites are super-fast because they are both rendered either on the server or statically, meaning that the JavaScript code does not wait for the browser to load. Let’s compare them according to the developer experience.
Gatsby is easy to start with, especially if you already know React. However, Gatsby uses GraphQL to query local data and pages. Using Gatsby to build this simple blog might be overkill because GraphQL has a learning curve, and the querying and build time of static pages would be a bit longer. If you built this same blog twice, first with Gatsby and then with Next.js, the one built with Next.js would be much faster at build time because it uses regular JavaScript to query local data and pages.
I hope you take advantage of the power of the Next.js framework and see why it’s so much handier than some alternatives. It’s also a great choice if your website relies heavily on SEO because your app will be fast and easy for Google robots to crawl. That’s the reason why we will be using Next.js in this article to build a blog with the MDX library.
Let’s start by setting up a new Next.js app.
Setting Up
There are two ways to create a Next.js app. We can set up a new app manually or use Create Next App. We’ll go for the latter because it’s the recommended way, and it will set up everything automatically for us.
To start a new app, run the following in the command-line interface (CLI):
npx create-next-app
Once the project is initialized, let’s structure the Next.js app as follows:
src
├── components
|  ├── BlogPost.js
|  ├── Header.js
|  ├── HeadPost.js
|  ├── Layout.js
|  └── Post.js
├── pages
|  ├── blog
|  |  ├── post-1
|  |  |  └── index.mdx
|  |  ├── post-2
|  |  |  └── index.mdx
|  |  └── post-3
|  |     └── index.mdx
|  ├── index.js
|  └── \_app.js
├── getAllPosts.js
├── next.config.js
├── package.json
├── README.md
└── yarn.lock
As you can see, our project has a simple file structure. There are three things to note:
_app.jsallows us to append some content to theApp.jscomponent in order to make it global.getAllPosts.jshelps us to retrieve the blog posts from the folderpages/blog. By the way, you can name the file whatever you want.next.config.jsis the configuration file for our Next.js app.
I will come back to each file later and explain what it does. For now, let’s see the MDX package.
Installing The MDX Library
MDX is a format that lets us seamlessly write JSX and import components into our Markdown files. It enables us to write regular Markdown and embed React components in our files as well.
To enable MDX in the app, we need to install the @mdx-js/loader library. To do so, let’s first navigate to the root of the project and then run this command in the CLI:
yarn add @mdx-js/loader
Or, if you’re using npm:
npm install @mdx-js/loader
Next, install @next/mdx, which is a library specific to Next.js. Run this command in the CLI:
yarn add @next/mdx
Or, for npm:
npm install @next/mdx
Great! We are done setting up. Let’s get our hands dirty and code something meaningful.
Configuring The next.config.js File
const withMDX = require("@next/mdx")({
  extension: /\.mdx?$/
});

module.exports = withMDX({
  pageExtensions: ["js", "jsx", "md", "mdx"]
});
Earlier in this tutorial, I said that files under the pages folder would be treated as pages/routes by Next.js at build time. By default, Next.js will just pick files with .js or .jsx extensions. That’s why we need a config file, to add some customizations to the default behavior of Next.js.
The next.config.js file tells the framework that files with .md or .mdx extensions should also be treated as pages/routes at build time because the blog folder that contains the articles lives in the pages directory.
That being said, we can start fetching the blog posts in the next part.
Fetching Blog Posts
One of the reasons why building a blog with Next.js is easy and simple is that you do not need GraphQL or the like to fetch local posts. You can just use regular JavaScript to get the data.
In getAllPosts.js:
function importAll(r) {
  return r.keys().map((fileName) => ({
    link: fileName.substr(1).replace(/\/index\.mdx$/, ""),
    module: r(fileName)
  }));
}

export const posts = importAll(
  require.context("./pages/blog/", true, /\.mdx$/)
);
This file can be intimidating at first. It’s a function that imports all MDX files from the folder pages/blog, and for each post it returns an object with the path of the file, without the extension (/post-1), and the data of the blog post.
With that in place, we can now build the components in order to style and show data in our Next.js app.
Building The Components
In components/Layout.js:
import Head from "next/head";
import Header from "./Header";

export default function Layout({ children, pageTitle, description }) {
  return (
    <>
      <Head>
        <meta name="viewport" content="width=device-width, initial-scale=1" />
        <meta charSet="utf-8" />
        <meta name="Description" content={description}></meta>
        <title>{pageTitle}</title>
      </Head>
      <main>
        <Header />
        <div className="content">{children}</div>
      </main>
    </>
  );
}
Here, we have the Layout component, which we’ll be using as a wrapper for the blog. It receives the meta data to show in the head of the page and the component to be displayed.
In components/Post.js:
import Link from 'next/link'
import { HeadPost } from './HeadPost'

export const Post = ({ post }) => {
  const {
    link,
    module: { meta },
  } = post

  return (
      <article>
        <HeadPost meta={meta} />
        <Link href={'/blog' + link}>
          <a>Read more →</a>
        </Link>
      </article>
  )
}
This component is responsible for displaying a preview of a blog post. It receives the post object to show as props. Next, we use destructuring to pull out the link of the post and the meta to show from the object. With that, we can now pass the data to the components and handle the routing with the Link component.
In components/BlogPost.js:
import { HeadPost } from './HeadPost'

export default function BlogPost({ children, meta}) {
  return (
    <>
      <HeadPost meta={meta} isBlogPost />
      <article>{children}</article>
    </>
  )
}
The BlogPost component helps us to render a single article. It receives the post to show and its meta object.
So far, we have covered a lot — but we have no articles to show. Let’s fix that in the next section.
Writing Posts With MDX
import BlogPost from '../../../components/BlogPost'

export const meta = {
  title: 'Introduction to Next.js',
  description: 'Getting started with the Next framework',
  date: 'Aug 04, 2020',
  readTime: 2
}

export default ({ children }) => <BlogPost meta={meta}>{children}</BlogPost>;

## My Headline

Lorem ipsum dolor sit amet, consectetur adipiscing elit. Quisque maximus pellentesque dolor non egestas. In sed tristique elit. Cras vehicula, nisl vel ultricies gravida, augue nibh laoreet arcu, et tincidunt augue dui non elit. Vestibulum semper posuere magna, quis molestie mauris faucibus ut.
As you can see, we import the BlogPost component, which receives the meta and the body of the post.
The parameter children is the body of the blog post or, to be precise, everything that comes after the meta object. It is the function responsible for rendering the post.
With that change, we can move to the index.js file and display the posts on the home page.
Displaying Posts
import { Post } from "../components/Post";
import { posts } from "../getAllPosts";

export default function IndexPage() {
  return (
    <>
      {posts.map((post) => (
        <Post key={post.link} post={post} />
      ))}
    </>
  );
}
Here, we start by importing the Post component and the posts fetched from the blog folder. Next, we loop through the array of articles, and for each post, we use the Post component to display it. That being done, we are now able to fetch the posts and display them on the page.
We are almost done. However, the Layout component is still not being used. We can use it here and wrap our components with it. But that won’t affect the articles pages. That’s where the _app.js file comes into play. Let’s use that in the next section.
Using The _app.js File
Here, the underscore symbol (_) is really important. If you omit it, Next.js will treat the file as a page/route.
import Layout from "../components/Layout";

export default function App({ Component, pageProps }) {
  return (
    <Layout pageTitle="Blog" description="My Personal Blog">
      <Component {...pageProps} />
    </Layout>
  );
}
Next.js uses the App component to initialize pages. The purpose of this file is to override it and add some global styles to the project. If you have styles or data that need to be shared across the project, put them here.
We can now browse the project folder in the CLI and run the following command to preview the blog in the browser:
yarn dev
Or, in npm:
npm run dev
If you open https://localhost:3000 in the browser, you will be able to see this:
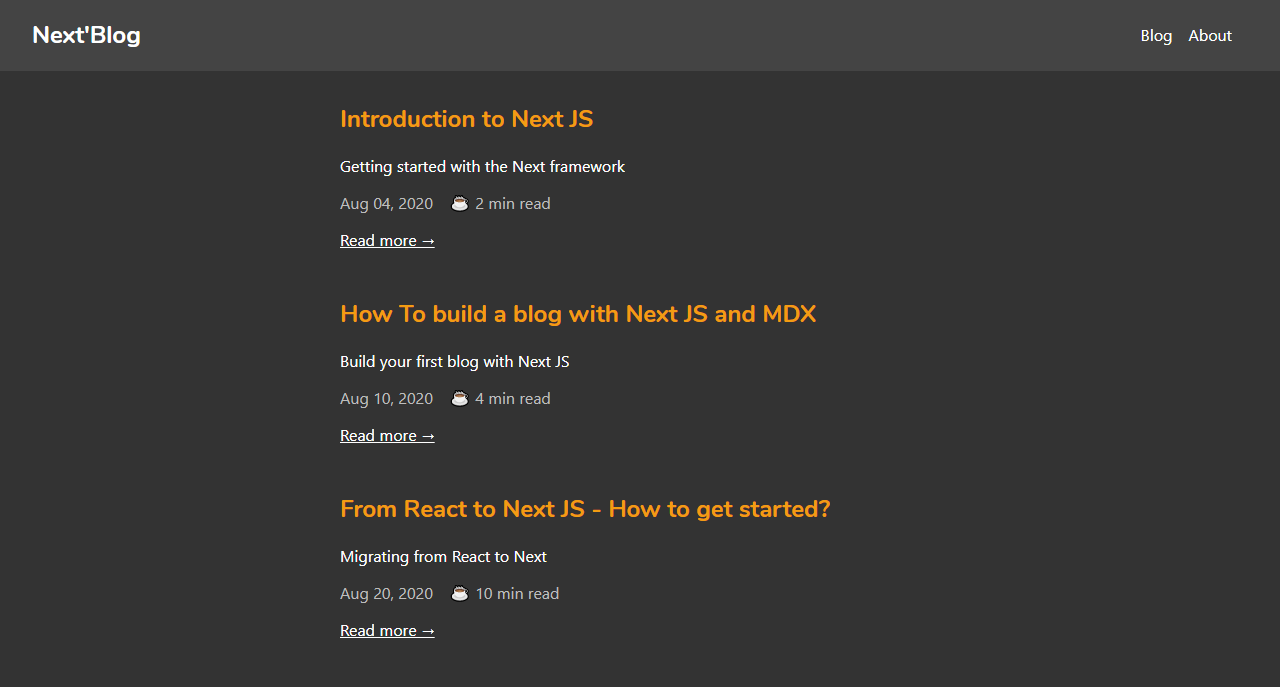
Great! Our blog looks good. We are done building the blog app with Next.js and MDX.
Conclusion
In this tutorial, we walked through Next.js by building a blog using the MDX library. The Next.js framework is a handy tool that makes React apps SEO-friendly and fast. It can be used to build static, dynamic JAMstack websites in no time, because it is production-ready and comes with some nice features. Next.js is used widely by big companies, and its performance keeps improving. It’s definitely something to check out for your next project.
You can preview the finished project on CodeSandbox.
Thanks for reading!
Resources
These useful resources will take you beyond the scope of this tutorial.
Further Reading
- Internationalization In Next.js 13 With React Server Components
- The Era Of Platform Primitives Is Finally Here
- Full Stack GraphQL With Next.js, Neo4j AuraDB And Vercel
- How I Learned To Stop Worrying And Love Multimedia Writing


