Creating A Continuous Integration Test Workflow Using GitHub Actions
When contributing to projects on version control platforms like GitHub and Bitbucket, the convention is that there is the main branch containing the functional codebase. Then, there are other branches in which several developers can work on copies of the main to either add a new feature, fix a bug, and so on. It makes a lot of sense because it becomes easier to monitor the kind of effect the incoming changes will have on the existing code. If there is any error, it can easily be traced and fixed before integrating the changes into the main branch. It can be time-consuming to go through every single line of code manually looking for errors or bugs — even for a small project. That is where continuous integration comes in.
What Is Continuous Integration (CI)?
“Continuous integration (CI) is the practice of automating the integration of code changes from multiple contributors into a single software project.”
— Atlassian.com
The general idea behind continuous integration (CI) is to ensure changes made to the project do not “break the build,” that is, ruin the existing code base. Implementing continuous integration in your project, depending on how you set up your workflow, would create a build whenever anyone makes changes to the repository.
So, What Is A Build?
A build — in this context — is the compilation of source code into an executable format. If it is successful, it means the incoming changes will not negatively impact the codebase, and they are good to go. However, if the build fails, the changes will have to be reevaluated. That is why it is advisable to make changes to a project by working on a copy of the project on a different branch before incorporating it into the main codebase. This way, if the build breaks, it would be easier to figure out where the error is coming from, and it also does not affect your main source code.
“The earlier you catch defects, the cheaper they are to fix.”
— David Farley, Continuous Delivery: Reliable Software Releases through Build, Test, and Deployment Automation
There are several tools available to help with creating continuous integration for your project. These include Jenkins, TravisCI, CircleCI, GitLab CI, GitHub Actions, etc. For this tutorial, I will be making use of GitHub Actions.
GitHub Actions For Continuous Integration
CI Actions is a fairly new feature on GitHub and enables the creation of workflows that automatically run your project’s build and tests. A workflow contains one or more jobs that can be activated when an event occurs. This event could be a push to any of the branches on the repo or the creation of a pull request. I will explain these terms in detail as we proceed.
Let’s Get Started!
Prerequisites
This is a tutorial for beginners so I will mostly talk about GitHub Actions CI on a surface level. Readers should already be familiar with creating a Node JS REST API using the PostgreSQL database, Sequelize ORM, and writing tests with Mocha and Chai.
You should also have the following installed on your machine:
- NodeJS,
- PostgreSQL,
- NPM,
- VSCode (or any editor and terminal of your choice).
I will make use of a REST API I already created called countries-info-api. It’s a simple api with no role-based authorizations (as at the time of writing this tutorial). This means anyone can add, delete, and/or update a country’s details. Each country will have an id (auto-generated UUID), name, capital, and population. To achieve this, I made use of Node js, express js framework, and Postgresql for the database.
I will briefly explain how I set up the server, database before I begin with writing the tests for test coverage and the workflow file for continuous integration.
You can clone the countries-info-api repo to follow through or create your own API.
Technology used: Node Js, NPM (a package manager for Javascript), Postgresql database, sequelize ORM, Babel.
Setting Up The Server
Before setting up the server, I installed some dependencies from npm.
npm install express dotenv cors

npm install --save-dev @babel/core @babel/cli @babel/preset-env nodemon
I am using the express framework and writing in the ES6 format, so I’ll need Babeljs to compile my code. You can read the official documentation to know more about how it works and how to configure it for your project. Nodemon will detect any changes made to the code and automatically restart the server.
Note: Npm packages installed using the --save-dev flag are only required during the development stages and are seen under devDependencies in the package.json file.
I added the following to my index.js file:
import express from "express";
import bodyParser from "body-parser";
import cors from "cors";
import "dotenv/config";

const app = express();
const port = process.env.PORT;

app.use(bodyParser.json());

app.use(bodyParser.urlencoded({ extended: true }));

app.use(cors());

app.get("/", (req, res) => {
    res.send({message: "Welcome to the homepage!"})
})

app.listen(port, () => {
    console.log(`Server is running on ${port}...`)
})
This sets up our api to run on whatever is assigned to the PORT variable in the .env file. This is also where we will be declaring variables that we don’t want others to easily have access to. The dotenv npm package loads our environment variables from .env.
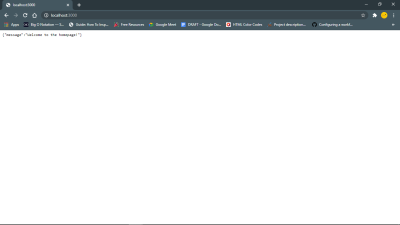
Now when I run npm run start in my terminal, I get this:

As you can see, our server is up and running. Yay!
This link https://127.0.0.1:your_port_number/ in your web browser should return the welcome message. That is, as long as the server is running.

Next up, Database and Models.
I created the country model using Sequelize and I connected to my Postgres database. Sequelize is an ORM for Nodejs. A major advantage is that it saves us the time of writing raw SQL queries.
Since we are using Postgresql, the database can be created via the psql command line using the CREATE DATABASE database_name command. This can also be done on your terminal, but I prefer PSQL Shell.
In the env file, we will set up the connection string of our database, following this format below.
TEST_DATABASE_URL = postgres://<db_username>:<db_password>@127.0.0.1:5432/<database_name>
For my model, I followed this sequelize tutorial. It is easy to follow and explains everything about setting up Sequelize.
Next, I will write tests for the model I just created and set up the coverage on Coverall.
Writing Tests And Reporting Coverage
Why write tests? Personally, I believe that writing tests help you as a developer to better understand how your software is expected to perform in the hands of your user because it is a brainstorming process. It also helps you discover bugs on time.
Tests:
There are different software testing methods, however, For this tutorial, I made use of unit and end-to-end testing.
I wrote my tests using the Mocha test framework and the Chai assertion library. I also installed sequelize-test-helpers to help test the model I created using sequelize.define.
Test coverage:
It is advisable to check your test coverage because the result shows whether our test cases are actually covering the code and also how much code is used when we run our test cases.
I used Istanbul (a test coverage tool), nyc (Instabul’s CLI client), and Coveralls.
According to the docs, Istanbul instruments your ES5 and ES2015+ JavaScript code with line counters, so that you can track how well your unit-tests exercise your codebase.
In my package.json file, the test script runs the tests and generates a report.
{
    "scripts": {
        "test": "nyc --reporter=lcov --reporter=text mocha -r @babel/register ./src/test/index.js"
    }
}
In the process, it will create a .nyc_output folder containing the raw coverage information and a coverage folder containing the coverage report files. Both files are not necessary on my repo so I placed them in the .gitignore file.
Now that we have generated a report, we have to send it to Coveralls. One cool thing about Coveralls (and other coverage tools, I assume) is how it reports your test coverage. The coverage is broken down on a file by file basis and you can see the relevant coverage, covered and missed lines, and what changed in the build coverage.
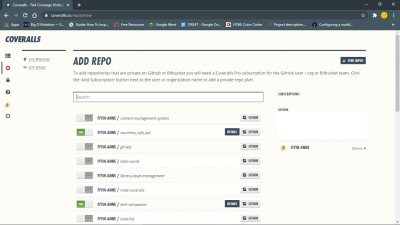
To get started, install the coveralls npm package. You also need to sign in to coveralls and add the repo to it.

Then set up coveralls for your javascript project by creating a coveralls.yml file in your root directory. This file will hold your repo-token gotten from the settings section for your repo on coveralls.
Another script needed in the package.json file is the coverage scripts. This script will come in handy when we are creating a build via Actions.
{
    "scripts": {
        "coverage": "nyc npm run test && nyc report --reporter=text-lcov --reporter=lcov | node ./node_modules/coveralls/bin/coveralls.js --verbose"
    }
}
Basically, it will run the tests, get the report, and send it to coveralls for analysis.
Now to the main point of this tutorial.
Create Node JS Workflow File
At this point, we have set up the necessary jobs we will be running in our GitHub Action. (Wondering what “jobs” mean? Keep reading.)
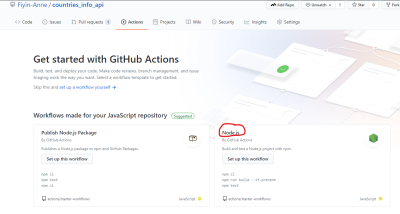
GitHub has made it easy to create the workflow file by providing a starter template. As seen on the Actions page, there are several workflow templates serving different purposes. For this tutorial, we will use the Node.js workflow (which GitHub already kindly suggested).

You can edit the file directly on GitHub but I will manually create the file on my local repo. The folder .github/workflows containing the node.js.yml file will be in the root directory.
This file already contains some basic commands and the first comment explains what they do.
# This workflow will do a clean install of node dependencies, build the source code and run tests across different versions of node
I will make some changes to it so that in addition to the above comment, it also runs coverage.
My .node.js.yml file:
name: NodeJS CI
on: ["push"]
jobs:
  build:
    name: Build
    runs-on: windows-latest
    strategy:
      matrix:
        node-version: [12.x, 14.x]

    steps:
    - uses: actions/checkout@v2
    - name: Use Node.js ${{ matrix.node-version }}
      uses: actions/setup-node@v1
      with:
        node-version: ${{ matrix.node-version }}
    - run: npm install
    - run: npm run build --if-present
    - run: npm run coverage

    - name: Coveralls
      uses: coverallsapp/github-action@master
      env:
        COVERALLS_REPO_TOKEN: ${{ secrets.COVERALLS_REPO_TOKEN }}
        COVERALLS_GIT_BRANCH: ${{ github.ref }}
      with:
        github-token: ${{ secrets.GITHUB_TOKEN }}
What does this mean?
Let’s break it down.
name
This would be the name of your workflow (NodeJS CI) or job (build) and GitHub will display it on your repository’s actions page.on
This is the event that triggers the workflow. That line in my file is basically telling GitHub to trigger the workflow whenever a push is made to my repo.jobs
A workflow can contain at least one or more jobs and each job runs in an environment specified byruns-on. In the file sample above, there is just one job that runs the build and also runs coverage, and it runs in a windows environment. I can also separate it into two different jobs like this:
Updated Node.yml file
name: NodeJS CI
on: [push]
jobs:
  build:
    name: Build
    runs-on: windows-latest
    strategy:
      matrix:
        node-version: [12.x, 14.x]

    steps:
    - uses: actions/checkout@v2
    - name: Use Node.js ${{ matrix.node-version }}
      uses: actions/setup-node@v1
      with:
        node-version: ${{ matrix.node-version }}
    - run: npm install
    - run: npm run build --if-present
    - run: npm run test

  coverage:
    name: Coveralls
    runs-on: windows-latest
    strategy:
      matrix:
        node-version: [12.x, 14.x]

    steps:
    - uses: coverallsapp/github-action@master
      env:
        COVERALLS_REPO_TOKEN: ${{ secrets.COVERALLS_REPO_TOKEN }}
      with:
        github-token: ${{ secrets.GITHUB_TOKEN }}
env
This contains the environment variables that are available to all or specific jobs and steps in the workflow. In the coverage job, you can see that the environment variables have been “hidden”. They can be found in your repo’s secrets page under settings.steps
This basically is a list of the steps to be taken when running that job.- The
buildjob does a number of things:- It uses a checkout action (v2 signifies the version) that literally checks-out your repository so that it is accessible by your workflow;
- It uses a setup-node action that sets up the node environment to be used;
- It runs install, build and test scripts found in our package.json file.
coverage
This uses a coverallsapp action that posts your test suite’s LCOV coverage data to coveralls.io for analysis.

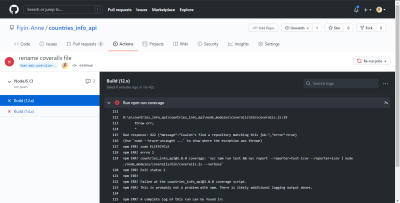
I initially made a push to my feat-add-controllers-and-route branch and forgot to add the repo_token from Coveralls to my .coveralls.yml file, so I got the error you can see on line 132.

Bad response: 422 {"message":"Couldn’t find a repository matching this job.","error":true}
Once I added the repo_token, my build was able to run successfully. Without this token, coveralls would not be able to properly report my test coverage analysis. Good thing our GitHub Actions CI pointed out the error before it got pushed to the main branch.

N.B: These were taken before I separated the job into two jobs. Also, I was able to see the coverage summary-and error message-on my terminal because I added the --verbose flag at the end of my coverage script
Conclusion
We can see how to set up continuous integration for our projects and also integrate test coverage using the Actions made available by GitHub. There are so many other ways this can be adjusted to fit the needs of your project. Although the sample repo used in this tutorial is a really minor project, you can see how essential continuous integration is even in a bigger project. Now that my jobs have run successfully, I am confident merging the branch with my main branch. I would still advise that you also read through the results of the steps after every run to see that it is completely successful.


 Flexible CMS. Headless & API 1st


 Register!


