How To Build A Progressively Enhanced, Accessible, Filterable And Paginated List

Email Newsletter
Weekly tips on front-end & UX.
Trusted by 182,000+ folks.


 Celebrating 10 million developers
 Custom Web Forms for Angular, React, & Vue. Your backend.
Most sites I build are static sites with HTML files generated by a static site generator or pages served on a server by a CMS like Wordpress or CraftCMS. I use JavaScript only on top to enhance the user experience. I use it for things like disclosure widgets, accordions, fly-out navigations, or modals.
The requirements for most of these features are simple, so using a library or framework would be overkill. Recently, however, I found myself in a situation where writing a component from scratch in Vanilla JS without the help of a framework would’ve been too complicated and messy.
Lightweight Frameworks
My task was to add multiple filters, sorting and pagination to an existing list of items. I didn’t want to use a JavaScript Framework like Vue or React, only because I needed help in some places on my site, and I didn’t want to change my stack. I consulted Twitter, and people suggested minimal frameworks like lit, petite-vue, hyperscript, htmx or Alpine.js. I went with Alpine because it sounded like it was exactly what I was looking for:
“Alpine is a rugged, minimal tool for composing behavior directly in your markup. Think of it like jQuery for the modern web. Plop in a script tag and get going.”
Alpine.js
Alpine is a lightweight (~7KB) collection of 15 attributes, 6 properties, and 2 methods. I won’t go into the basics of it (check out this article about Alpine by Hugo Di Francesco or read the Alpine docs), but let me quickly introduce you to Alpine:
Note: You can skip this intro and go straight to the main content of the article if you’re already familiar with Alpine.js.
Let’s say we want to turn a simple list with many items into a disclosure widget. You could use the native HTML elements: details and summary for that, but for this exercise, I’ll use Alpine.
By default, with JavaScript disabled, we show the list, but we want to hide it and allow users to open and close it by pressing a button if JavaScript is enabled:
<h2>Beastie Boys Anthology</h2>
<p>The Sounds of Science is the first anthology album by American rap rock group Beastie Boys composed of greatest hits, B-sides, and previously unreleased tracks.</p>
<ol>
  <li>Beastie Boys</li>
  <li>Slow And Low</li>
  <li>Shake Your Rump</li>
  <li>Gratitude</li>
  <li>Skills To Pay The Bills</li>
  <li>Root Down</li>
  <li>Believe Me</li>
  …
</ol>
First, we include Alpine using a script tag. Then we wrap the list in a div and use the x-data directive to pass data into the component. The open property inside the object we passed is available to all children of the div:
<div x-data="{ open: false }">
  <ol>
    <li>Beastie Boys</li>
    <li>Slow And Low</li>
    …
  </ol>
</div>

<script src="https://unpkg.com/alpinejs@3.9.1/dist/cdn.min.js" integrity="sha384-mDHH3kdyMS0F6QcfHCxEgPMMjssTurzucc7Jct3g1GOfB4p7PxJuugPP1NOLvE7I" crossorigin="anonymous"></script>
We can use the open property for the x-show directive, which determines whether or not an element is visible:
<div x-data="{ open: false }">
  <ol x-show="open">
    <li>Beastie Boys</li>
    <li>Slow And Low</li>
    …
  </ol>
</div>
Since we set open to false, the list is hidden now.
Next, we need a button that toggles the value of the open property. We can add events by using the x-on:click directive or the shorter @-Syntax @click:
<div x-data="{ open: false }">
  <button @click="open = !open">Tracklist</button>

  <ol x-show="open">
    <li>Beastie Boys</li>
    <li>Slow And Low</li>
    …
  </ol>
</div>
Pressing the button, open now switches between false and true and x-show reactively watches these changes, showing and hiding the list accordingly.
While this works for keyboard and mouse users, it’s useless to screen reader users, as we need to communicate the state of our widget. We can do that by toggling the value of the aria-expanded attribute:
<button @click="open = !open" :aria-expanded="open">
  Tracklist
</button>
We can also create a semantic connection between the button and the list using aria-controls for screen readers that support the attribute:
<button @click="open = ! open" :aria-expanded="open" aria-controls="tracklist">
  Tracklist
</button>
<ol x-show="open" id="tracklist">
  …
</ol>
Here’s the final result:
See the Pen [Simple disclosure widget with Alpine.js](https://codepen.io/smashingmag/pen/xxpdzNz) by Manuel Matuzovic.
Pretty neat! You can enhance existing static content with JavaScript without having to write a single line of JS. Of course, you may need to write some JavaScript, especially if you’re working on more complex components.
A Static, Paginated List
Okay, now that we know the basics of Alpine.js, I’d say it’s time to build a more complex component.
Note: You can take a look at the final result before we get started.
I want to build a paginated list of my vinyl records that works without JavaScript. We’ll use the static site generator eleventy (or short “11ty”) for that and Alpine.js to enhance it by making the list filterable.

Setup
Before we get started, let’s set up our site. We need:
- a project folder for our site,
- 11ty to generate HTML files,
- an input file for our HTML,
- a data file that contains the list of records.
On your command line, navigate to the folder where you want to save the project, create a folder, and cd into it:
cd Sites # or wherever you want to save the project
mkdir myrecordcollection # pick any name
cd myrecordcollection
Then create a package.json file and install eleventy:
npm init -y
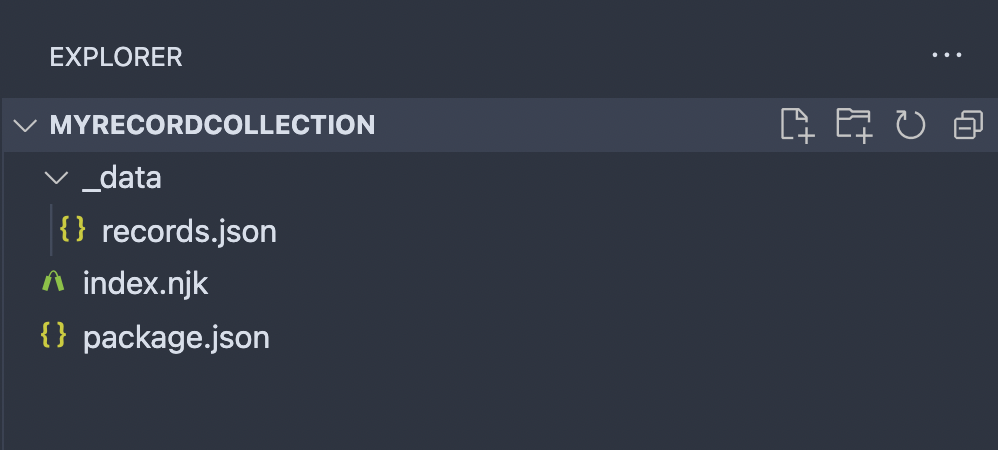
npm install @11ty/eleventyNext, create an index.njk file (.njk means this is a Nunjucks file; more about that below) and a folder _data with a records.json:
touch index.njk
mkdir _data
touch _data/records.json
You don’t have to do all these steps on the command line. You can also create folders and files in any user interface. The final file and folder structure looks like this:
Adding Content
11ty allows you to write content directly into an HTML file (or Markdown, Nunjucks, and other template languages). You can even store data in the front matter or in a JSON file. I don’t want to manage hundreds of entries manually, so I’ll store them in the JSON file we just created. Let’s add some data to the file:
[
  {
    "artist": "Akne Kid Joe",
    "title": "Die große Palmöllüge",
    "year": 2020
  },
  {
    "artist": "Bring me the Horizon",
    "title": "Post Human: Survial Horror",
    "year": 2020
  },
  {
    "artist": "Idles",
    "title": "Joy as an Act of Resistance",
    "year": 2018
  },
  {
    "artist": "Beastie Boys",
    "title": "Licensed to Ill",
    "year": 1986
  },
  {
    "artist": "Beastie Boys",
    "title": "Paul's Boutique",
    "year": 1989
  },
  {
    "artist": "Beastie Boys",
    "title": "Check Your Head",
    "year": 1992
  },
  {
    "artist": "Beastie Boys",
    "title": "Ill Communication",
    "year": 1994
  }
]
Finally, let’s add a basic HTML structure to the index.njk file and start eleventy:
<!DOCTYPE html>
<html lang="en">
<head>
  <meta charset="UTF-8">
  <meta name="viewport" content="width=device-width, initial-scale=1.0">

  <title>My Record Collection</title>
</head>
<body>
  <h1>My Record Collection</h1>

</body>
</html>
By running the following command you should be able to access the site at http://localhost:8080:
eleventy --serve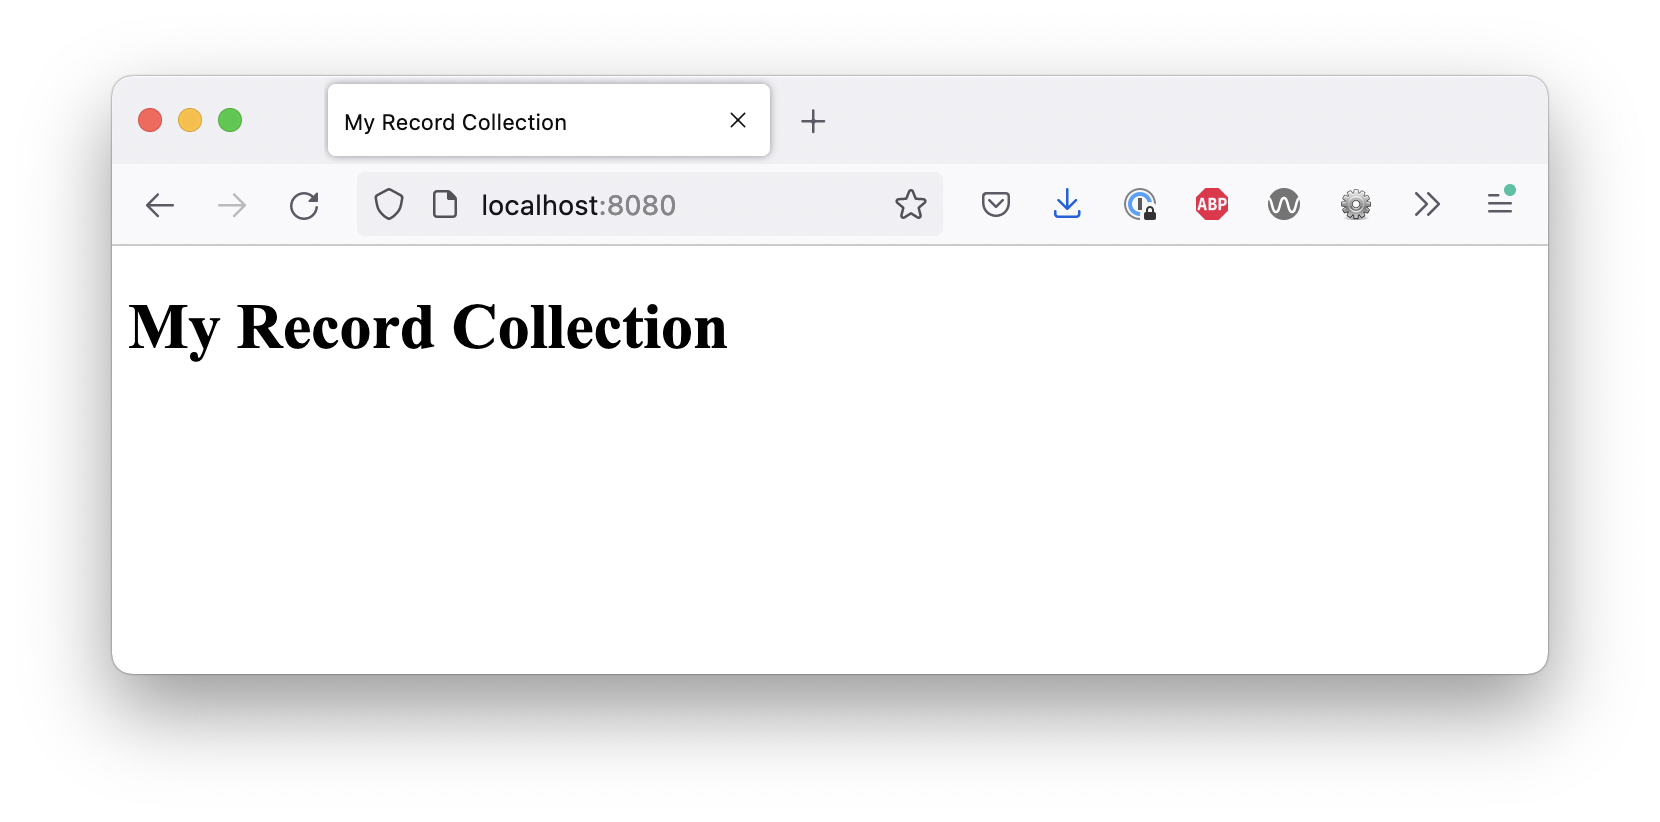
:8080. The site just shows the heading ‘My Record Collection’. (Large preview)Displaying Content
Now let’s take the data from our JSON file and turn it into HTML. We can access it by looping over the records object in nunjucks:
<div class="collection">
  <ol>
    {% for record in records %}
    <li>
      <strong>{{ record.title }}</strong><br>
      Released in <time datetime="{{ record.year }}">{{ record.year }}</time> by {{ record.artist }}.
    </li>
    {% endfor %}
  </ol>
</div>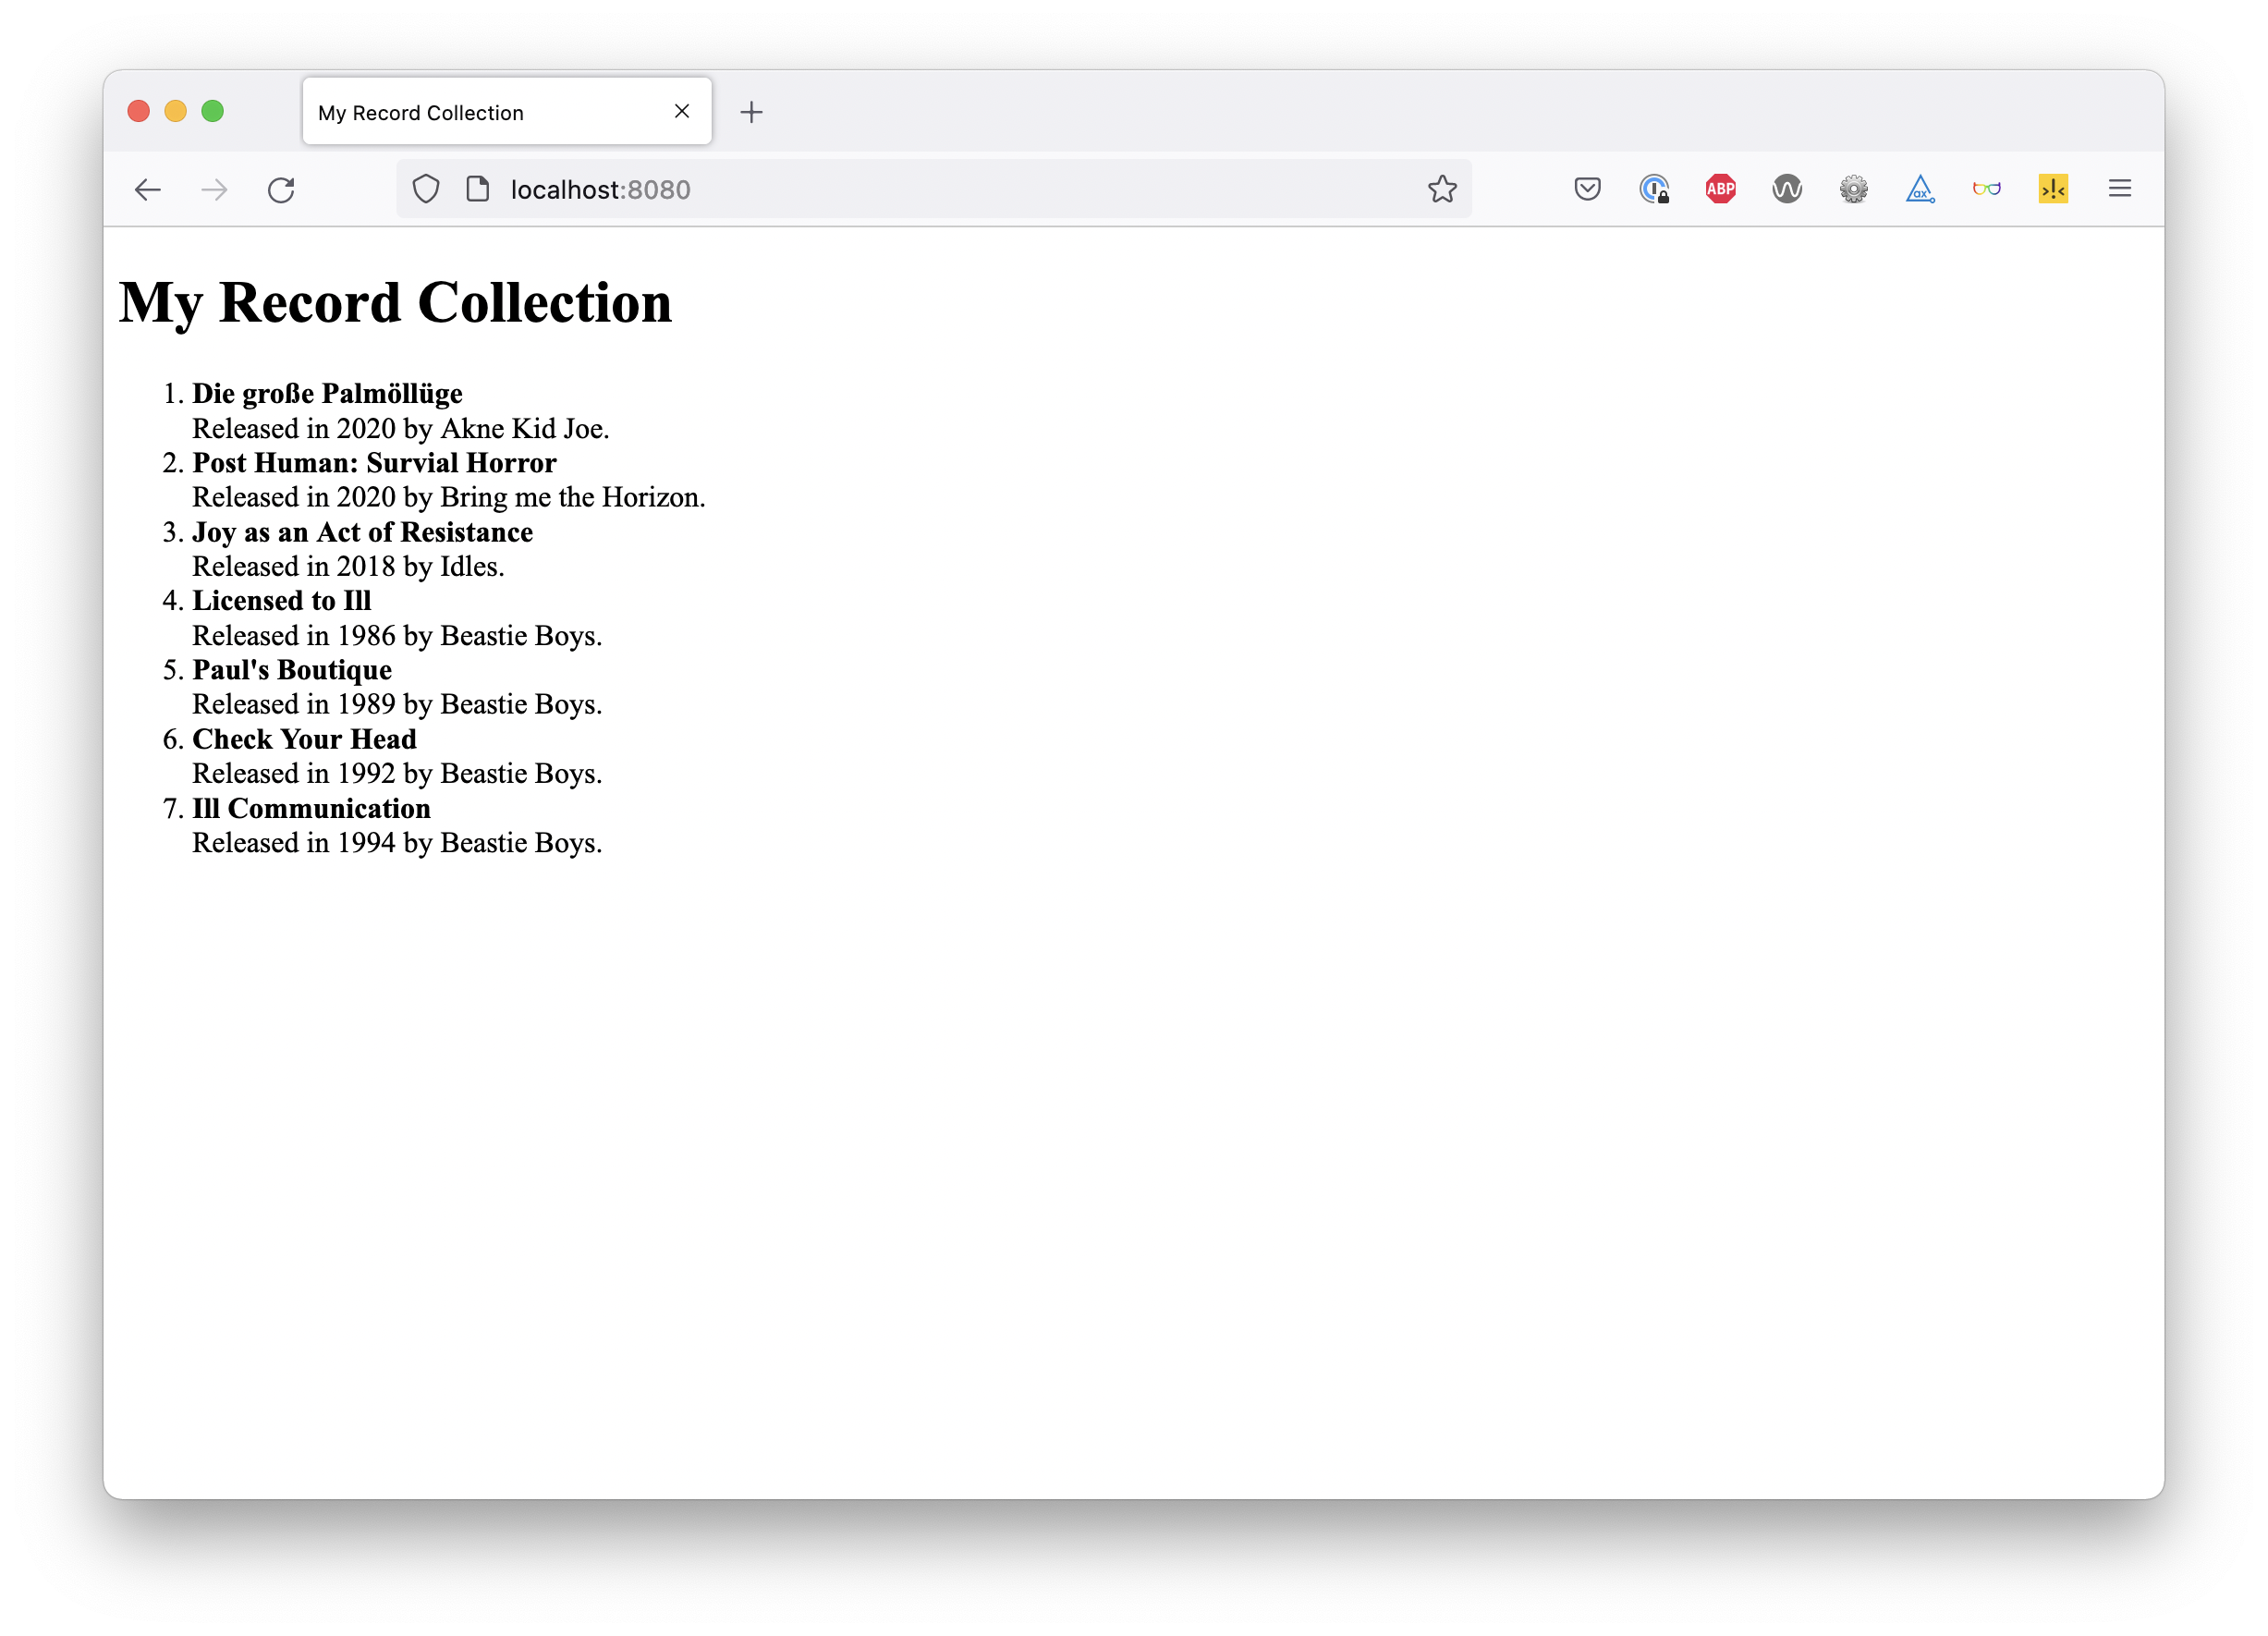
Pagination
Eleventy supports pagination out of the box. All we have to do is add a frontmatter block to our page, tell 11ty which dataset it should use for pagination, and finally, we have to adapt our for loop to use the paginated list instead of all records:
---
pagination:
data: records
size: 5
---
<!DOCTYPE html>
<html lang="en">
<head>
<meta charset="UTF-8">
<meta name="viewport" content="width=device-width, initial-scale=1.0">
<title>My Record Collection</title>
</head>
<body>
<h1>My Record Collection</h1>
<div class="collection">
<p id="message">Showing <output>{{ records.length }} records</output></p>
<div aria-labelledby="message" role="region">
<ol class="records">
{% for record in pagination.items %}
<li>
<strong>{{ record.title }}</strong><br>
Released in <time datetime="{{ record.year }}">{{ record.year }}</time> by {{ record.artist }}.
</li>
{% endfor %}
</ol>
</div>
</div>
</body>
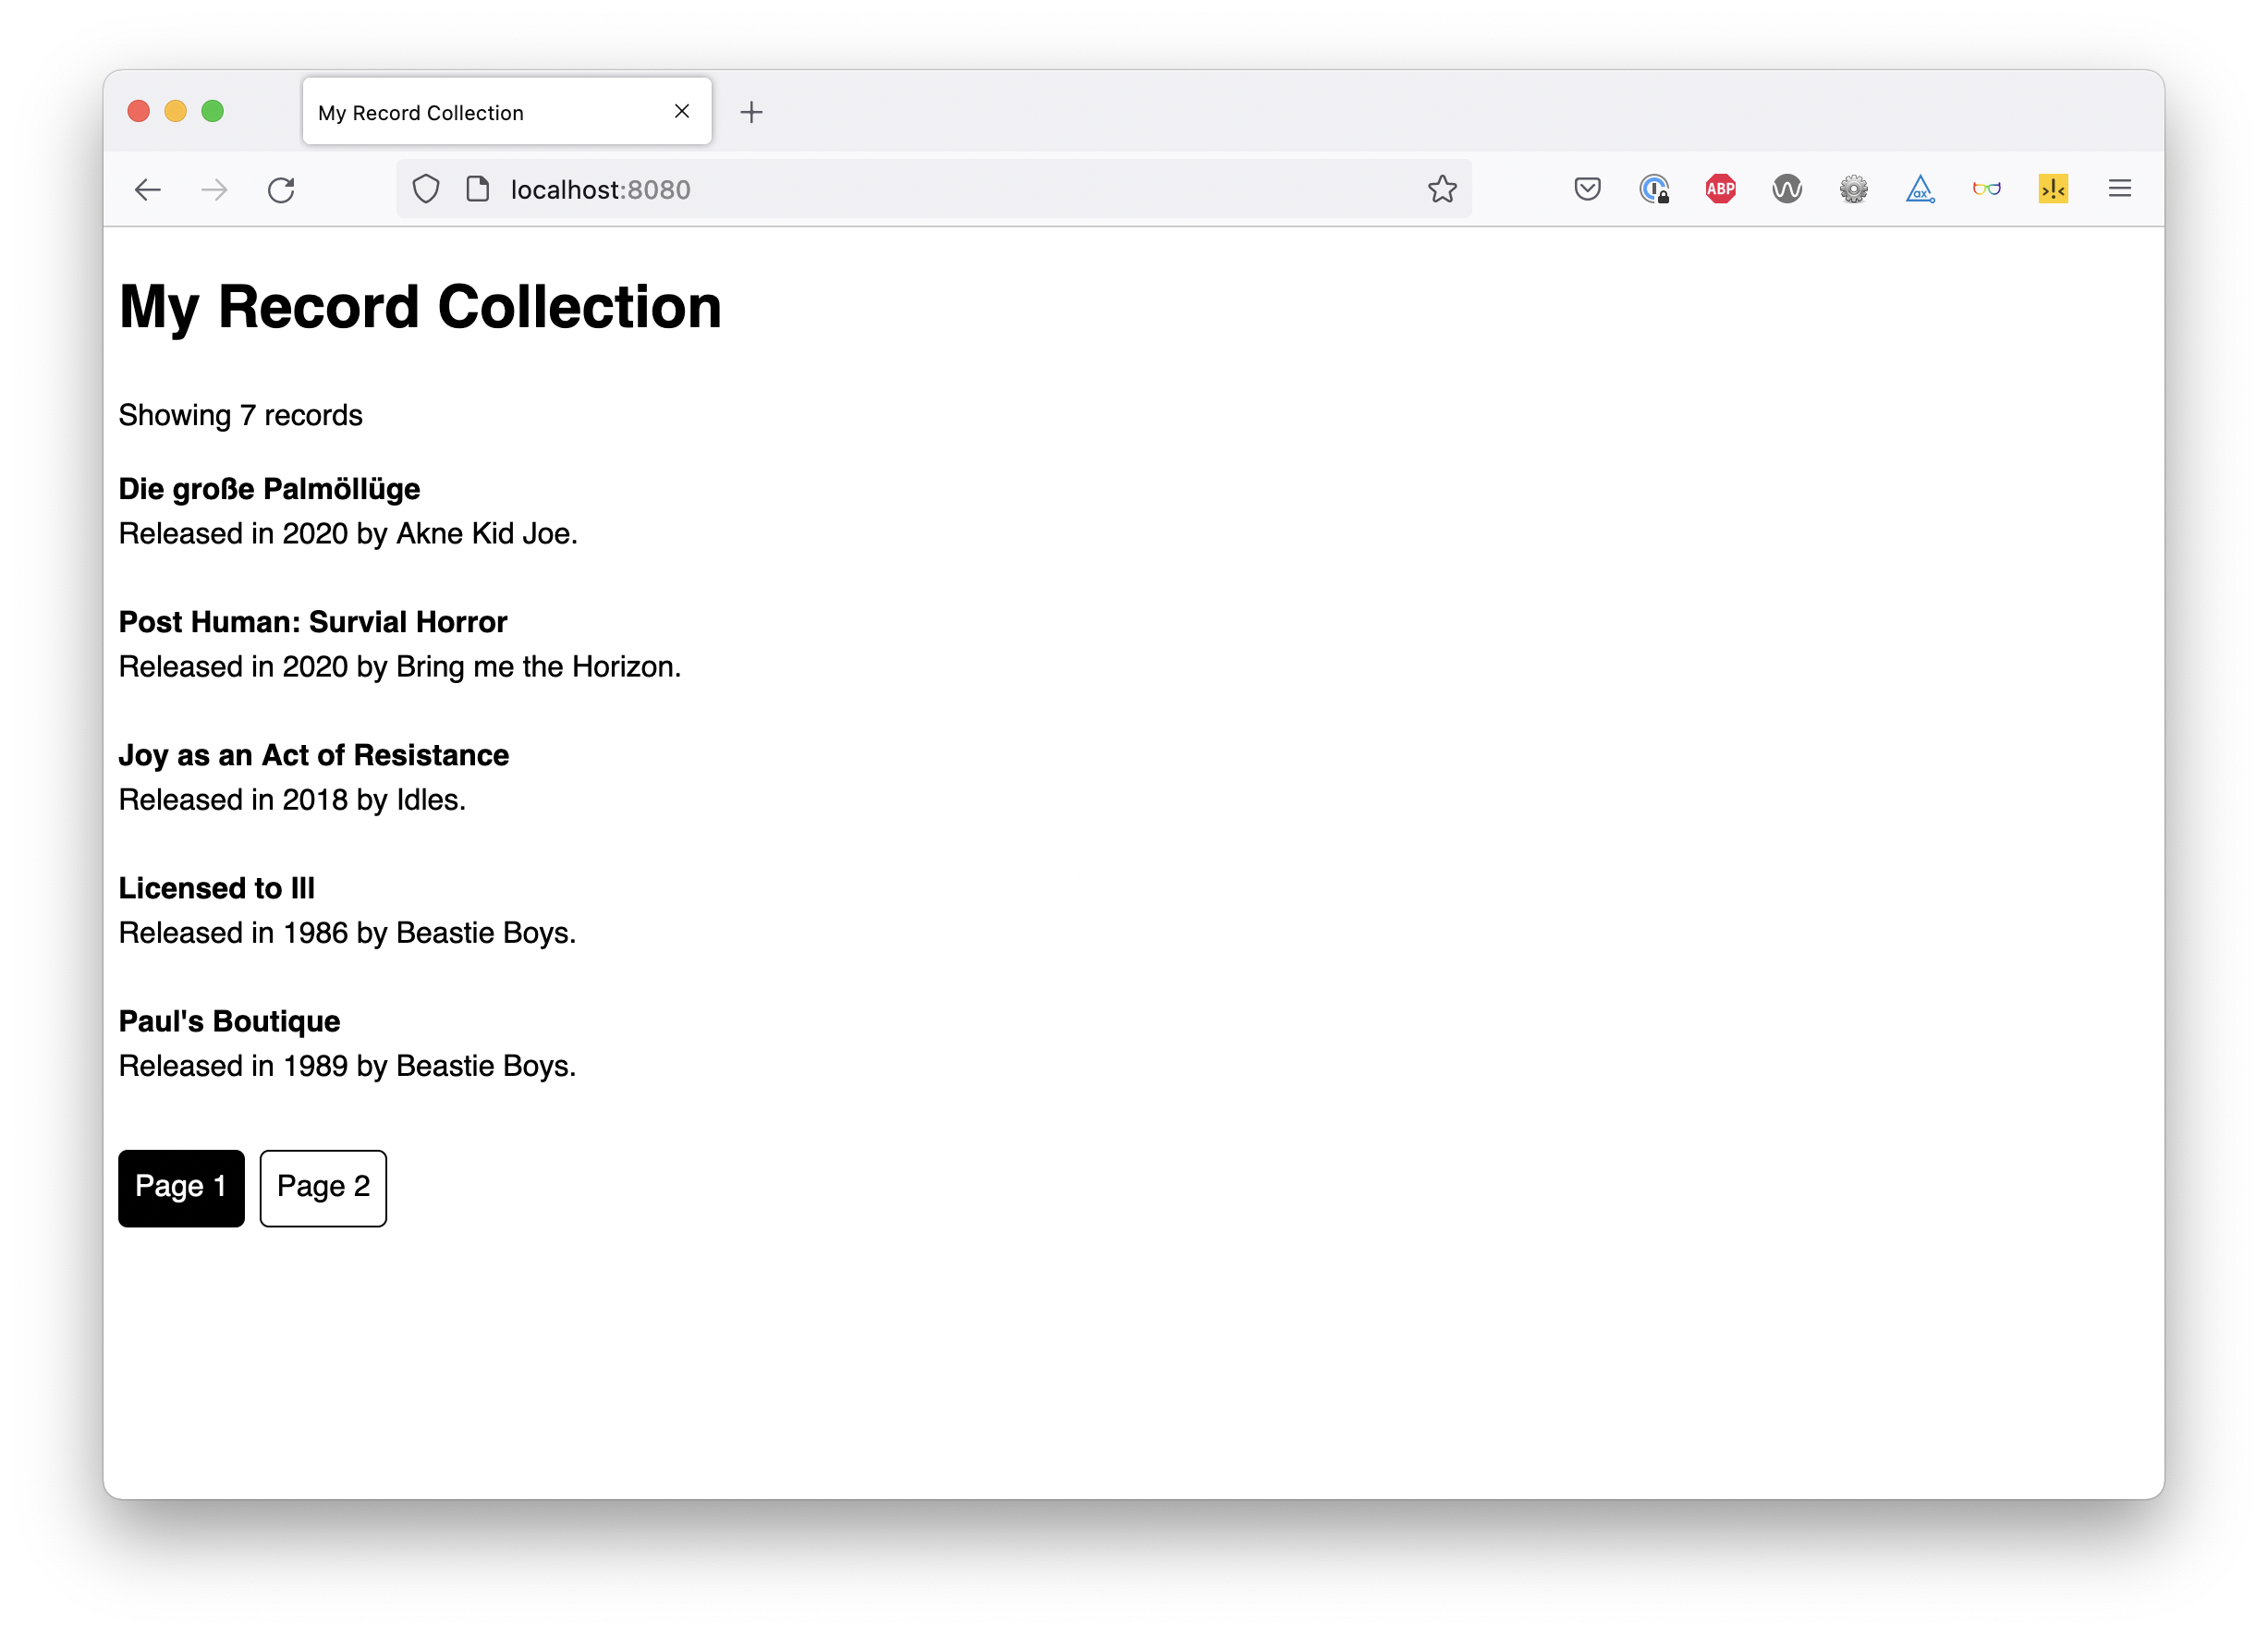
</html>If you access the page again, the list only contains 5 items. You can also see that I’ve added a status message (ignore the output element for now), wrapped the list in a div with the role “region”, and that I’ve labelled it by creating a reference to #message using aria-labelledby. I did that to turn it into a landmark and allow screen reader users to access the list of results directly using keyboard shortcuts.
Next, we’ll add a navigation with links to all pages created by the static site generator. The pagination object holds an array that contains all pages. We use aria-current="page" to highlight the current page:
<nav aria-label="Select a page">
  <ol class="pages">
    {% for page_entry in pagination.pages %}
      {%- set page_url = pagination.hrefs[loop.index0] -%}
      <li>
        <a href="{{ page_url }}"{% if page.url == page_url %} aria-current="page"{% endif %}>
          Page {{ loop.index }}
        </a>
      </li>
    {% endfor %}
  </ol>
</nav>
Finally, let’s add some basic CSS to improve the styling:
body {
  font-family: sans-serif;
  line-height: 1.5;
}

ol {
  list-style: none;
  margin: 0;
  padding: 0;
}

.records > * + * {
  margin-top: 2rem;
}

h2 {
  margin-bottom: 0;
}

nav {
  margin-top: 1.5rem;
}

.pages {
  display: flex;
  flex-wrap: wrap;
  gap: 0.5rem;
}

.pages a {
  border: 1px solid #000000;
  padding: 0.5rem;
  border-radius: 5px;
  display: flex;
  text-decoration: none;
}

.pages a:where([aria-current]) {
  background-color: #000000;
  color: #ffffff;
}

.pages a:where(:focus, :hover) {
  background-color: #6c6c6c;
  color: #ffffff;
}
You can see it in action in the live demo and you can check out the code on GitHub.
This works fairly well with 7 records. It might even work with 10, 20, or 50, but I have over 400 records. We can make browsing the list easier by adding filters.
A Dynamic Paginated And Filterable List
I like JavaScript, but I also believe that the core content and functionality of a website should be accessible without it. This doesn’t mean that you can’t use JavaScript at all, it just means that you start with a basic server-rendered foundation of your component or site, and you add functionality layer by layer. This is called progressive enhancement.
Our foundation in this example is the static list created with 11ty, and now we add a layer of functionality with Alpine.
First, right before the closing body tag, we reference the latest version (as of writing 3.9.1) of Alpine.js:
 <script src="https://unpkg.com/alpinejs@3.9.1/dist/cdn.min.js" integrity="sha384-mDHH3kdyMS0F6QcfHCxEgPMMjssTurzucc7Jct3g1GOfB4p7PxJuugPP1NOLvE7I" crossorigin="anonymous"></script>
</body>
Note: Be careful using a third-party CDN, this can have all kinds of negative implications (performance, privacy, security). Consider referencing the file locally or importing it as a module.
In case you’re wondering why you don’t see the Subresource Integrity hash in the official docs, it’s because I’ve created and added it manually.
Since we’re moving into JavaScript-world, we need to make our records available to Alpine.js. Probably not the best, but the quickest solution is to create a .eleventy.js file in your root folder and add the following lines:
module.exports = function(eleventyConfig) {
    eleventyConfig.addPassthroughCopy("_data");
};
This ensures that eleventy doesn’t just generate HTML files, but it also copies the contents of the _data folder into our destination folder, making it accessible to our scripts.
Fetching Data
Just like in the previous example, we’ll add the x-data directive to our component to pass data:
<div class="collection" x-data="{ records: [] }">
</div>
We don’t have any data, so we need to fetch it as the component initialises. The x-init directive allows us to hook into the initialisation phase of any element and perform tasks:
<div class="collection" x-init="records = await (await fetch('/_data/records.json')).json()" x-data="{ records: [] }">
  <div x-text="records"></div>
  […]
</div>
If we output the results directly, we see a list of [object Object]s, because we’re fetching and receiving an array. Instead, we should iterate over the list using the x-for directive on a template tag and output the data using x-text:
<template x-for="record in records">
  <li>
    <strong x-text="record.title"></strong><br>
    Released in <time :datetime="record.year" x-text="record.year"></time> by <span x-text="record.artist"></span>.
  </li>
</template>"The<template>HTML element is a mechanism for holding HTML that is not to be rendered immediately when a page is loaded but may be instantiated subsequently during runtime using JavaScript."
MDN:<template>: The Content Template Element
Here’s how the whole list looks like now:
<div class="collection" x-init="records = await (await fetch('/_data/records.json')).json()" x-data="{ records: [] }">
  <p id="message">Showing <output>{{ records.length }} records</output></p>

  <div aria-labelledby="message" role="region">
    <ol class="records">
      <template x-for="record in records">
        <li>
          <strong x-text="record.title"></strong><br>
          Released in <time :datetime="record.year" x-text="record.year"></time> by <span x-text="record.artist"></span>.
        </li>
      </template>

      {%- for record in pagination.items %}
        <li>
          <strong>{{ record.title }}</strong><br>
          Released in <time datetime="{{ record.year }}">{{ record.year }}</time> by {{ record.artist }}.
        </li>
      {%- endfor %}
    </ol>
  </div>
  […]
</div>
Isn’t it amazing how quickly we were able to fetch and output data? Check out the demo below to see how Alpine populates the list with results.
Hint: You don’t see any Nunjucks code in this CodePen, because 11ty doesn’t run in the browser. I’ve just copied and pasted the rendered HTML of the first page.
See the Pen [Pagination + Filter with Alpine.js Step 1](https://codepen.io/smashingmag/pen/abEWRMY) by Manuel Matuzovic.
You can achieve a lot by using Alpine’s directives, but at some point relying only on attributes can get messy. That’s why I’ve decided to move the data and some of the logic into a separate Alpine component object.
Here’s how that works: Instead of passing data directly, we now reference a component using x-data. The rest is pretty much identical: Define a variable to hold our data, then fetch our JSON file in the initialization phase. However, we don’t do that inside an attribute, but inside a script tag or file instead:
<div class="collection" x-data="collection">
  […]
</div>

[…]

<script>
  document.addEventListener('alpine:init', () => {
    Alpine.data('collection', () => ({
      records: [],
      async getRecords() {
        this.records = await (await fetch('/_data/records.json')).json();
      },
      init() {
        this.getRecords();
      }
    }))
  })
</script>

<script src="https://unpkg.com/alpinejs@3.9.1/dist/cdn.min.js" integrity="sha384-mDHH3kdyMS0F6QcfHCxEgPMMjssTurzucc7Jct3g1GOfB4p7PxJuugPP1NOLvE7I" crossorigin="anonymous"></script>
Looking at the previous CodePen, you’ve probably noticed that we now have a duplicate set of data. That’s because our static 11ty list is still there. Alpine has a directive that tells it to ignore certain DOM elements. I don’t know if this is actually necessary here, but it’s a nice way of marking these unwanted elements. So, we add the x-ignore directive on our 11ty list items, and we add a class to the html element when the data has loaded and then use the class and the attribute to hide those list items in CSS:
<style>
  .alpine [x-ignore] {
    display: none;
  }
</style>

[…]
{%- for record in pagination.items %}
  <li x-ignore>
    <strong>{{ record.title }}</strong><br>
    Released in <time datetime="{{ record.year }}">{{ record.year }}</time> by {{ record.artist }}.
  </li>
{%- endfor %}
[…]
<script>
  document.addEventListener('alpine:init', () => {
    Alpine.data('collection', () => ({
      records: [],
      async getRecords() {
        this.records = await (await fetch('/_data/records.json')).json();
        document.documentElement.classList.add('alpine');
      },
      init() {
        this.getRecords();
      }
    }))
  })
</script>
11ty data is hidden, results are coming from Alpine, but the pagination is not functional at the moment:
See the Pen [Pagination + Filter with Alpine.js Step 2](https://codepen.io/smashingmag/pen/eYyWQOe) by Manuel Matuzovic.
Pagination
Before we add filters, let’s paginate our data. 11ty did us the favor of handling all the logic for us, but now we have to do it on our own. In order to split our data across multiple pages, we need the following:
- the number of items per page (
itemsPerPage), - the current page (
currentPage), - the total number of pages (
numOfPages), - a dynamic, paged subset of the whole data (
page).
document.addEventListener('alpine:init', () => {
  Alpine.data('collection', () => ({
    records: [],
    itemsPerPage: 5,
    currentPage: 0,
    numOfPages: // total number of pages,
    page: // paged items
    async getRecords() {
      this.records = await (await fetch('/_data/records.json')).json();
      document.documentElement.classList.add('alpine');
    },
    init() {
      this.getRecords();
     }
  }))
})
The number of items per page is a fixed value (5), and the current page starts with 0. We get the number of pages by dividing the total number of items by the number of items per page:
numOfPages() {
  return Math.ceil(this.records.length / this.itemsPerPage)
  // 7 / 5 = 1.4
  // Math.ceil(7 / 5) = 2
},
The easiest way for me to get the items per page was to use the slice() method in JavaScript and take out the slice of the dataset that I need for the current page:
page() {
  return this.records.slice(this.currentPage * this.itemsPerPage, (this.currentPage + 1) * this.itemsPerPage)

  // this.currentPage * this.itemsPerPage, (this.currentPage + 1) * this.itemsPerPage
  // Page 1: 0 * 5, (0 + 1) * 5 (=> slice(0, 5);)
  // Page 2: 1 * 5, (1 + 1) * 5 (=> slice(5, 10);)
  // Page 3: 2 * 5, (2 + 1) * 5 (=> slice(10, 15);)
}
To only display the items for the current page, we have to adapt the for loop to iterate over page instead of records:
<ol class="records">
  <template x-for="record in page">
    <li>
      <strong x-text="record.title"></strong><br>
      Released in <time :datetime="record.year" x-text="record.year"></time> by <span x-text="record.artist"></span>.
    </li>
  </template>
</ol>
We now have a page, but no links that allow us to jump from page to page. Just like earlier, we use the template element and the x-for directive to display our page links:
<ol class="pages">
  <template x-for="idx in numOfPages">
    <li>
      <a :href="`/${idx}`" x-text="`Page ${idx}`" :aria-current="idx === currentPage + 1 ? 'page' : false" @click.prevent="currentPage = idx - 1"></a>
    </li>
  </template>

  {% for page_entry in pagination.pages %}
    <li x-ignore>
      […]
    </li>
  {% endfor %}
</ol>
Since we don’t want to reload the whole page anymore, we put a click event on each link, prevent the default click behavior, and change the current page number on click:
<a href="/" @click.prevent="currentPage = idx - 1"></a>Here’s what that looks like in the browser. (I’ve added more entries to the JSON file. You can download it on GitHub.)
See the Pen [Pagination + Filter with Alpine.js Step 3](https://codepen.io/smashingmag/pen/GRymwjg) by Manuel Matuzovic.
Filtering
I want to be able to filter the list by artist and by decade.
We add two select elements wrapped in a fieldset to our component, and we put a x-model directive on each of them. x-model allows us to bind the value of an input element to Alpine data:
<fieldset class="filters">
  <legend>Filter by</legend>

  <label for="artist">Artist</label>
  <select id="artist" x-model="filters.artist">
    <option value="">All</option>
  </select>

  <label for="decade">Decade</label>
  <select id="decade" x-model="filters.year">
    <option value="">All</option>
  </select>
</fieldset>
Of course, we also have to create these data fields in our Alpine component:
document.addEventListener('alpine:init', () => {
  Alpine.data('collection', () => ({
      filters: {
        year: '',
        artist: '',
      },
      records: [],
      itemsPerPage: 5,
      currentPage: 0,
      numOfPages() {
        return Math.ceil(this.records.length / this.itemsPerPage)
      },
      page() {
        return this.records.slice(this.currentPage * this.itemsPerPage, (this.currentPage + 1) * this.itemsPerPage)
      },
      async getRecords() {
        this.records = await (await fetch('/_data/records.json')).json();
        document.documentElement.classList.add('alpine');
      },
      init() {
        this.getRecords();
      }
  }))
})
If we change the selected value in each select, filters.artist and filters.year will update automatically. You can try it here with some dummy data I’ve added manually:
See the Pen [Pagination + Filter with Alpine.js Step 4](https://codepen.io/smashingmag/pen/GRymwEp) by Manuel Matuzovic.
Now we have select elements, and we’ve bound the data to our component. The next step is to populate each select dynamically with artists and decades respectively. For that we take our records array and manipulate the data a bit:
document.addEventListener('alpine:init', () => {
  Alpine.data('collection', () => ({
    artists: [],
    decades: [],
    // […]
    async getRecords() {
      this.records = await (await fetch('/_data/records.json')).json();
      this.artists = [...new Set(this.records.map(record => record.artist))].sort();
      this.decades = [...new Set(this.records.map(record => record.year.toString().slice(0, -1)))].sort();
      document.documentElement.classList.add('alpine');
    },
    // […]
  }))
})
This looks wild, and I’m sure that I’ll forget what’s going on here real soon, but what this code does is that it takes the array of objects and turns it into an array of strings (map()), it makes sure that each entry is unique (that’s what [...new Set()] does here) and sorts the array alphabetically (sort()). For the decade’s array, I’m additionally slicing off the last digit of the year because I don’t want this filter to be too granular. Filtering by decade is good enough.
Next, we populate the artist and decade select elements, again using the template element and the x-for directive:
<label for="artist">Artist</label>
<select id="artist" x-model="filters.artist">
  <option value="">All</option>
  <template x-for="artist in artists">
    <option x-text="artist"></option>
  </template>
</select>

<label for="decade">Decade</label>
<select id="decade" x-model="filters.year">
  <option value="">All</option>
  <template x-for="year in decades">
    <option :value="year" x-text="`${year}0`"></option>
  </template>
</select>
Try it yourself in demo 5 on Codepen.
See the Pen [Pagination + Filter with Alpine.js Step 5](https://codepen.io/smashingmag/pen/OJzmaZb) by Manuel Matuzovic.
We’ve successfully populated the select elements with data from our JSON file. To finally filter the data, we go through all records, we check whether a filter is set. If that’s the case, we check that the respective field of the record corresponds to the selected value of the filter. If not, we filter this record out. We’re left with a filtered array that matches the criteria:
get filteredRecords() {
  const filtered = this.records.filter((item) => {
    for (var key in this.filters) {
      if (this.filters[key] === '') {
        continue
      }

      if(!String(item[key]).includes(this.filters[key])) {
        return false
      }
    }

    return true
  });

  return filtered
}
For this to take effect we have to adapt our numOfPages() and page() functions to use only the filtered records:
numOfPages() {
  return Math.ceil(this.filteredRecords.length / this.itemsPerPage)
},
page() {
  return this.filteredRecords.slice(this.currentPage * this.itemsPerPage, (this.currentPage + 1) * this.itemsPerPage)
},
See the Pen [Pagination + Filter with Alpine.js Step 6](https://codepen.io/smashingmag/pen/GRymwQZ) by Manuel Matuzovic.
Three things left to do:
- fix a bug;
- hide the form;
- update the status message.
Bug Fix: Watching a Component Property
When you open the first page, click on page 6, then select “1990” — you don’t see any results. That’s because our filter thinks that we’re still on page 6, but 1) we’re actually on page 1, and 2) there is no page 6 with “1990” active. We can fix that by resetting the currentPage when the user changes one of the filters. To watch changes in the filter object, we can use a so-called magic method:
init() {
  this.getRecords();
  this.$watch('filters', filter => this.currentPage = 0);
}
Every time the filter property changes, the currentPage will be set to 0.
Hiding the Form
Since the filters only work with JavaScript enabled and functioning, we should hide the whole form when that’s not the case. We can use the .alpine class we created earlier for that:
<fieldset class="filters" hidden>
  […]
</fieldset>
.filters {
display: block;
}
html:not(.alpine) .filters {
visibility: hidden;
}I’m using visibility: hidden instead of hidden only to avoid content shifting while Alpine is still loading.
Communicating Changes
The status message at the beginning of our list still reads “Showing 7 records”, but this doesn’t change when the user changes the page or filters the list. There are two things we have to do to make the paragraph dynamic: bind data to it and communicate changes to assistive technology (a screen reader, e.g.).
First, we bind data to the output element in the paragraph that changes based on the current page and filter:
<p id="message">Showing <output x-text="message">{{ records.length }} records</output></p>Alpine.data('collection', () => ({
message() {
return `${this.filteredRecords.length} records`;
},
// […]Next, we want to communicate to screen readers that the content on the page has changed. There are at least two ways of doing that:
- We could turn an element into a so-called live region using the
aria-liveattribute. A live region is an element that announces its content to screen readers every time it changes.
In our case, we don’t have to do anything, because we’re already using the<div aria-live="polite">Dynamic changes will be announced</div>outputelement (remember?) which is an implicit live region by default.
```<p id="message">Showing <output x-text="message">{{ records.length }} records</output></p>“The
<output>HTML element is a container element into which a site or app can inject the results of a calculation or the outcome of a user action.”
Source:<output>: The Output Element, MDN Web Docs ``` - We could make the region focusable and move the focus to the region when its content changes. Since the region is labelled, its name and role will be announced when that happens.
We can reference the region using the<div aria-labelledby="message" role="region" tabindex="-1" x-ref="region">x-refdirective.<a @click.prevent="currentPage = idx - 1; $nextTick(() => { $refs.region.focus(); $refs.region.scrollIntoView(); });" :href="`/${idx}`" x-text="`Page ${idx}`" :aria-current="idx === currentPage + 1 ? 'page' : false">
I’ve decided to do both:
- When users filter the page, we update the live region, but we don’t move focus.
- When they change the page, we move focus to the list.
That’s it. Here’s the final result:
See the Pen [Pagination + Filter with Alpine.js Step 7](https://codepen.io/smashingmag/pen/zYpwMXX) by Manuel Matuzovic.
Note: When you filter by artist, and the status message shows “1 records”, and you filter again by another artist, also with just one record, the content of the output element doesn’t change, and nothing is reported to screen readers. This can be seen as a bug or as a feature to reduce redundant announcements. You’ll have to test this with users.
What’s Next?
What I did here might seem redundant, but if you’re like me, and you don’t have enough trust in JavaScript, it’s worth the effort. And if you look at the final CodePen or the complete code on GitHub, it actually wasn’t that much extra work. Minimal frameworks like Alpine.js make it really easy to progressively enhance static components and make them reactive.
I’m pretty happy with the result, but there are a few more things that could be improved:
- The pagination could be smarter (maximum number of pages, previous and next links, and so on).
- Let users pick the number of items per page.
- Sorting would be a nice feature.
- Working with the history API would be great.
- Content shifting can be improved.
- The solution needs user testing and browser/screen reader testing.
P.S. Yes, I know, Alpine produces invalid HTML with its custom x- attribute syntax. That hurts me as much as it hurts you, but as long as it doesn’t affect users, I can live with that. :)
P.S.S. Special thanks to Scott, Søren, Thain, David, Saptak and Christian for their feedback.
Other Resources
- “How To Build A Filterable List Of Things”, Søren Birkemeyer
- “Considering Dynamic Search Results And Content”, Scott O’Hara
Further Reading
- Transitioning Top-Layer Entries And The Display Property In CSS
- How OWASP Helps You Secure Your Full-Stack Web Applications
- Creating An Effective Multistep Form For Better User Experience
- The Importance Of Graceful Degradation In Accessible Interface Design


